
Each loving mother tries to dress her daughter as beautiful as possible. Along with the richest selection of children's clothing, I want the thing to be exclusive, special. And if sewing a child's dress will require some skills and complicated patterns, to sew a sundress for a girl with your own hands is an occupation that any mother can do. The main thing is to have a sewing machine at hand.


General recommendations
Sometimes the presence of the pattern is an obstacle tailoring. In fact, the patterns greatly simplify the work. Unfortunately, it is impossible to find the ideal patterns for children, since children are individual and grow quickly. But to create the right piece for the minimum of time - the task is quite feasible. And often the “homemade” pattern sits better than the one offered in needlework magazines.
To facilitate the work, you need to adopt a few simple tips:
- the pattern does not imply seam allowances: they are added during the cut;
- so that there are no material overlaps when assembling the product, when cutting, they make notches: cut the seam allowance 0.5 cm at the waist, hips and hem, folding the side sections of the back and the shelf together, aligning their edges;
- simple products without a fit on the figure can be “swept away” with a machine line “wide pitch” 4 mm;
- in the presence of a typical pattern at the right age, you can carve out a sundress on it, and then adjust it to the shape;
- It is not recommended to make a sundress with a snug fit: the skin should "breathe";
- textile is better to choose natural, one that does not slip;
- it is undesirable to sew a model for a girl from bi-elastic fabric (stretching up and down): such textiles need special production equipment;
- we must not forget about the WTO: the omission of the processing units' ironing always affects the sewing time and the final result;
- if an elastic band is used in the work (linen, elastic thread), it is unacceptable to iron it, this will stretch it;
- for perfect matching seams need to use sewing pins;
- if the seam is obtained by "accordion", it does not undo, such a defect must be immediately redone;
- in order to flush the bottom evenly, you can first press the seam allowance: this will save the fabric from twisting.
Besides:
- The work can be facilitated by using a comfortable jersey as a pattern for a girl. This will reduce the time for cutting and eliminates the need to build a pattern. In some cases, you can make a pattern directly on the fabric, given the circumference of the hips, chest and the length of the product.
- If you need to make changes when fitting, you can measure the future dress to the wrong side. This method is good if the cut is symmetrical. It allows you to better see the imperfections of the landing.
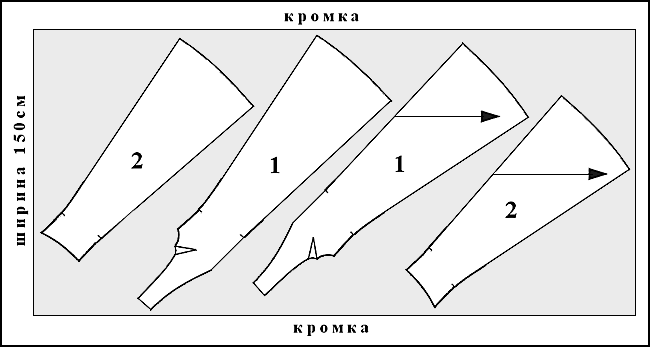
- In order not to buy extra fabric, you can first prepare a template, then make an approximate layout of patterns, taking into account the width of the material you like. About 5 cm should be added to the approximate layout.
- Another small trick: to dress looked like from a store, the width of the finishing seams of the parts must be identical. In addition, it is worth considering the secret of professionals: if the print allows, it should be symmetrical, coinciding along the side seams (strip, cell).
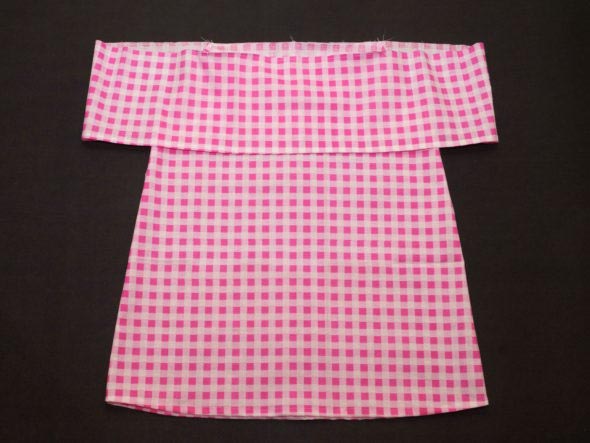
Simple model for a girl for 1 year
Easy summer sarafan with a minimum of details - a great option for beginners.It will take a minimum of time to tailor it, it does not need additional decor. This is a beautiful model in which the girl will be comfortable.
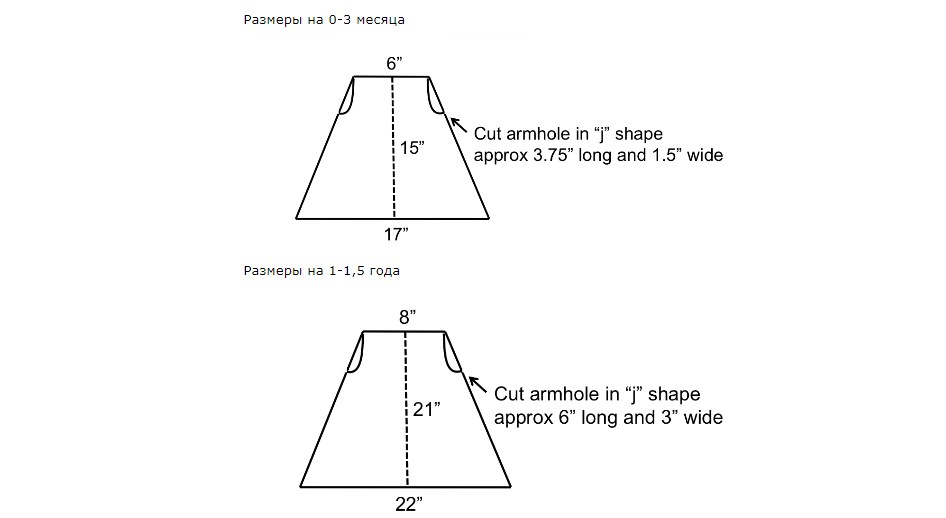
At the base of the pattern there is a trapezium with the size of the top face 8 cm, the bottom one is 22 cm, 21 cm long.
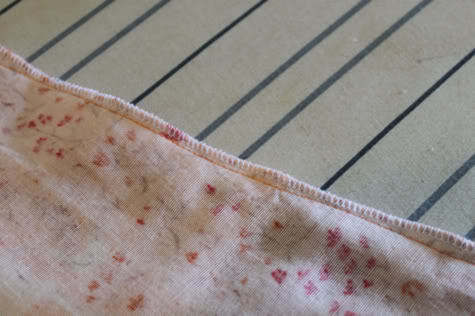
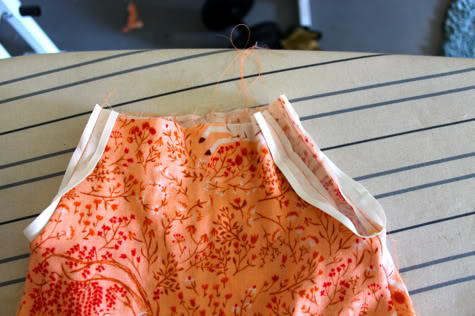
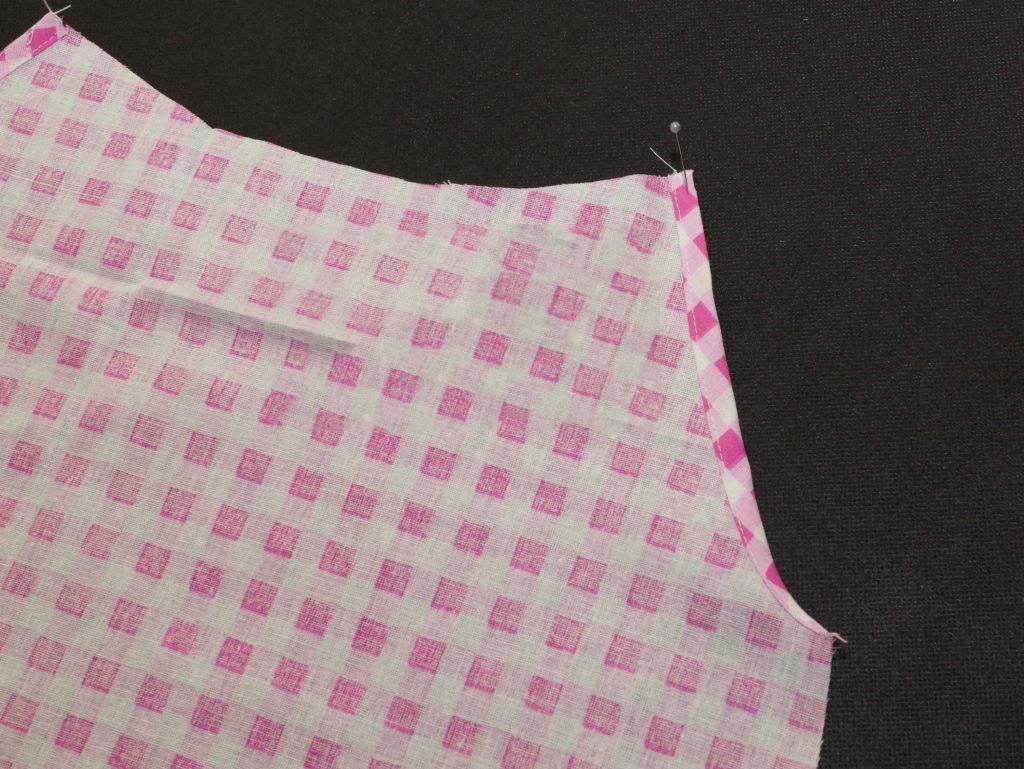
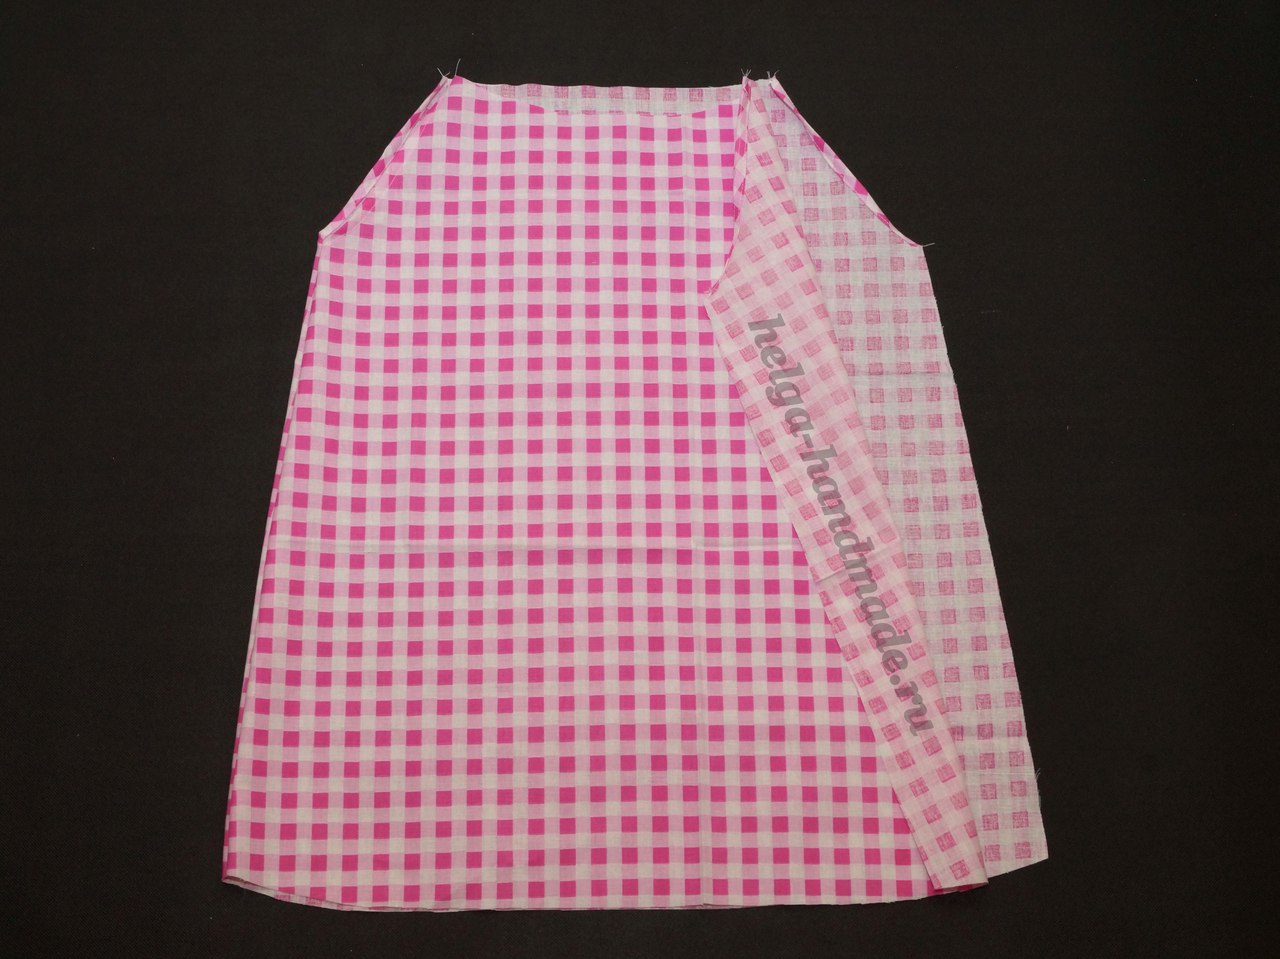
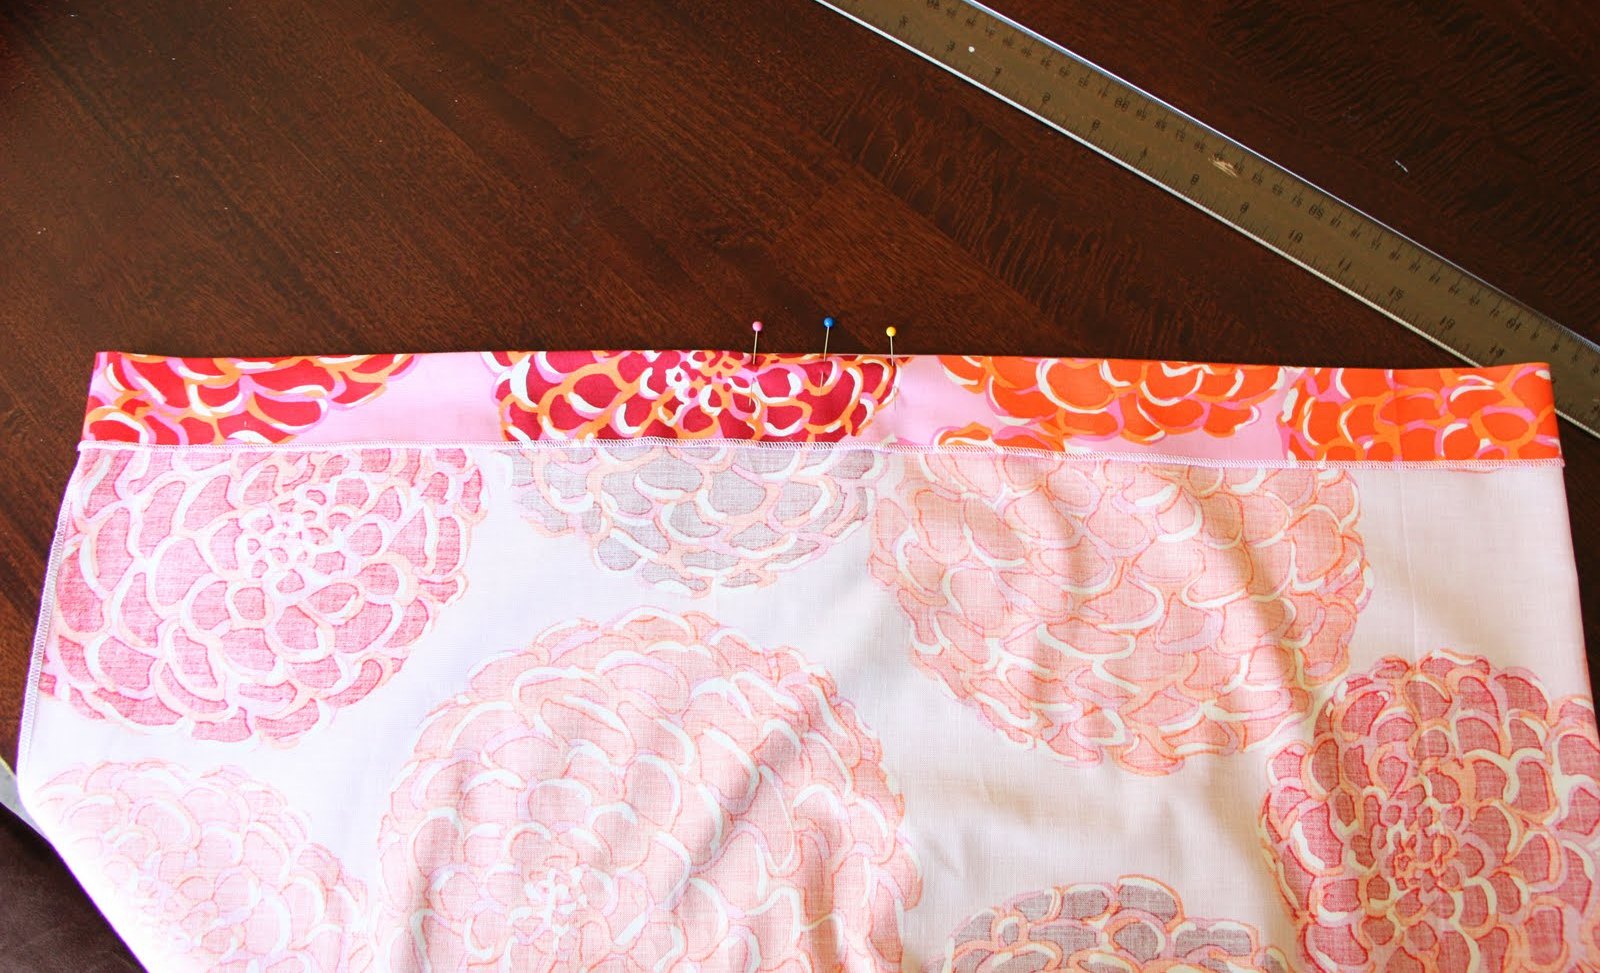
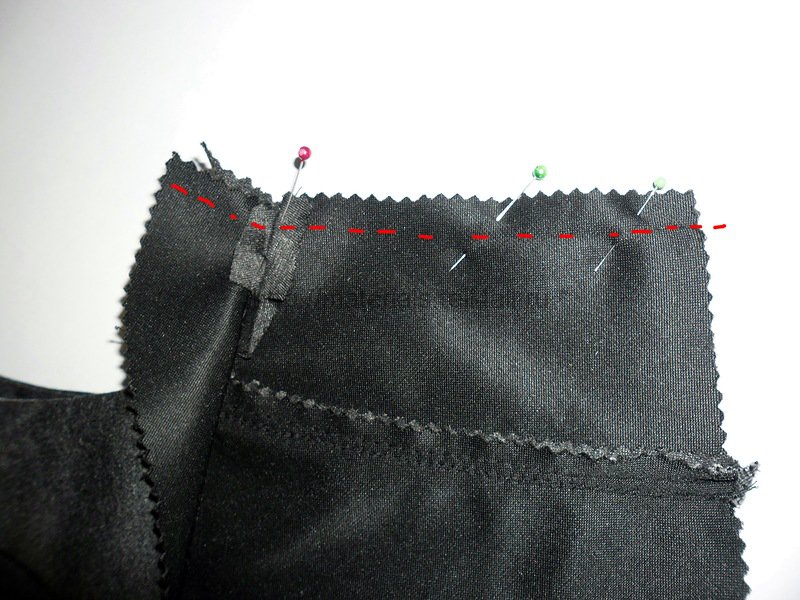
Having cut out 2 parts of the base, they are folded face to face, then they grind off side sections and process them on a typewriter. Ironing the seam allowance, a finishing band is pinned to it. It is sewn, spit around the edge, then bend, so that the ribbon is visible, and pave the finishing line.

Armholes can be processed using oblique bake. So that in the finished form they do not look stretched, when processing, you need to slightly stretch the slanting tape and make a barely noticeable wave of textiles. For convenience, it is better to use sewing pins. It turns out a wide edging from the inside.
Nuance: a slanting back-up to a beginner may seem capricious. To tailor a sundress to cause pleasant emotions, and did not have to mess with the bake, you can change the processing of the edge of the armhole. To do this, you need to initially press the finished slanting inlay, folding it in half. Sew it with one line is much easier, putting inside the edge of the armhole.
It now remains to wrap the top cut of the sundress, stitch it and pull the satin ribbon. Fashionable update for her daughter is ready!

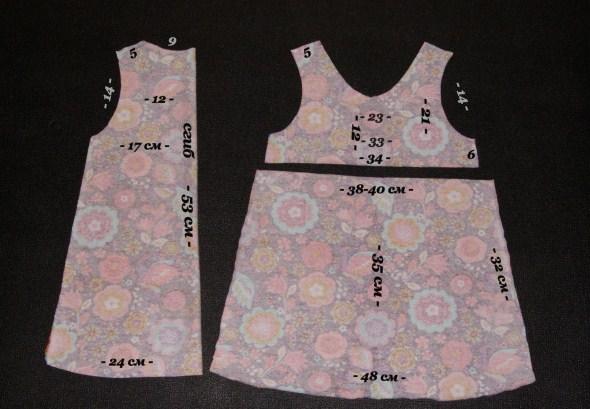
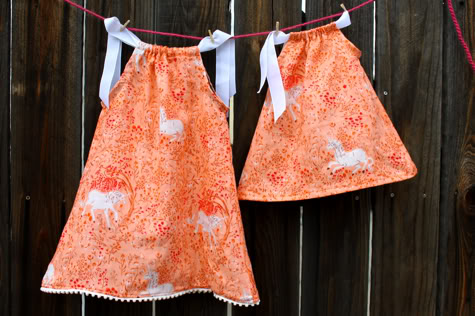
Summer model for 2-4 years: a master class for beginners
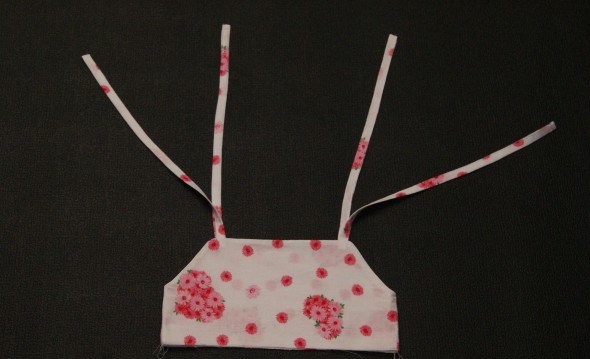
A mother who has an hour of free time can sew a cute sarafan dress on her straps to her daughter. Even a beginner can cope with sewing such a model. In addition, measurements for the pattern are also minimal: we need the parameters of chest girth and the desired length.

Details of cut
The pattern is designed for a girl of 2 years. Having measured the chest girth, a small allowance for a tight fit is added to it, then the result is divided by 2. The length of the bodice depends on preferences. Approximate figure - 30 cm.
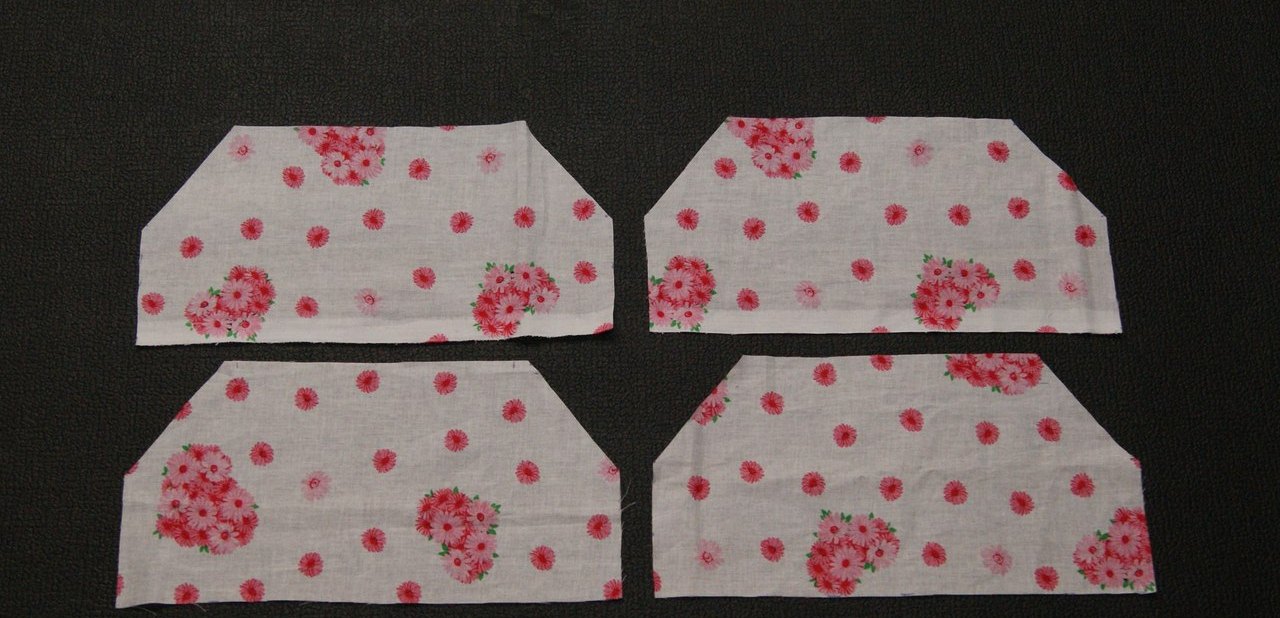
The top of the sarafan will be double. Cut out from fabric:
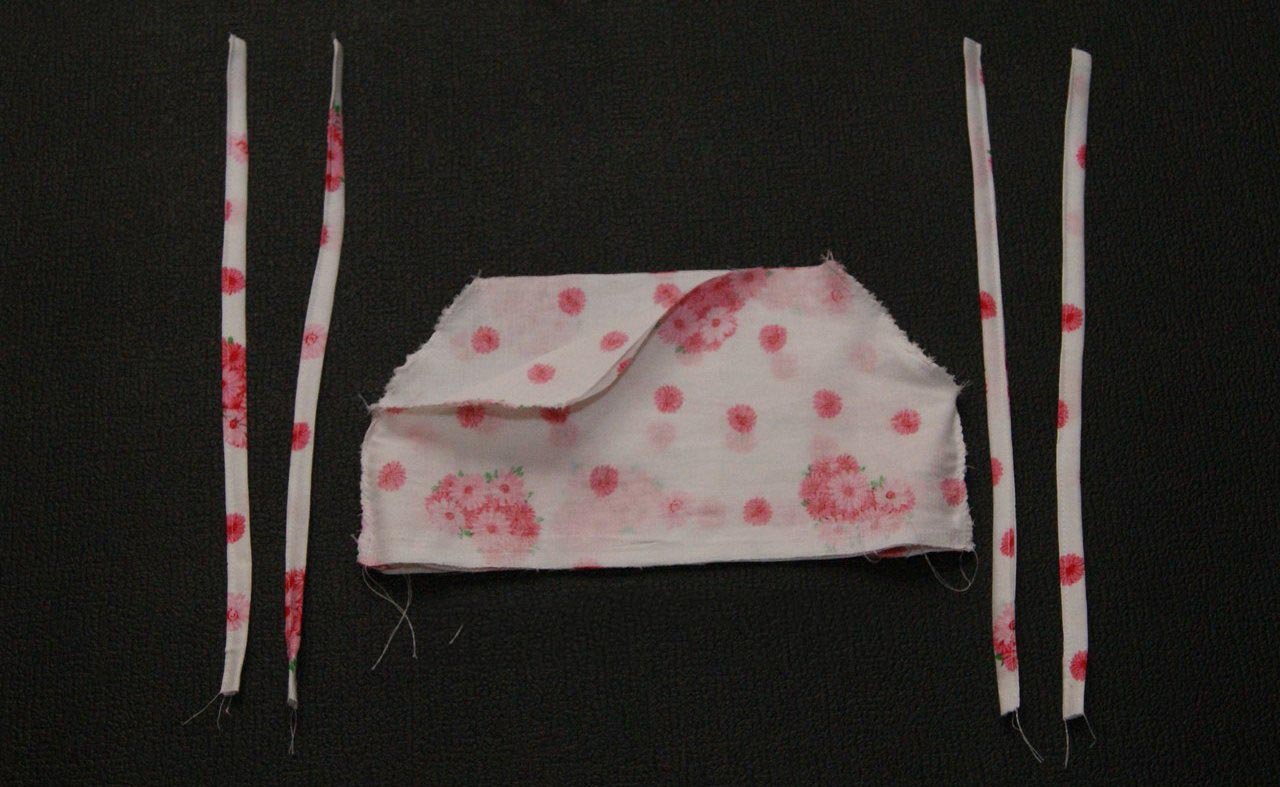
- 4 rectangles 16 x 30 cm (bodice), then the upper corners are cut with a straight line at 5-7 cm, forming armholes.
- For the skirt, cut 2 rectangles of size 33 x 50.
- Straps cut out with a width of 3 cm, the length depends on the particular child.
When cutting, it is worth considering a small nuance: without an allowance for free-fitting, putting on a sundress can cause difficulties.
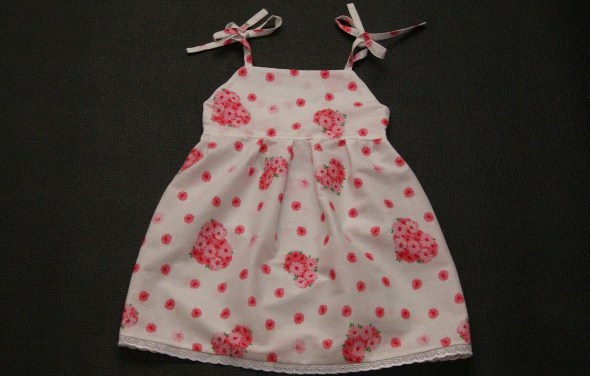
Sewing technology
It is quite simple:
- first prepare the straps, stitching them on a typewriter;
- details of the bodice are joined in pairs by the front sides inside;
- having marked the correct position of the straps (at the uppermost corner of the armholes), they are inserted between the paired details of the bodice;
- top blanks stitch on three sides, without touching the bottom cut, then turn on the front side and iron;
- The details of the skirt are folded face up inside, grinded on the sides and the seams are processed on the overlock;
- A narrow lace ribbon is sewn to the bottom edge, then oversize the seam allowance and fix it with a finishing stitch.
- combining skirt with side seams, find the centers of the shelves and backs;
- folds are laid from the centers of the skirt, distributing them symmetrically from both sides (for convenience, it is better to chop the centers of the parts and the side seams of the top and bottom);
- The skirt is joined to the bodice, the edge is overlapped (if desired, you can wrap the seam allowance on the side of the bodice and secure it with a stitching).
The straps are knotted when wearing the product. If the model seems rustic, you can decorate it with a small flower along the line between the bodice and the skirt.

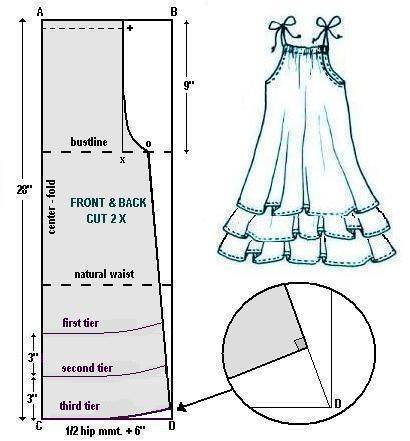
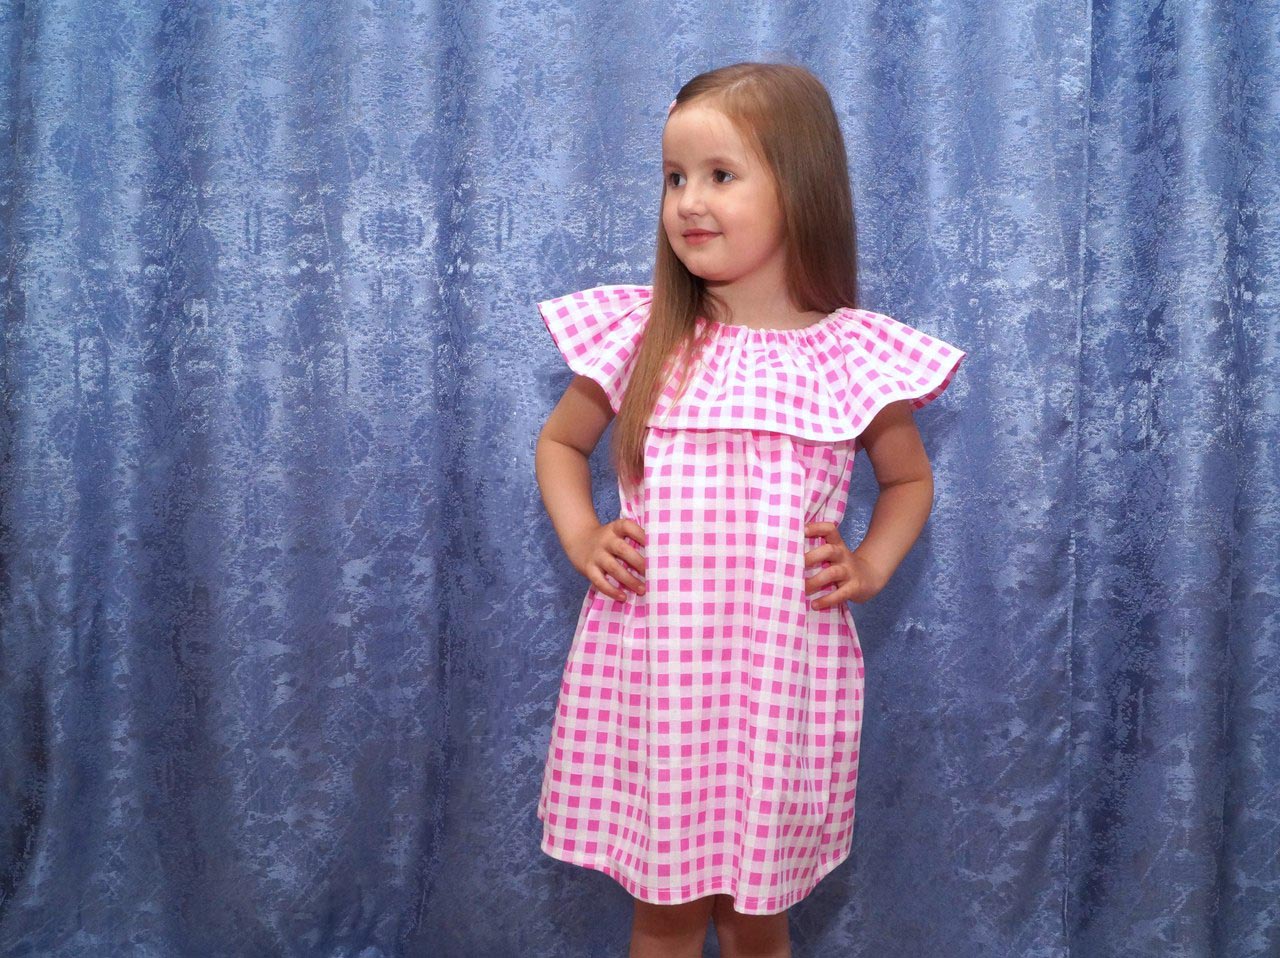
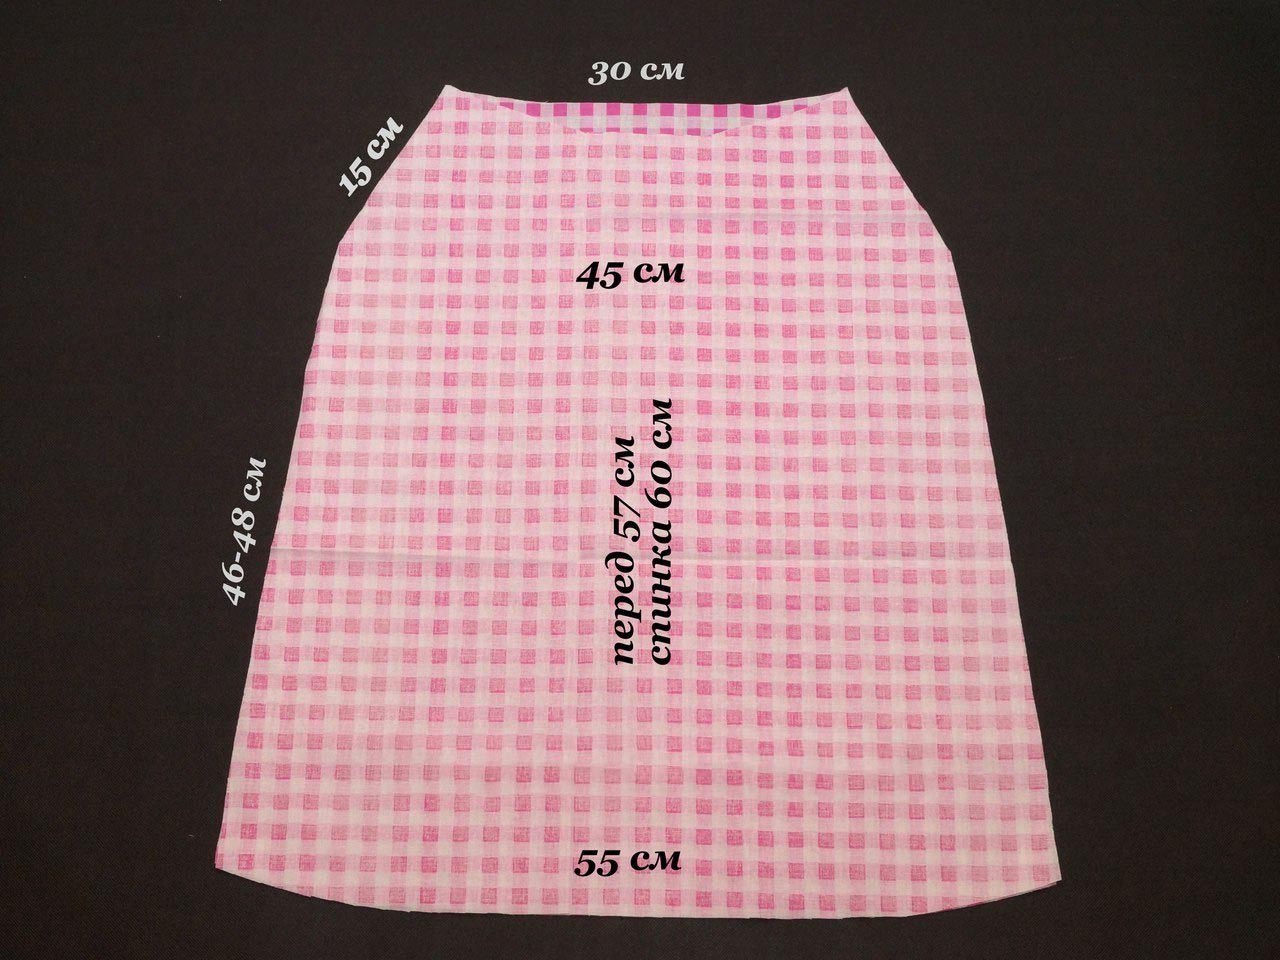
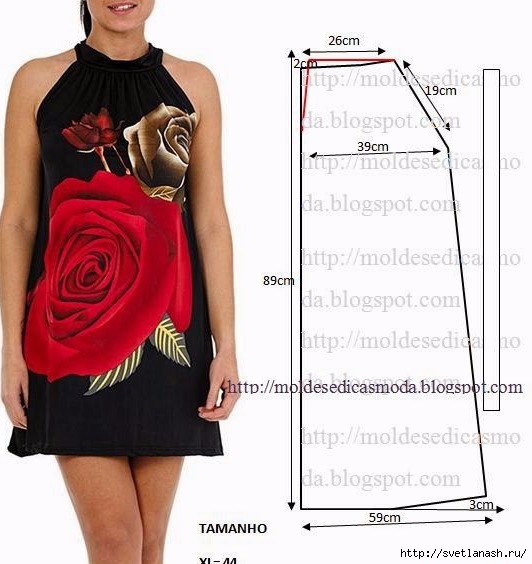
Dress-dress with flounce on the neck for 5-7 years
This model is very simple in execution. Its creation will take no more than an hour. In order not to subtilize the pattern, you can create a pattern on the model. The photo shows a pattern for a girl of 5 years (height 110 cm).
For those who find it difficult to figure out how to build a pattern, a small instruction will help:
- on a large sheet (newspaper or remnants of wallpaper) draw a rectangle measuring 27.5 x 60 cm (half of the pattern with the fold);
- 15 cm recede from the middle of the upper line and set point A;
- from the obtained point A retreat downwards approximately 15 cm and draw a perpendicular line connecting the two sides of the rectangle (this is the armhole line);
- then draw up the side, as in the photo: from the middle of the second line (armhole level) 22.5 cm recede and put the point B, then the points A and B are joined;
- from the sideline of the bottom, retract upwards 3 - 3.5 cm and set point C, then connect it with point B;
- the bottom line should be rounded: the point C is smoothly connected to the middle of the bottom;
- the neckline has a slightly larger neckline, so the line of the neckline of the shelf should be 1-1.5 cm lower.
Before you carve out the base, you need to steam the fabric with an iron: this will save the finished product from deformation and shrinkage after washing. Cut out the details of the base, you need to carve out a strip of 130 x 18 cm (shuttlecock).
Sewing a simple sundress:
- the product is placed on the wrong side, bend the armholes and stitch them with a seam into the hem with a closed edge;
- after armholes, they grind off and process side sections on the overlock;
- the bottom of the product is turned on 2 cm, bend 0.7 cm and stitch on a typewriter;
- the sides of the shuttlecock grind, overlap, and then tuck the bottom and stitch it with a seam with a bead with a closed edge;
- having marked 2 mid-shuttlecock, 1 shelf, 1 back, they are combined with sewing pins (the shuttlecock rings the top face down on the face):
- shuttlecock attached to the base.
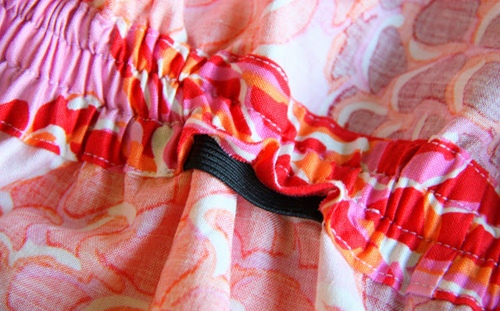
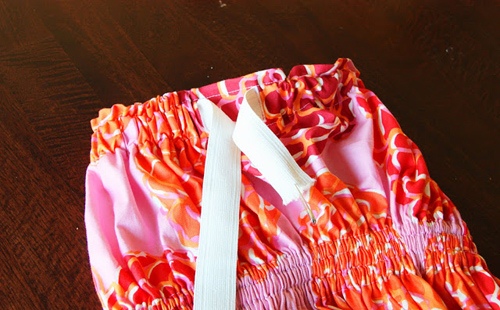
- The upper side of the shuttlecock is folded up to the width of the elastic, stitched on a typewriter, then the elastic is threaded (approximately 45 - 49 cm long).

If the girl is older, the size of the pattern is increased. The length of the finished sundress is small (you need to take this into account before opening). If you want an accent, you can add a sundress with a narrow contrasting belt.
New onion style for 8-10 years
A charming children's dress with a fluffy skirt and a bow will appeal to any girl. Tailoring will not take much time: its complexity is minimized. First you need to measure the circumference of the hips, the distance to the waist line and the estimated length of the model. To the measure of the circumference of the hips add an allowance for the assembly to the bodice and skirt seemed lush.

Sewing a model like this:
- Having cut out two rectangles with allowance for allowances, they are grinded on the sides, overcast the edges.
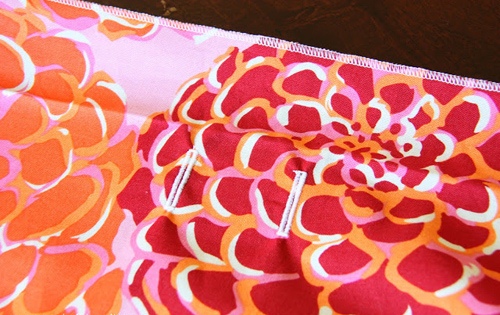
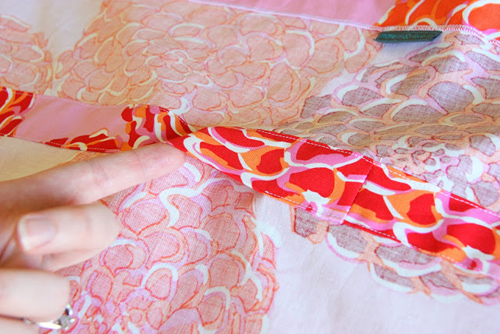
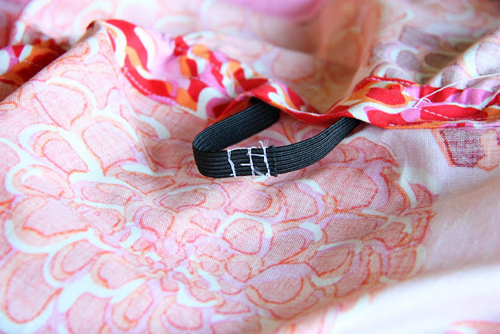
- The top edge is wrapped to make a drawstring, after which two loops are made in front for threading the bow. In order for them to be reliable and not to tear the fabric, in the place of their execution it is necessary to strengthen the fabric with glue pad. It is important to note that the width of the drawstring should close the loop.

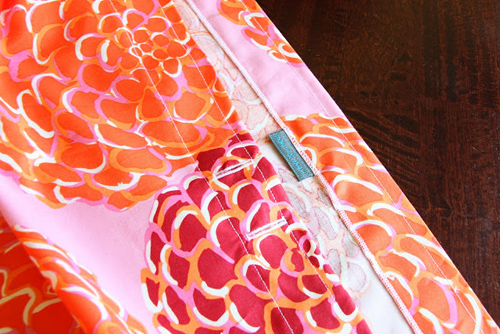
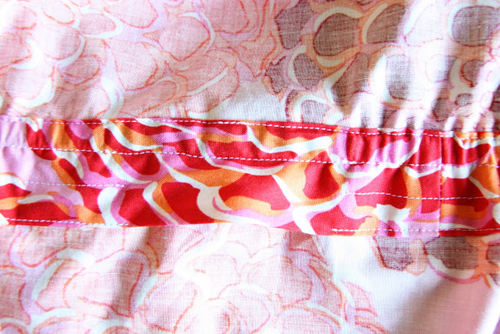
- The curtain at the waist is fastened with two lines: at the top and bottom edge. It is desirable to select the threads for the stitching to match the fabric, so the product will look neater. Performing the lines, it is better to focus on the labels to the right of the presser foot, located on the metal plate of the machine. This will make the lines even and parallel. If you do not want to mess with the scenes, you need to iron their allowances. This will pave the lines smoothly and without preliminary planning. That the line of pritachivaniye was not displaced, it will be enough to fix it in several places with sewing pins.
- Outlining the waist line (you can attach the product to the figure on the wrong side), sew a drawstring, leaving space for putting in rubber bands (the width of the stitching seam is 0.1 cm). The curtain around the waist should be solid, including running over the side seams. Dividing the width of the part into three parts, lay two more lines for the rubber bands, also leaving a small skipping pass.
- Having measured the gum of the desired size, they are threaded and joined into rings. The assembly at the waist is distributed evenly.
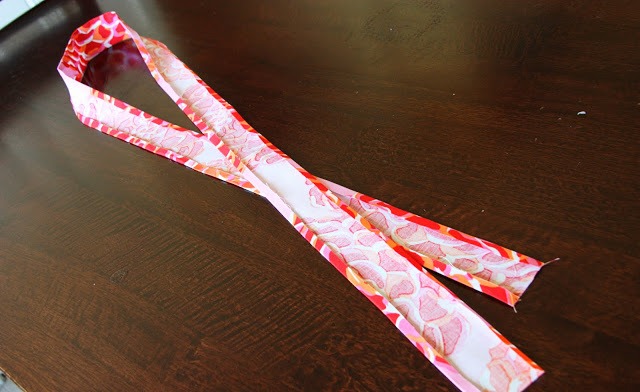


- After making the waist you need to complete work with the top of the sundress. To do this, take a satin ribbon and thread it into the loops, then cut off the excess length and gently sing down the ends of the ribbon. It remains to collect the straps and sew them to the top, without going beyond the upper line of the line.
The model is convenient in that, to simplify donning, it allows you to change the width of the top.Looks like a sarafan stylish and beautiful.

Patterns for teenage girls
Teenagers are a little harder to pick a pattern. The thing is that the figure is just beginning to form, and each girl has its own way. However, here you can simplify the sewing task: choosing patterns for cutting, you need to make a start from four measures: chest grip, hips, waist and height.
They all matter. Even with the observance of the first three, but not taking into account the growth of the girl, it is possible to complicate the sewing process, because in the calculation and construction much depends on the growth.
If the model is simple, for example, flared or trapezoidal, you may need only the size of the hips. In this case, the pattern will be a rectangle, which with the help of an elastic thread-gum will turn into a fitted model. And to make such a dress is very quick and easy: connecting the side seams, processing the bottom and top, you need to arrange the bodice in parallel lines with a distance of 1 cm (from top to waistline).
Another option - a pattern in the form of a trapezoid, combined with a square on the base. The bottom of the pattern is rounded, the top is a straight line. To build you need to measure the circumference of the chest, hips and length. To measurements necessarily add allowances for freedom of fit. Making a pattern, cut out the base of the sundress and straps (two strips of fabric along the lobe).
Combining the side sections and overcasting them, process the bottom of the product, and then proceed to the bodice. First, armholes are folded over and stitched, and then the top is bent (the backs and shelves are separate) and stitched up. It will remain to assemble the straps, press them into the received channels of the top of the back and the shelves, tying them in a knot.

If you have a comfortable T-shirt, you can carve out a dress with its help. For this product impose on the fabric, encircle the neck and armholes with a pencil, and then draw a flared line. Such a dress will be easy and comfortable, and besides, fashionable. The only difficulty in tailoring is the processing of the neck and the armhole with a single piping. Bake will simplify the look.


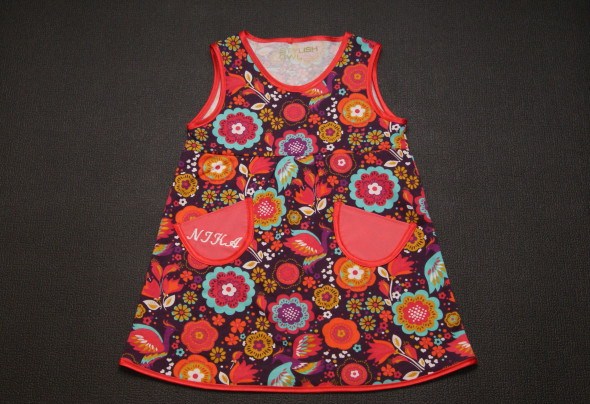
School sundress with their own hands
When a girl goes to school, I want her to be the best. It is no secret that it is more difficult to choose the form: often the school sundress looks baggy, so it often has to be tweaked. Those who are set to a perfect result, you can sew a school dress yourself. To do this, the basis is taken from a pattern from magazines or seen on the Internet in forums dedicated to needlework.
Unfortunately, it is not easy to find a quality pattern of a school sundress, its construction is often puzzled. But if you look closely at the templates, there is nothing supercomplex in them: you can do them yourself. For example, the skirt is a rectangular cloth fabric, gathered in the fold. The bodice is a T-shirt with reliefs (lateral parts) coming from the armholes.
If the pattern is a dark forest, you can take a ready-made template, designed for a suitable age. The main task is to print it in the right size. To do this, we need two measurements: the length from back to waist (exact) and the waist half-grip (with allowance for fitting freedom).
Having opened a Microsoft Word document, you need to insert a picture of the pattern into it and increase it to the desired size by measuring the parameters on the screen with a measuring tape. If the girl's figure is slightly different, you can slightly adjust the height. Since the template does not fit on the page, it is spread over several pages, then printed and glued, combining the edges.
Pulling cut, focusing on the details of the base: they repeat the shape of the neck, armhole, are connected to the shoulder and side seam. Before cutting out the fabric, it is better to glue the fabric with interlining. So they are not deformed, in contrast to the method, when cutting out the separate and adhesive sections, and then connect them.

Sewing technology is as follows:
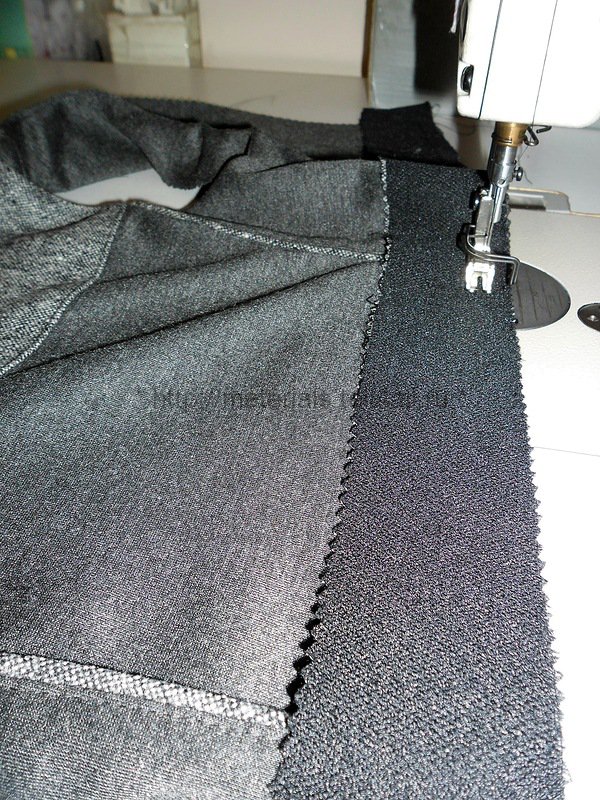
- Cutting all the details of the cut (shelf, flange shelves, two parts of the backrest, flanks of the backrest, facing), they are assembled with a temporary line. Necessary fitting to avoid alterations. In order not to stretch the neck, you can tuck in it facing.
- After fitting, grind relief sidewalls and side sections. The edges are overlaid (if the fabric is thick, the side seams are overlaid separately, in order to then iron out and not create excess thickness when combined with facing). The seams of reliefs are ironed to the center (shelves or backrests).
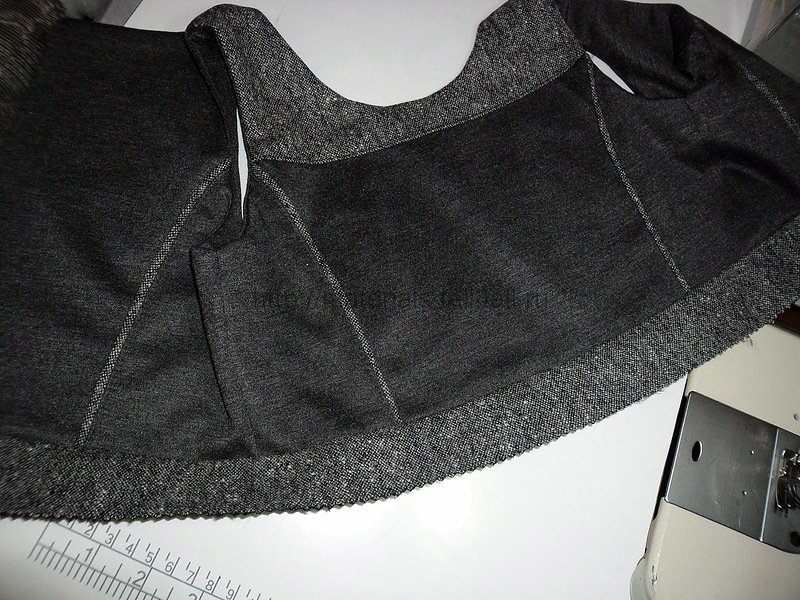
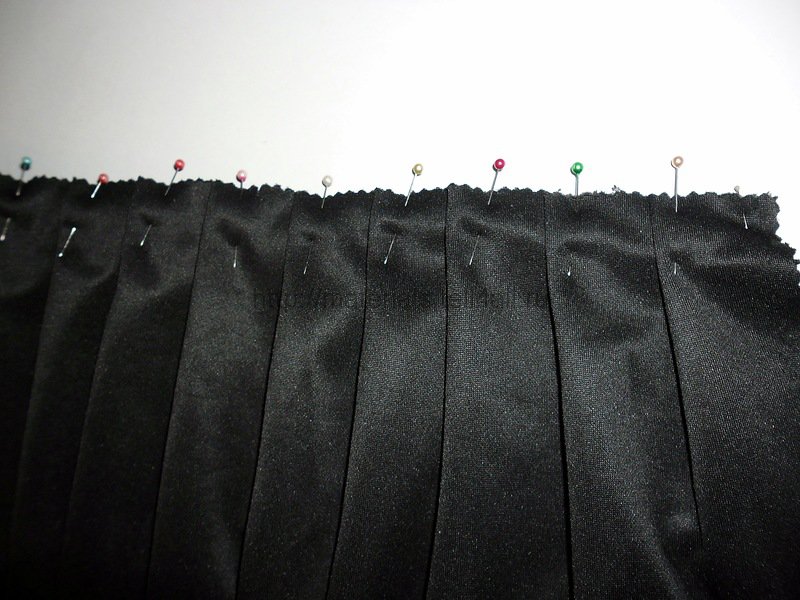
- Having noticed the folds (observing symmetry from the center of the shelf), they are ironed from the wrong side, then the skirt is crafted to the top. The allowance is overlaid and ironed up.
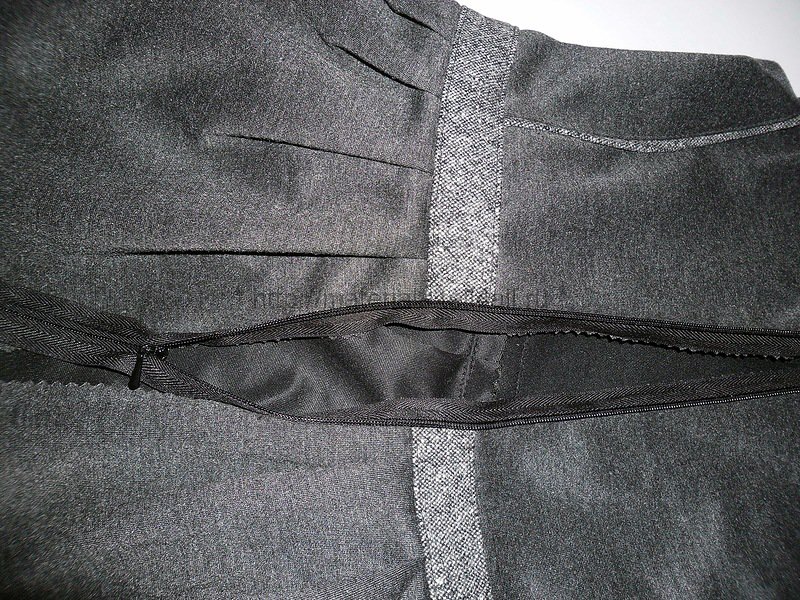
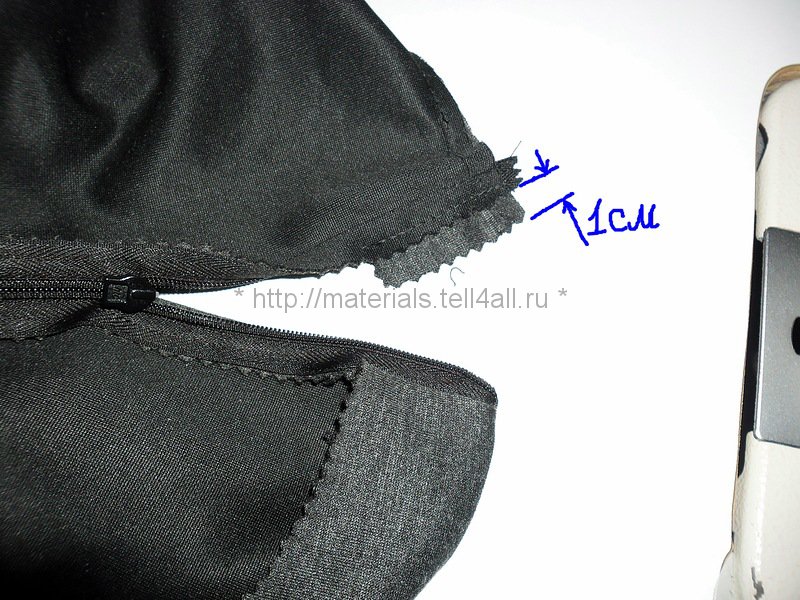
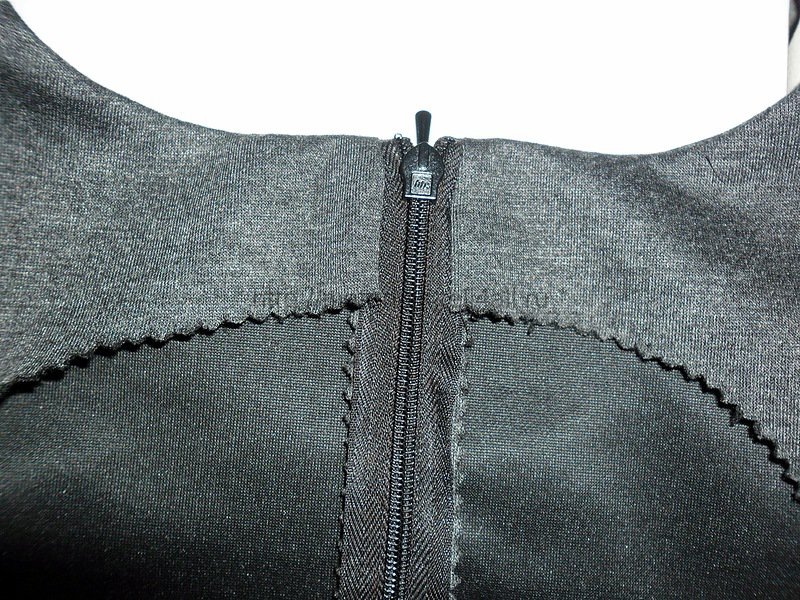
- Each middle section of the back is swept over, then a secret zipper is sewn in (each side is separate), using a special presser foot. Then grind off the middle seam.
- This product is somewhat different from simple sundresses, so you can not do without the fit: the bodice is folded, combining the side seams, free shoulder sections and armholes (temporary lines are removed). Having specified symmetry, they grind off shoulder seams.
- Strokes over the bottom edge, putting face to the front side of the sundress, stitching. Then turn and zayuyvayut, fixing the shape of the neck. This style does not need finishing lines, as they will simplify it.
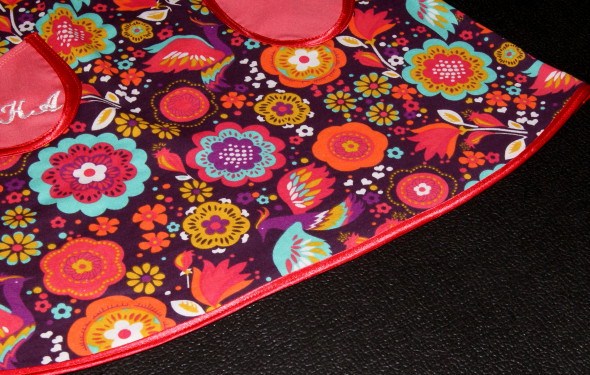
- The final stage of the knotted processing is the bottom edge. He is overlaid, turned over and stitched. The bottom can not do without a strong stitch: it is safer than hidden stitches. At the end of the work sundress podlyuyuzhivat, not forgetting about the folds below.
Textiles used for sewing school clothes, is very picky about a delicate ironing. WTO is performed only from the reverse side and through a fine cotton fabric (or gauze). If you iron the product on the fabric, it will remain on the las.

How can I sew a beautiful sundress without a pattern, see the next video.


