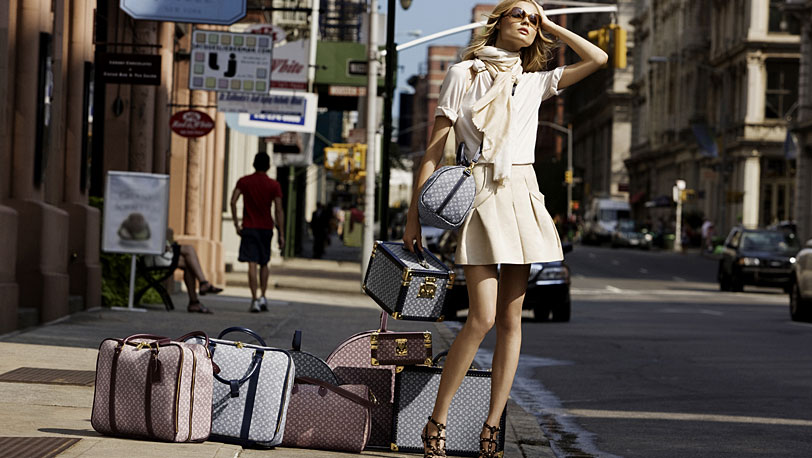
Going on a journey, each person takes with him a certain minimum of things that need to be put somewhere. Most often for these purposes travel bags are used as the most suitable option for any type of transport, whether it be a car, a bus, a train or a plane. This necessary travel accessory can be sewn with your own hands, while saving money and becoming the owner of a unique, roomy and most convenient bag.
How to sew a women's travel bag?
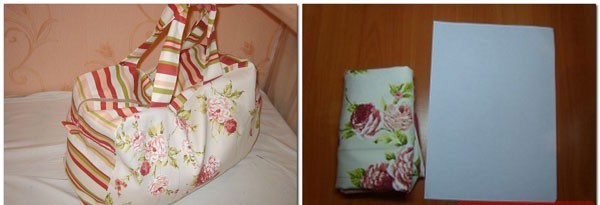
Travel bag for women is important. It should be not only roomy with lots of pockets, but also beautiful. When sewing this accessory with your own hands, all these characteristics can be taken into account, and you need to start with the selection of fabric.
The material for sewing needs to be durable, as the bag must withstand certain loads. Sacking, tarpaulin or gretta, used when sewing work clothes, are perfect for sewing bags.
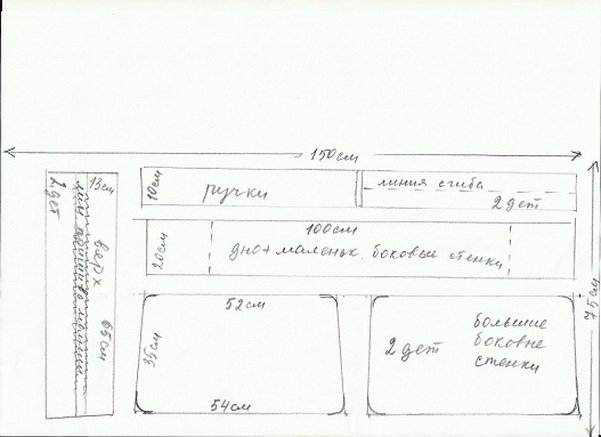
To sew an accessory you will need a length of fabric 75 cm and a standard width of 150 cm, lightning 65 cm long, nylon thread. But first you need to make a pattern on graph paper or tracing paper.
The steps for sewing are:
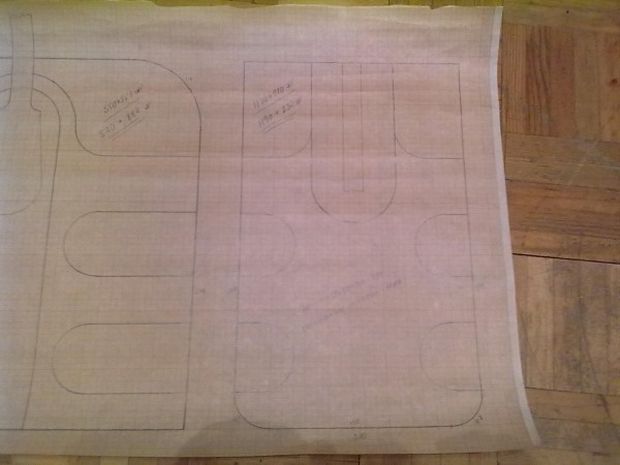
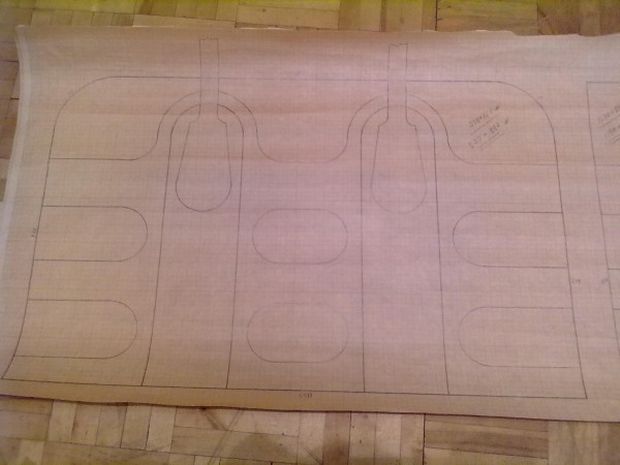
- For a large side wall draw a shape resembling a trapezoidwhere the bottom side is 54 cm, the top is slightly smaller, namely 52 cm, and the sides are 35 cm, the corners of the part are rounded. Such blanks need two pieces. The bottom and two ends of the bag are expressed in one piece in the shape of a rectangle 100x26 in size. For pens, we draw a rectangular part with a width of 10 cm, but the length can be adjusted depending on the desire, it can be from 30 to 50 cm. The top of the bag will consist of two rectangular parts measuring 13x65 in size.
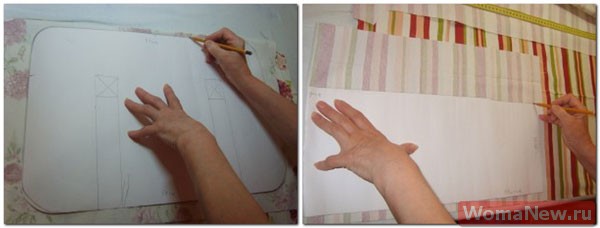
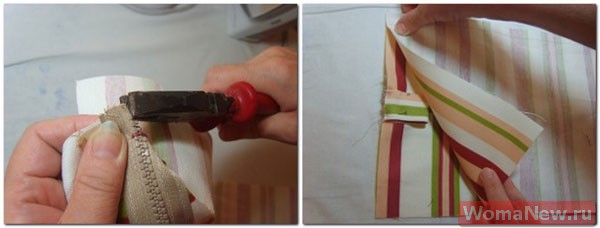
- The finished pattern laid on the fabric and outlines every detail, taking into account the allowances for the seams, namely 1.5 cm. We begin to collect the bag. First, sew the zipper between the two parts of the top. To do this, tuck the long sections from the side of the zipper zipper, every detail to the wrong side. Then with the help of pins we pin the zipper to the details and sew.
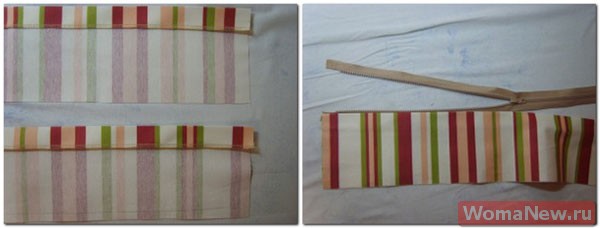
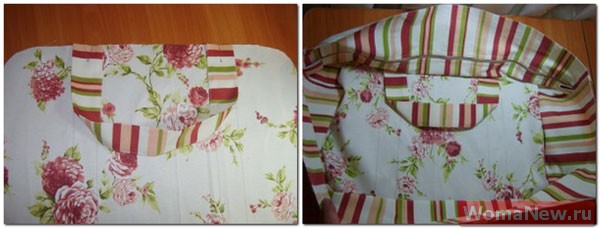
- Now proceed to stitching two loops in the form of loops between the top with zipper and detailwhich is at the same time the bottom and ends of the bag. To do this, you need to fold the two main parts face up, and between them to insert a loop and stitch from the wrong side. On the other hand, similarly sew the second loop. Then turn the now single piece and flash it from the front side.
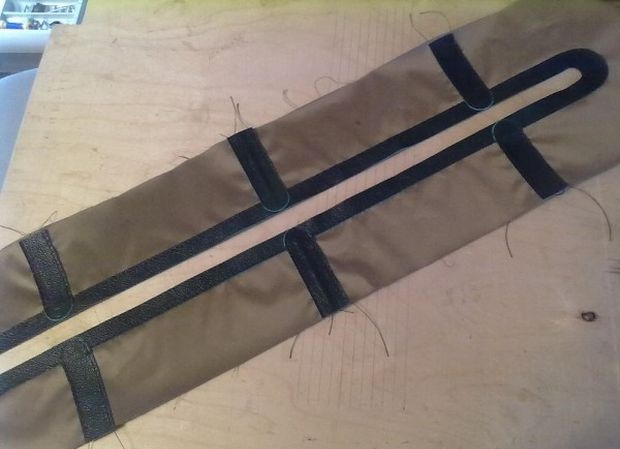
- Cooking handles for sewing. At each workpiece, we twist the cuts to the seamy side, then fold each piece in half and sew it on each side. Finished handles are attached with pins to trapezoid-shaped blanks. The distance between the two ends of the handles depends on their length, as well as on personal preferences.
- We start to stitch to the workpiece with a zipper first one large side wall with a handle, and then the second.
- If desired in this model, you can add a hard bottomputting inside bag. To do this, cut the cardboard and sheathe it with a cloth. Instead of cardboard, you can use polyurethane foam, izolon, linoleum, haberdashery cardboard.
We sew from old jeans
It is easy to sew a road accessory from old jeans, and most importantly - a unique and inimitable model is obtained without much material costs.

For sewing will need:
- old jeans and leather for pens and bottoms;
- lining fabric;
- interlining or dublerin;
- pins, thread, sewing machine;
- pattern
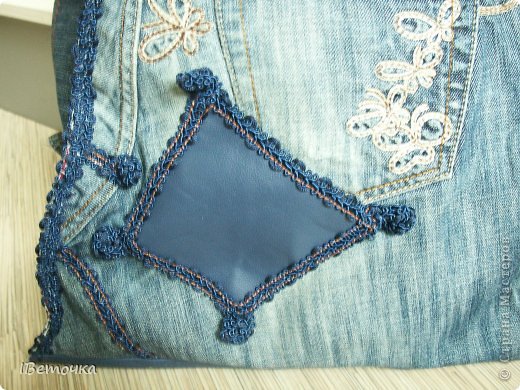
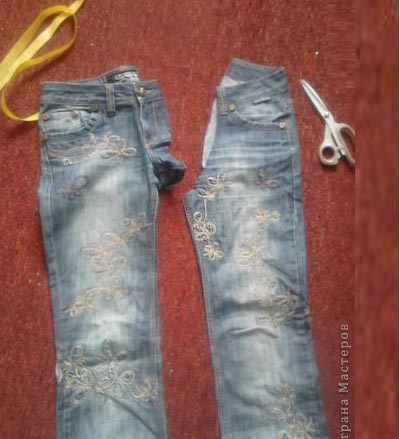
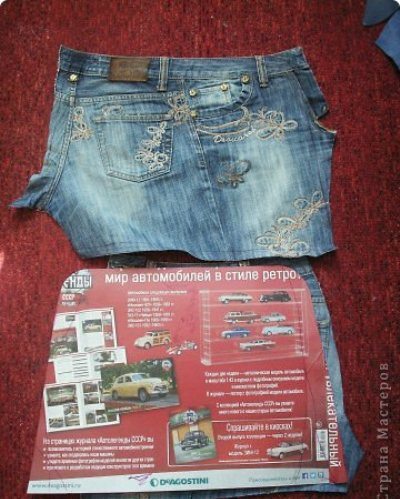
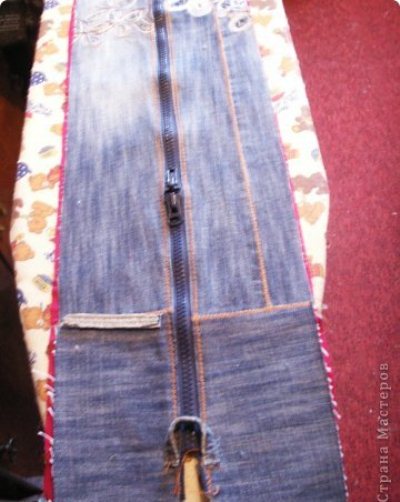
First you need to cut the jeans in the fastener area and back along the seam. It turned out two halves, which are cut along the internal seam. The upper part of jeans is designed for large side walls, and the bottom is useful for cutting handles and the ends of the bag. We iron the blanks and pin the pattern, using which we cut out the parts, taking into account the seam allowances.
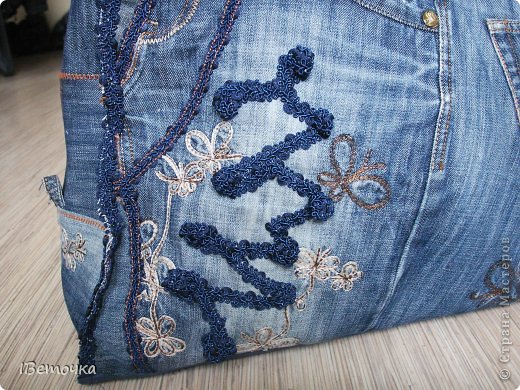
If the upper part of jeans, designed for the side walls of the less pattern, you can stitch pieces, and then decorate, for example, with a tape.

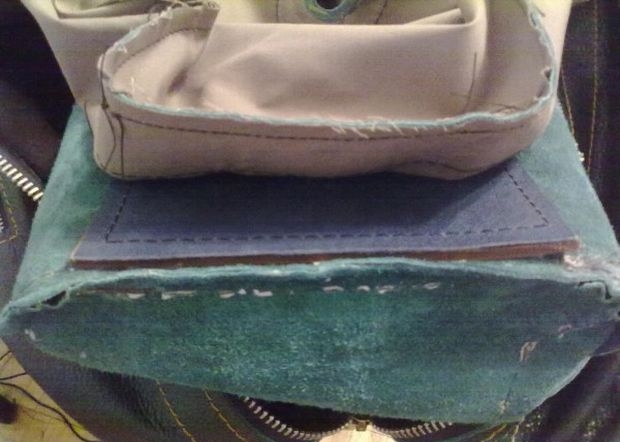
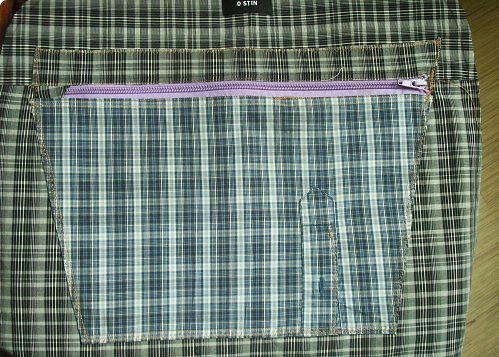
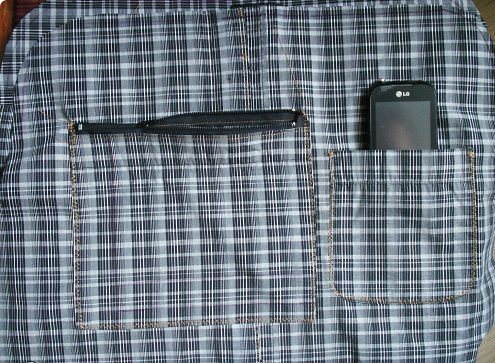
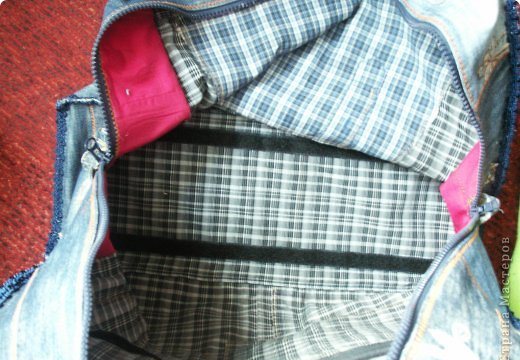
Now cut the lining, you can use an old shirt. We cut out the sides, bottom and ends. You can sew pockets with zipper and open to large sides if desired. The bottom of the bag can be made from both leather and denim. To shape the lower part, it is better to make an additional removable bottom consisting of cardboard in a fabric case and attached to the main one with the help of a contact tape-adhesive tape.
Strengthen the basic denim details flizelinom or dublerinom, then sew them with lining details and proceed to the manufacture of handles. Prepared two parts lay out the seamy side up, and in the center of each blank put the prepared strips of leather. From two sides we turn sections of each detail so that the formed edge goes on the skin and pin with pins. Then we stitch both blanks on each side.

We proceed to the assembly of the bag:
- First, sew the zipper in the upper part. Then sew two large sides to the bottom of the bag on the wrong side.
- With the help of pins we attach the handles to the big sides and then grind off. To the ends of the future accessory sew loops. If they are with rings, then in the future you can sew a long handle to the finished bag, fastened to the rings with a carabiner.
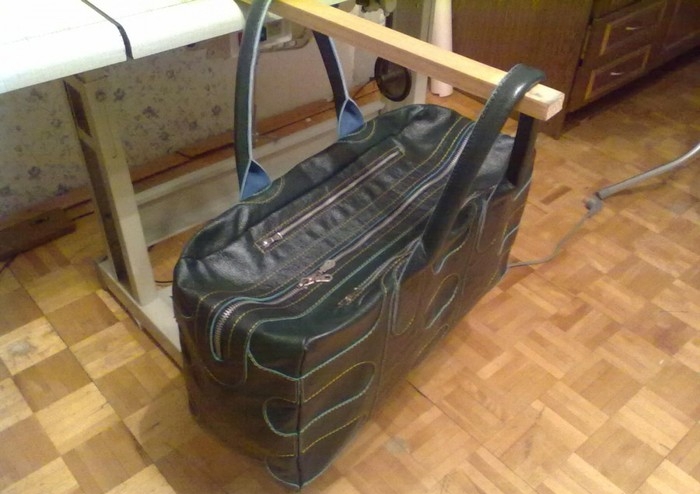
- Sew the ends of the bag with the top blank, in which the zipper is already sewn. It turned out a long strip, which we attach first to one wall of the bag, and then to the second.
The bag is ready to use.

How to sew a model of a denim skirt, see the following video.
Leather model: master class
To sew a leather travel bag with your own hands you will need:
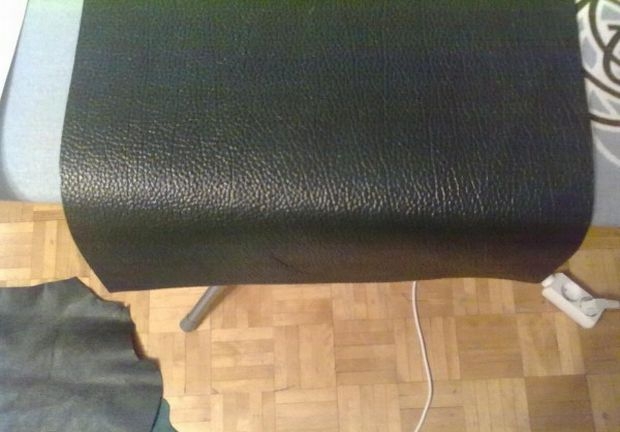
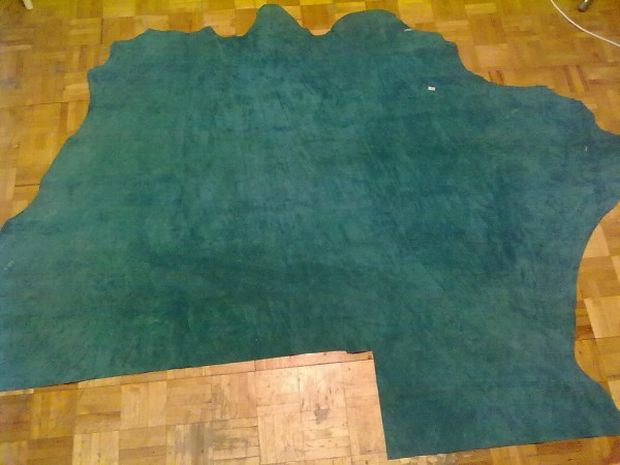
- a piece of calf leather for a bag and a thick, thick leather-neck for the bottom;
- awl;
- scissors or knife;
- glue;
- two strong needles with a wide eye;
- hammer;
- tape measure;
- special thread for stitching the skin;
- lightning
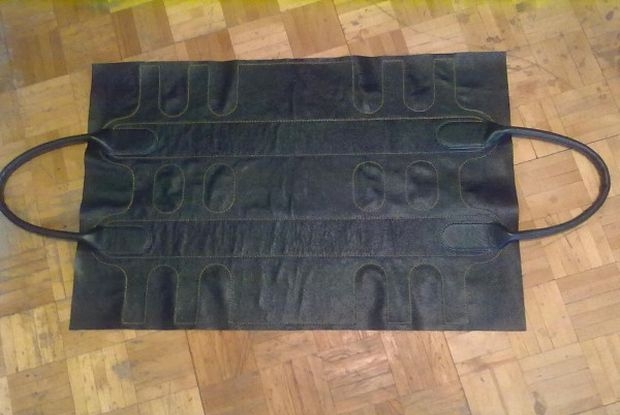
First you need to make a pattern consisting of two main parts. For the sides and bottom, draw a rectangle 55 cm wide and 89 cm long. The second rectangle 123 cm long and 21 cm wide is the ends and top of the bag. For pens, draw rectangles with rounded ends on both sides.
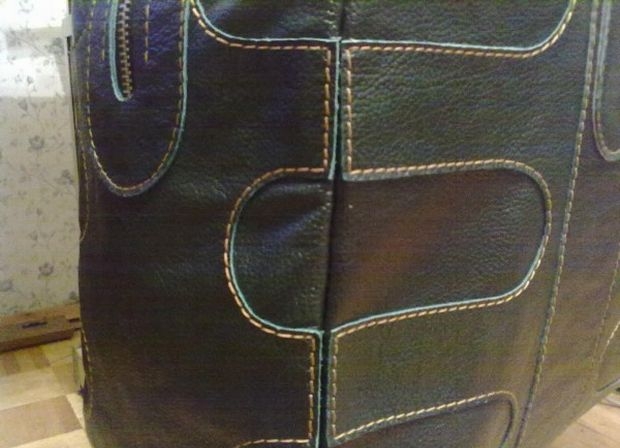
You can decorate the accessory with the help of shaped elements of the application, which are first drawn on paper and then transferred to the skin with the help of chalk.
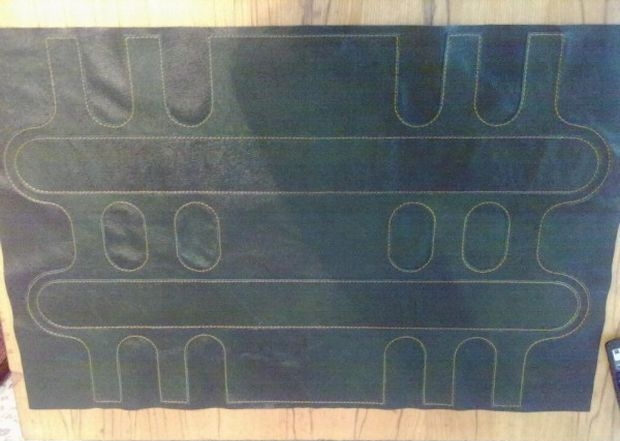
We apply the pattern to the seamy side of the skin, we trace it, taking into account the seam allowances and cut it. The resulting blanks ironed iron, spreading them face up and placing a sheet of paper on them.
It is necessary to iron evenly without pressure.
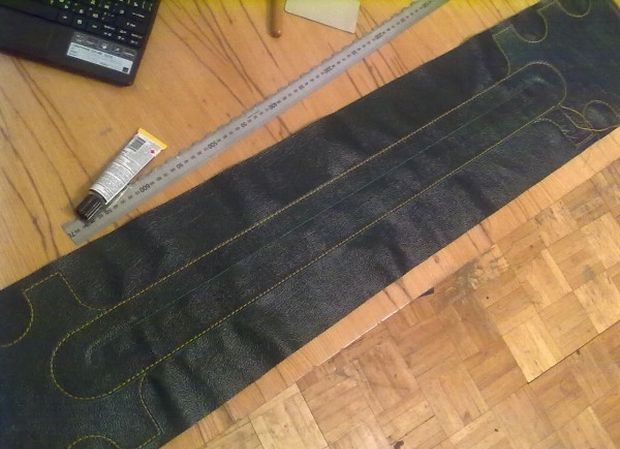
Before stitching blanks, it is necessary to outline the lines along which the stitch will follow. This is done either with the help of special tools, or with the help of a ruler neatly drawn. Then it is necessary to make holes for the future seam either with the help of a piercer or with the help of an awl and a hammer. Details are sewn with the help of a saddle stitch, the strongest and most reliable. Formed seam need to knock hammer, so that the stitches are well laid down.

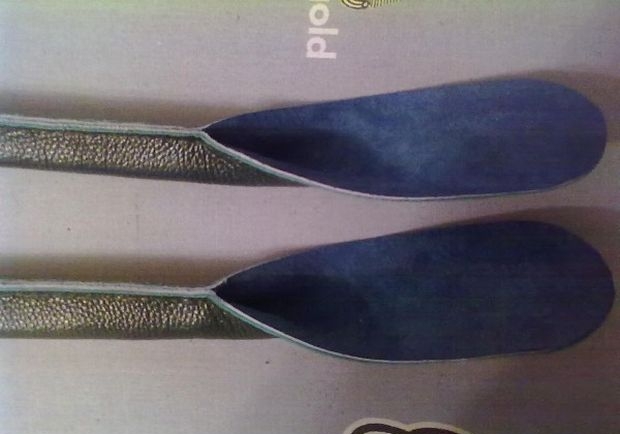
Getting to the formation of pens. At first we glue them together, but we don’t completely leave sections on each side, which will then be attached to the main blank. We insert a nylon cord with a diameter of 8 mm inside each blank, its ends are smeared with glue and put inside the handle. It is necessary to preserve the circular cross section of this element. Sew handles to the main workpiece.
At first we glue on the second part, and then sew the lock strip and cut out the place for the zipper. Sew it must be carefully grabbing only the edge. It turns out two parallel seams running along the zipper on each side. If desired, two pockets are sewn on each side of the top of the bag. Then, both blanks are stitched with the addition of a girdle, to prevent deformation.
The resulting seams need to be glued in places under the seam allowances and tapped with a hammer. First on one side and then on the other.

Now you can start making the lining. We cut it out similarly to the main blanks. It turned out two parts.
A lock strap is cut out of leather, the same as on the main blank and sewn to the lining fabric. Perpendicular to it sewn several small leather linings. Small leather lining is also sewn on the second lining detail. Both parts are stitched.
Inside the bag is put cap and ready lining. Leather lining, sewn to the main parts of the lining fabric, glue with cheprakom and bag. The protruding parts of the lining can be grabbed with a few stitches. We also glue the upper part of the lining with the located locking plate under the zipper, and then stitch it - and your bag is ready!