There are situations when you need to get rid of manicure at home. It is not difficult to cope with ordinary varnish. But if shellac is applied to the nails, you will have to work a little. However, this task is quite feasible. This article will help you to find out in what ways you can remove shellac from marigolds without contacting the salon.


Is it possible to remove shellac by yourself?
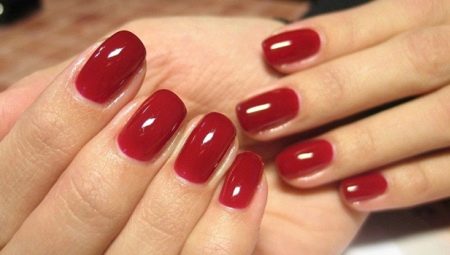
This varnish for nails appeared in the field of manicure in 2010. Shellac immediately gained popularity, as this composition has unique and more beneficial properties (compared to conventional varnishes). We can say that this is a kind of combination of two components: colored varnish and firming gel. Thanks to this, the coating on the nails lasts much longer.
This increased resistance has brought some inconvenience. Remove from the nails such a coating was not under the force of those means by which ordinary nail polish is easily removed. True, for manicure salons it became a big bonus. Now clients often turn to the master not only in order to apply a manicure, but also in order to get rid of it later. However, many were not afraid to try to remove shellac from the nails at home.
Through trial and error, resourceful girls still managed to find some simple ways and means by which you can carry out such a procedure yourself.

What to remove?
Shellac will not be removed quickly, so please be some patience. On average, the whole process takes about an hour.
In salons, this procedure is faster. Professional masters use two ways to remove such a coating from the nails.
- One of them is that the shellac layer is first treated with solvent compounds. For this, fingers with manicure are wrapped in mini-compresses with a special liquid. After the coating has softened, it is removed sparingly mechanically. An alternative to this particular shellac removal method is available for home use. About it will be described in detail below.
- The second method appeared not so long ago. The coating is treated with a special manicure machine, grinding down a layer of shellac. This machine is called a router. This method is better suited for acrylic nails. Accurate machining does not damage extended nails, while solvents can have a negative effect on the acrylic layer.

To remove the shellac coating correctly and not to harm the nails, You will need to prepare in advance the necessary tools and supporting materials.
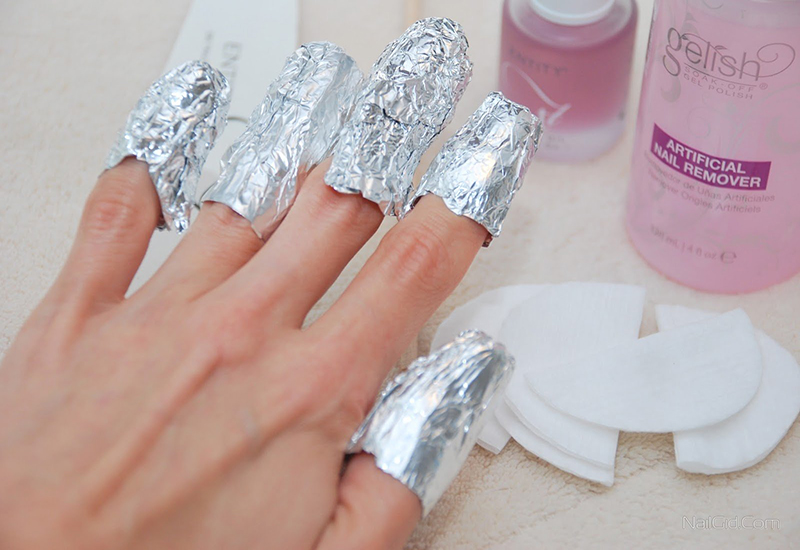
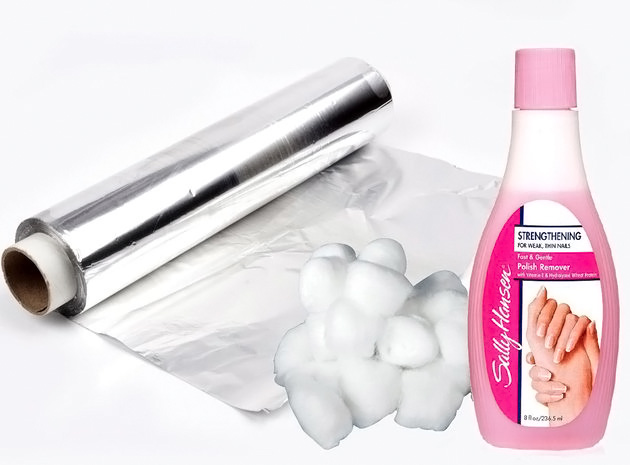
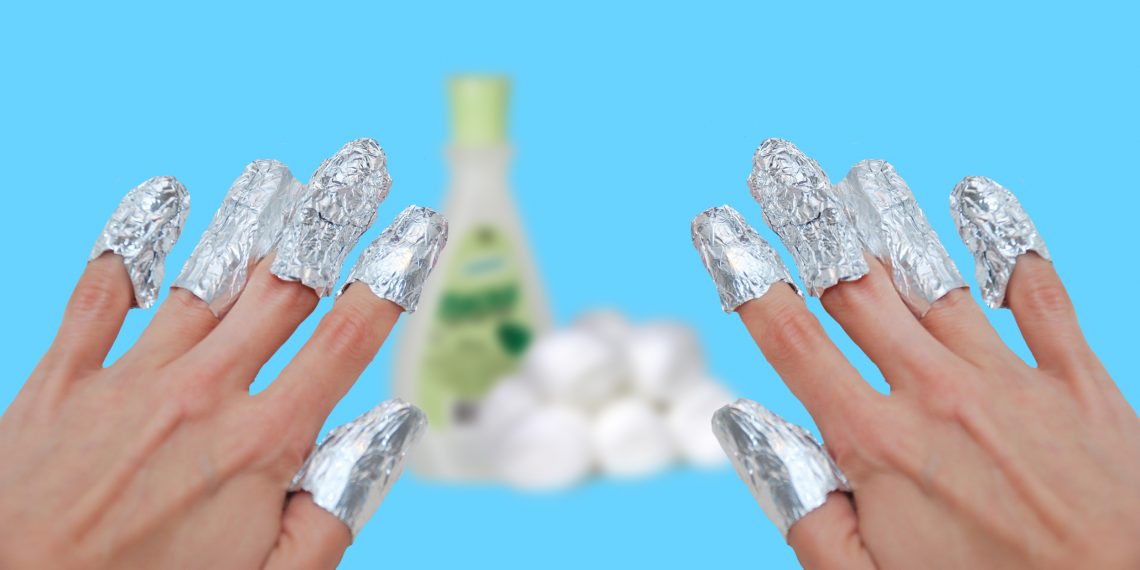
- A few cotton pads or pieces of gauze. They will need to be wetted in a solvent liquid and applied to the nail plate. Therefore, for convenience, pre-cut them into small pieces that completely cover each nail. If you use cheesecloth, the pieces should be folded in 3-4 layers.
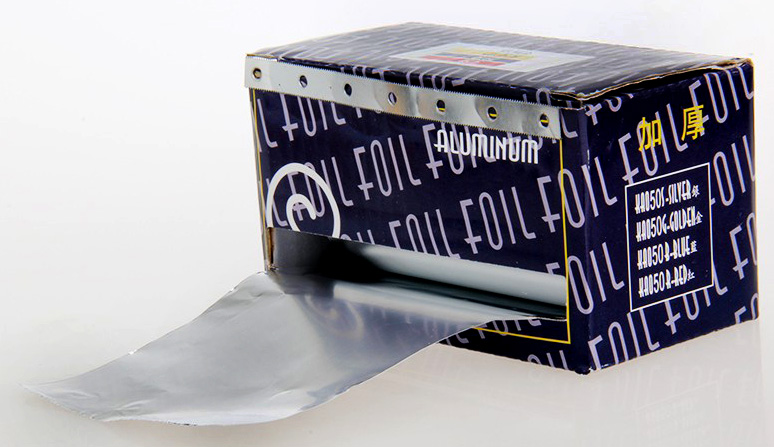
- Foil or special lining on the nails from silicone. Lock caps are available in stores. They are sold in sets and are very convenient to use. They can be used a large number of times, just rinsing and drying after each use. Foil is a more affordable and economical option. Cut it into strips about 2 times the width of your nails.The length of these strips should be such that it is enough for 3-4 turns around the upper phalanx.
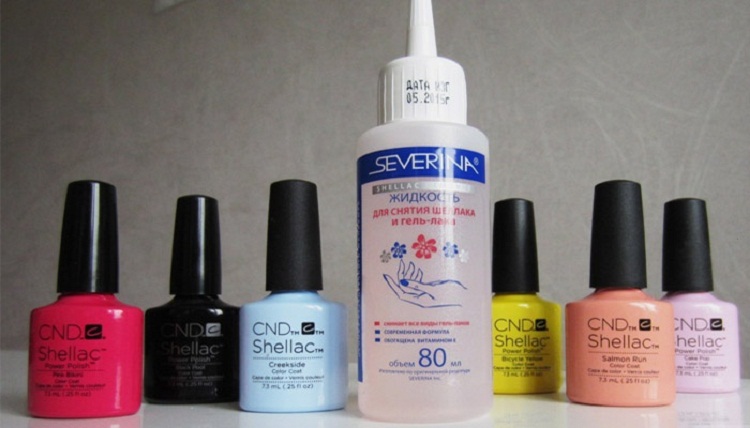
- Gel polish remover. Any agent containing acetone can also be useful.
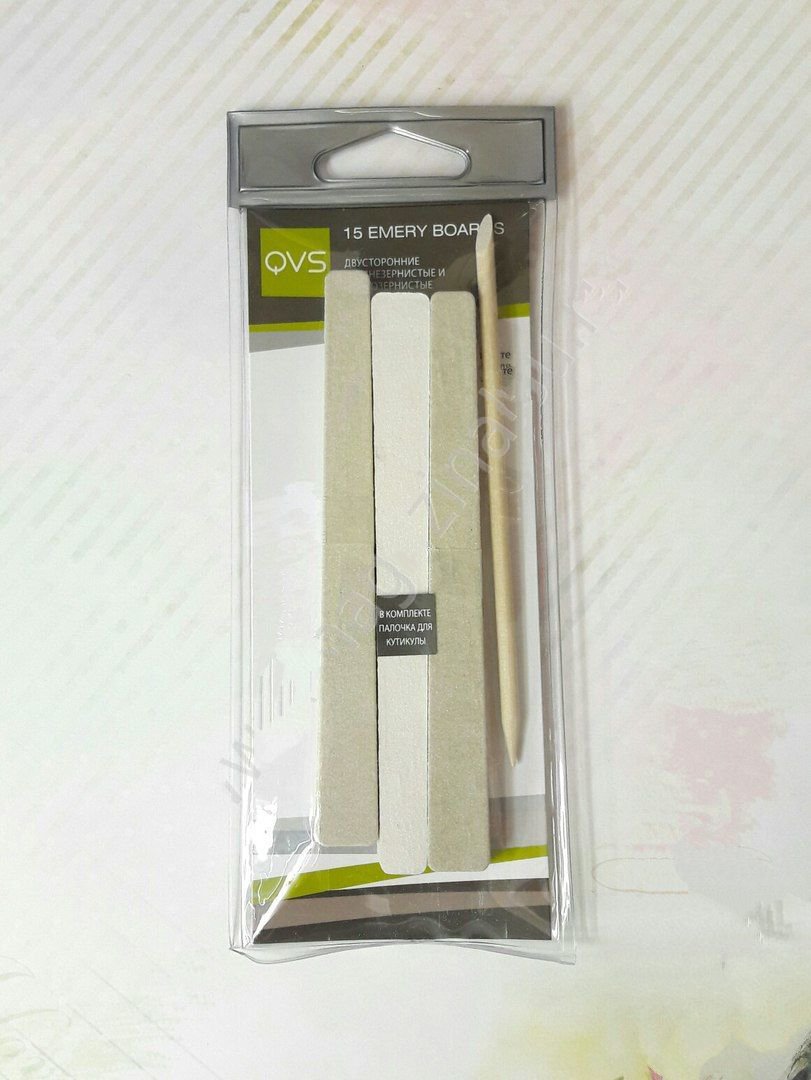
- Orange wood sticks, which are used for pushing the cuticle. This simple tool is convenient to clean the remnants of the softened shellac layer from the nail plates.
- Medium hard file for polishing, as well as a hard abrasive file. The second is useful for removing the top protective and most dense layer of lacquer coating, the so-called top.
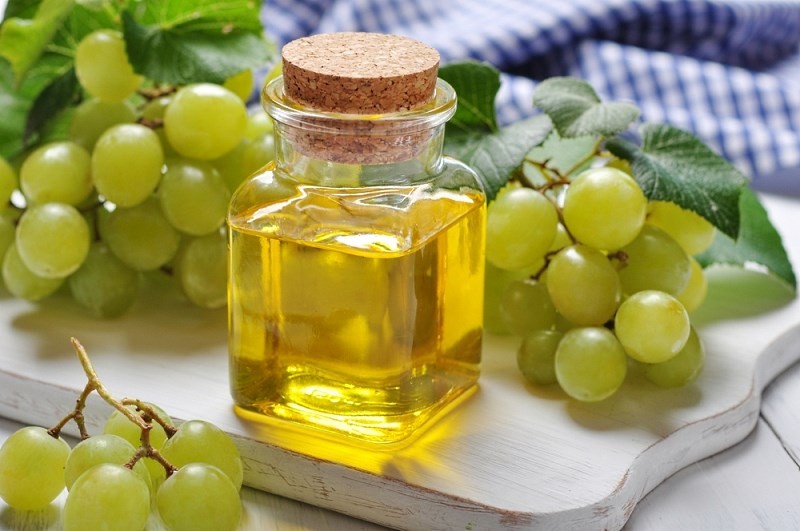
- Moisturizing fat cream or grape seed oil.
This is a standard set for the most convenient and effective removal of shellac at home.
If you don’t have any special liquid or acetone containing products in your home, you can replace them with isopropyl alcohol. This substance also dissolves well hard lacquer coating. This tool is sold in the departments of household chemicals and hardware stores. One has only to remember that in case you decide to use isopropyl alcohol, you should not keep it on the nails for more than 15 minutes.
For wrapping fingers instead of foil, you can use cling film.

The procedure for removing the lacquer layer with foil or linings.
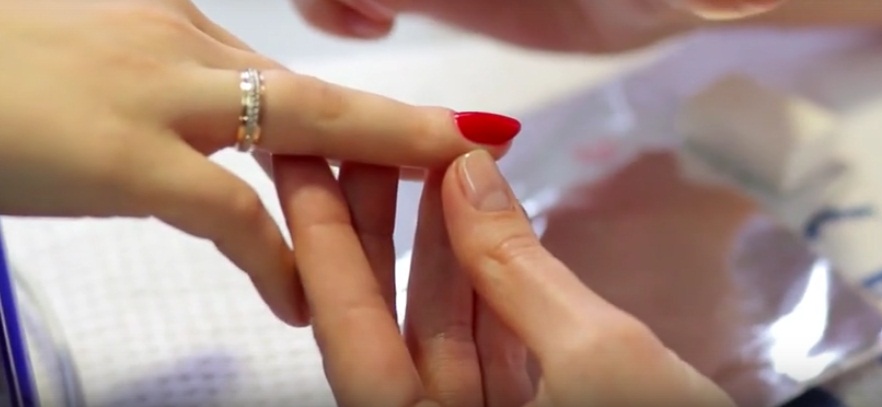
- Treat the skin around the nails with a nourishing cream or oil. This will help protect it from exposure to the solvent composition.
- The surface of the shellac coating should be slightly processed using a nail file for sanding to remove the most stable top layer. This procedure is not mandatory, but its implementation will significantly reduce the softening time of the lacquer coating.
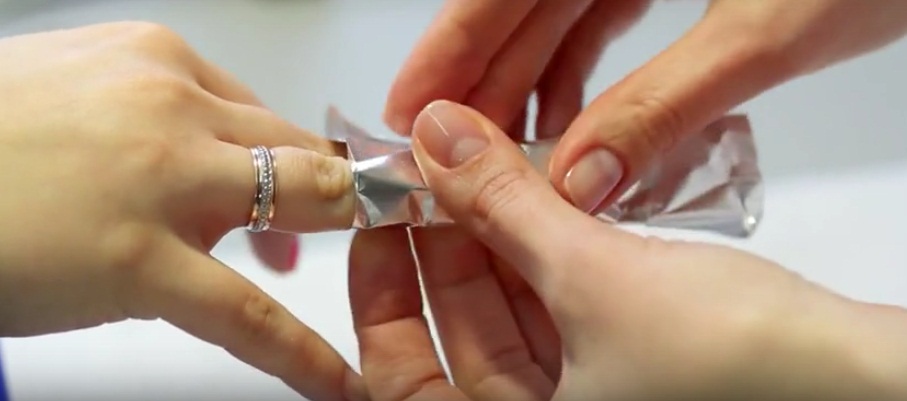
- Cotton pads or pieces of gauze should be moistened abundantly in a special compound or in acetone. Each wetted piece needs to be put on the nail plate so that it covers it completely.
- Wrap the foil over the material soaked in solvent. It should be wound in several layers on the tip of each finger and fix the upper free edge in the form of a cone. The foil should fit snugly to the upper phalanx. Instead of foil, you can use special silicone caps. They are easily and conveniently put on a finger over pieces of cotton pads. The processing time of the shellac layer in this way is 15-20 minutes. That is how much time you need to keep fingers in the foil. Hands should be placed down with your palms. This will ensure the most uniform distribution of the composition of the nail plates.
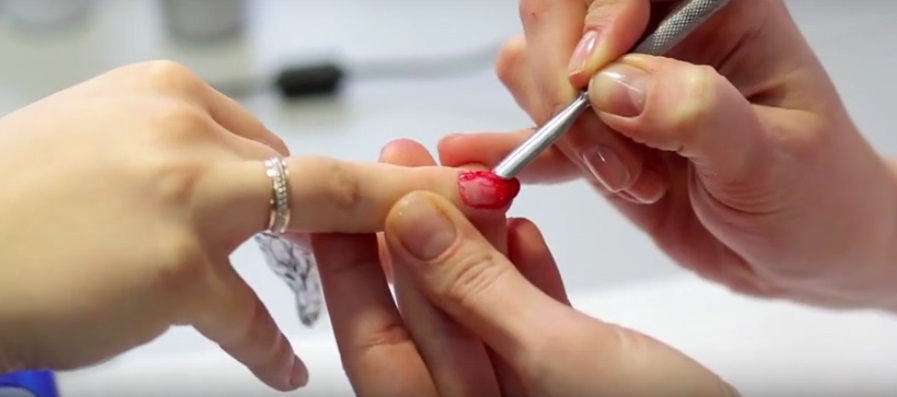
- After the aforementioned period of time has passed, the foil or the fixing plates together with the cotton pads are removed from the fingers. The coating should lose integrity and begin to peel off in small fragments.
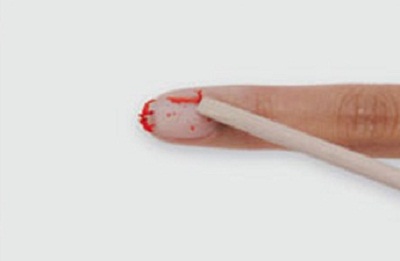
- The softened shellac is easily removed with the flat end of an orange stick. Difficult waste fragments will need to re-process with acetone and repeat the procedure of scraping the lacquer layer.
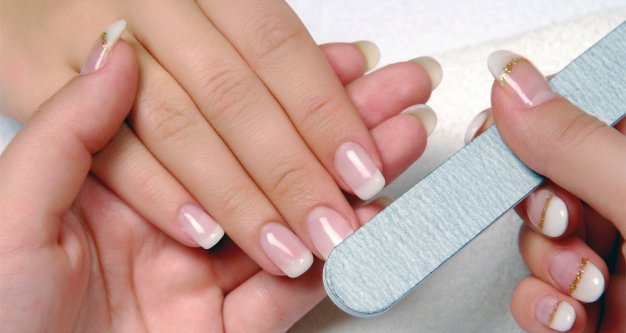
- Process the surface of the nails with a sanding file.


Removing shellac in an alternative way.
- The preparatory stage is identical: hands need to be washed, wiped and applied on the skin of the fingers around the nail plates softening cream.
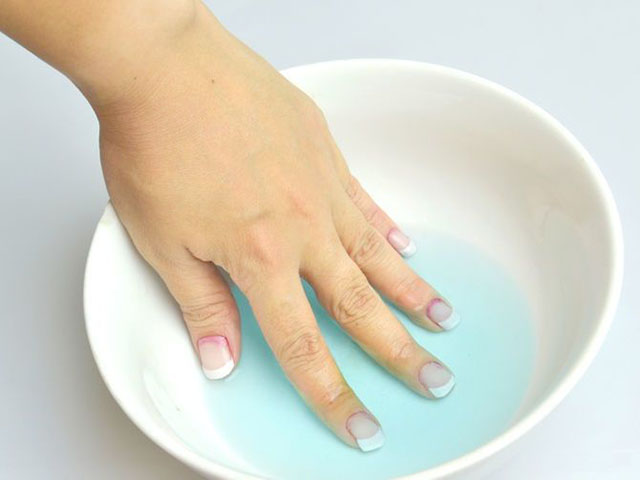
- Pour acetone or gel polish remover into a small glass or porcelain dish. You need so much fluid so that you can sink the upper phalanges of the fingers.
- Each finger is wrapped with a small piece of plaster in one layer. The main thing is that the patch covers the nail plate.
- Immerse the upper phalanges of the fingers in the liquid and wait 10-15 minutes.
- Next, the patch can be removed. Softened in solution, shellac is removed with an orange stick.
- The final stage is the grinding of nail plates.

Shellac removal without harm
In order not to harm their nails some mistakes should be avoided.
- Do not attempt to cut a hard coating with hard metal files or other sharp tools. This is fraught with nail injuries, not to mention the damaged appearance of the nail plates.
- Do not overdo it when cutting the top coat. If you sand the surface of the shellac layer too intensively, you can damage the nail itself. Spoiled nail plates will have to be treated and restored for a long time.
- Shellac must be pre-soften. But the use of gasoline, kerosene or acids for this purpose is strictly contraindicated. Solvents should not be too aggressive. From the listed substances skin and nails are very badly affected.
- According to the observations of experts, the dissolution and discharge of shellac from the nail plates depends on the ambient temperature. It is more difficult to remove the coating if the room is cool or the woman has cold hands during the procedure. At home, you should also take care of temperature conditions. Many girls warm their fingers wrapped in foil with a hair dryer and claim that this significantly speeds up and facilitates the entire process of manicure removal.
Precautions during the procedure:
- When in contact with acetone or solvent liquid, be attentive to your feelings. If you feel that your fingers hurt, they feel burning, tingling or other discomfort, immediately stop the procedure. Such manifestations may be a sign of an allergic reaction or severe skin irritation.
- Even professional nail polish removers are quite toxic. They produce a strong odor, and at high concentrations in the inhaled air can cause irritation of the respiratory tract and organs. Therefore, the removal of the lacquer coating using such means should be carried out in a well-ventilated area.
- Avoid contact of aggressive solvent fluids with mucous membranes or with damaged skin.
Care after removal
To keep the marigold healthy, strong and beautiful, it is important to regularly take care of them. The process of removing the shellac layer involves contact with aggressive solvent compounds, therefore, after such a traumatic procedure, a number of measures should be taken to restore the nail plates.
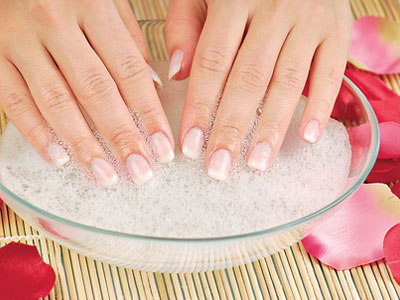
- Iodine-salt baths perfectly strengthen the nails. Pour 150-200 ml of warm water into a small container. There, add 1 tbsp. a spoonful of salt (preferably sea) and a few drops of iodine. The solution should turn slightly brown. Keep your fingers in the bath for 15-20 minutes.
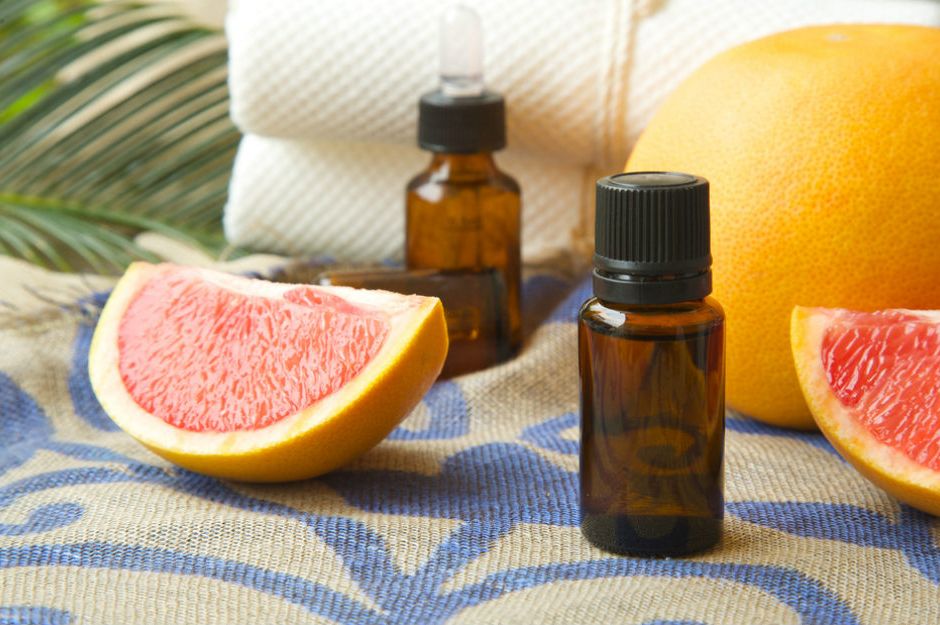
- Essential oils of pine, bergamot, lavender can be added to the salt solution. Essential oils of citrus fruits: orange, lemon, grapefruit have a wonderful healing effect.
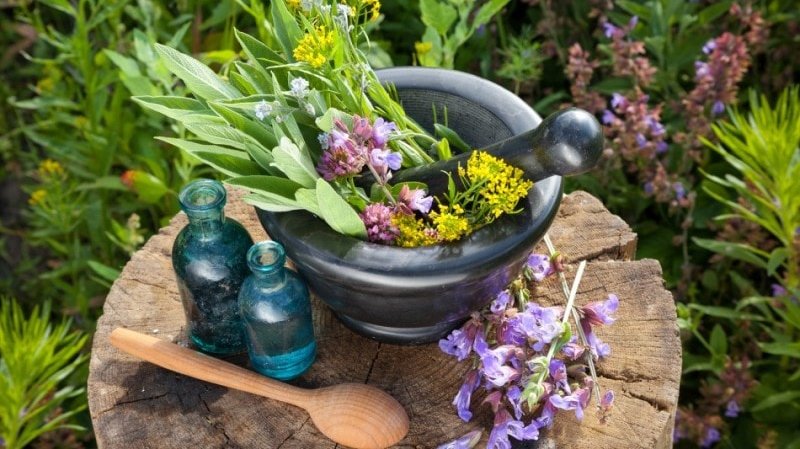
- Pamper your nails with herbal decoctions. They can be prepared from yarrow, nettle, oak bark, chamomile. Raw materials, taken in the amount of 1 tablespoon, should be poured with a glass of boiling water and left in a closed thermos for half an hour. After - strain the broth and cool to a warm state. For better effect, you can add iodized sea salt to the herbal bath.
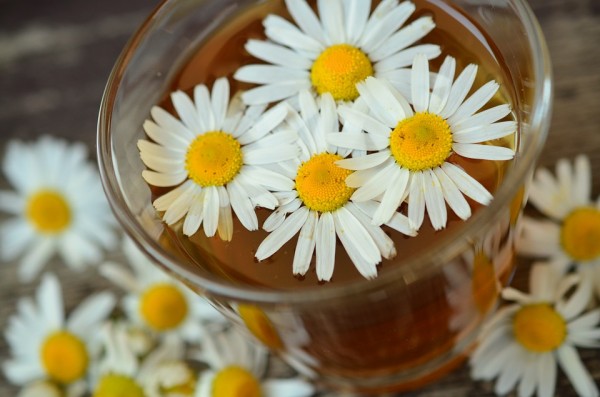
- Chamomile brew made from beer is also a good home remedy for healing nails. A glass of dark beer should be heated in an enamel saucepan, but not boiled. In a thermos pour 1 tbsp. spoon chopped chamomile and pour hot beer. Infuse the mixture for 15–20 minutes, then strain and allow to cool slightly. Apply the resulting composition in the form of trays with a duration of about 15 minutes. This recipe gives excellent results and can be used every day without harm to the appearance and condition of the nails.
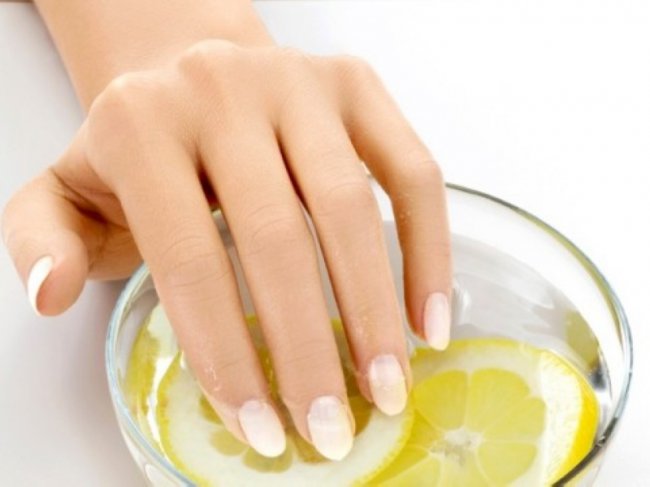
- Lemon juice is very useful for nail plates. It is rich in vitamin C and has a mild whitening, regenerating and accelerating the growth of the nails.To soften the acids contained in the juice of lemon, the tool is used in a mixture with glycerin and honey. For the preparation of a therapeutic composition of the need to mix the components in the following proportions: 100 g glycerin, 1 tbsp. spoon of honey, 2 tbsp. spoons of fresh juice. To make the procedure comfortable, it is better to warm up the mixture to a warm state. The tool is used in the form of trays. Fingers should be immersed in a warm mixture for 15-20 minutes.
- After each treatment procedure it is useful to lubricate the nails and the skin around them with nourishing creams or oils. After that, the nails always look shiny and well-groomed.
- You can buy special strengthening and health creams or gels for nails. They contain vitamins and medicinal ingredients. Also, the nail plate responds well to treatment with conventional nourishing cream or grape seed oil.
How to remove shellac at home, see the next video.


