Each new season brings new trends in the nail industry, however, gradient hues have been at the peak of popularity for several years now. The very structure of such a coating is a bright combination of several tones without a pronounced sharp transition between them; this style allows you to dream and realize the most creative combinations in the wardrobe and accessories.
What?
From a technical point of view, the gradient, or, as it is also called, degradation, is a soft transition from one tone to another, and stretching in it can be carried out not only from light to darker shades of any one color, women of fashion sometimes choose absolutely different colors and try to beautifully combine them with each other. This is one of the main advantages of such a coating - a combination can be any, rather unexpected and original; All this allows the girl to stand out and, without doubt, impress others. There is one more plus, much more practical - when several tones are collected on the nails, it is always easier to choose a dress so that it creates a single image with a manicure.
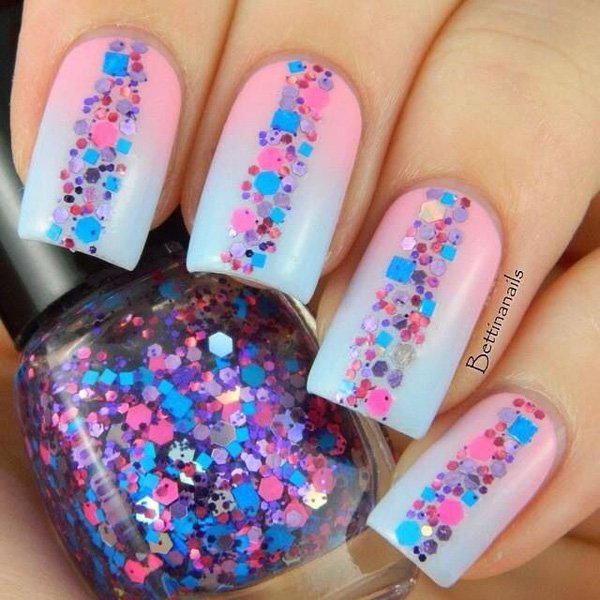
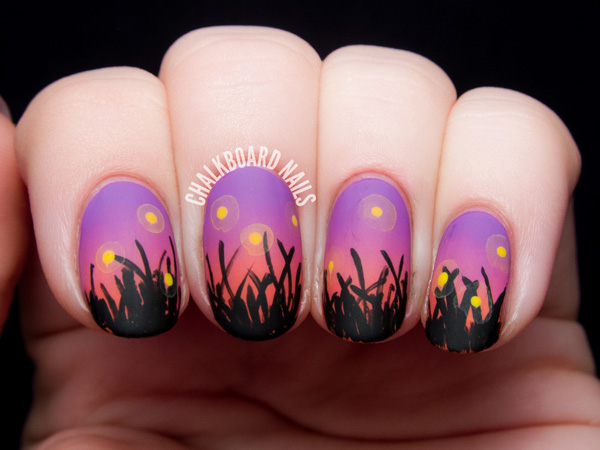
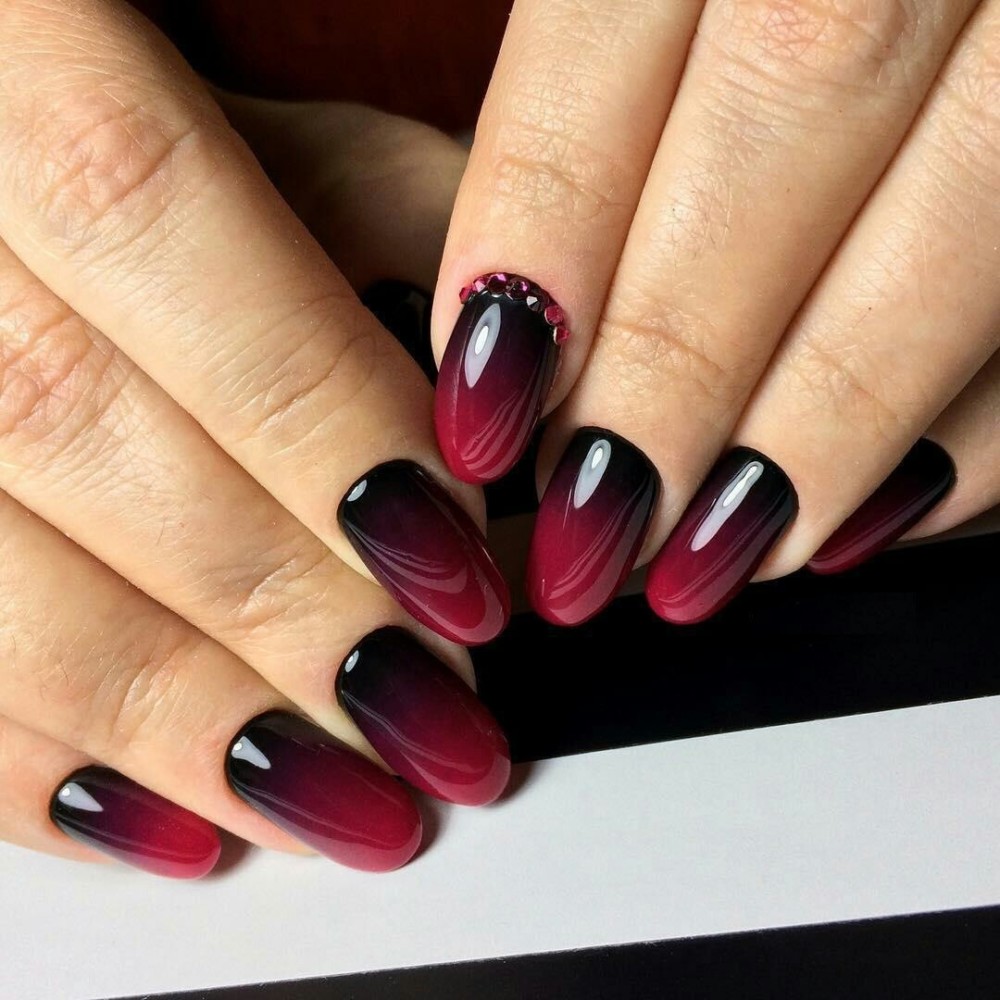
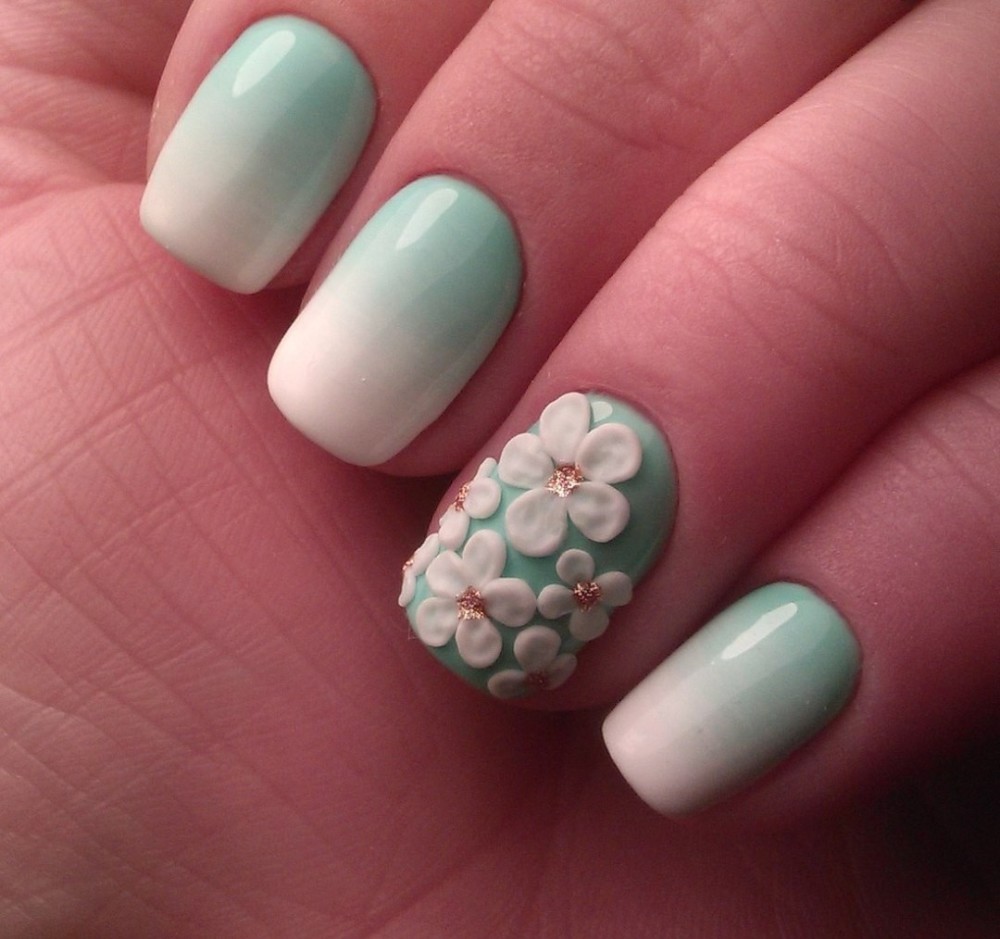
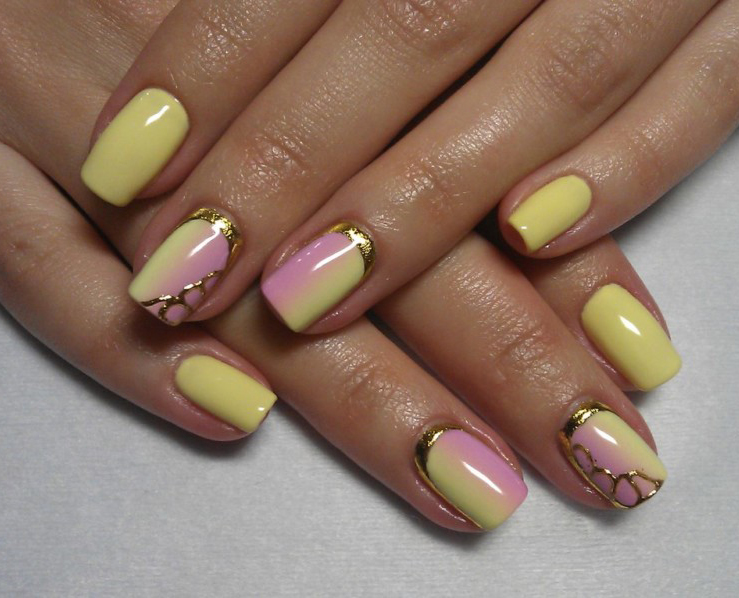
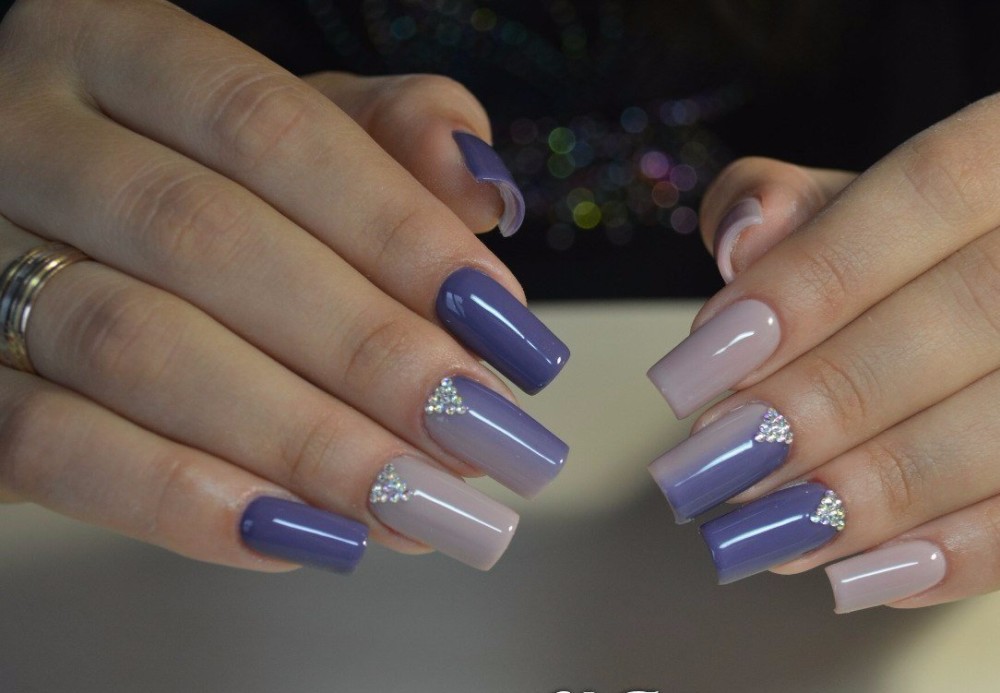
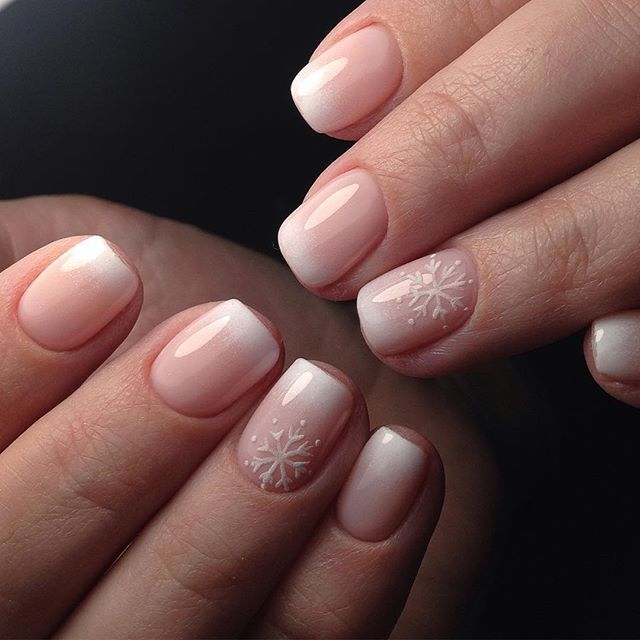
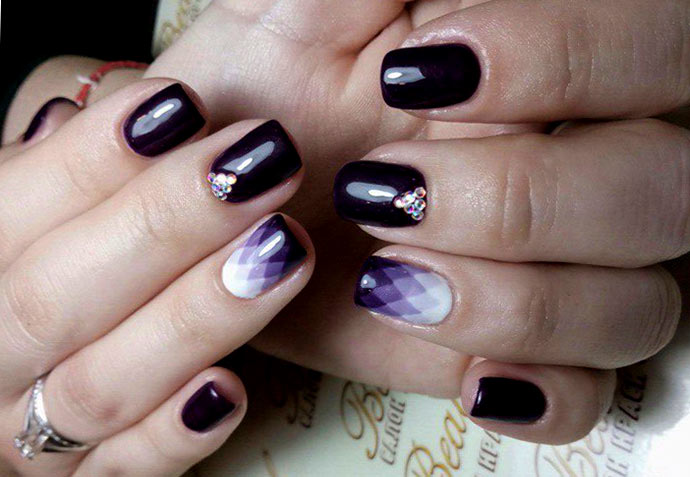
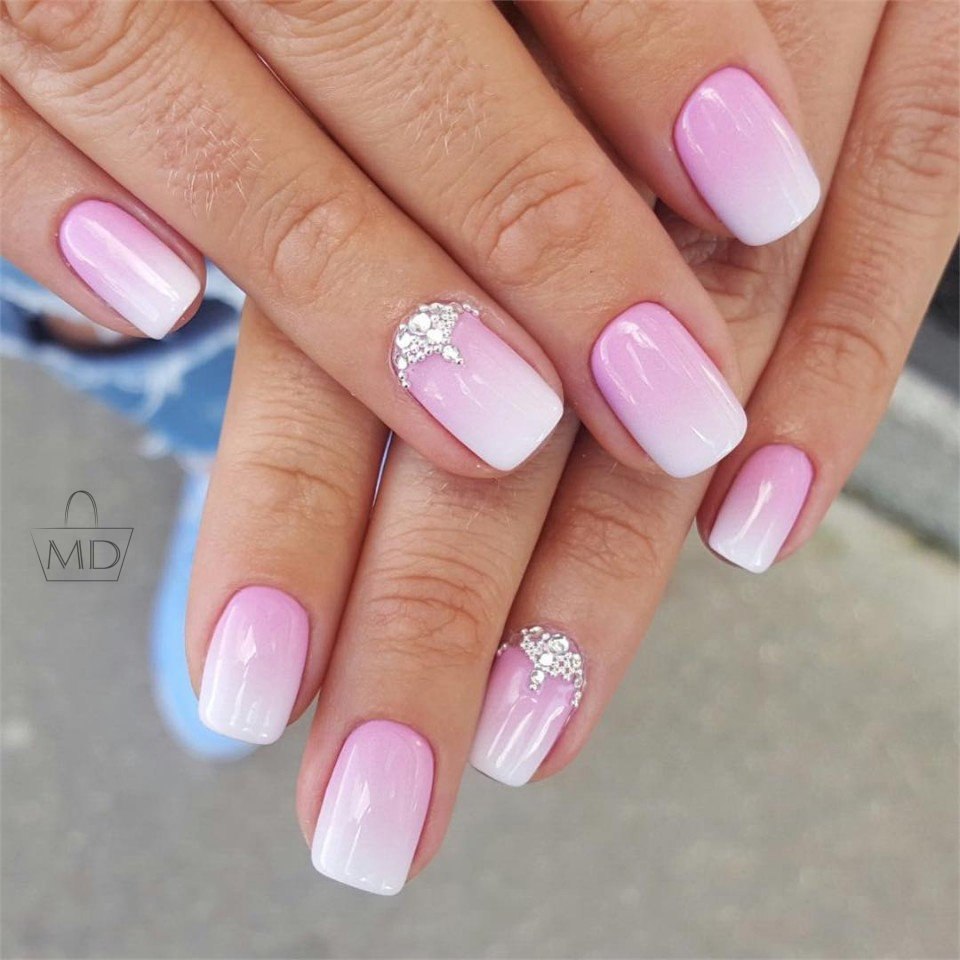
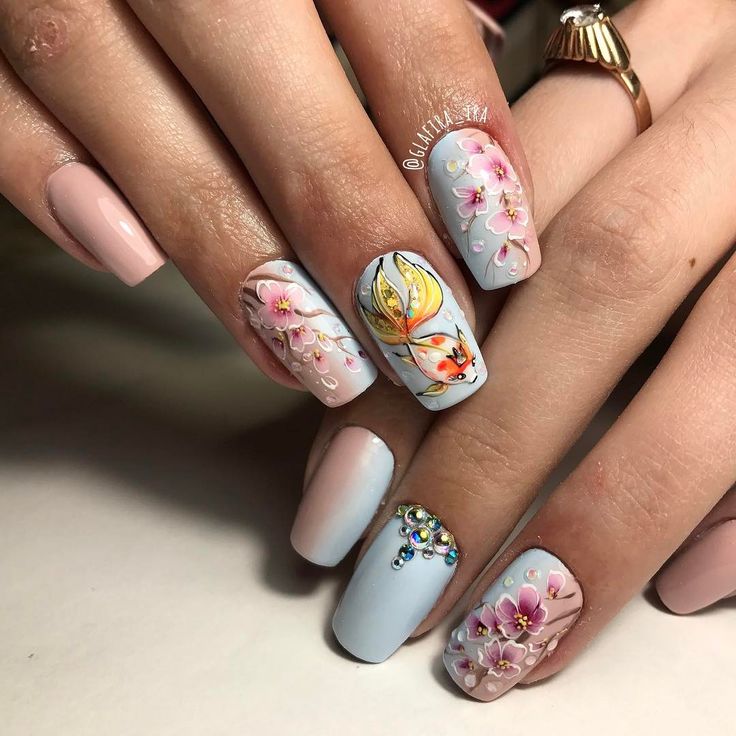
Quite often, the gradient is accompanied by the use of additional decorative elements, for example, glitter, beads or small stickers - all this allows you to make a truly exclusive design.
Stylists emit a few more advantages of applying ombre:
- soft transitions from tone to tone represent fertile ground for bold experiments;
- this design, which includes several colors, always attracts increased attention;
- for the gradient any colors and shades can be used;
- the covering is perfectly combined with additional decorative accessories;
- You do not need to repaint your nails whenever you change your outfit;
- Depending on the colors chosen, a gradient may be appropriate at a ceremonial event or in an office with a strict dress code.

Perhaps one of the drawbacks can be noted - not all colors are in good harmony with each other and not every shade can flow beautifully from one tone to another. But all this is just a matter of taste: if a woman is brave and not afraid of bright colors, then she will be able to turn any combination into her own flavor.
Varieties
The gradient is often referred to as a banner and is usually drawn in several ways. Depending on the technique of coating, manicure options are divided into several types, we dwell on them in more detail.
- Gradient Manicure - such a technique of coating the nail plates, when one shade imperceptibly flows into any other. Such a manicure is better known as an ombre and, as a rule, one color is used for this design, only its shades change from light to slightly darker.


- An alternative to it is the so-called Dip Dye manicurewhen coloring goes in several different, but necessarily bright shades.
- Besides, manicure with graduation divided into horizontal as well as vertical, emit and gradient with the transition. Of course, with each season more and more new variants of such stylish coverage appear, but at the peak of popularity there is always a classic.
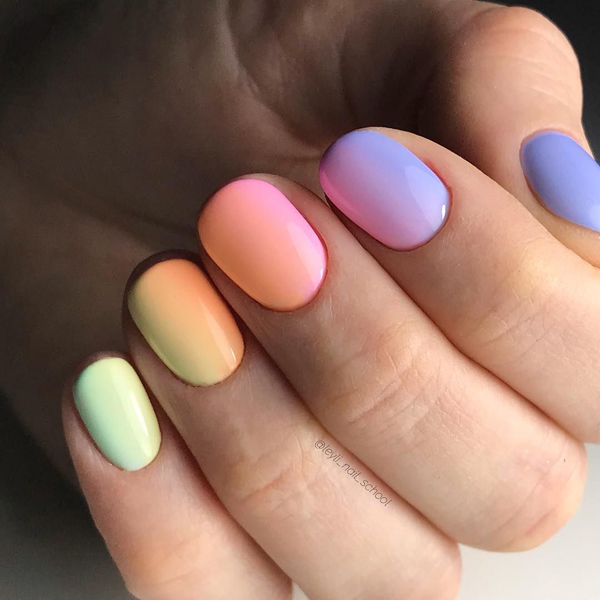
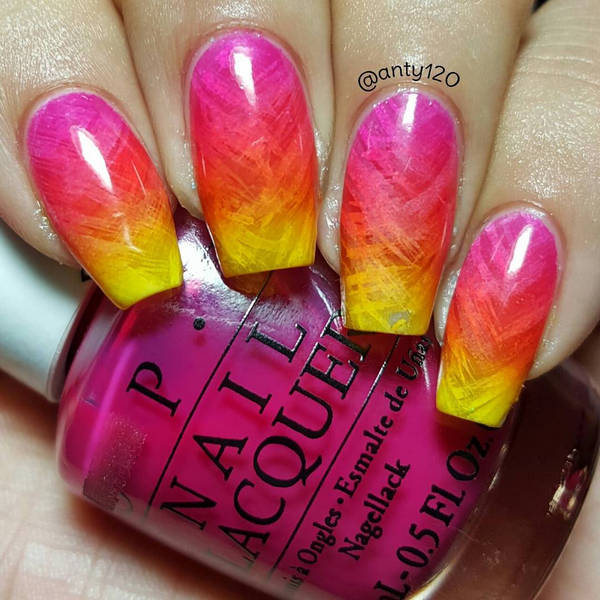
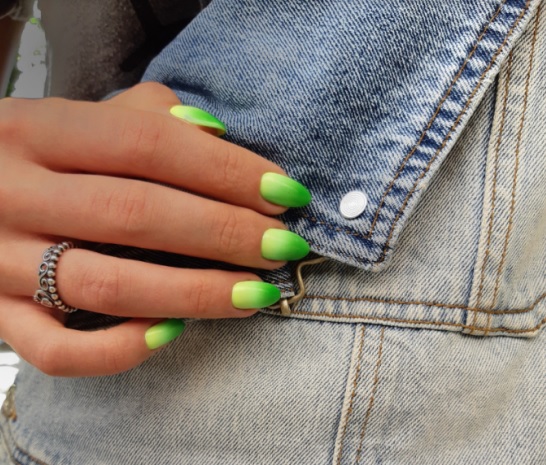
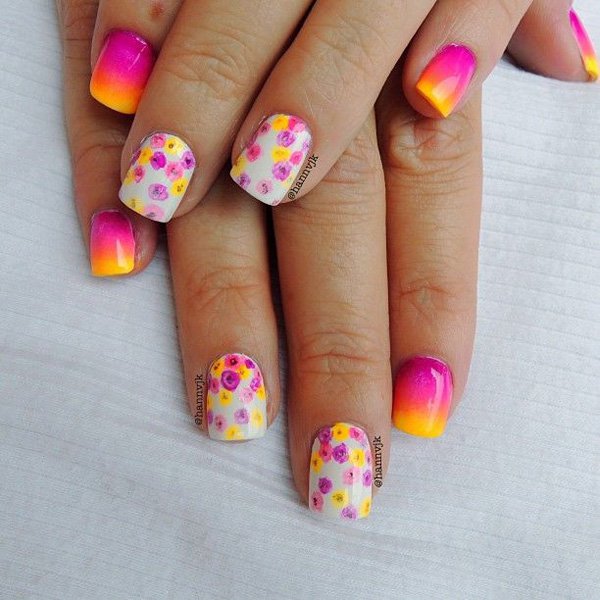
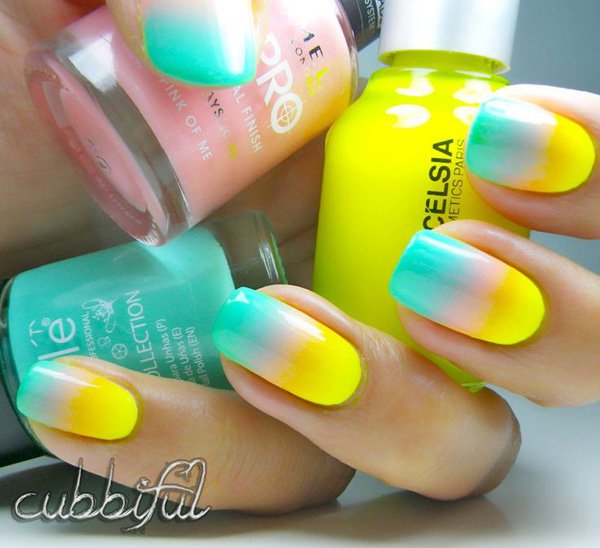
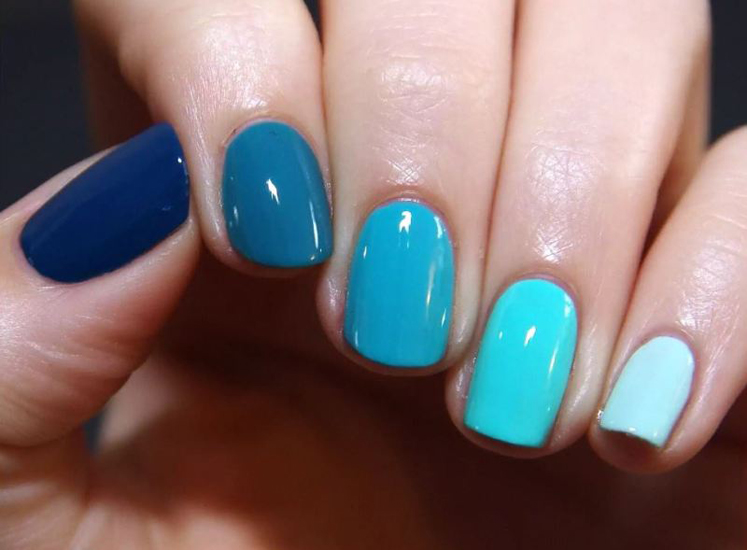
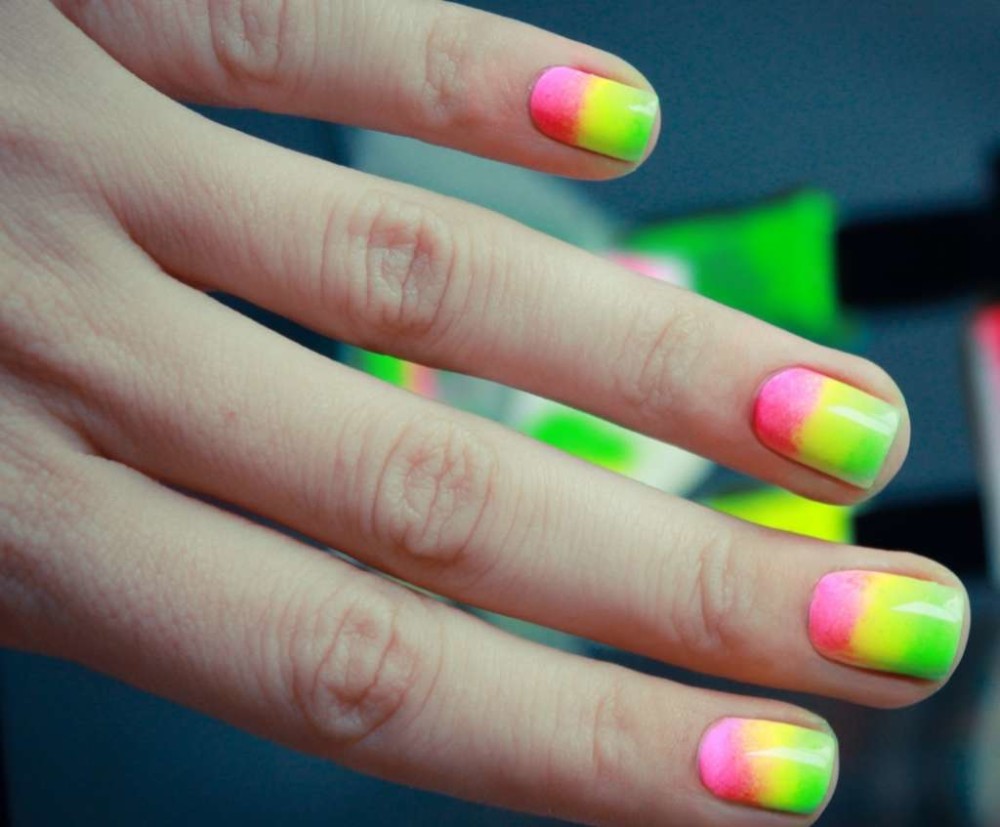
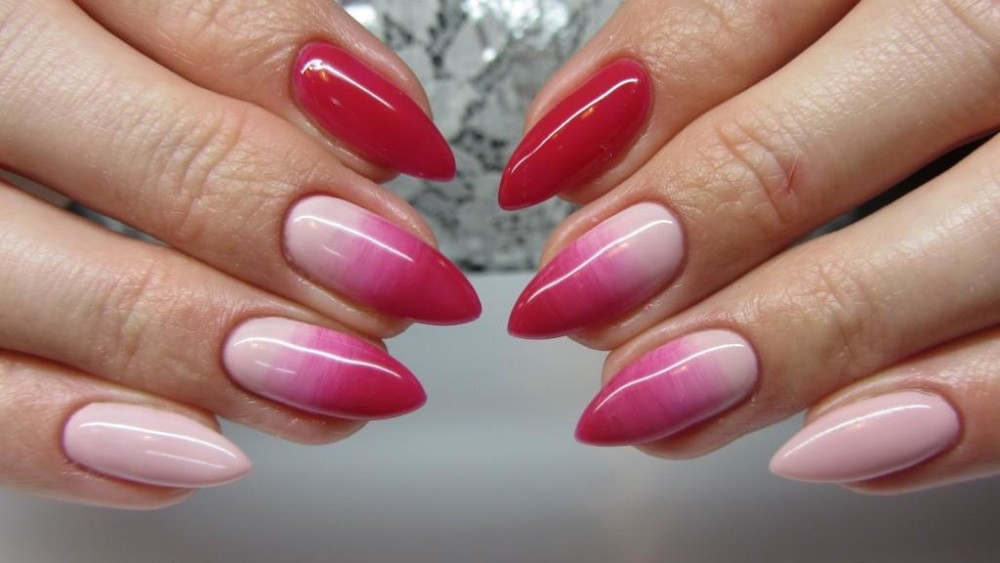
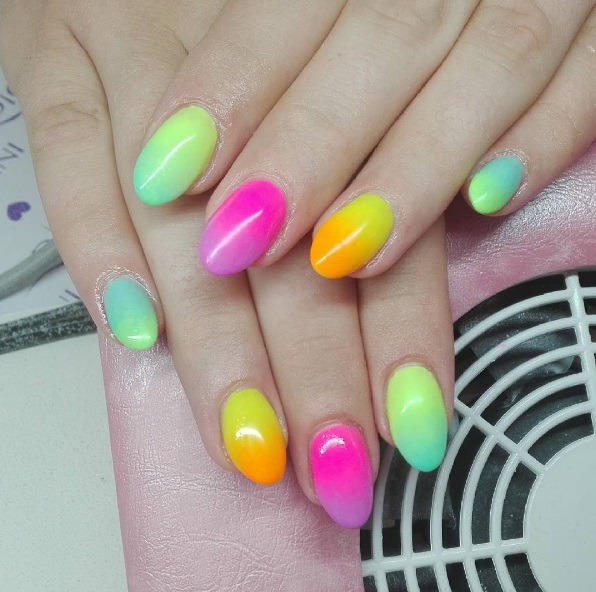
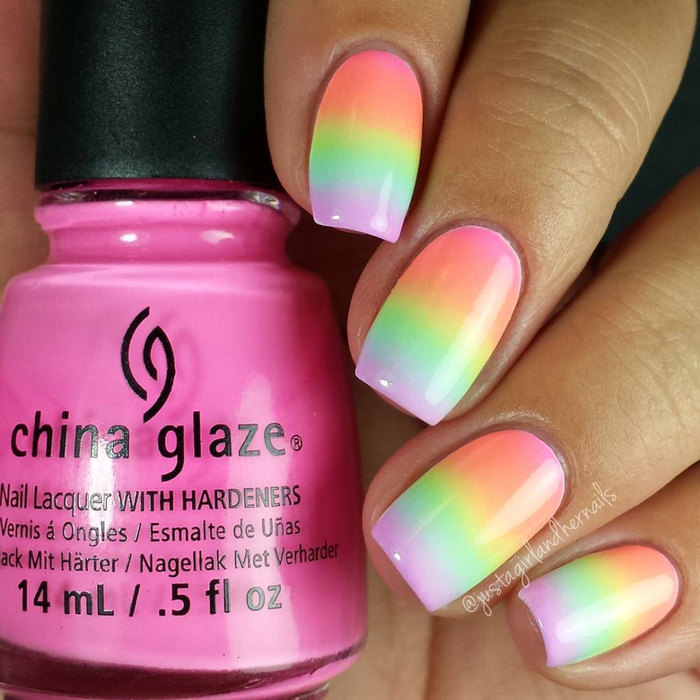
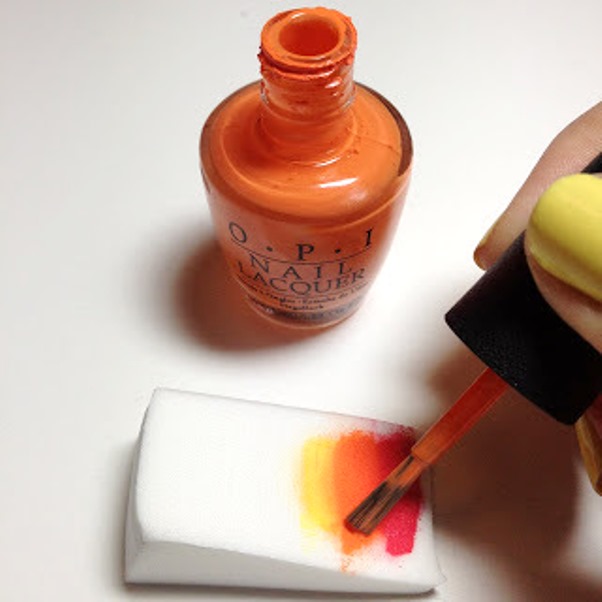
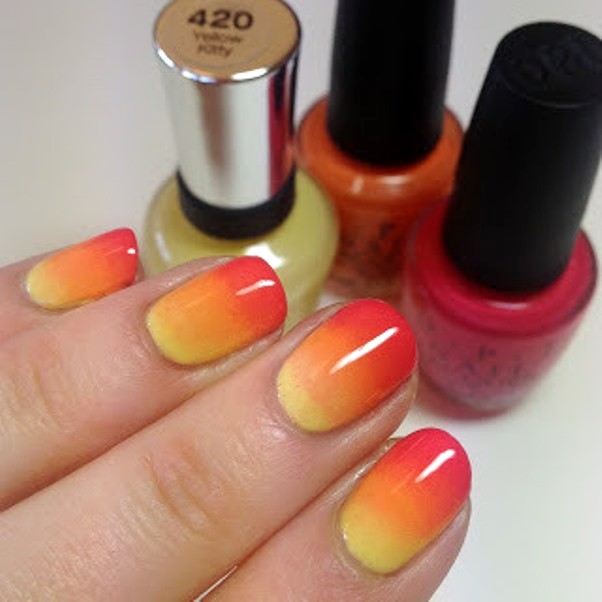
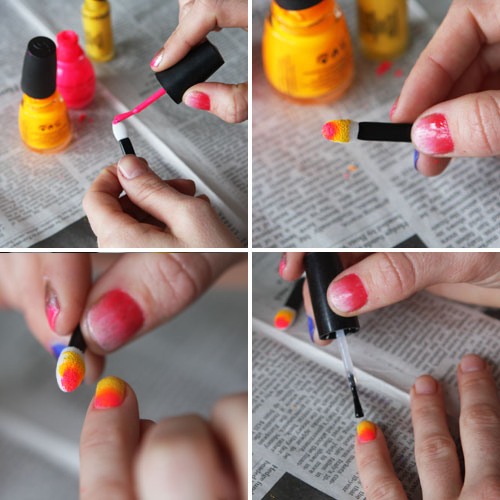
The easiest way to apply is considered a transition gradient. Typically, for the execution of such a coating, 5 coatings are selected and one by one each covers the nails from large to pinky. Thus, it turns out stretching tones from one finger to another. Such a manicure is quite easy to do yourself, and if you do not have five varnishes of different tones on hand, you can always make a new color yourself - it’s enough to mix several colors, for example, red and yellow give orange, yellow with blue give green and pink with purple - a pleasant lilac shade.
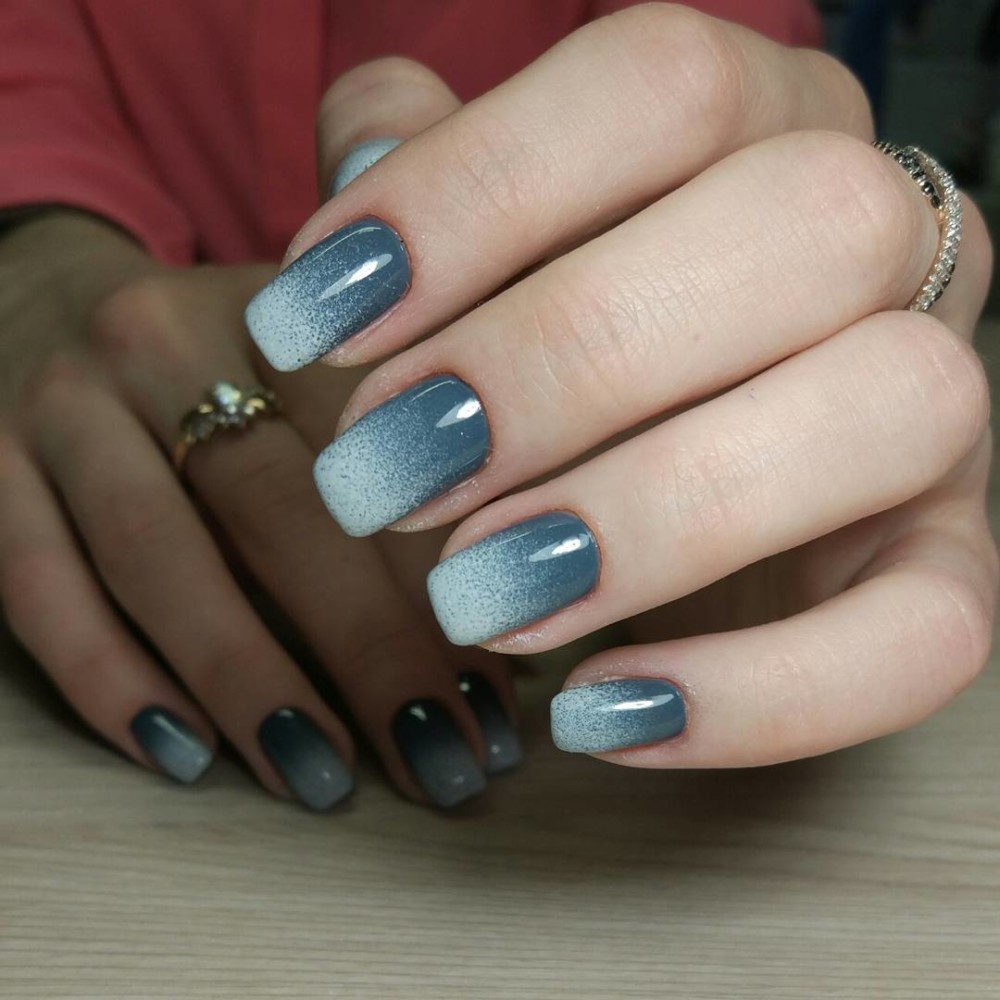
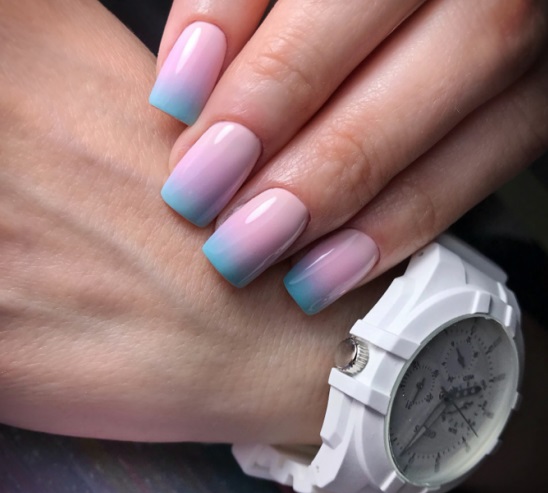
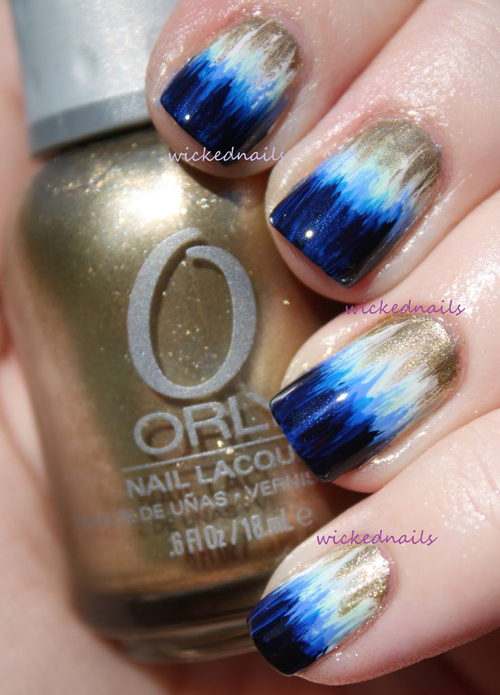
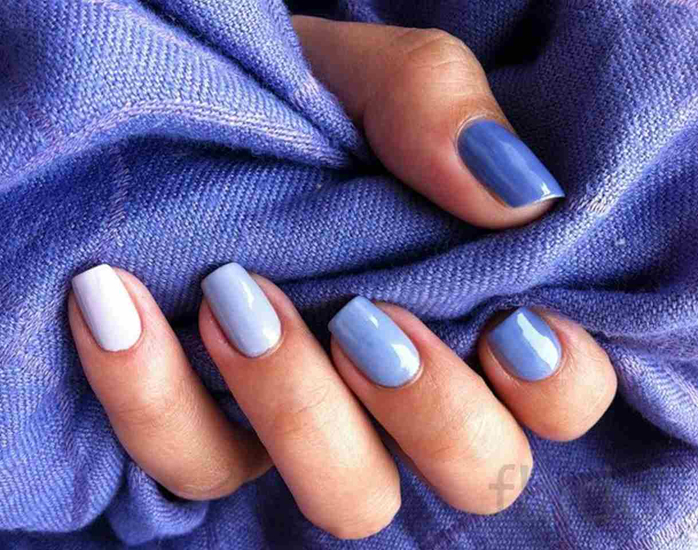
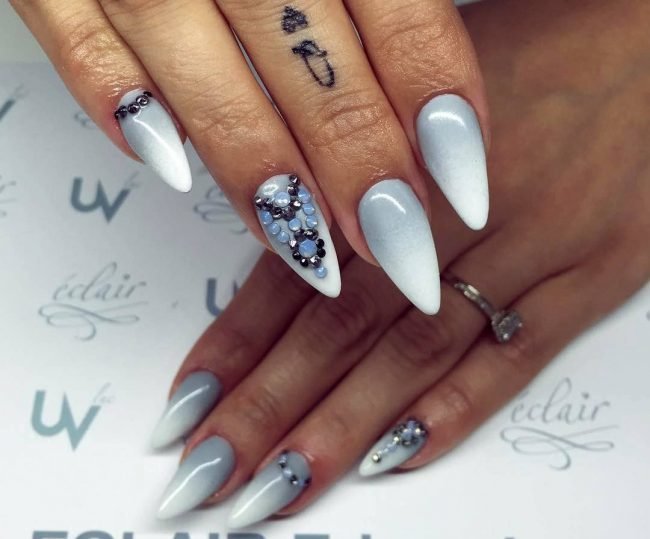
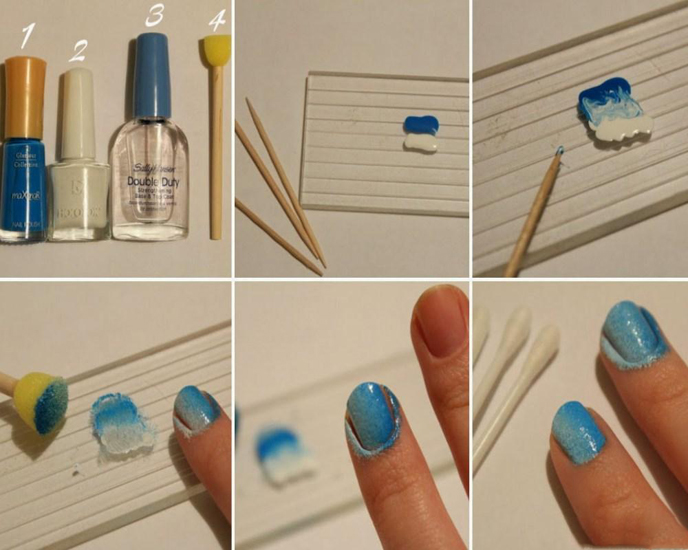
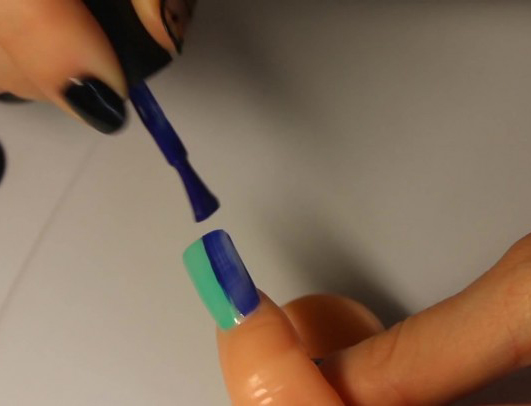
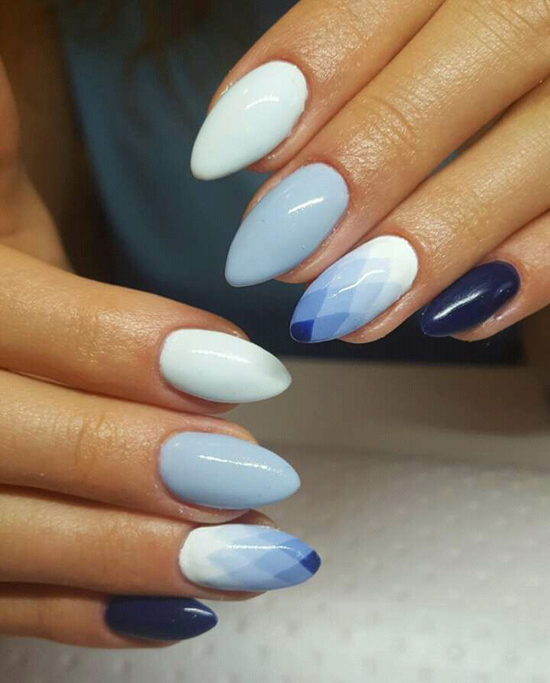
Skilled craftswomen sometimes even manage with two varnishes, for example, you can make blue and white coatings.
Cover the first nail with blue color, and to paint the second one, drop a little of this blue lacquer onto a glass or plastic palette and add a little white to it so that the shade becomes a little lighter. This color is necessary to cover the second plate, and then add another drop of white to the palette and paint the third nail. Thus, you get the transition from blue to soft blue, while you can paint all 10 nails with a gradient or cover the nails on both hands equally or arrange the nails on one hand from blue to white, and the second to do the same, but mirror.
Slightly more complicated is the horizontal and vertical transitions; they are stretching from one color to another.
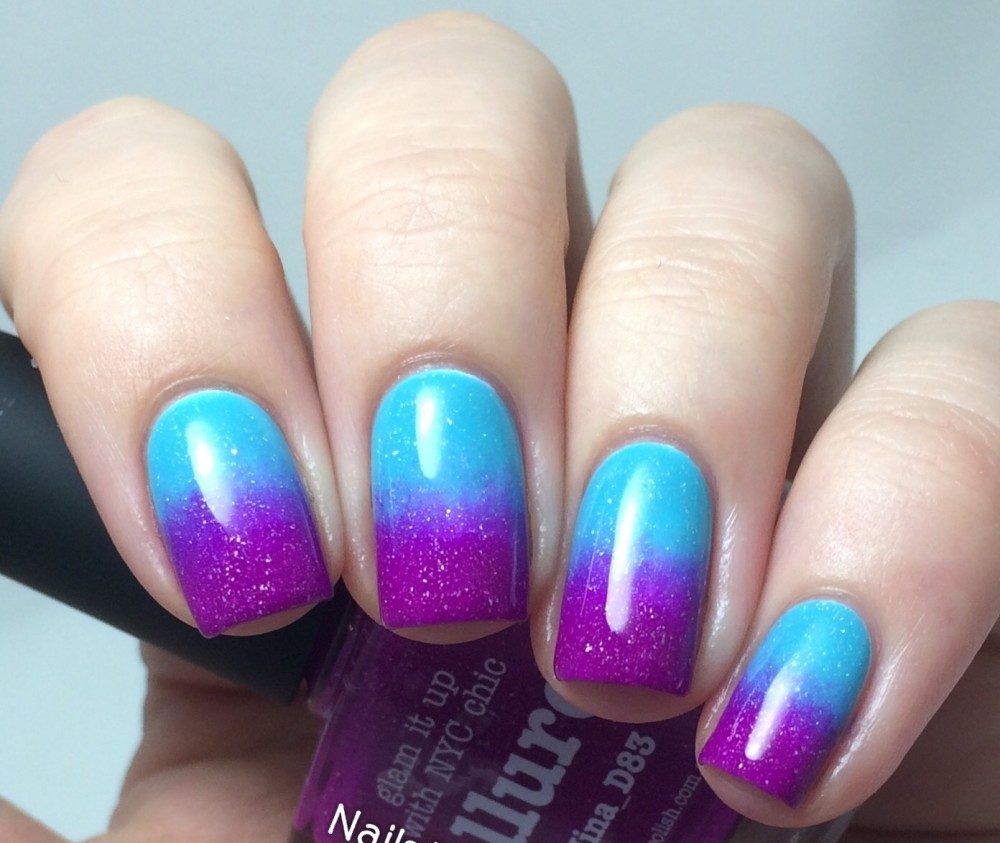
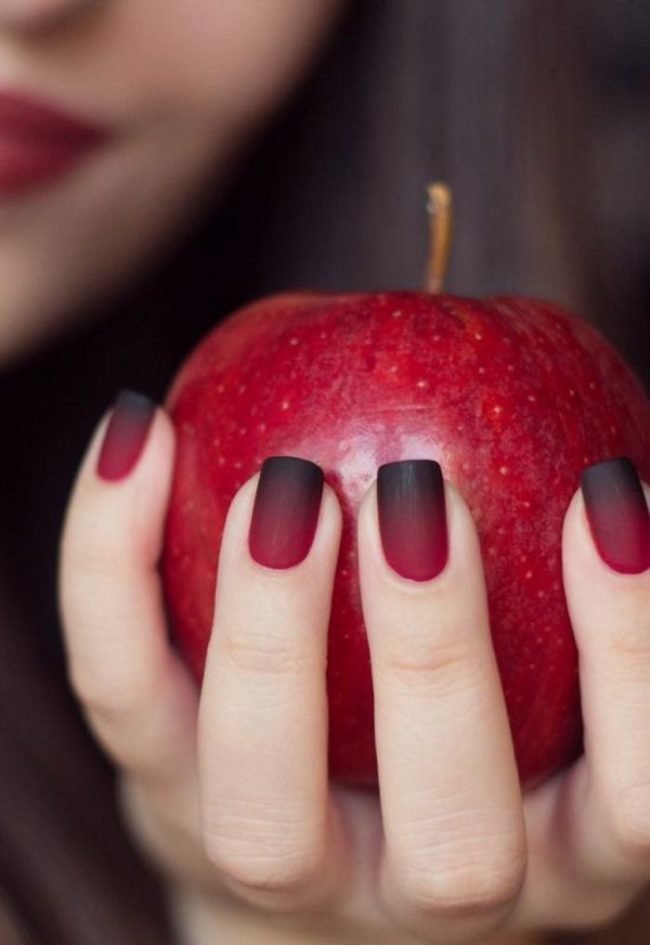
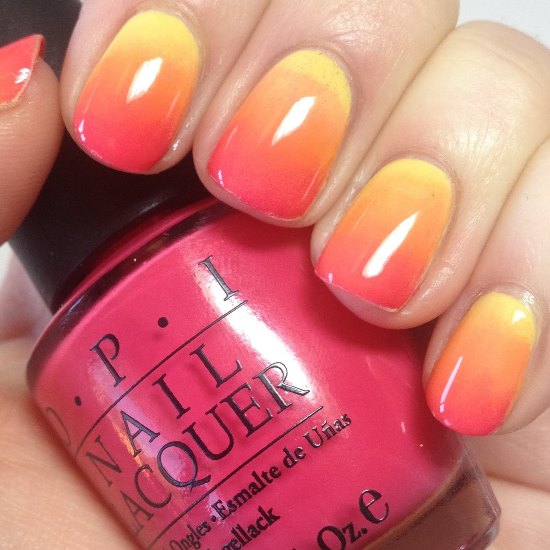
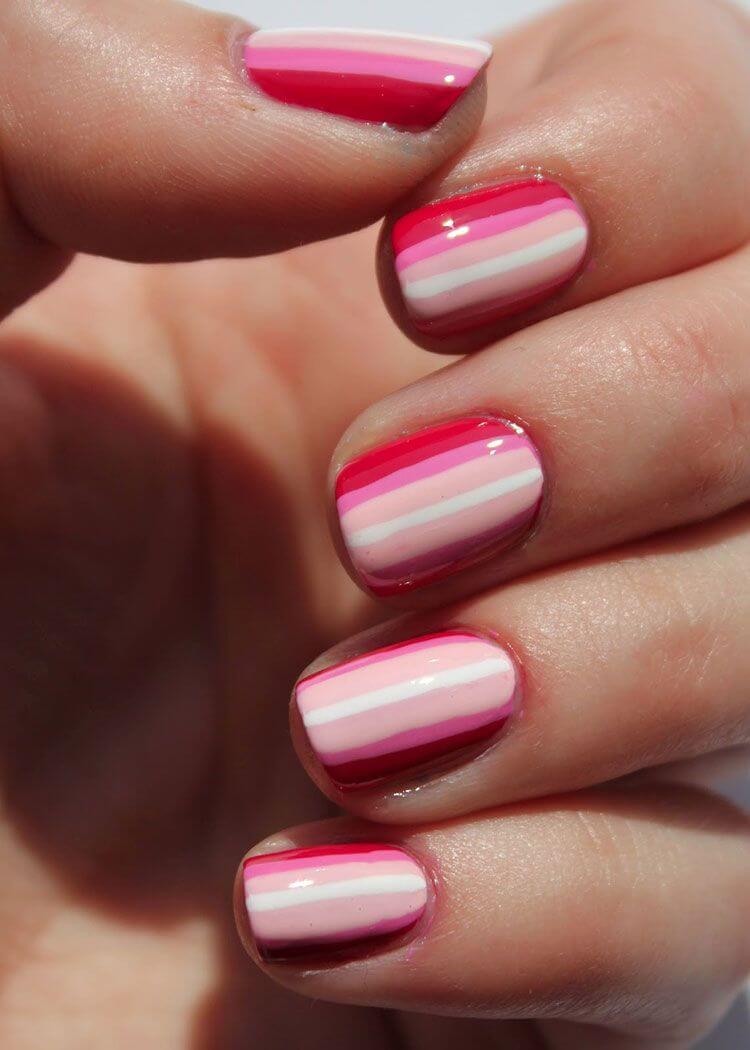
Horizontal ombre involves the transition of tones from the very tip of the nail to its cuticle, while the shades are both "related" and completely different. In the first case, the manicure will be gentle and classic, in the second - bold and extravagant.
Usually, at least three shades are used in such a manicure, and experienced craftsmen apply even more colors. At the same time, note that if you use a lot of shades in a contrasting ombre, the transition will be quite sharp, and if you use close shades, then the overall look will be, on the contrary, soft and gentle.
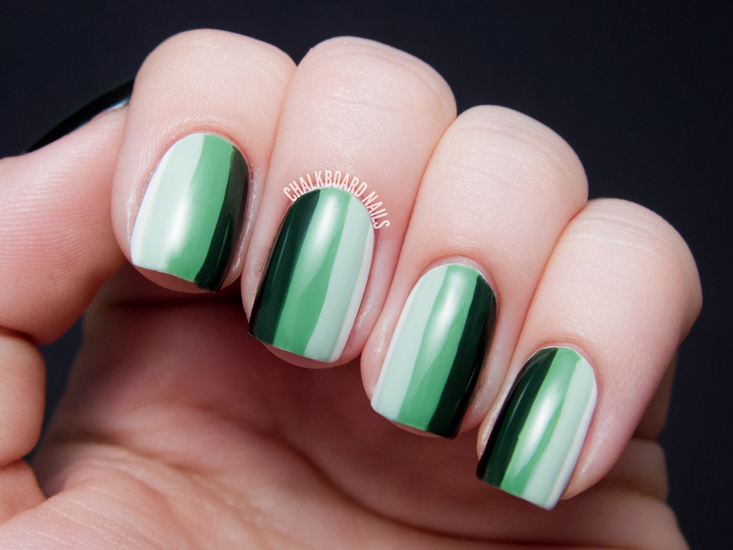
Vertical graduation also implies a transition of tones inside the nail plate, but here the tones flow from right to left. Just as in a horizontal coating, three or more colors are used here, most often the little finger is completely painted in one color, a gradient in another tone is formed in a different tone, in the middle tone they go from the one we received on the nameless and etc. This manicure looks pretty fresh and very stylish, and most importantly, very well-groomed and elegant.
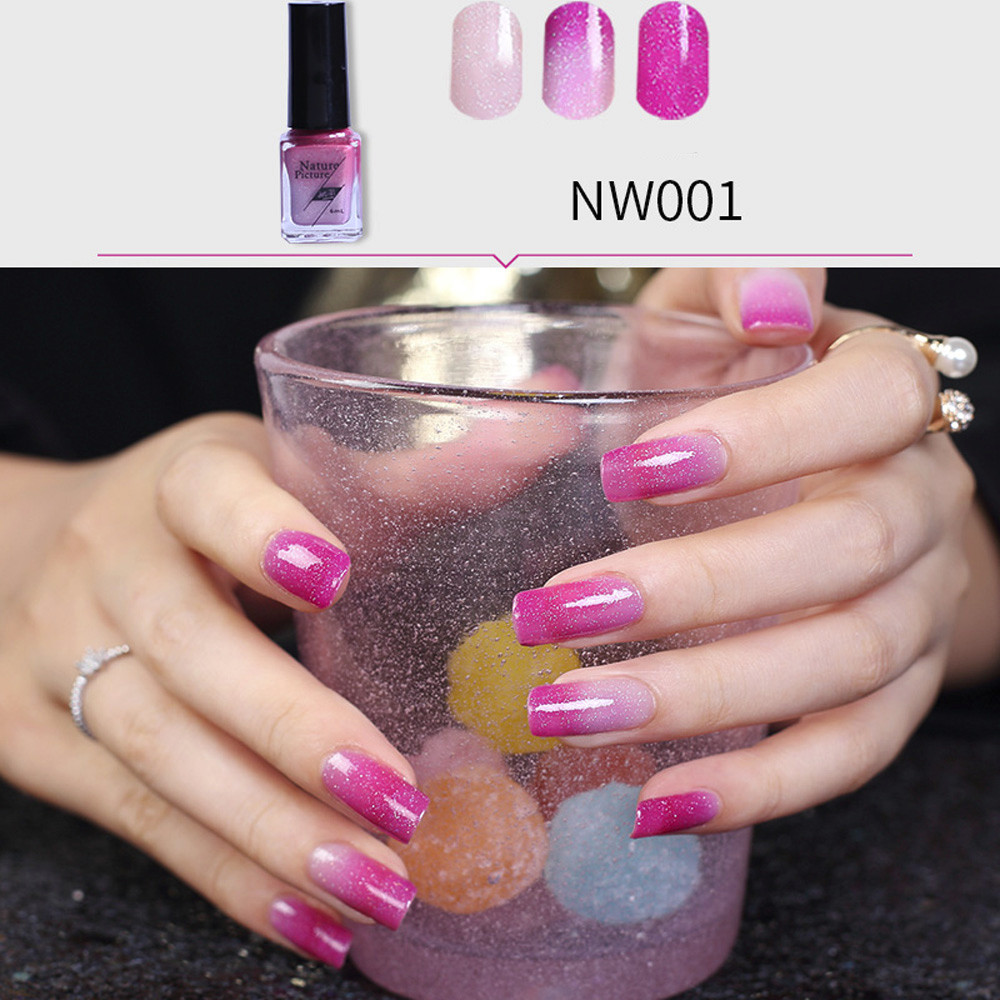
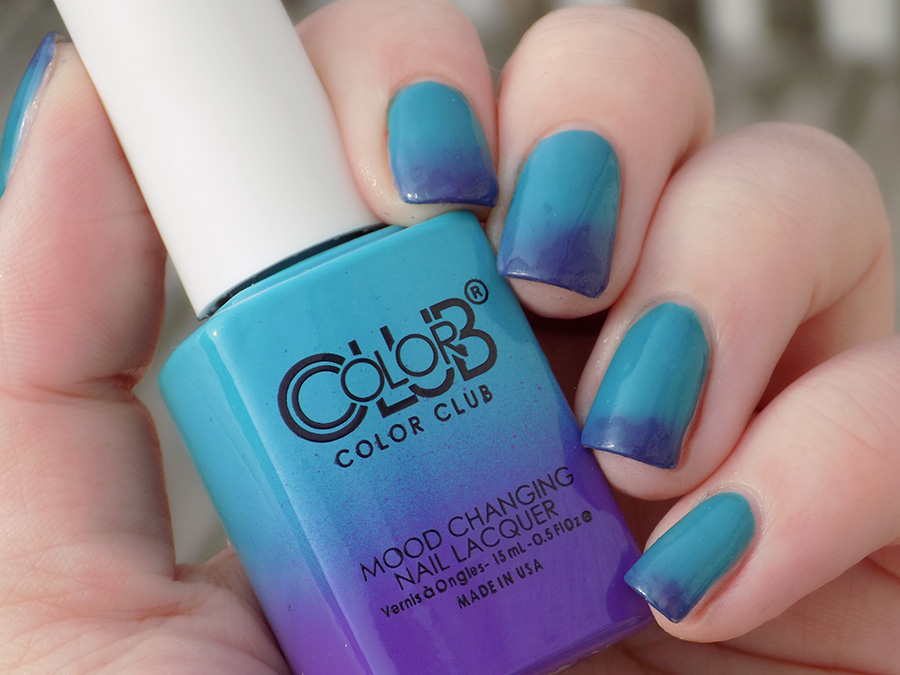
By the way, the use of thermo-lacquers is considered to be another fairly original trick of the gradients. When the ambient temperature changes, they change shades and the coating every time plays with new unusual colors.
Coverage options
When applying a gradient on the nails use a variety of coatings.
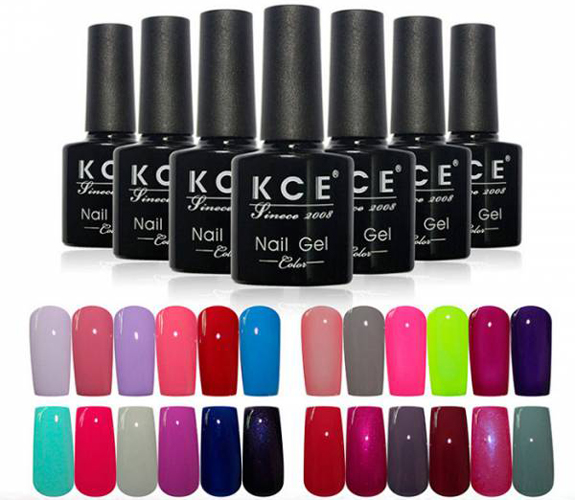
The most popular are gel polishes, which in essence are a hybrid of ordinary varnish and acrylic paint. Distinctive features of this composition are:
- high percentage of gel in the structure;
- much lower levels of unhealthy formaldehyde and toluene;
- when applying such a coating, the nail plate does not require pre-grinding and gouging, it is only cleaned and degreased, which means that the nails stay longer and healthy and longer;
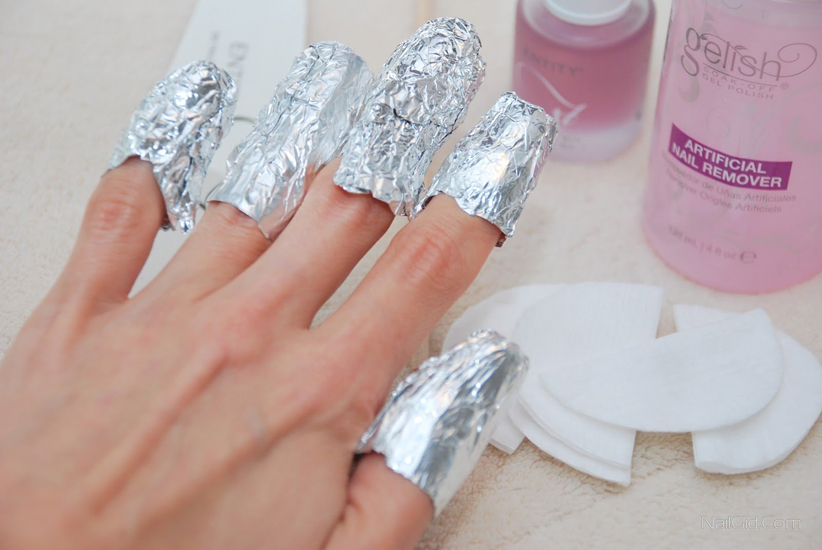
- in order to get rid of such a coating, it is not at all necessary to destroy it, it is enough to apply a removal agent - in this case, gel lacquer soaks in literally 10 minutes.
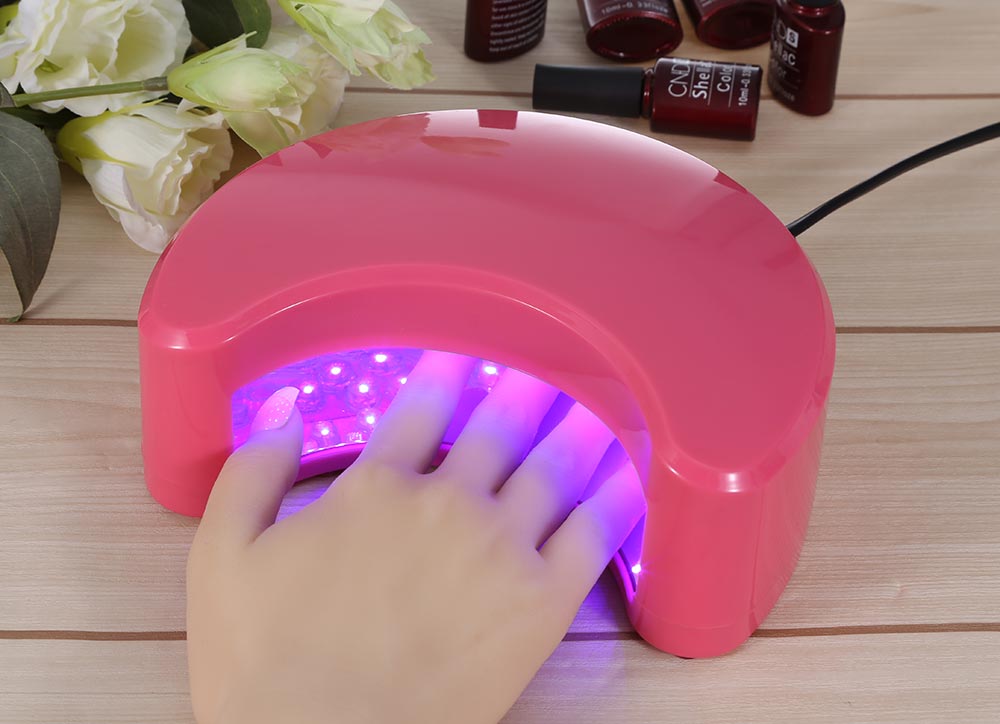
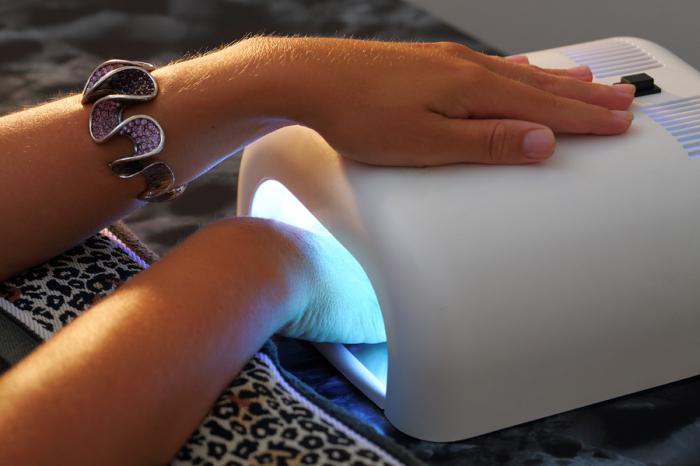
Such a lacquer is necessarily dried in an ultraviolet lamp, due to which it becomes so strong that the coating cannot be damaged even by very sharp objects.
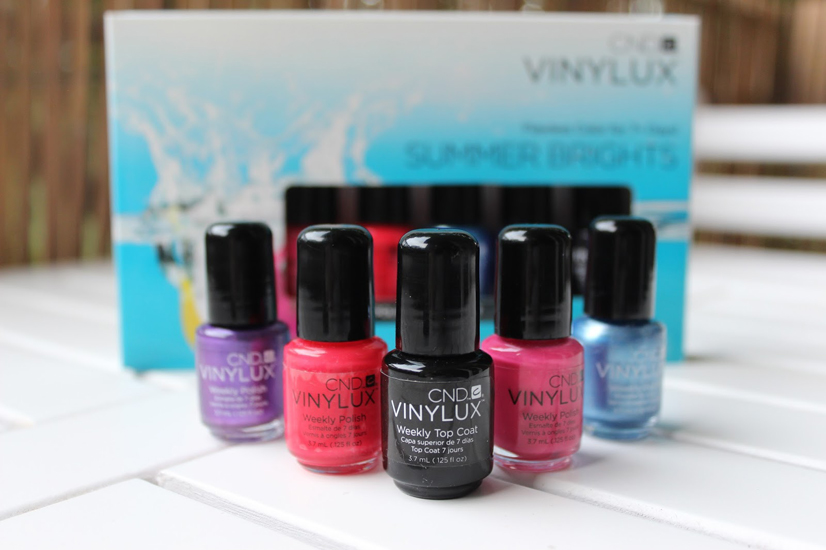
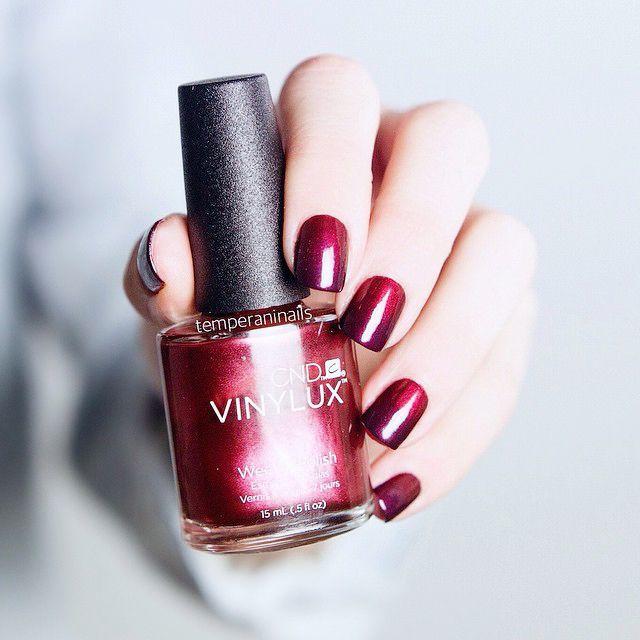
Vinylux is another popular coating with a gradient. Purely visually, it looks like a varnish familiar to everyone, but it has its own characteristic features that are impossible to see at a glance.In essence, this lacquer is a two-phase tool, which includes the base - so you can not apply the foundation on the nails.
Vinylux has a rather peculiar structure. - its pigments are slightly larger than the size of the intervals between keratin scales, so they simply can not paint the nail plate. The coating hardens in 10 minutes, at the same time it only becomes stronger over time.
Some skilled workers are trying to use biogel for the gradient - this is a completely meaningless exercise, because it is designed to lengthen the nail plate or give it the desired shape, but not to paint it.
Gel polish keeps on nails for about 2-3 weeks, while it can withstand any, even the most adverse weather conditions.
Vinylux is called “weekly” lacquer - it is worn for 7 days, however, as practice shows, after 4-5 days the first chips are often enough, moreover, such a coating does not look quite aesthetically pleasing if there are at least minimal defects on the nails and damage.
And, of course, to create a gradient, you can use the most common varnish, then you have to update it every 3-4 days, and most types of household chores (cleaning and washing dishes) have the most adverse effect on it.
Trendy colors
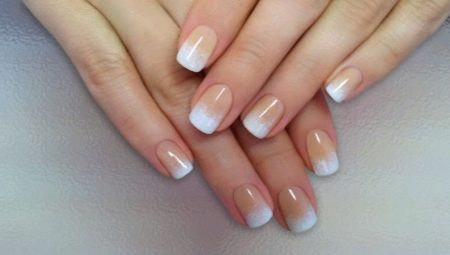
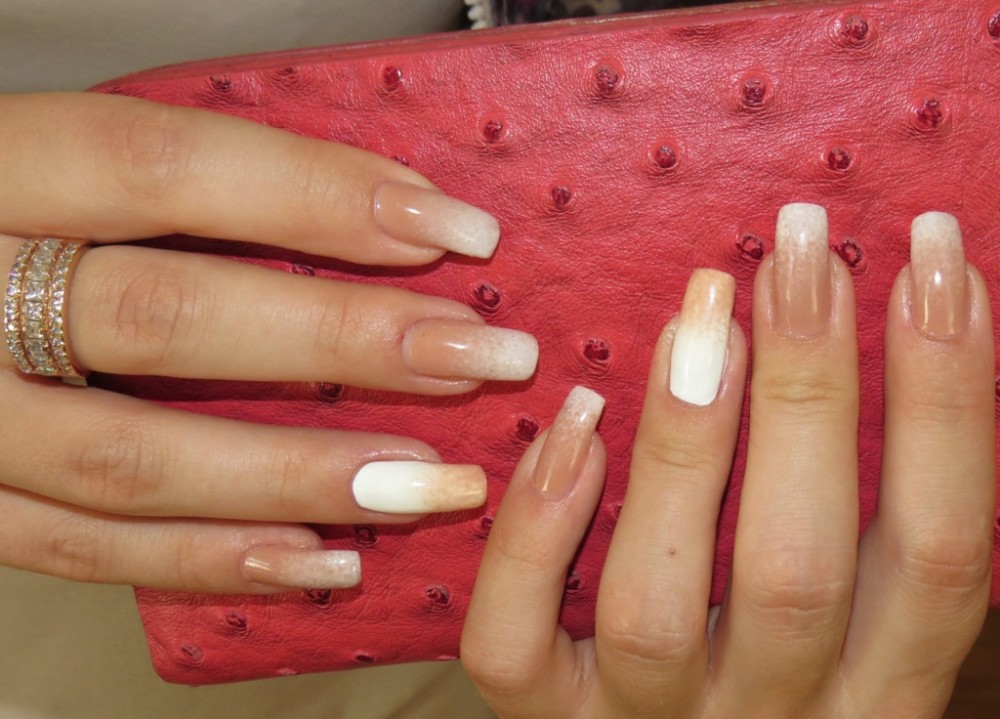
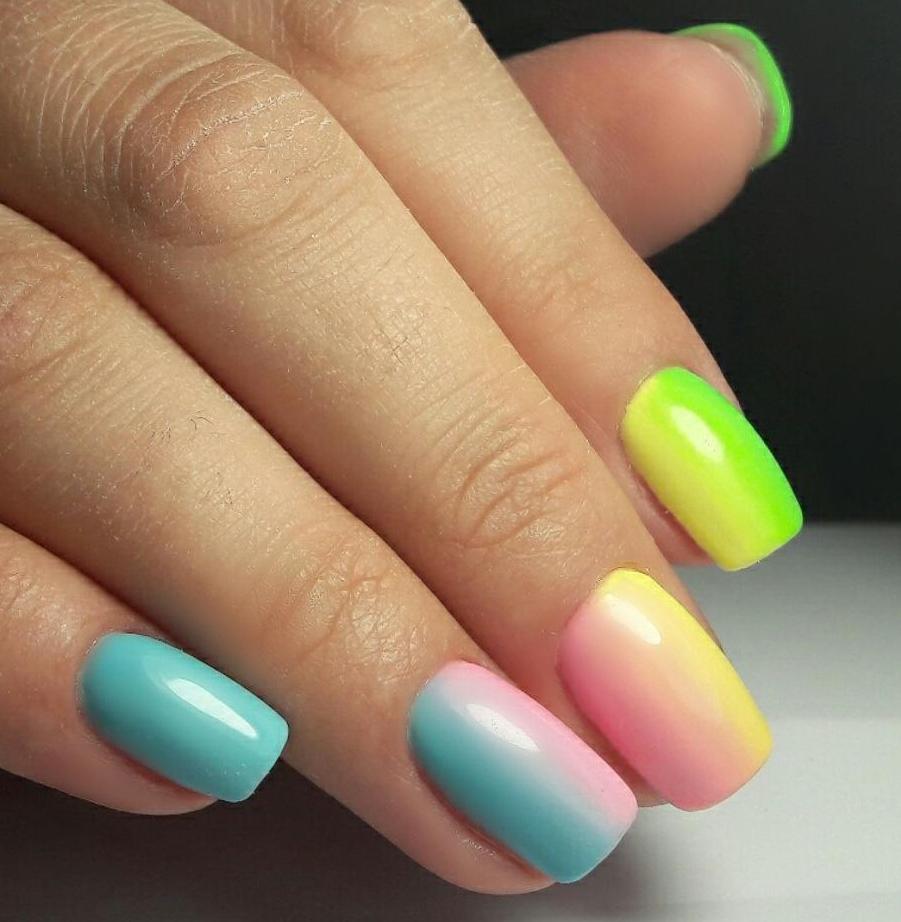
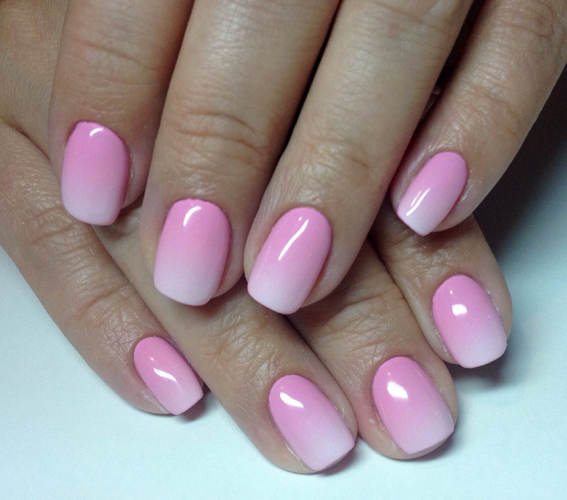
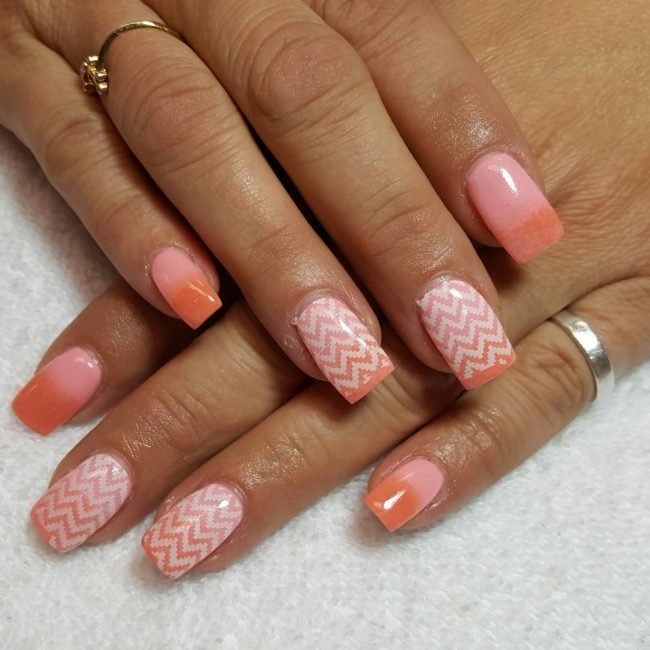
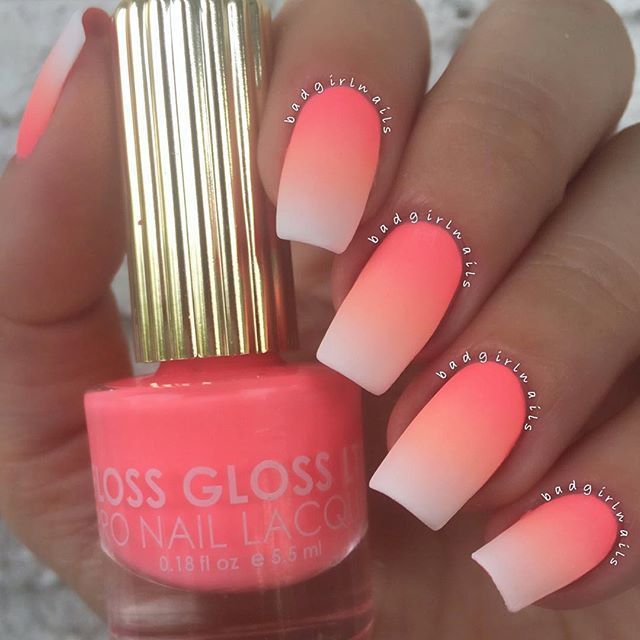
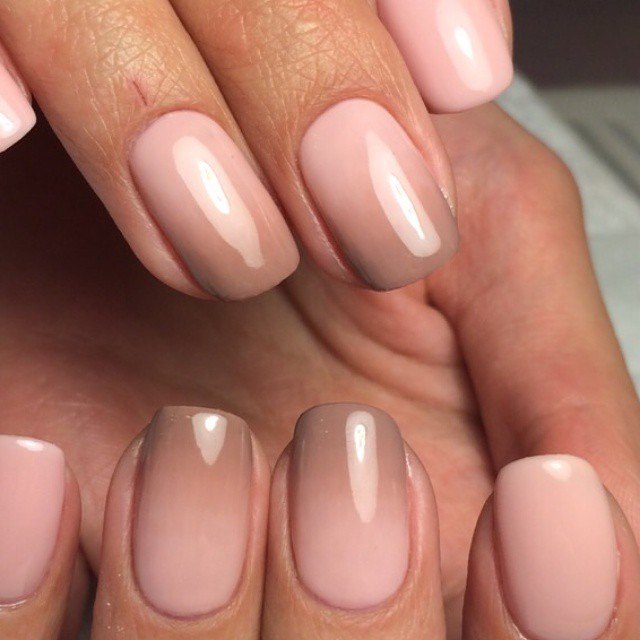
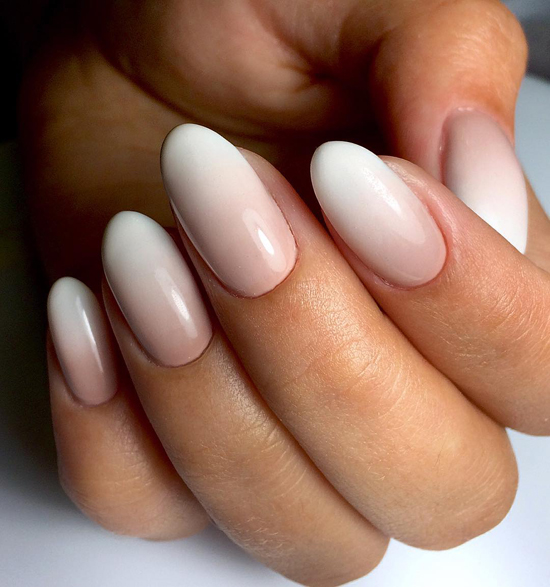
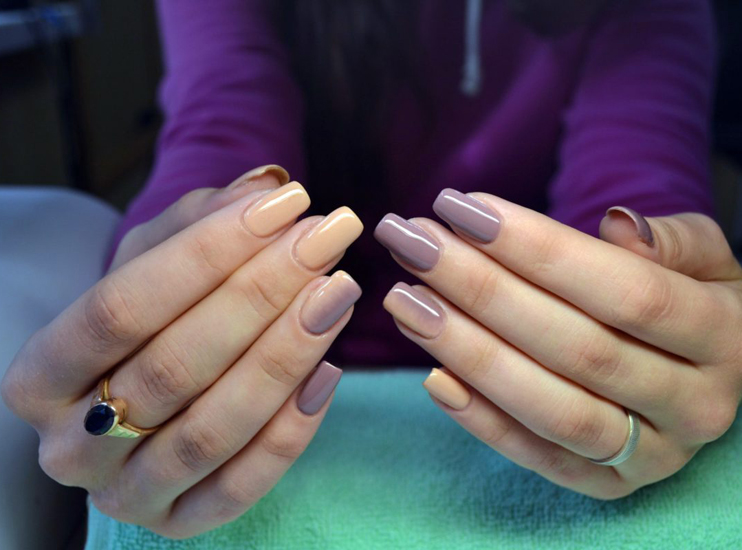
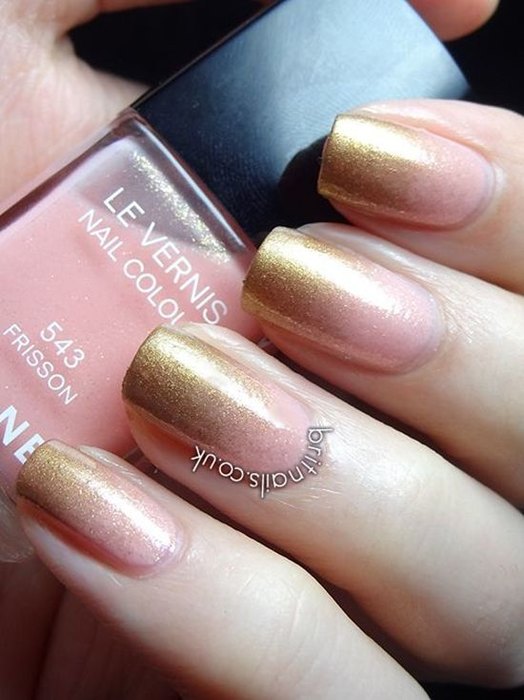
For a long time, the gradient was performed in beige shades, stretching it from light milky to darker peach. Nowadays, the color palette used in degradation is limited only by the imagination and personal preferences of the owner of such a manicure.
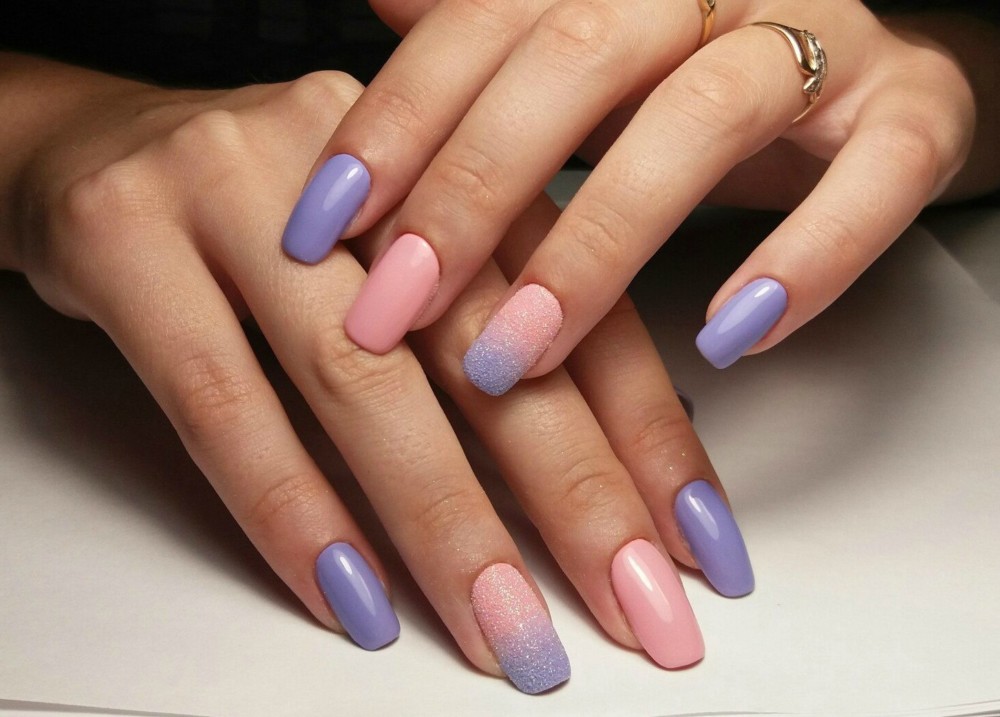
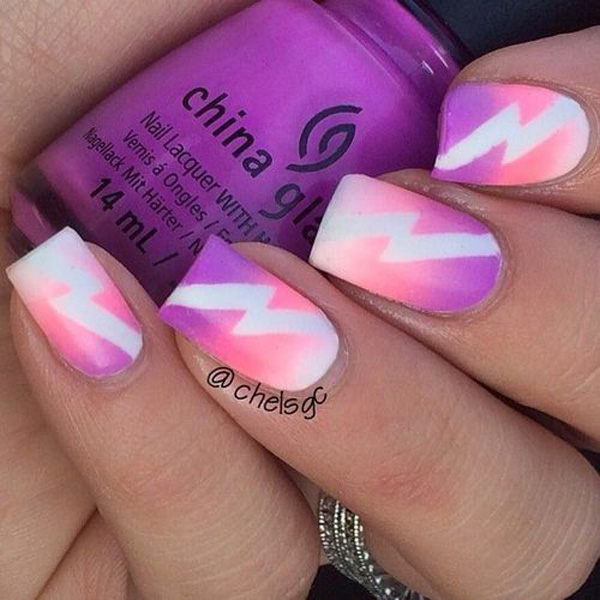
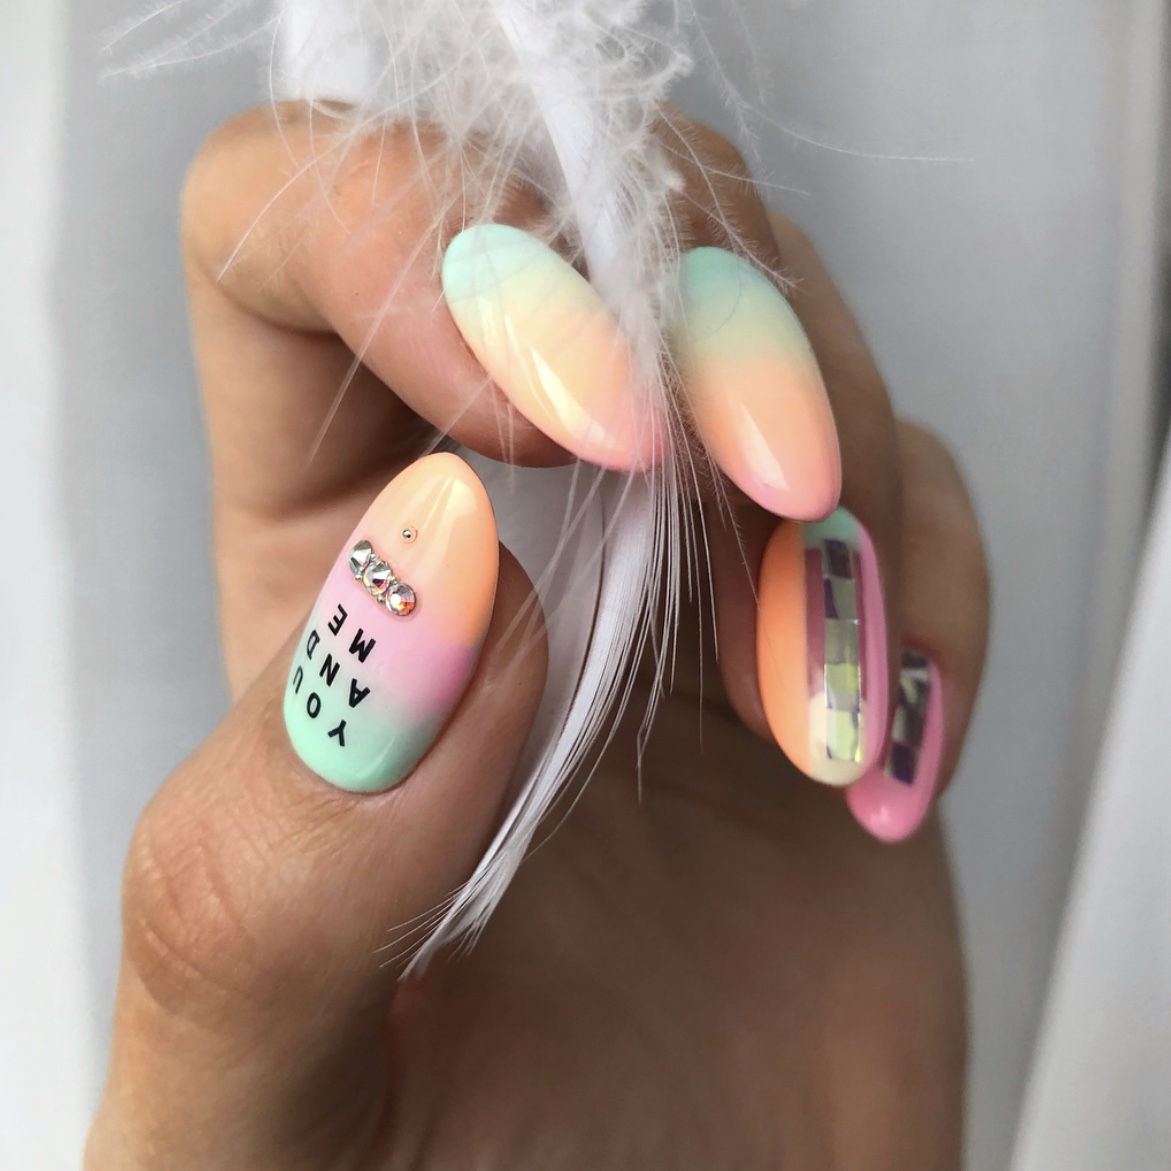
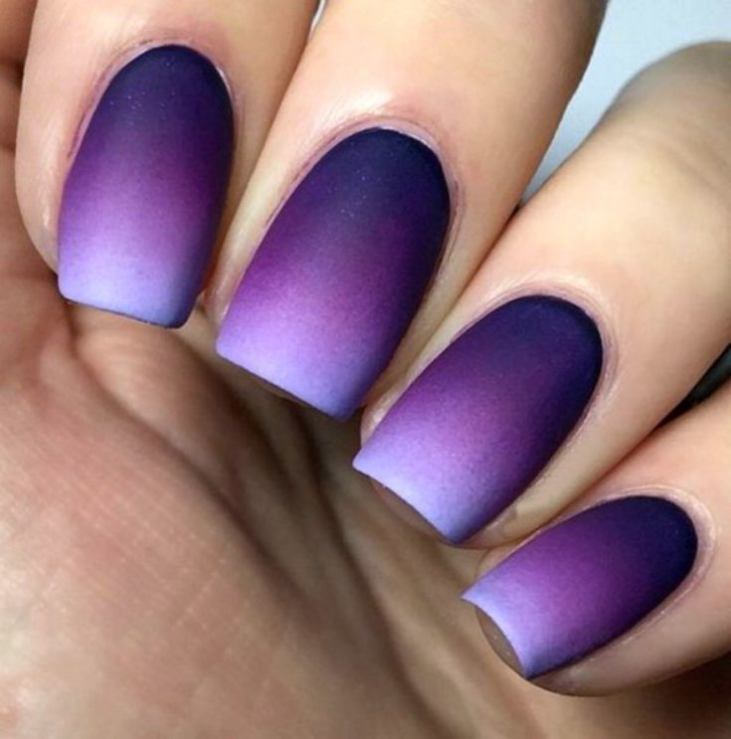
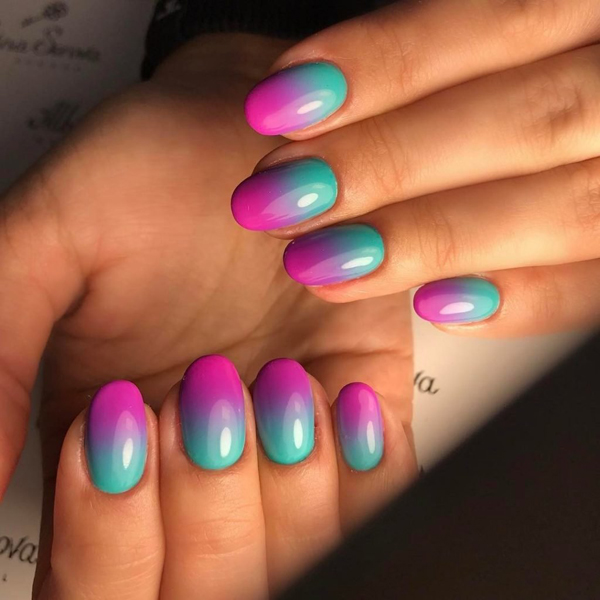
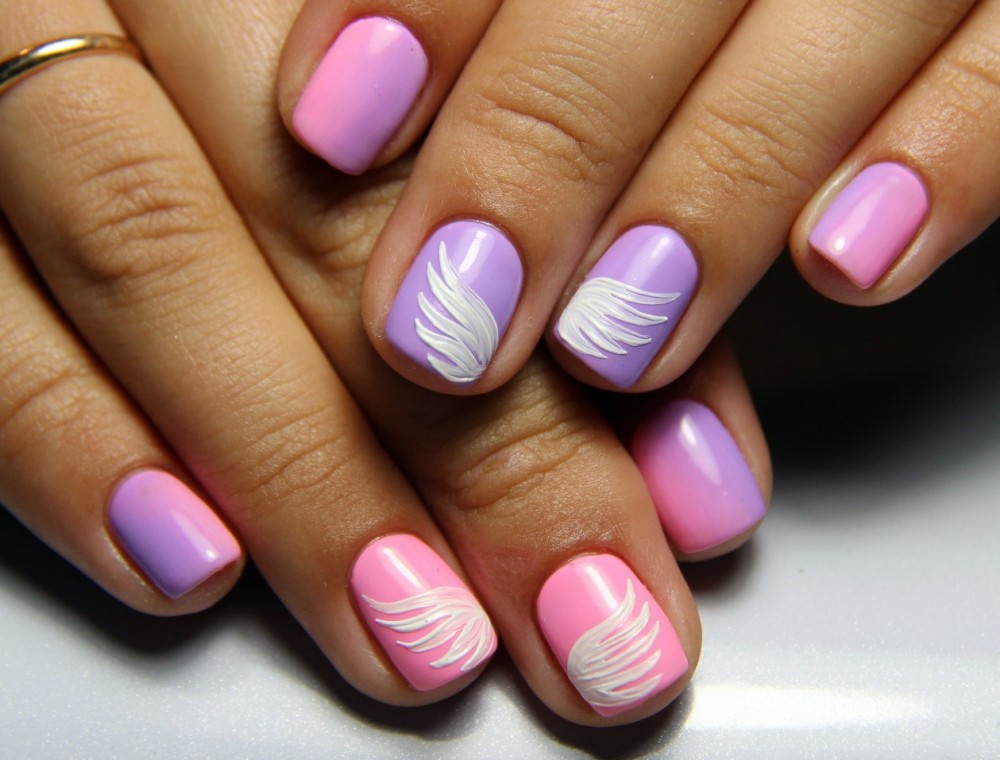
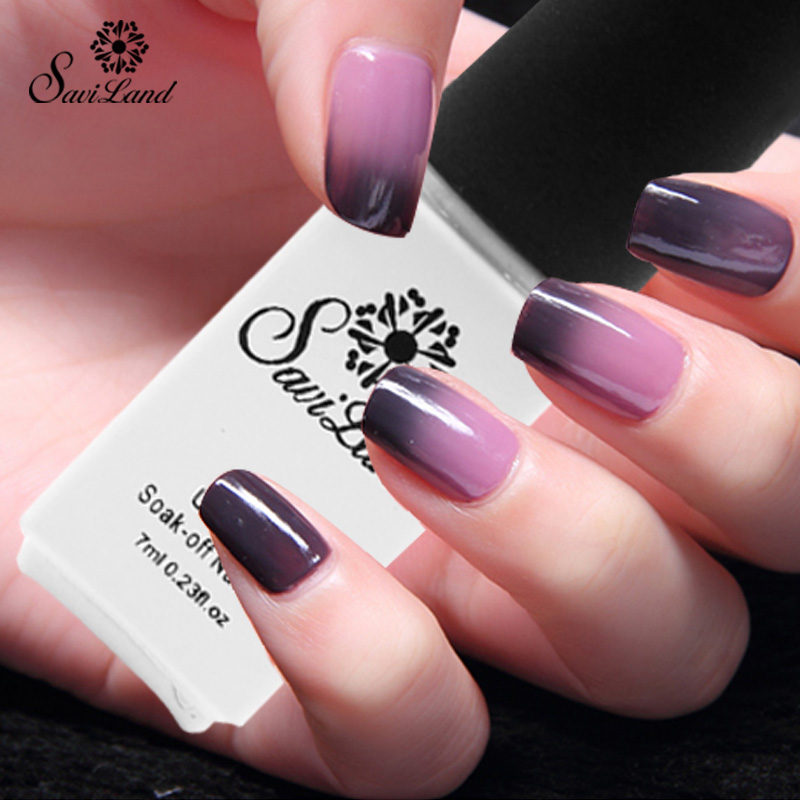
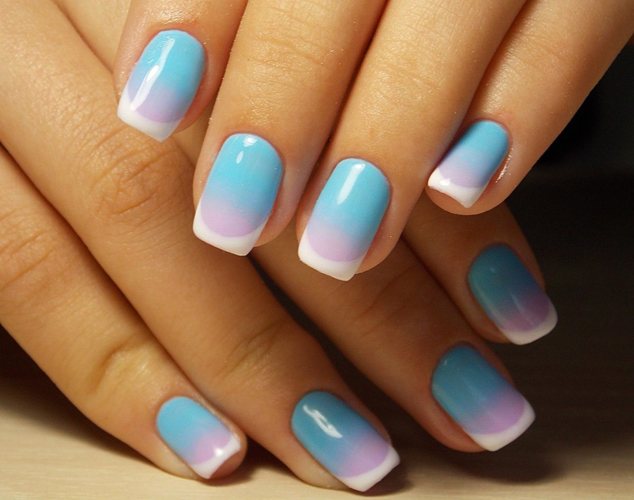
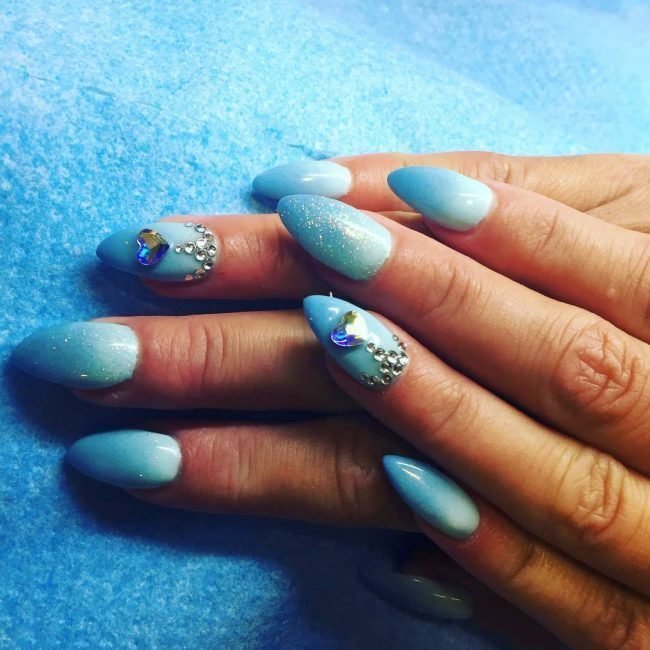
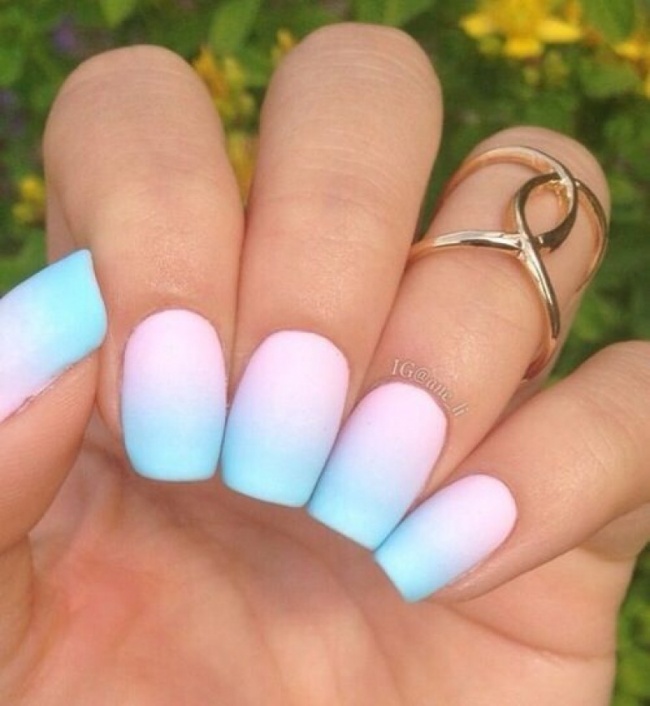
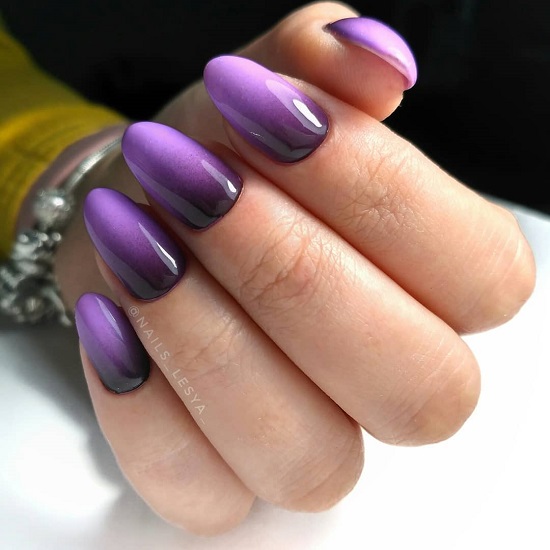
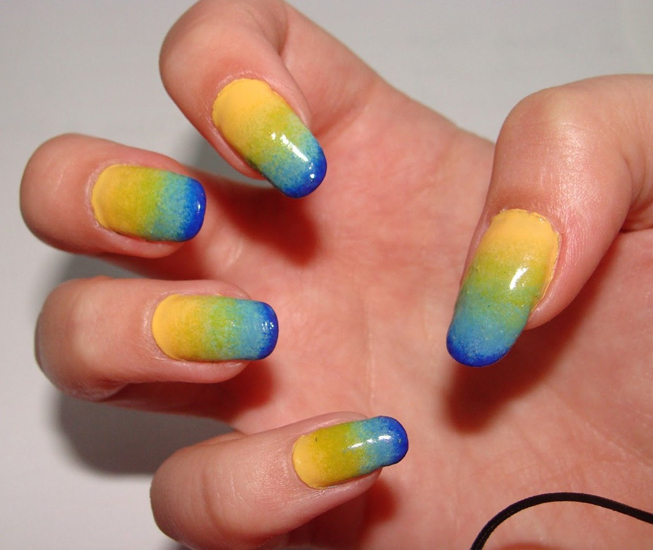
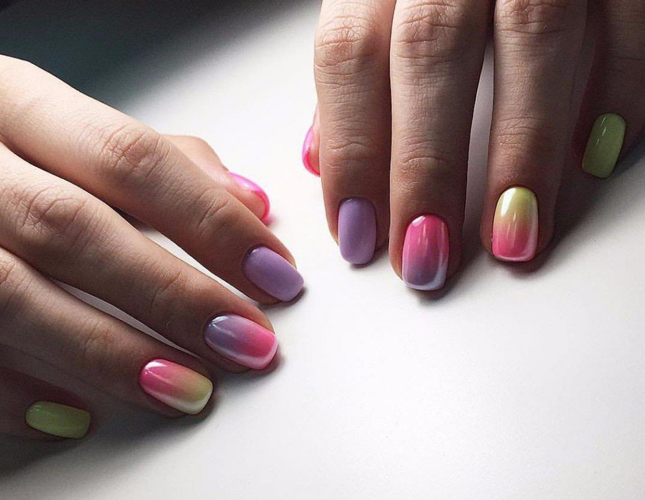
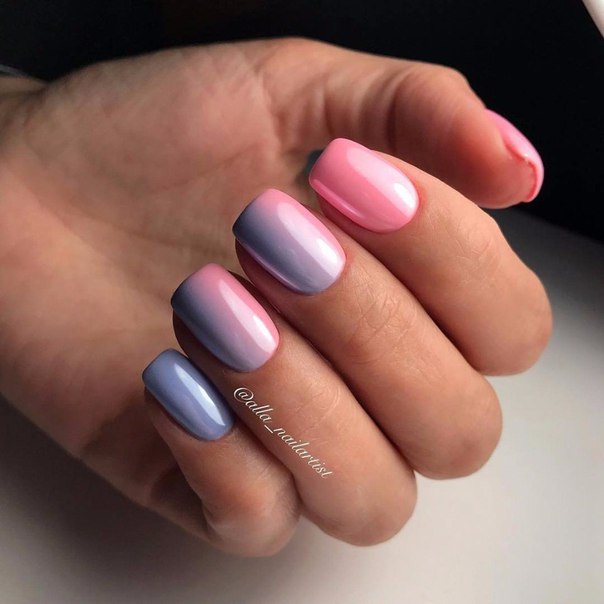
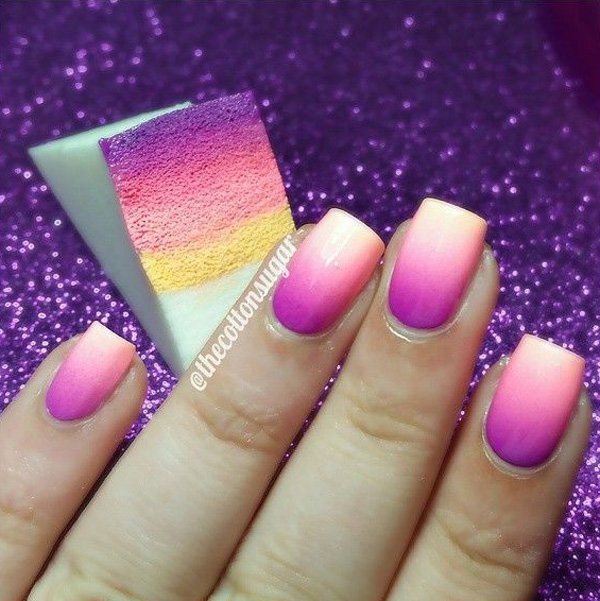
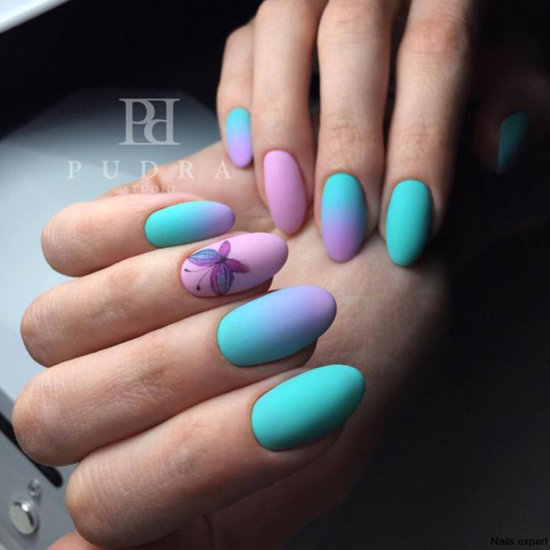
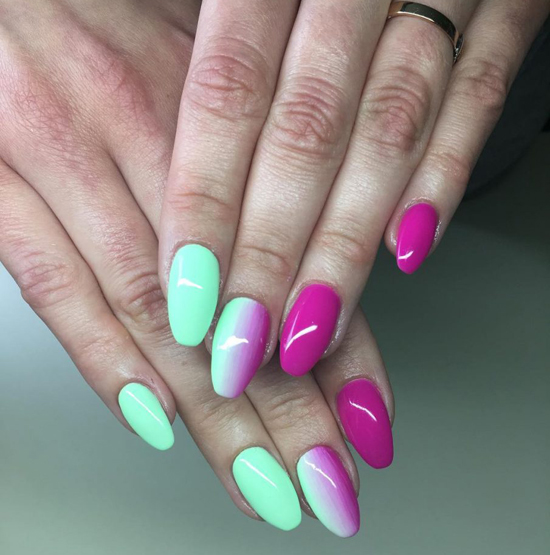
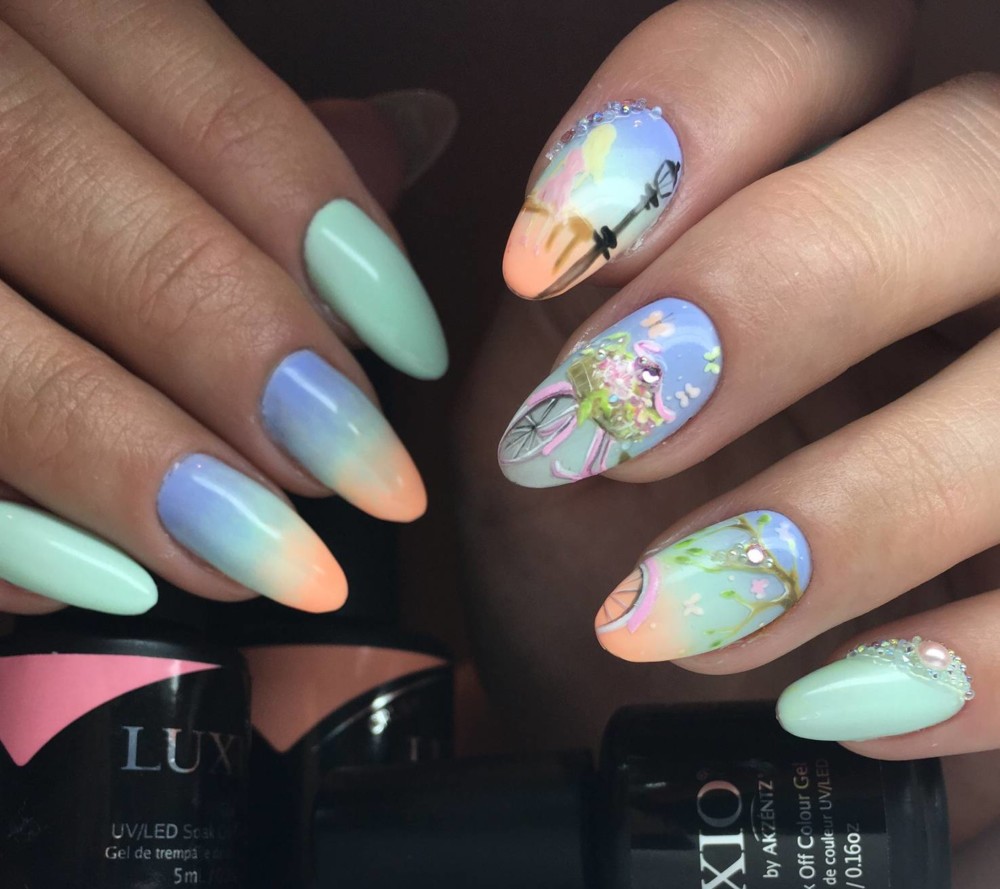
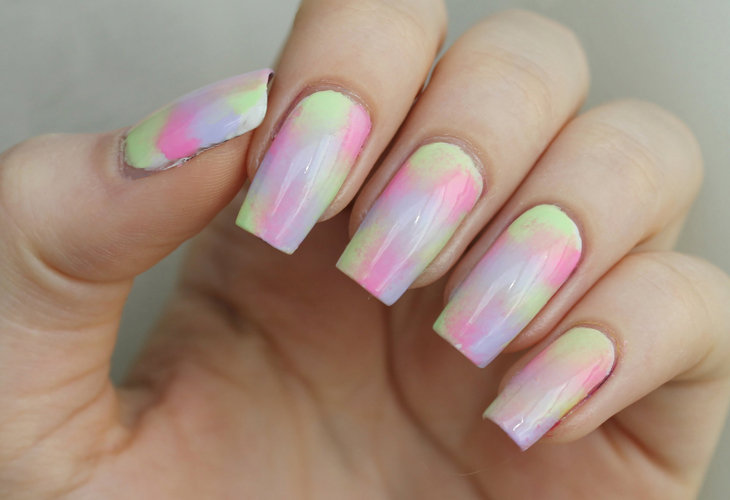
The stretching from blue to pink looks very gently, the transition of shades from lilac to saturated purple. But the more daring girls combine almost incompatible, for example, green and red tones, or combine blue with yellow.
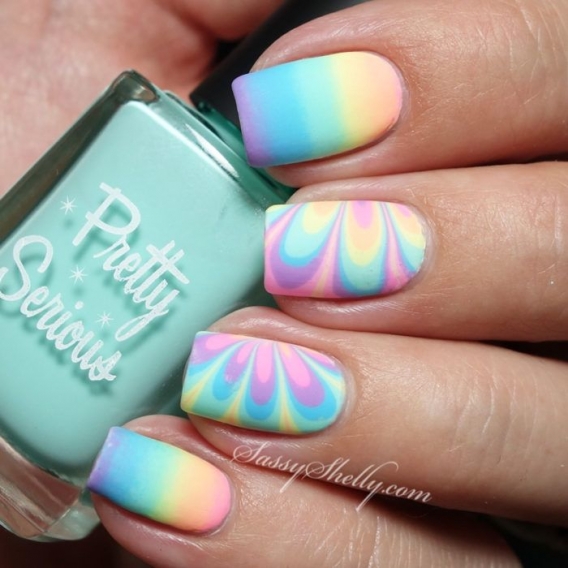
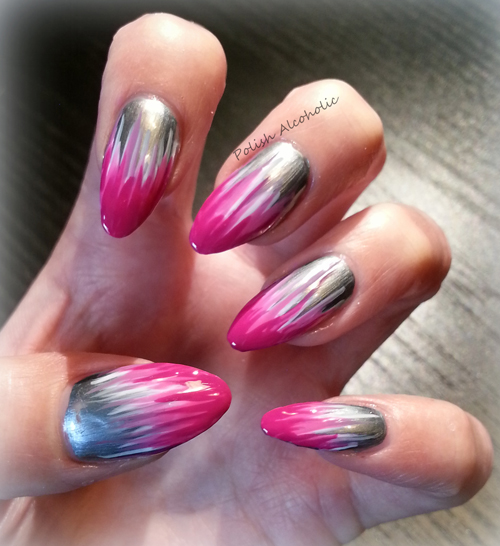
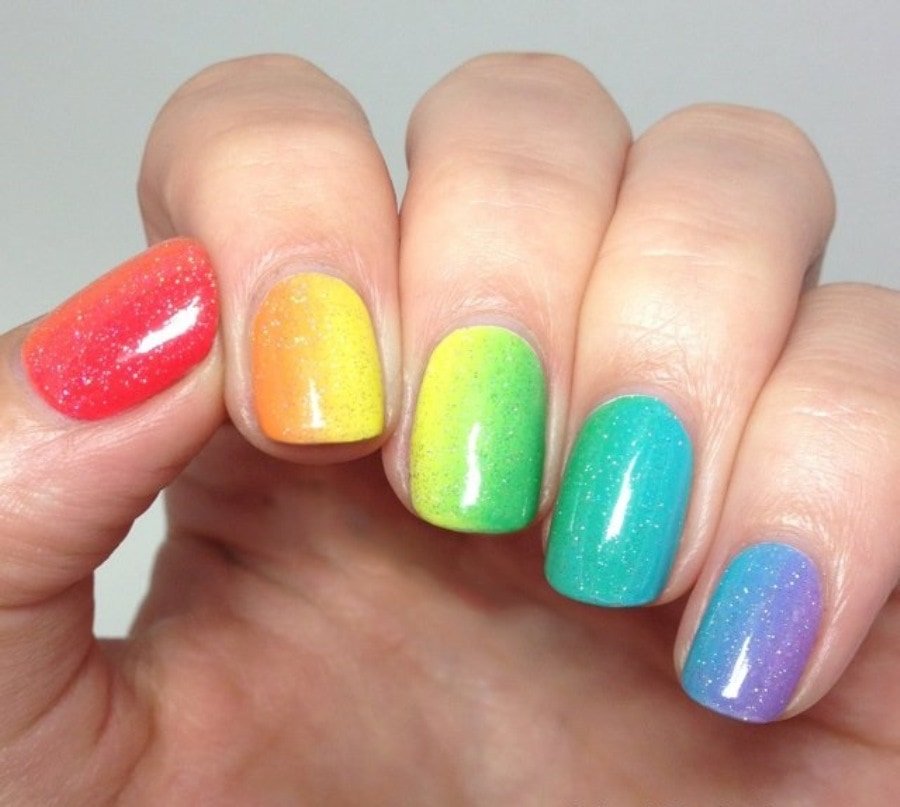
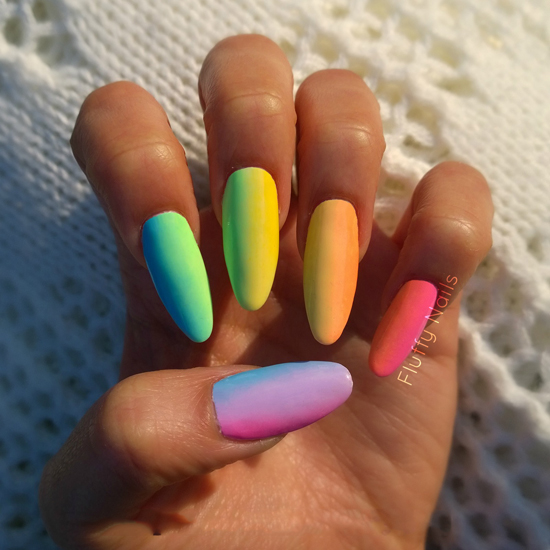
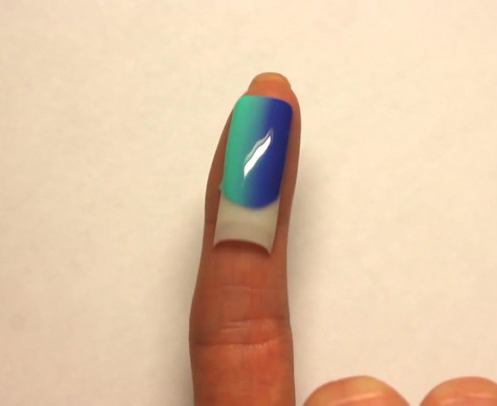
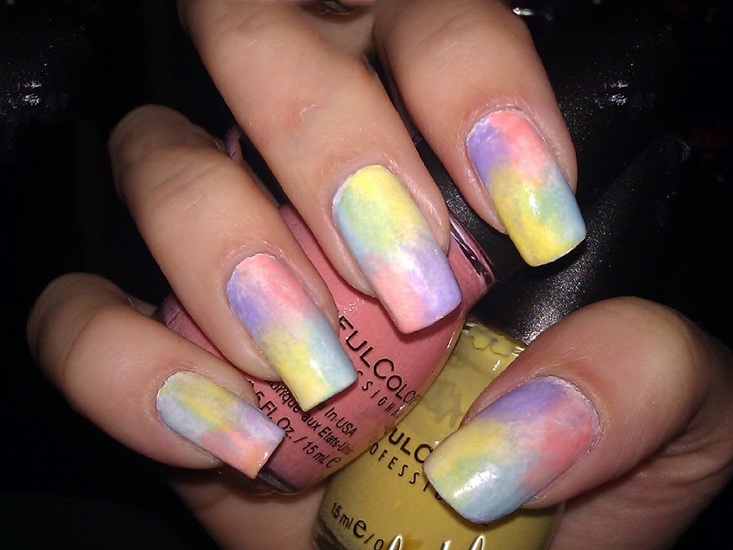
Color rainbow manicure is quite popular in the last year, as well as coatings with mirror-like rubs that give the coating a metallic tint.
This manicure looks finished and extremely stylish.
Ways to create and necessary inventory
You can draw a gradient on the nails even at home, To do this, prepare the main inventory:
- several types of varnishes of various shades;
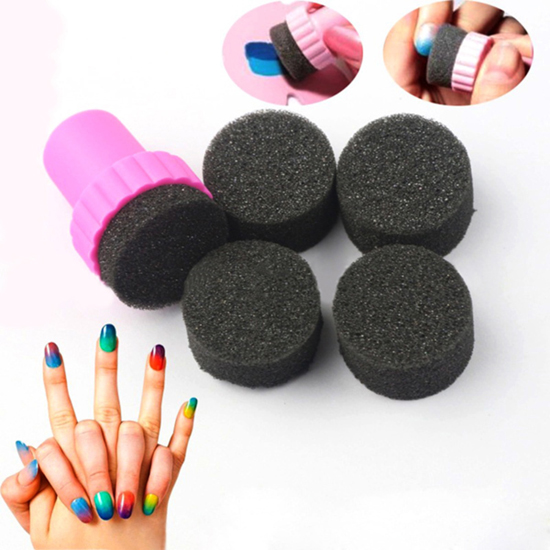
- sponge / applicator / kitchen sponge;
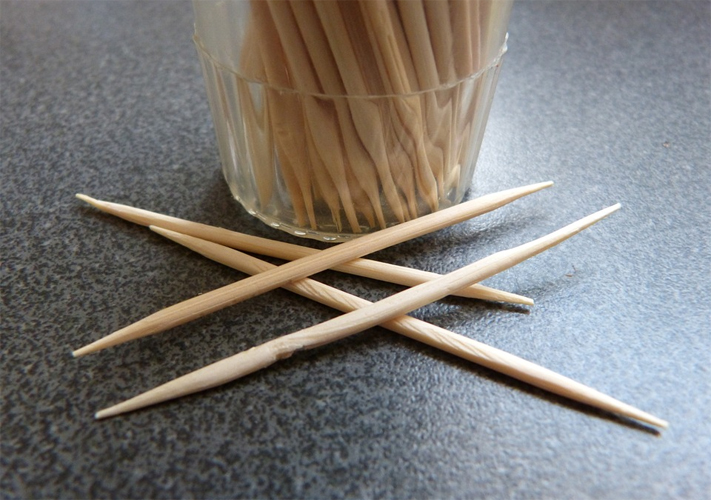
- wooden stick or two-three toothpicks;
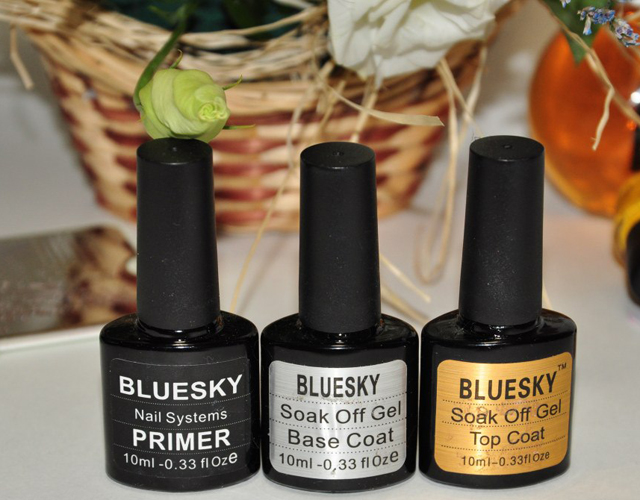
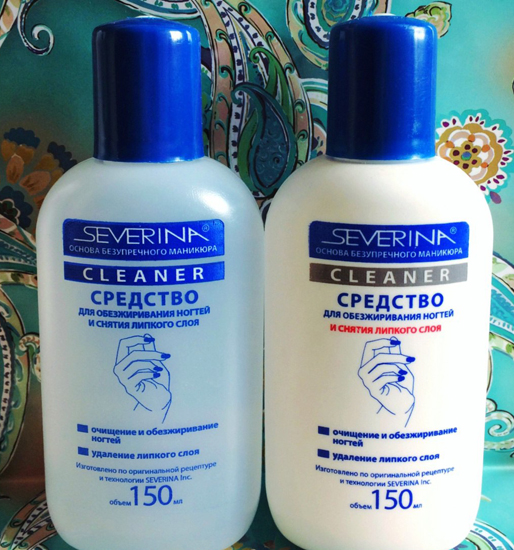
- degreaser, base coat, fixer;
- nail polish remover;
- corrector.
Stretching is fairly easy to do if you use the most common nail polish, but there is also a “but” - such a manicure will last no more than 2-3 days. Slightly more durable will be the gradient made by the coatings on the gel base, but it is much more difficult to draw it.
The experts of the nail industry use several basic coatings, tell you about the most popular.
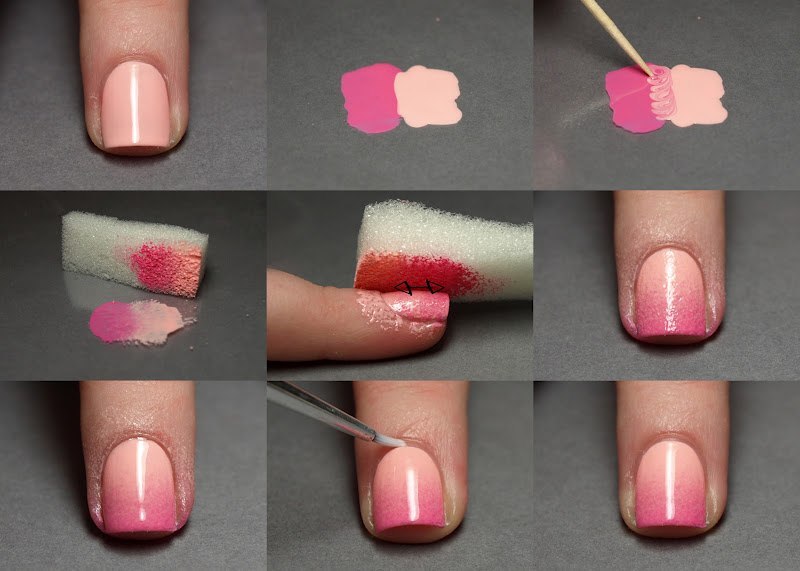
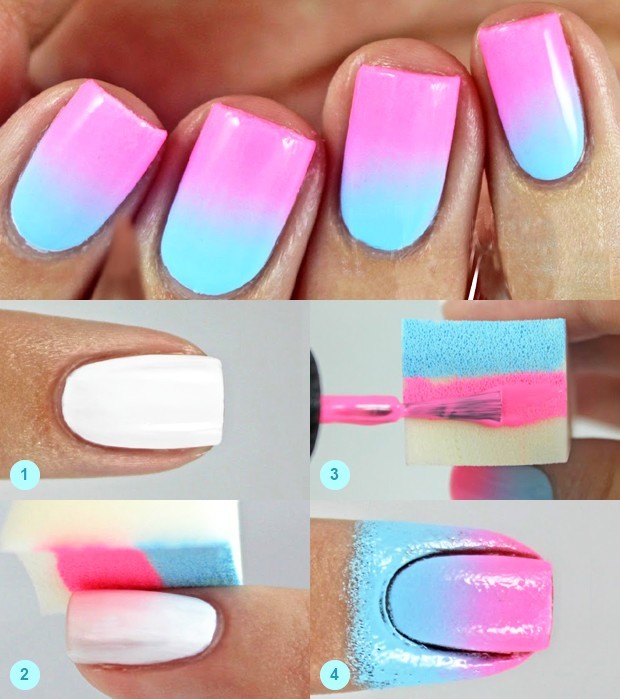
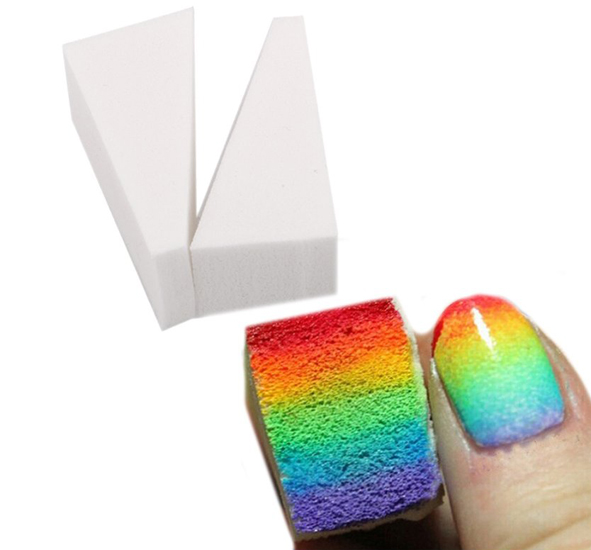
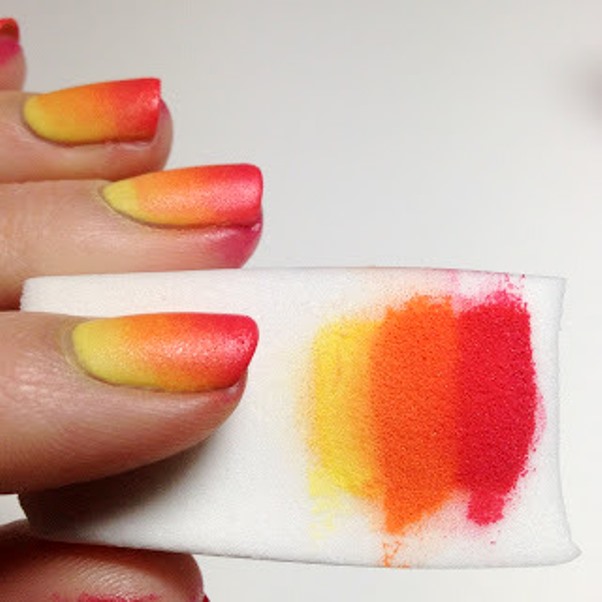
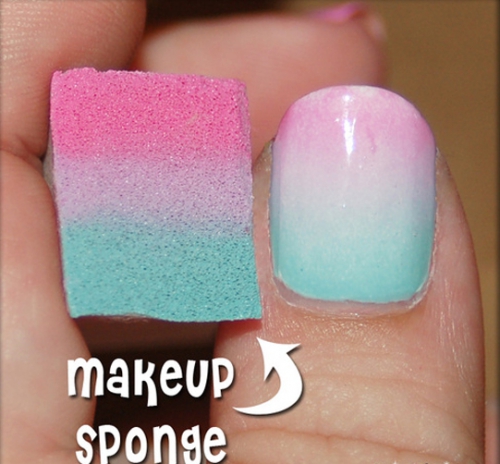
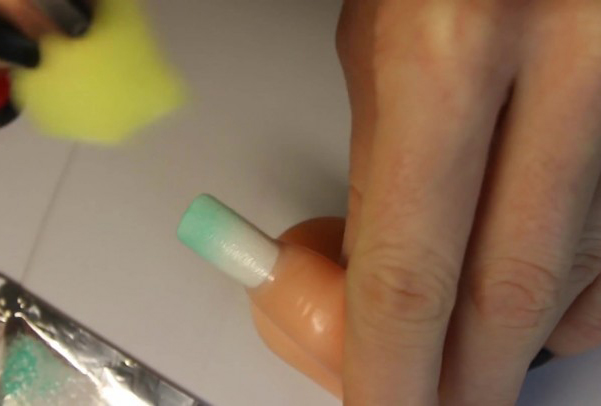
With a sponge
In order to create an ombre in this way, it is necessary to prepare a piece of kitchen sponge or cosmetic sponge.
First you need to decide on the shades that you plan to use in the decorative coating.
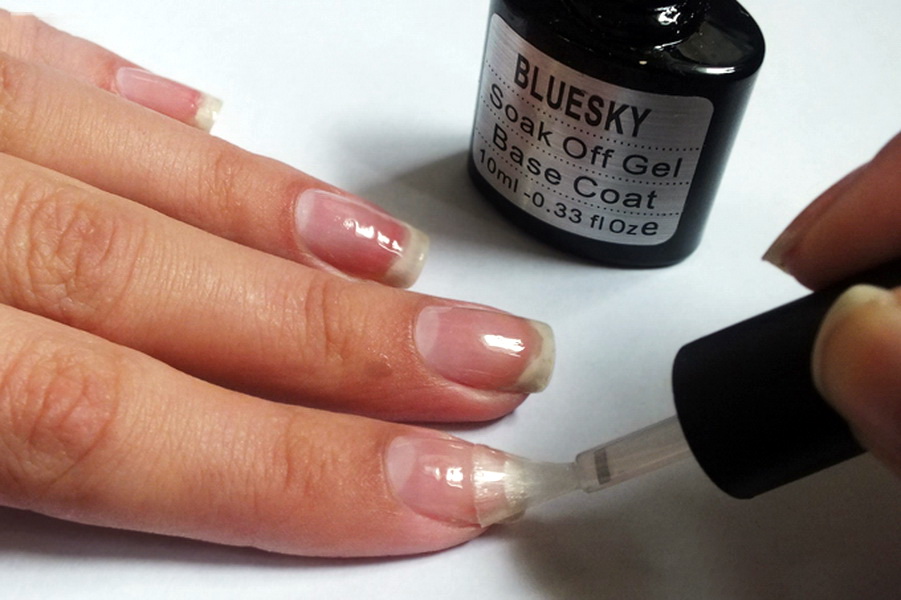
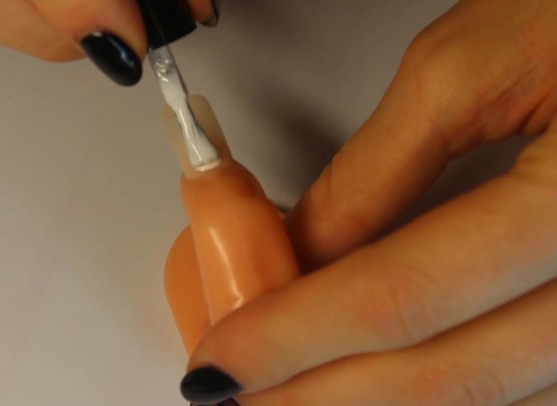
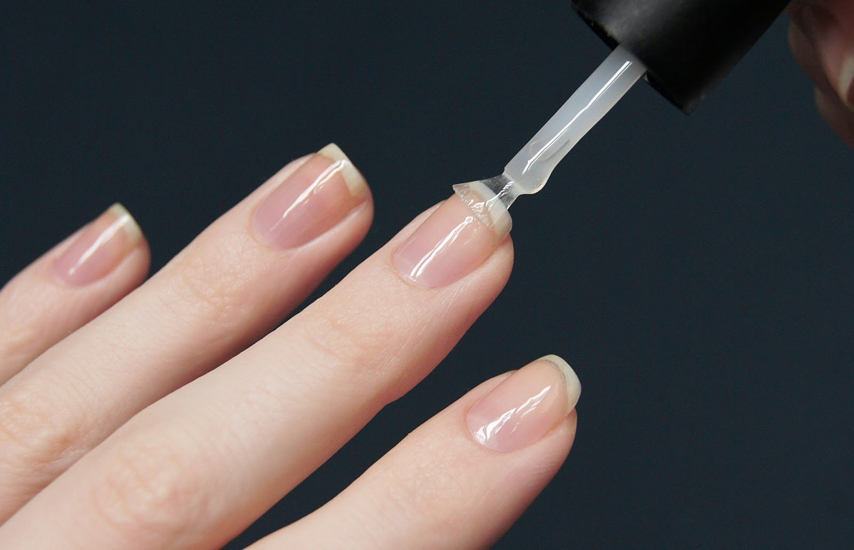
Further, a base is applied, which is designed to protect the nail plate, so that the gradient remains on the nails for a longer time.
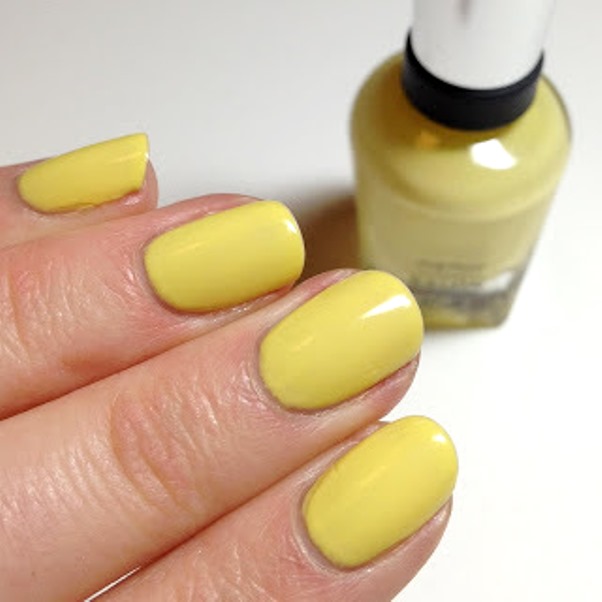
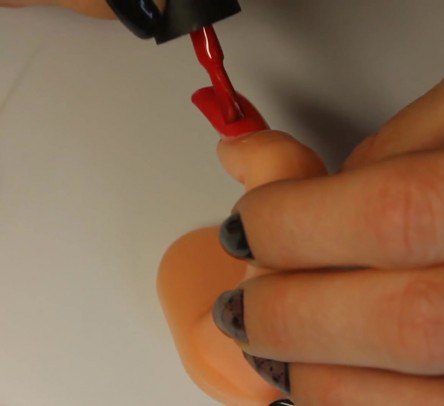
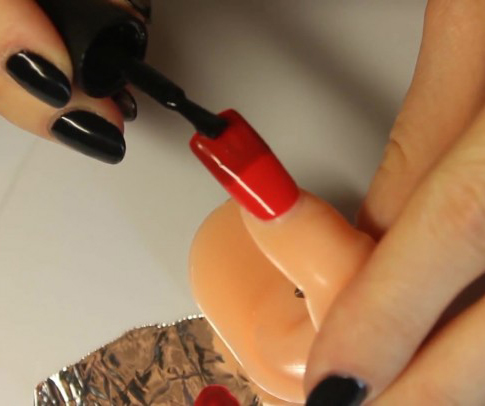
Then the lightest varnish is taken, they should completely cover the nail and let it dry.
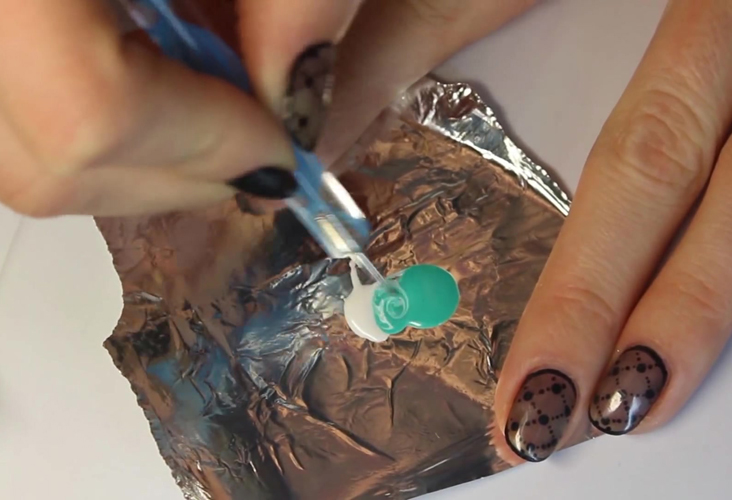
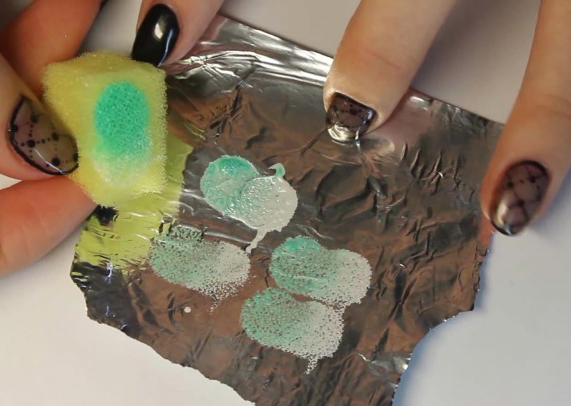
After that, the sponge or sponge should be moistened with ordinary water so that the material becomes moist and does not absorb the lacquer. Then you should take the varnishes and apply them alternately with stripes on the sponge, moving from the first tone to the second, while drawing them should be pretty confident so that the lines slightly touch each other.
At this stage, a polyethylene film or foil may be required, the boundaries of the spongy surface with them are washed out and a smooth transition is formed; in order to make sure that the stretch marks are harmonious, check the effect on the paper.
If you are satisfied with the colors, you should proceed to the most difficult - the transfer of the coating on the nails. If you do not have much experience in manicure, then start with one fingernail in a few touches, while the sponge can be slightly shifted from one side to the other for a more original result. Experts cope with this task in one touch.
If remnants of used lacquer fall on the skin, then you need to get rid of them even before it is completely dry, you will need a special liquid or a corrector.
However, you can secure your fingers in advance - for this, they stick adhesive tape on them even before processing the plates with a painted sponge.
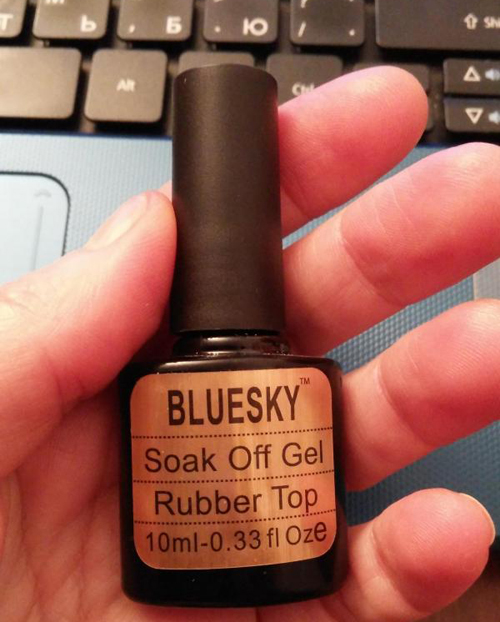
To consolidate the effect, you should apply a top coat that will give the manicure greater durability.
In this method, there is a slight trick - in order to shape the gradient, you can just put a basic shade on the plates, and another on the sponge - it is you who will later print it on a clean edge.
Design using foil is not very different from the above described by the main technology. The only difference is that if in the first case varnishes are initially applied to the sponge, here it is on the foil. Keep in mind that for this you will need a flat surface.
The color transition is initially made using a sharp toothpick.
With applicator
In this method, I use the applicator for cosmetic shadows. And this technology is very similar to the first two, however, it is believed that the applicator is more convenient than the sponge and sponge.
The order of manipulations in such a case is as follows:
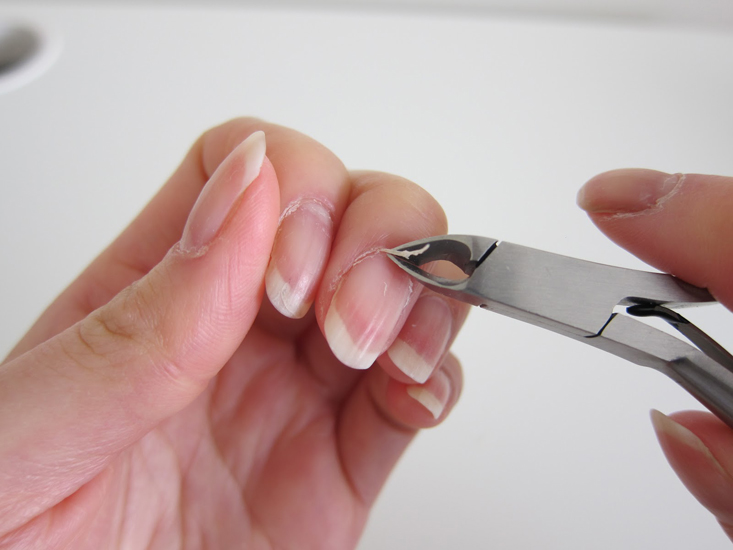
To begin with, the cuticle and horny skin near the nail plates are removed.
The nails are painted with base varnish and only after it dries, the edge of the plate is covered with one of the used varnishes, and the second is applied to the applicator, it is printed at some distance. Depending on the total number of shades desired, the actions are repeated.
At the final stage, it is imperative to remove the remains of the coating from the fingers and apply a layer of fixative.
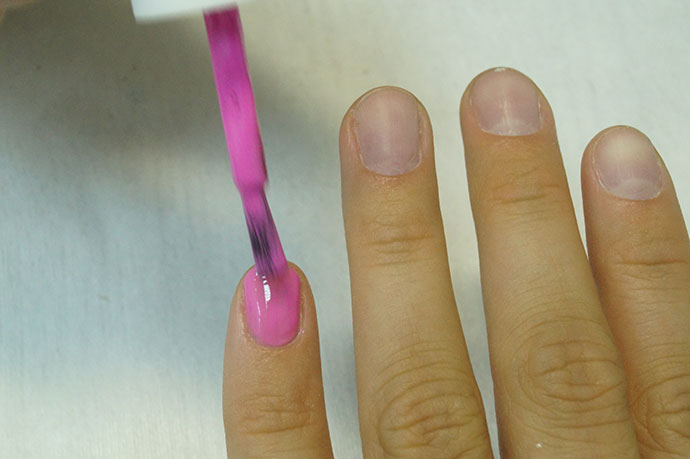
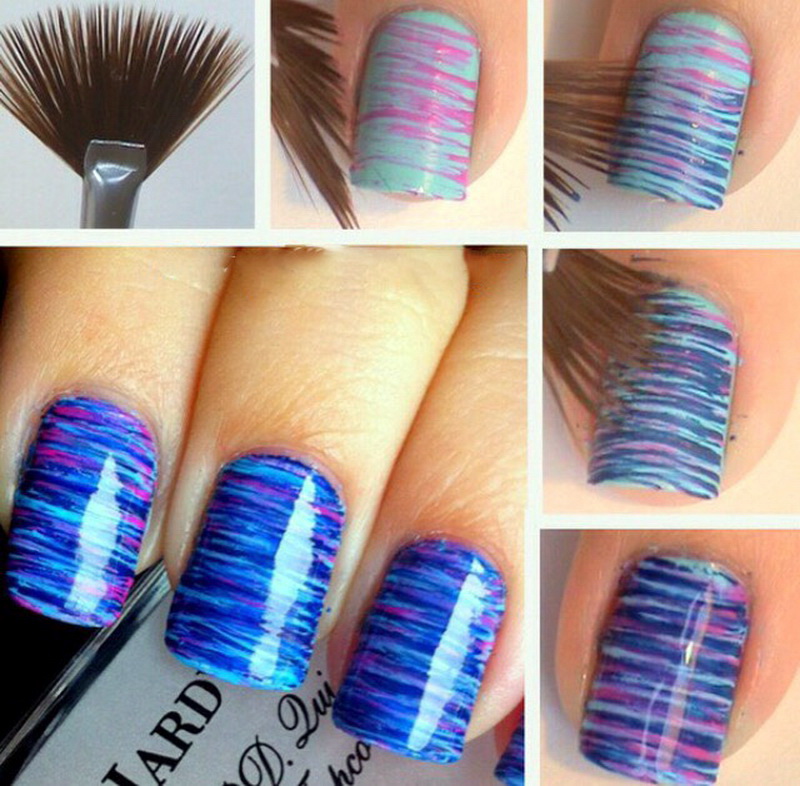
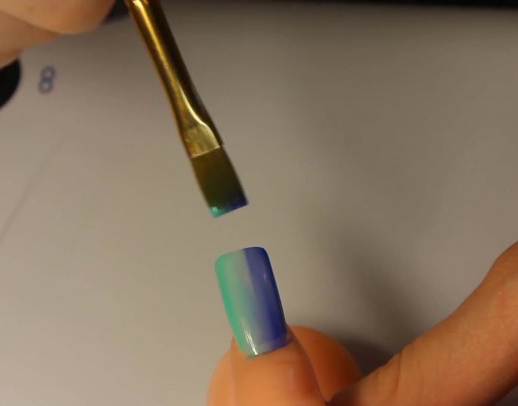
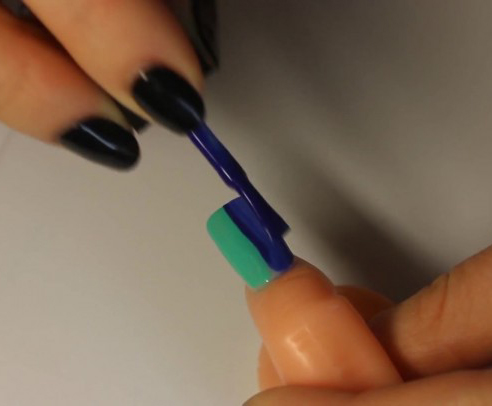
With a brush
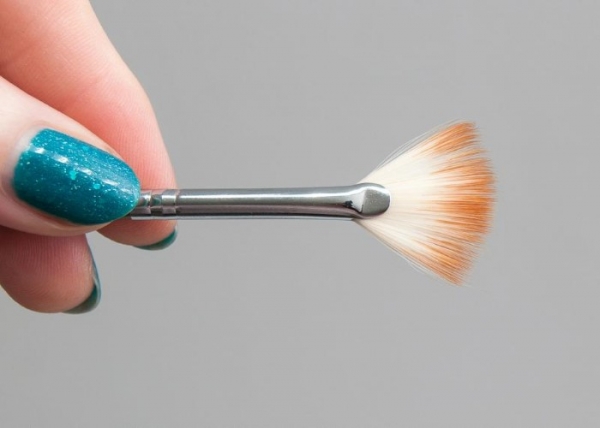
This method of application is referred to as the simplest one, because for decoration of a beautiful gradient you only need a brush with soft fibers.
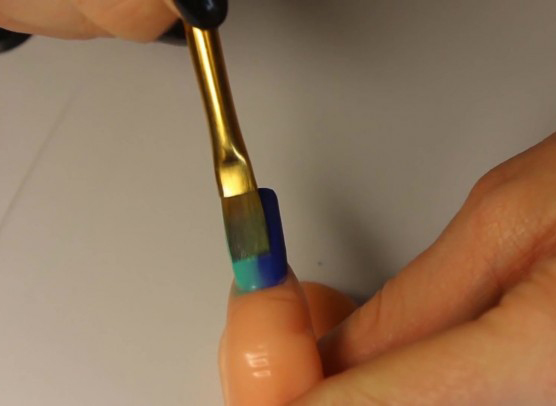
Cleaned and degreased pre-nails should be applied with a thin layer of selected shades of lacquers, then the brush is dipped in a wedge and immediately, until the varnishes are completely dry, a number of quick movements are made on the nail plate where there should be a transition from one to another.
After each such shading, the brush should be wiped with a napkin without fail, if you do not have much experience in applying ombra, it is better to prefer a fan-shaped brush. However, the procedure in this case will be a little different - this brush does not make a soft transition, so it’s better to independently mix the middle, transitional tone before starting work, connecting the main tones together, apply all the colors on the nails and make movements similar to wipes with a brush. brooms and repeat until the desired effect appears.
Gel polish coating
As we have already mentioned, such a graded coating lasts much longer, moreover, it does not have the unpleasant property to peel off the pieces and peel around the edges, as is often the case when applying ordinary varnishes.
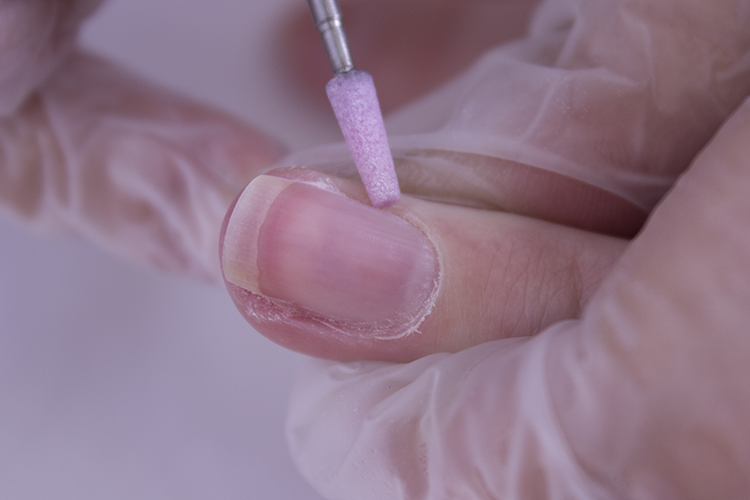
Before making a gradient manicure, the nail plate should be cleaned, degreased and lightly polished, then remove the remnants of nail dust and send hands to dry in a special lamp.
After that, the surface of the nails must be covered with a base coat, after that it quickly polymerizes, and the sticky top layer is removed using any lint-free napkin.
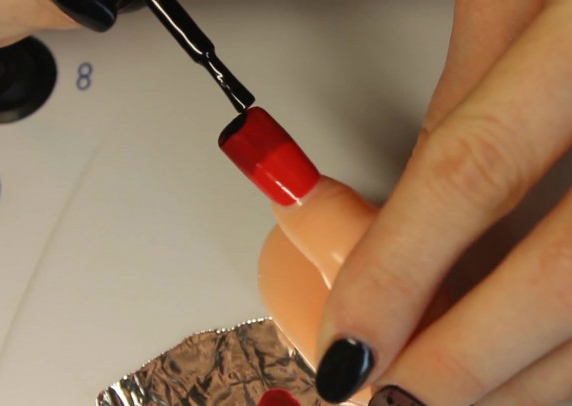
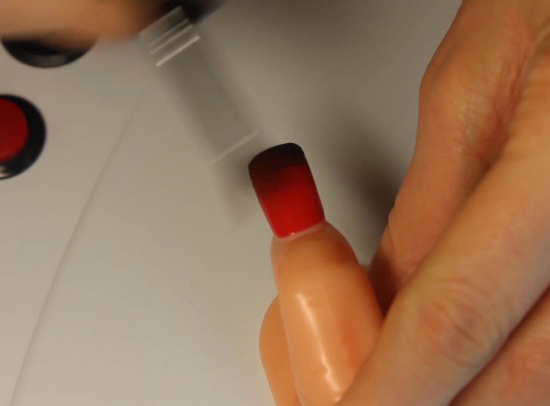
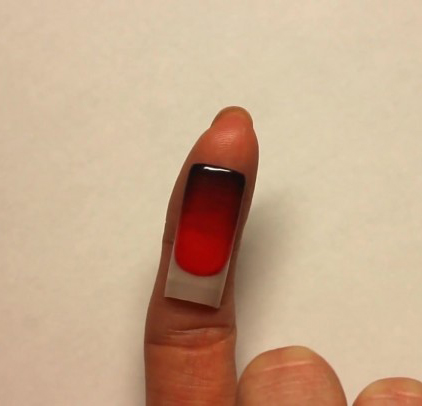
When the nails are fully prepared for staining, apply gel varnish of one shade on one side, second on the other, then a smooth stretch between tones is drawn with a very thin brush.
At the end, the nails are sent again for drying, the sticky residue is removed and the top fixing coating is applied over it.
Keep in mind that during the polymerization should not keep your nails under the light of the lamp for more than two minutes.
In recent years, the geometric gradient has become very popular.It is performed with a rather thin brush. For such a coating, you should prepare a pair of gel polishes, one should be white, and the second one more saturated and bright. By progressively diluting the shellac of a bright shade with white, you will get more and more delicate light colors - they should display various geometric shapes from light to dark. In this case, all layers are applied very thinly, after each application no drying is required - the hand should be placed in the UV lamp only after you finish the entire drawing.
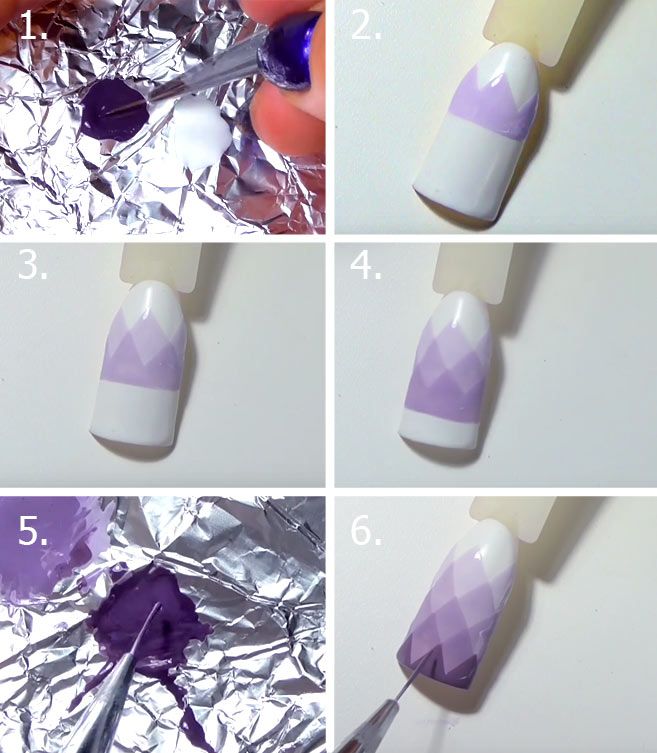
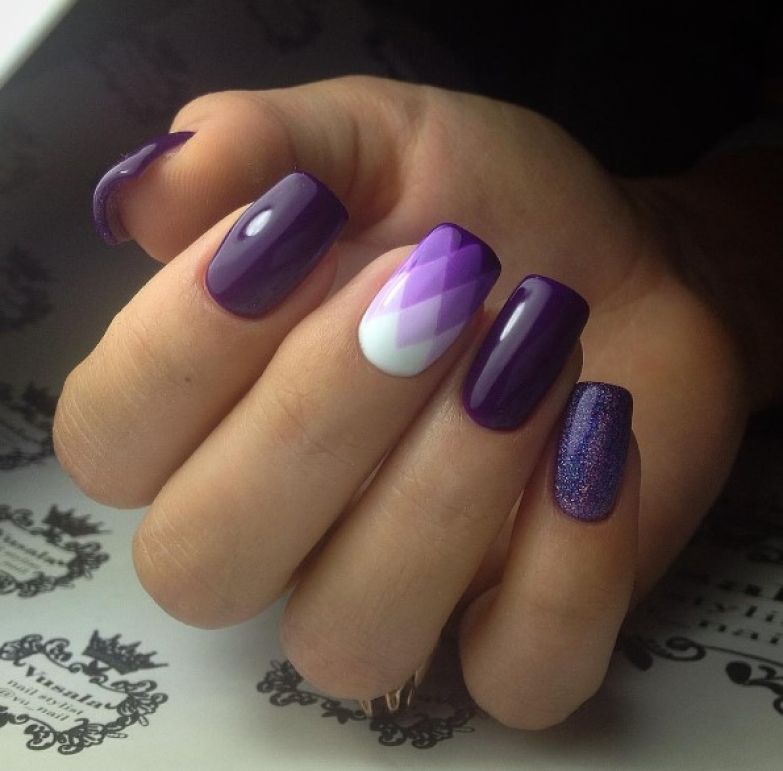
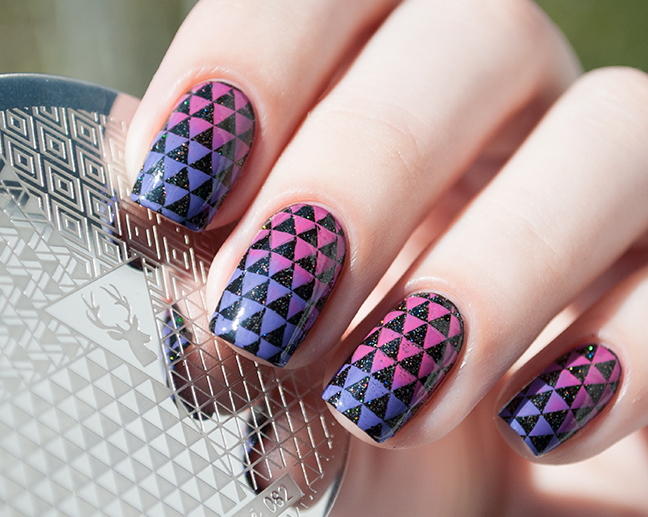
In the current season at the peak of popularity is the gradient, made in the form of diamonds.
However, it is possible to apply such a pattern with ordinary varnish, although it dries out rather quickly and therefore its use will be rather difficult. In this case, you better use special stencils with different patterns that allow you to implement the most daring design ideas.
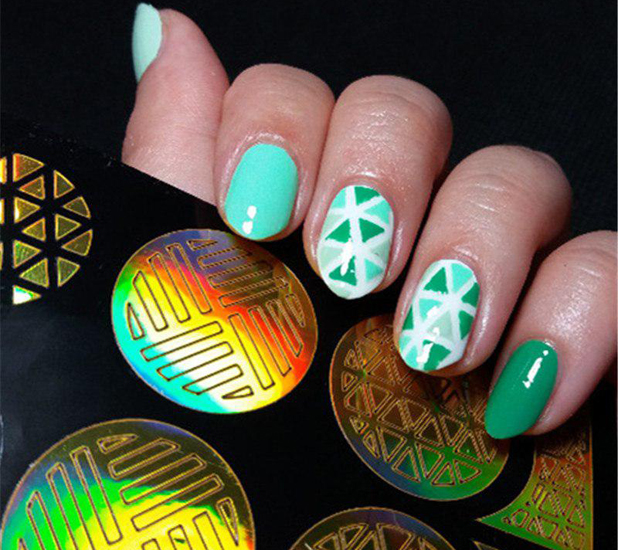
Some girls use stencils and in working with gel polishes - this is not entirely correct, since shellac tends to flow under the stencil, so the effect may turn out to be quite different from what you are planning.
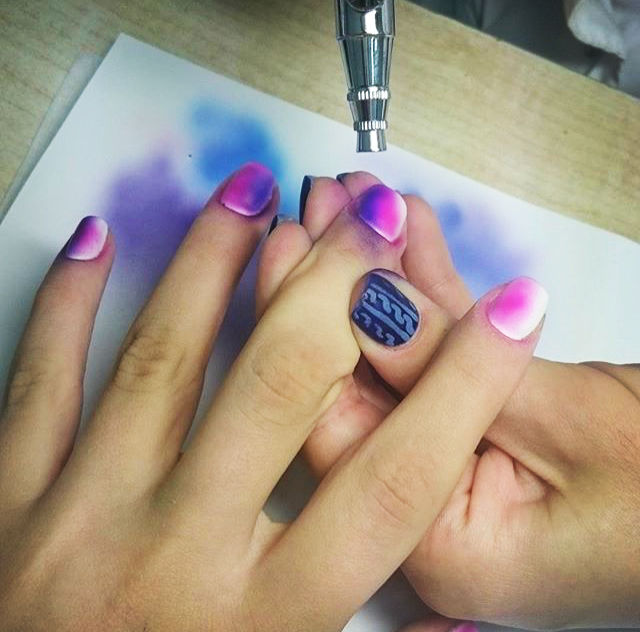
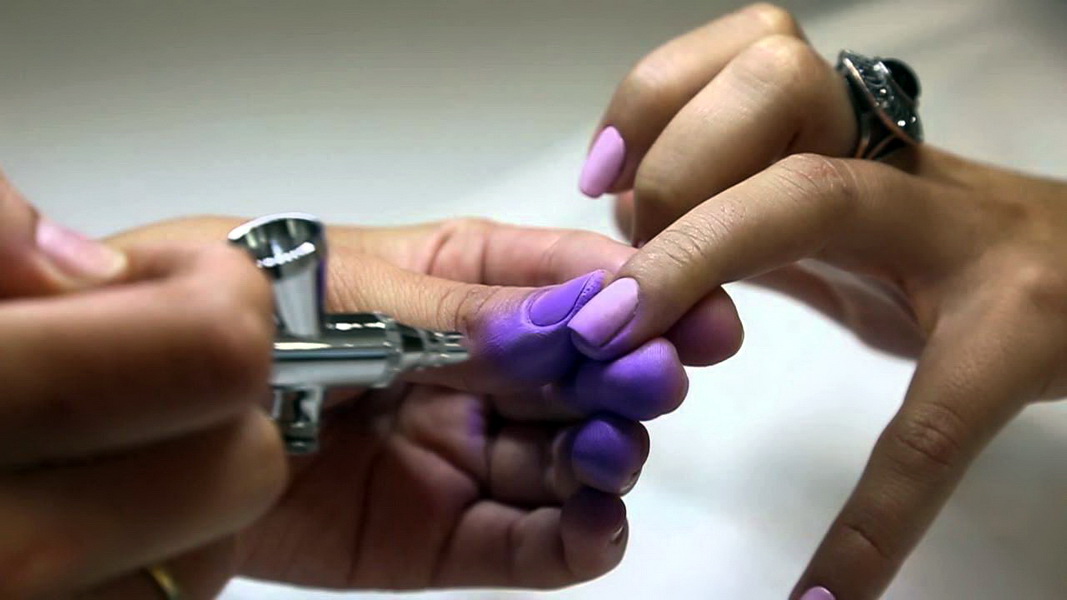
Professionals in the salons of the nail service in the performance of degrad using special machines and sprayers.
Popular nail design ideas
In conclusion, let us dwell on the most trending options for the design of nail art using the ombre technique.
- Classical - in this case, the gradient is applied on one nail vertically or horizontally.
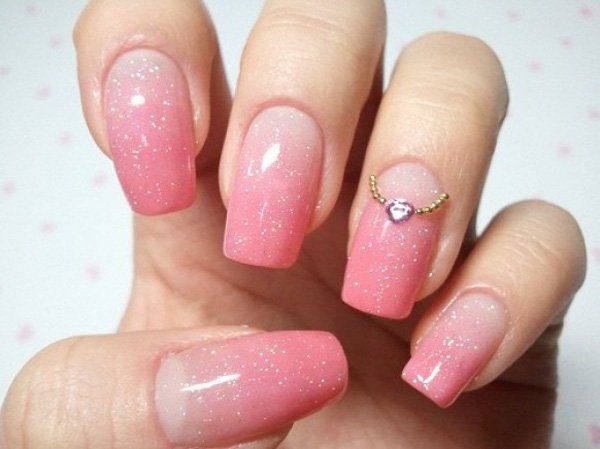
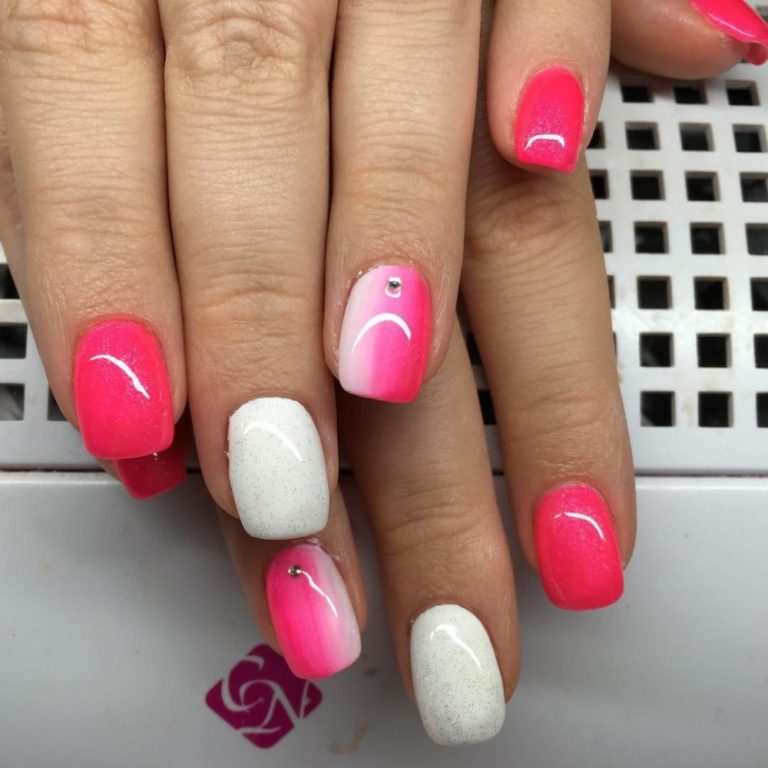
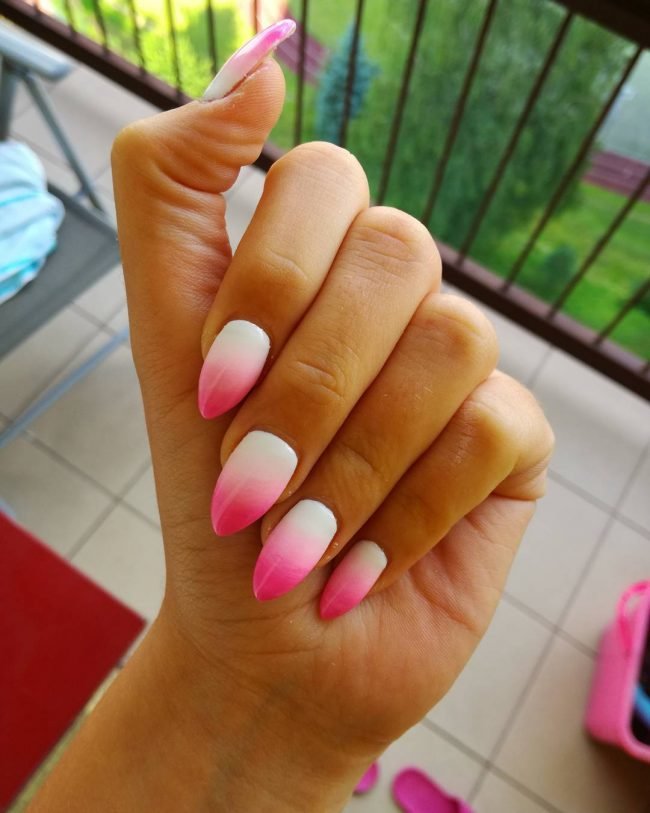
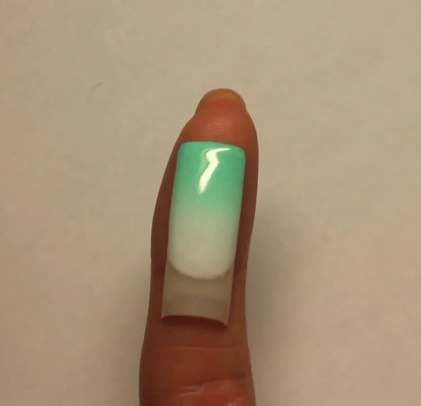
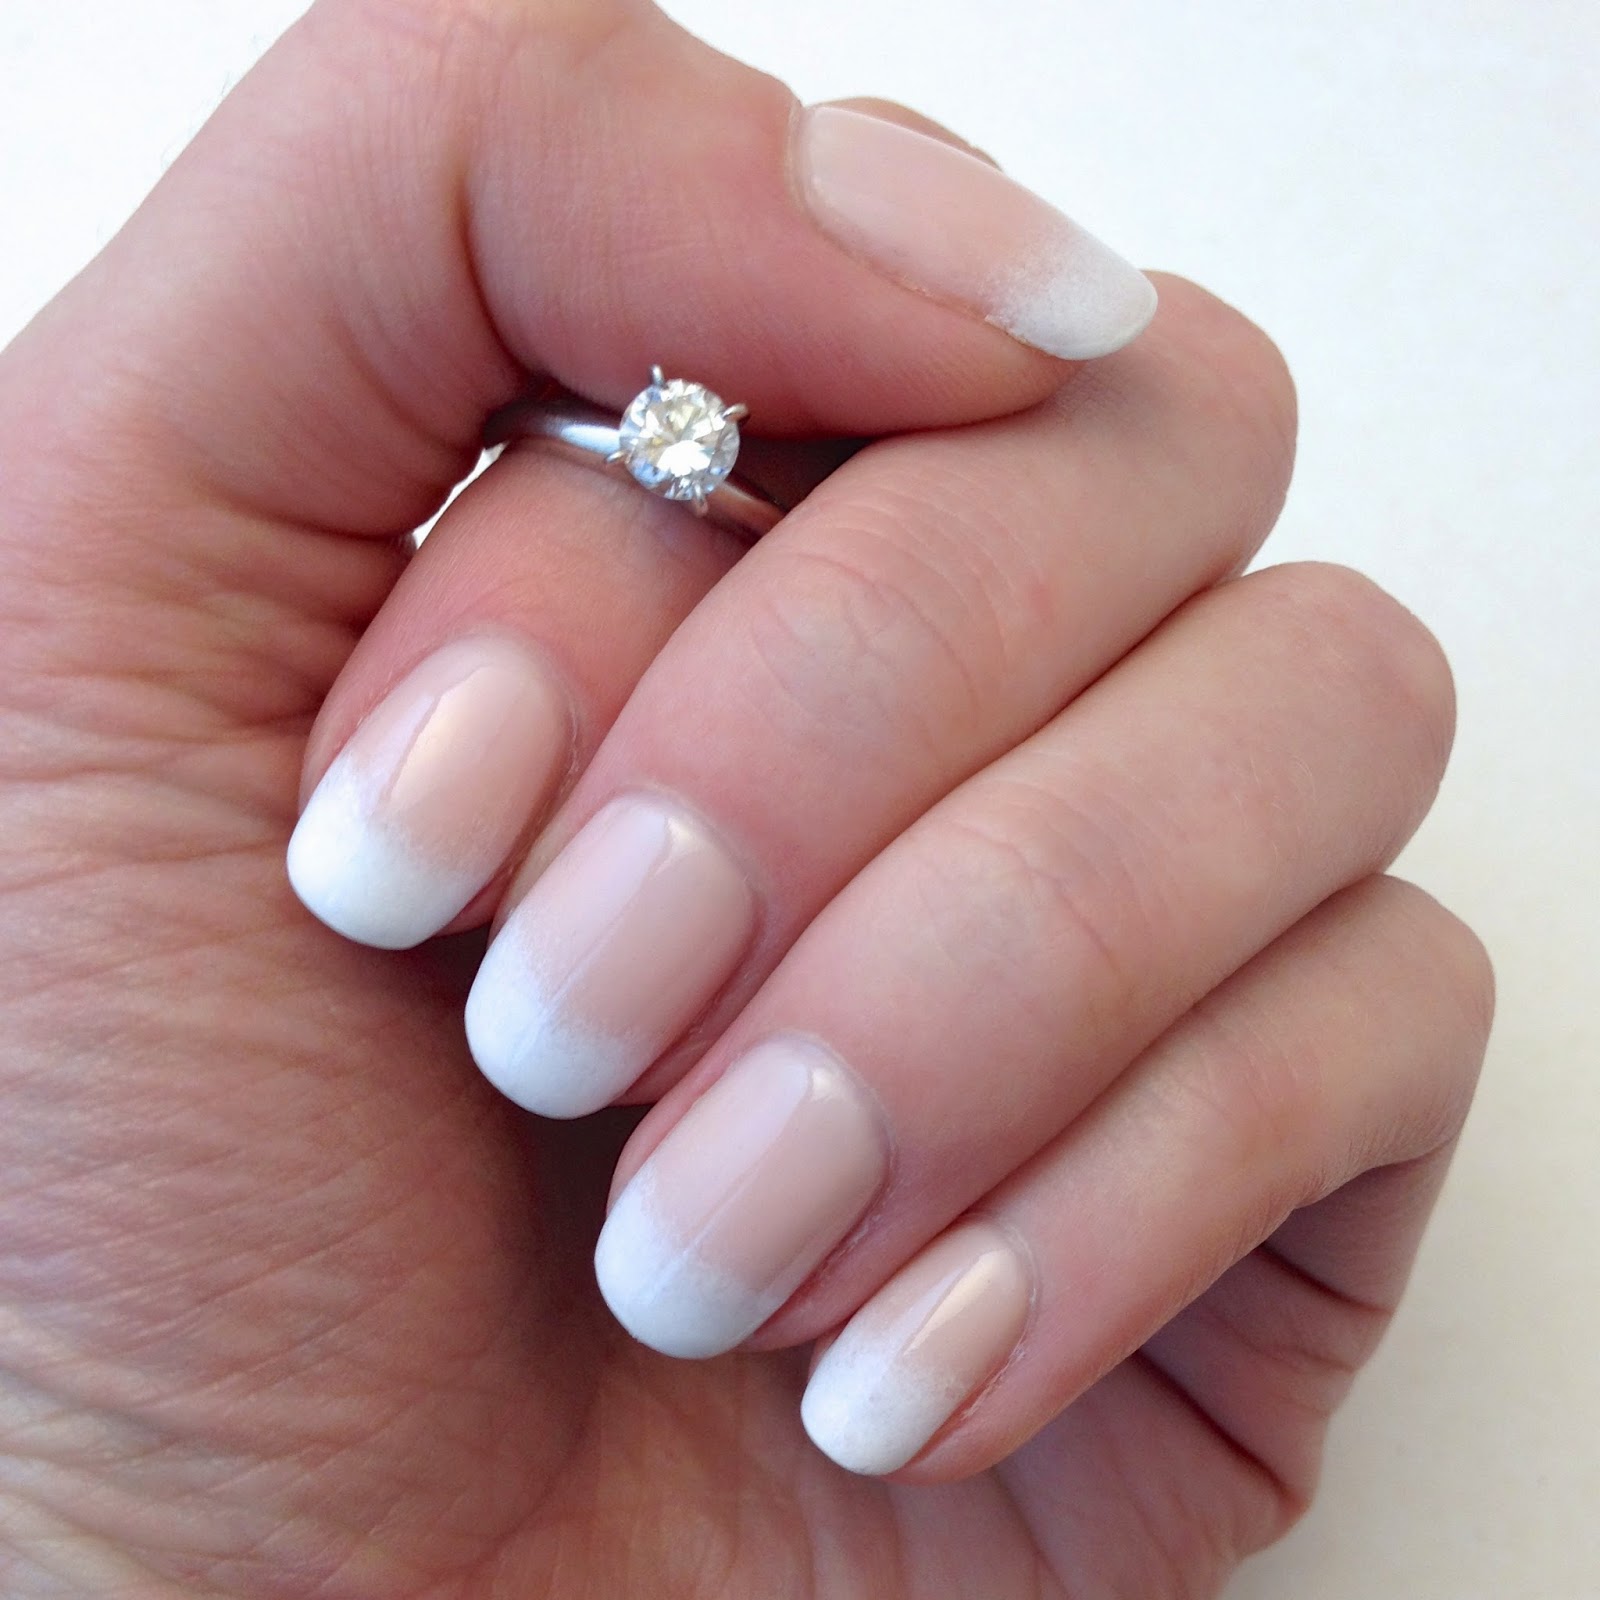
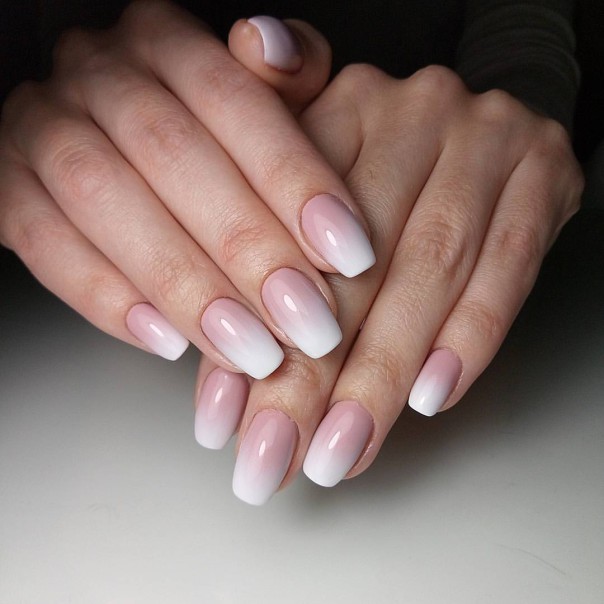
- In the technique of french - The basic principle here remains unchanged, however, beige or light pink colors are taken as the basic shades, which smoothly change to milky or white within one nail plate.
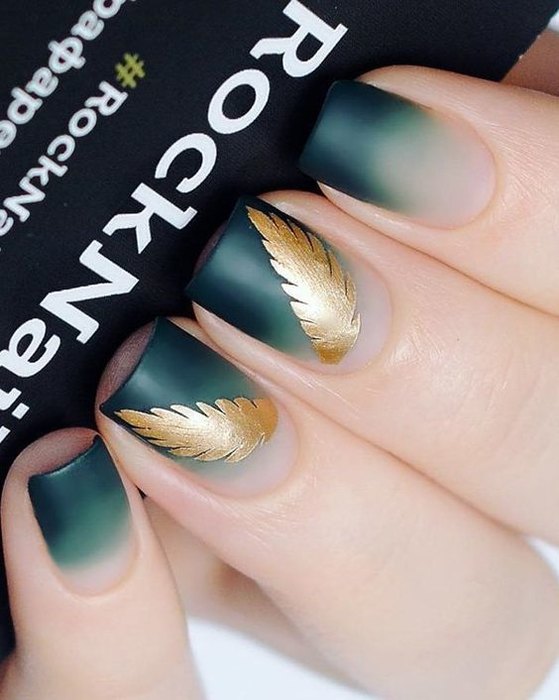
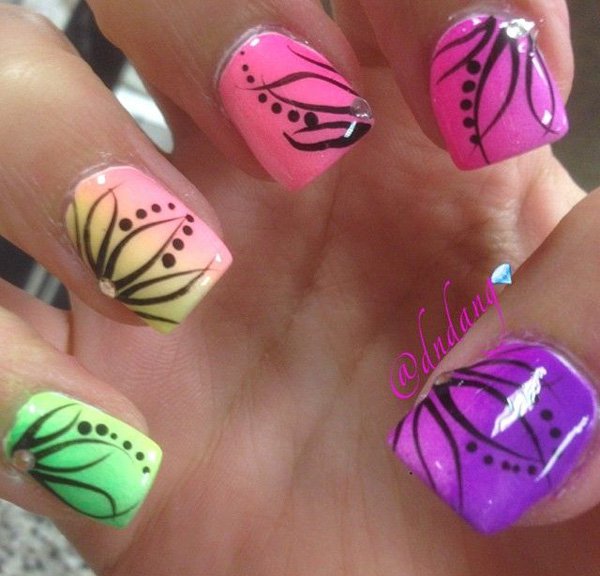
- Gradient with artistic painting - in this case, the coating is used as a field for drawing interesting pictures.
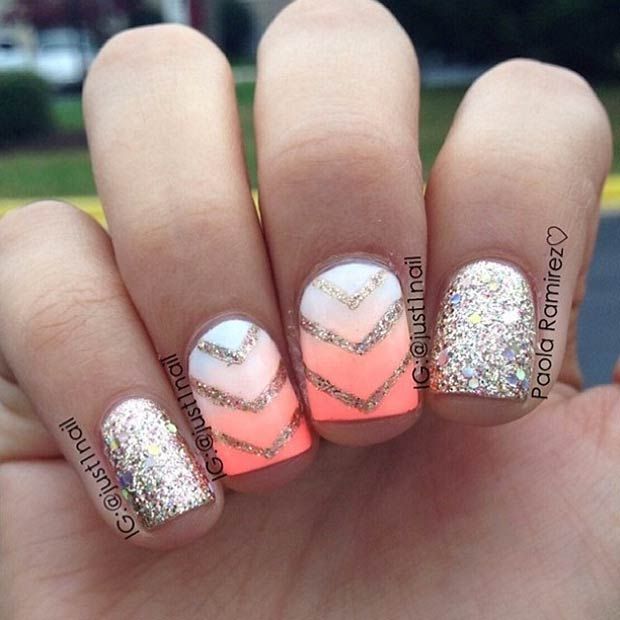
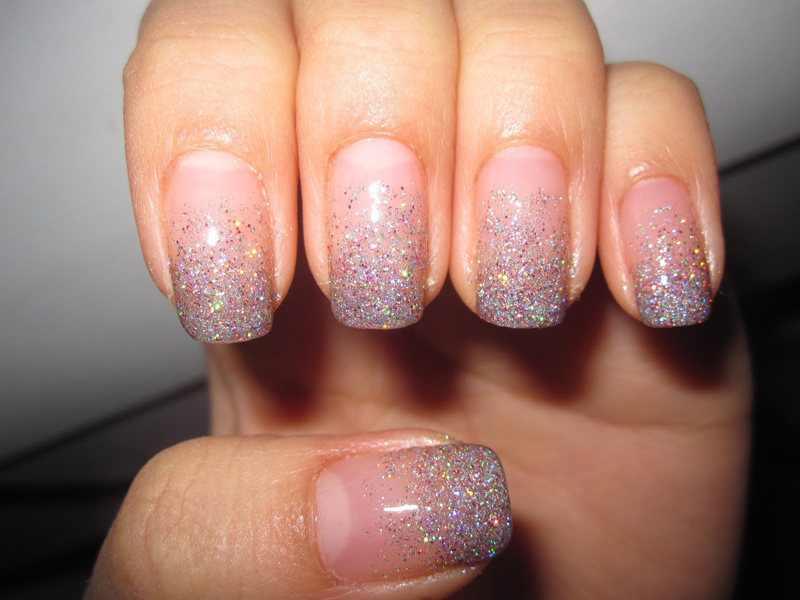
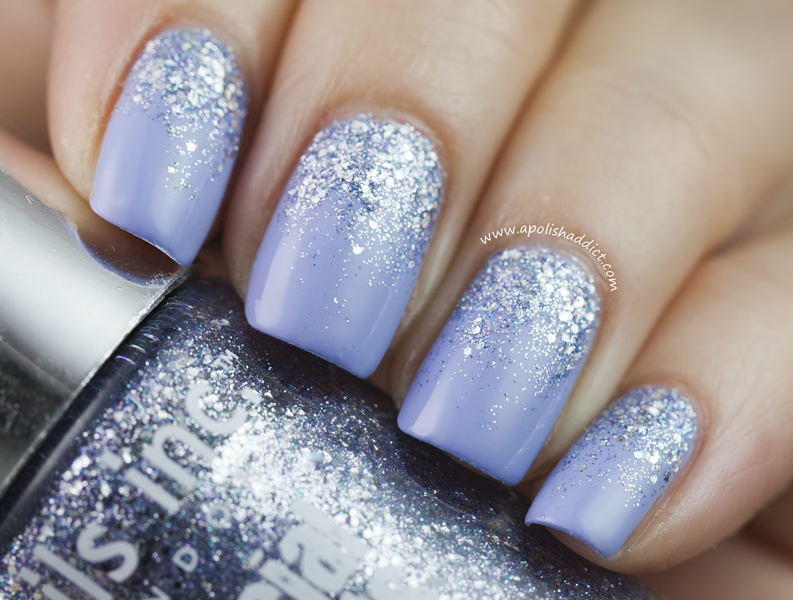
- Shining - here graduation looks a little different. Nails are covered with only one shade of lacquer, while the gradient is performed using glitter, the number of which is reduced from the edge of the nail to the cuticle or vice versa.
- Chaotic - in this case, the border of the transition points are located absolutely in any area, and the applied colors themselves often change direction. As an example, Skitles' Neil-Design, which received its name from the name of the well-known candy, can be cited - everyone knows how these sweets behave when they are in milk.
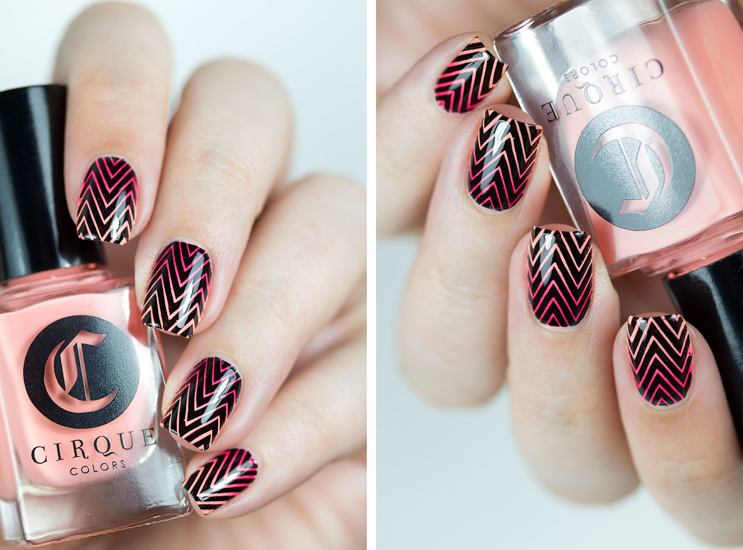
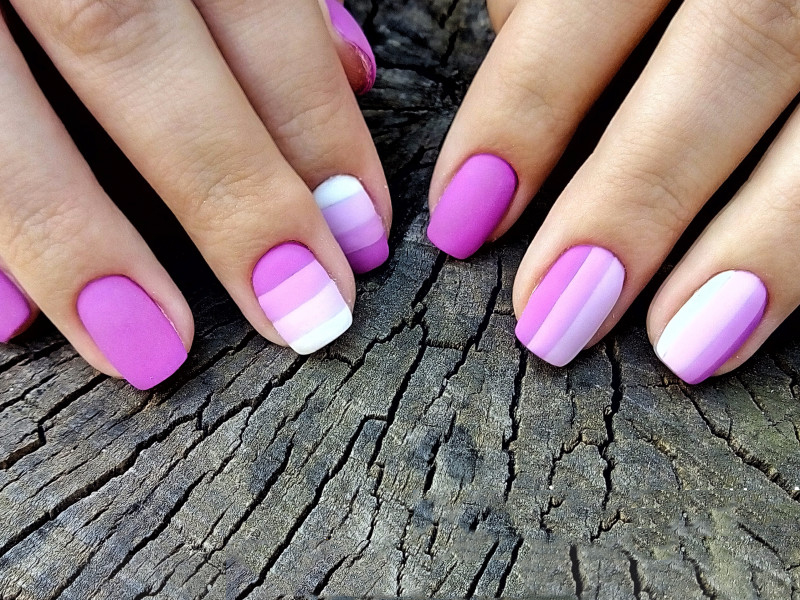
- Linear - this decor is represented by simple lines, painted vertically with thin tassels. With this decor there is no blur between the borders of the shades.
How to make a gradient manicure with a stamping, see the following video.


