How to draw a rose on the nails: design options and ways of drawing

The image of flowers can be found anywhere. They draw pictures from them, they decorate clothes and textiles. They find their place in the nail design. One of the most popular colors in both live and painted remains a rose. It seems that only an experienced master can draw such beauty. But it is not. Below we look at the ways that you can repeat at home.
How to use the stencil?
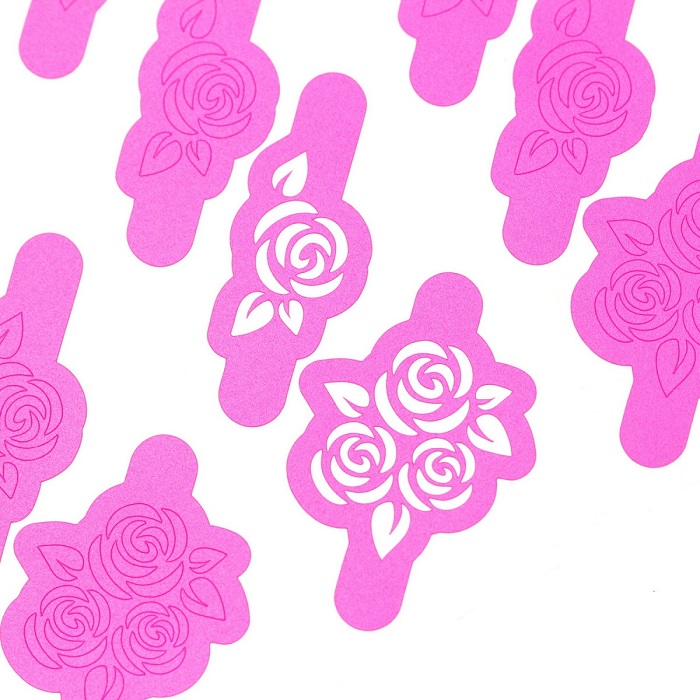
This is the easiest and most affordable way to get a beautiful and neat pattern on your own nails. I must say that in the world of nail design, the word stencil has acquired a slightly different meaning. Today they are called ordinary stickers.
But no one bothers you to use traditional stencils. For example, you can cut it out of a thin film, but then the blots in the drawing are not excluded. Better, perhaps, to visit a specialized store and buy stickers - stencils. They look very natural and beautiful. You can choose the desired size, color, and style of the picture. Another advantage is the low cost of such products. How to use them?
There are two types of labels - transferable and regular. The application steps will be almost identical.
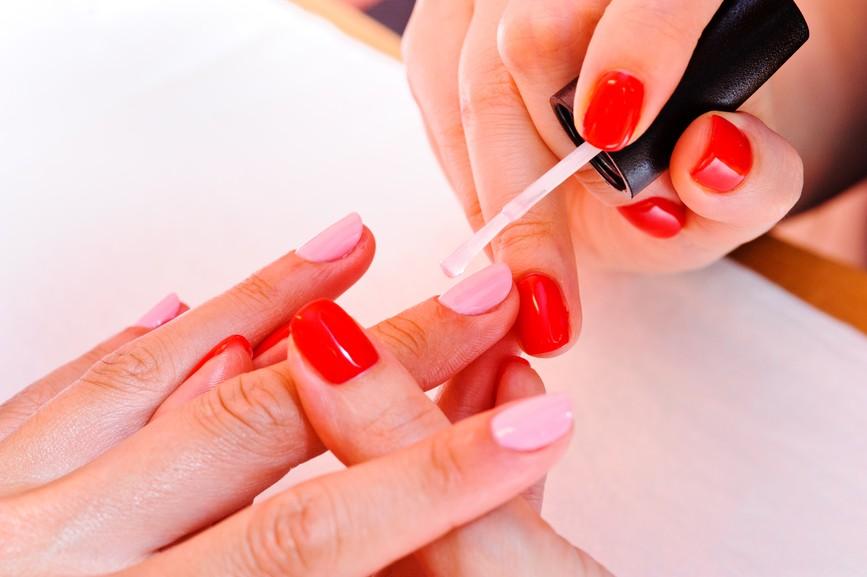
- We make a manicure, align the nail plate and give it the desired shape.
- We cover the marigold base coating. It performs several functions at once: it hides minor defects, protects the nail from the aggressive coloring pigments of varnish, creates an excellent basis for applying colored varnish.
- Cover with two layers of colored lacquer. If the varnish has a high coating capacity, then maybe one coat will suffice.
- If the sticker is transferable, then we pre-soak it in water. At this stage, it must be disconnected from the base and transferred to the nail. It has a minimum thickness, so the transition will be completely invisible. With ordinary stickers is still easier. We cut off the necessary element, with tweezers we detach it from the glue base and apply it on the nail. Both in the first and in the second case it is important to immediately correct the location. Make it comfortable with a wand or tweezers. Make sure that there are no air bubbles under the sticker.
- Cover the picture with a top coat. So the drawing will be protected and will last for a long time on the nails.

How to apply acrylic drawing?
Another way to paint a rose on nails is to use acrylic. Working with this material requires certain skills, so for beginners it will be difficult to do it the first time. Best of all, of course, entrust this design to professionals. But if you are determined to learn how to do it yourself and you have all the necessary tools, then practice for a start on the templates.
Any stylish manicure is not only a beautiful design, but also a good preparation of nails. Make a trimmed or hardware manicure, file nails to the desired length and shape, degrease the surface. Only after all this, apply a transparent base. Next comes the background. The color here can be absolutely anyone, as long as it blends well with your image as a whole.

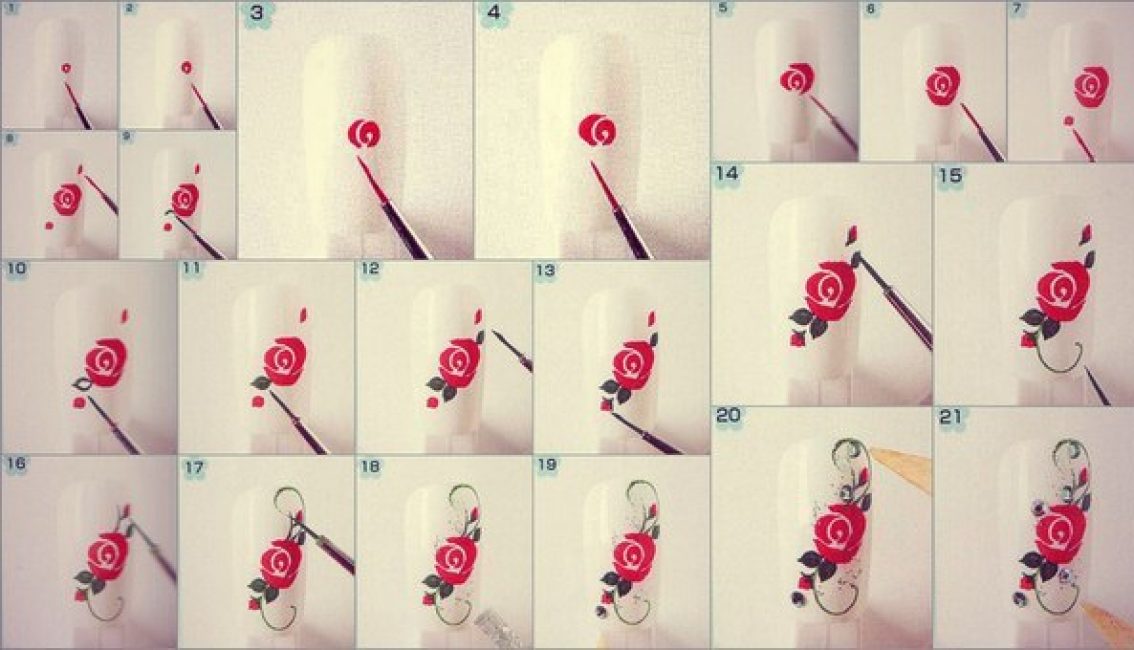
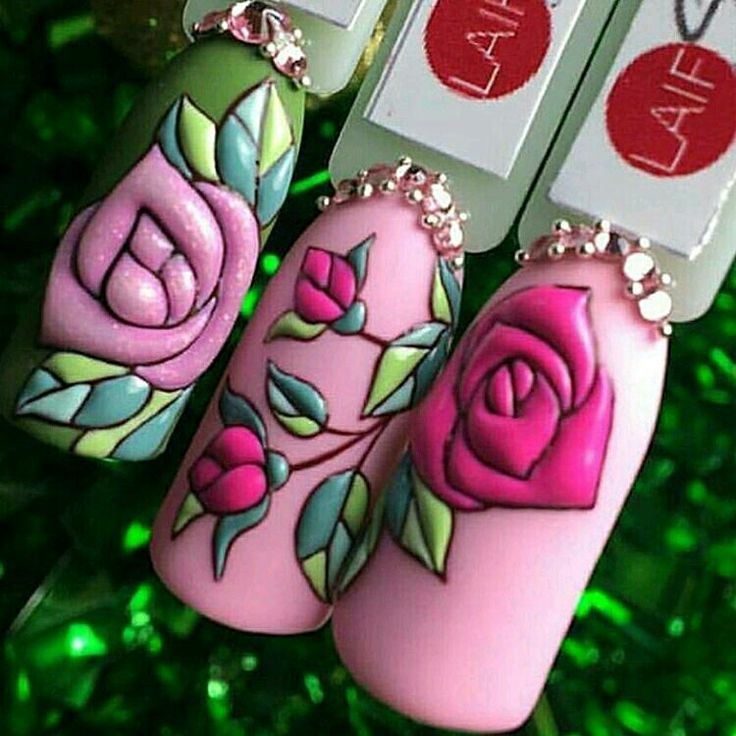
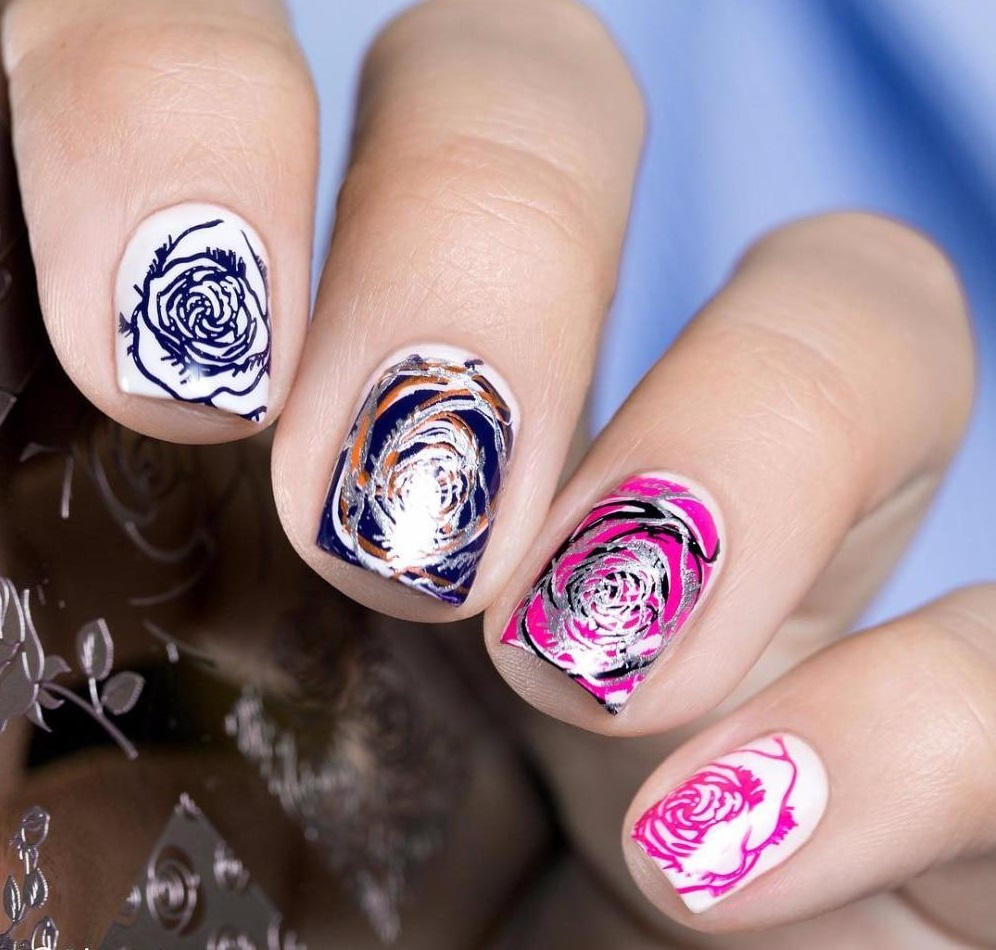
After the base is dry or you dry it in the lamp, it is time to apply the pattern. To do this, arm yourself with a thin brush. Rose can be made in several colors at the same time. This will give the drawing volume and depth. After all, in wildlife, the flower has several shades. They just go so smoothly into one another that the color seems to be one.
Type acrylic on the brush and place a small comma in the place where the bed flower will be located. Further similar commas repeat around the central element. With each round they should be more and more.
After the flower dries, cover it with a topcoat. You can not worry about such a drawing, since acrylic is firmly adhered to the nails. The main advantage of this method is the volume of the image. However, he will not give you any discomfort.
How to draw a flower gel polish?
Here are two main ways. The first one is called dry, the second one is drawing over wet. Both methods can be repeated at home. The most interesting and beautiful pictures are obtained with the second method, as smooth transitions and divorces are created.
Consider step by step drawing the first way. The initial stages are no different from those that are done with any kind of manicure. This nail processing, creating a form, degreasing and applying the base. Next comes the color base or background.
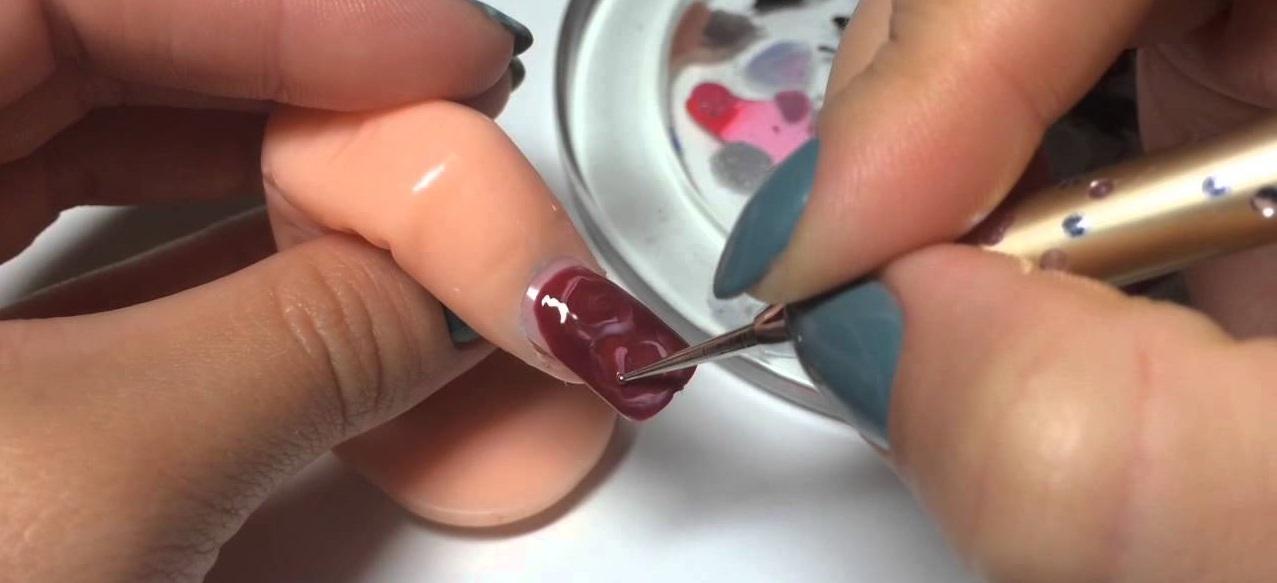
For a neat drawing of roses, you will need a special tool - dots. This is such a metal stick, the end of which is thin, but not sharp. Dip it in gel polish and make a comma already familiar to us. Then we move from the center to the edges, drawing each petal in the form of commas or arcs of a similar shape, but large in size. Dry and fix the finish.


In the wet drawing option, only one step and the way the drawing is applied will change. After you dry the first layer of color gel polish, apply a second, but not dry. The picture will be drawn right now. To do this, you can use various improvised or professional tools. Special thin brushes, toothpicks, needles and even cotton swabs will do.
To make a drawing beautifully, some practice is needed. Professionals sharpen their skills from day to day, but you should first try to create a drawing on a regular sheet of paper or special templates (nails). The advantage of this method is the fact that the gel polish does not dry on the nails and you can perform a drawing without much haste. In the case of ordinary varnish such slowness can ruin everything.

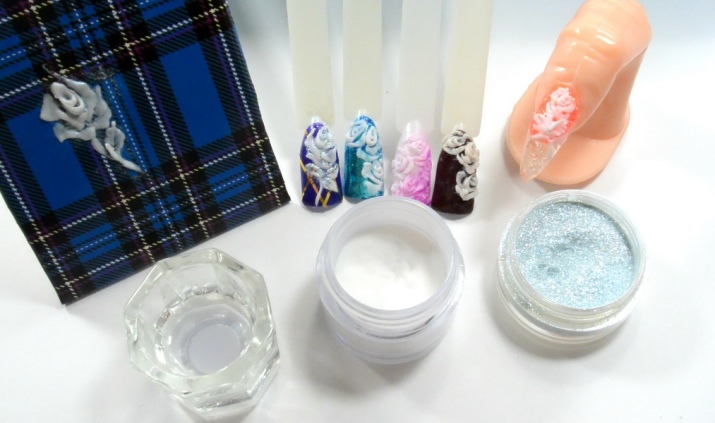
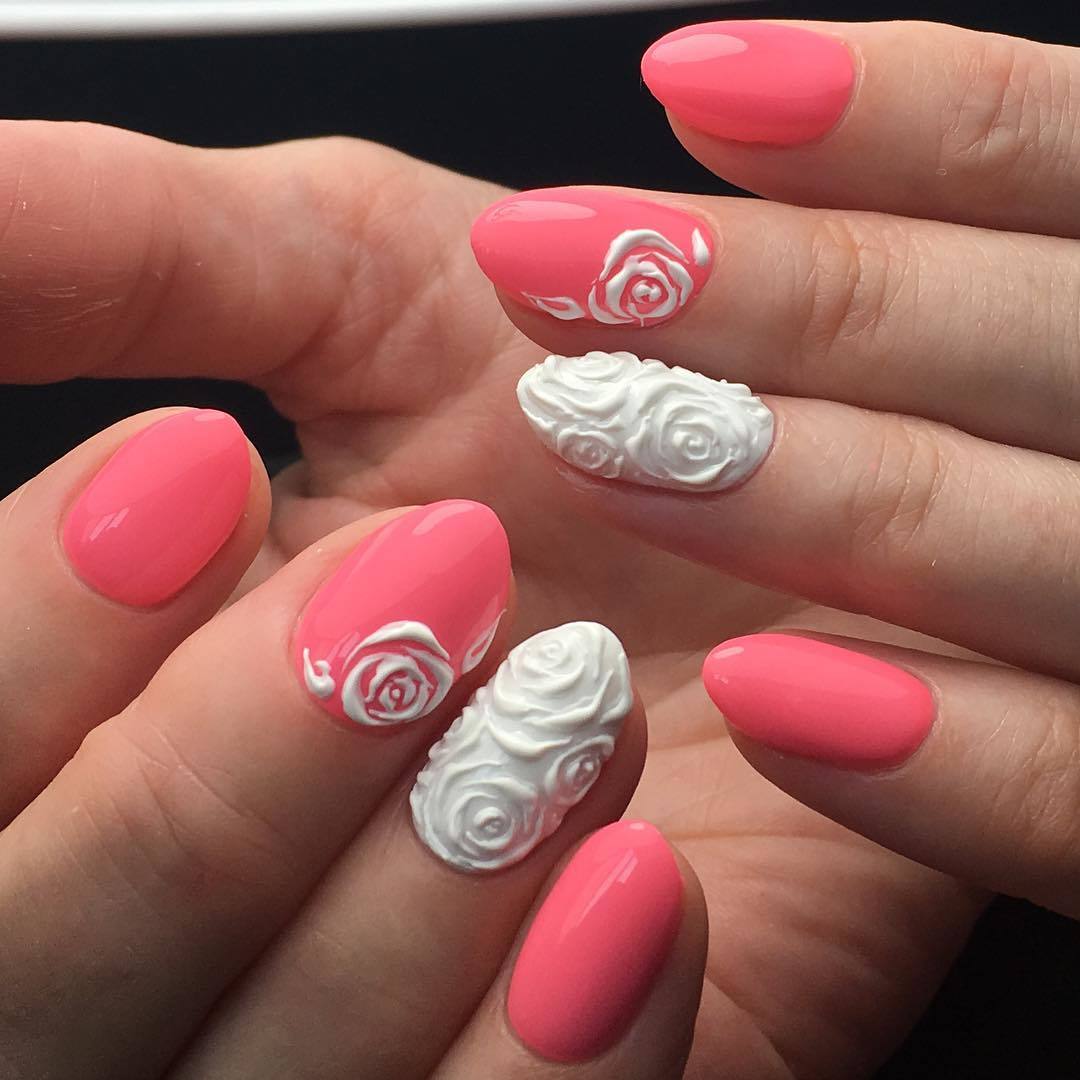
How to make a three-dimensional image?
Such a design requires a high level of professionalism from the artist. Acrylic powder or gel is used to create volumetric parts. The master can make a blank on the foil in advance, and then just stick it on the nail or immediately start to sculpt on the nail plate. For beginners, of course, the first method is preferred. Even if the figure does not work, you can just throw it away. Manicure is not affected. Assuming a number of errors on the nail will have to start all over again.
If you are unsure of your own abilities, and you know that you cannot make an aesthetic rosette, you can buy the finished blank in a specialized store and just stick it on the nail.

Some inaccuracies in modeling can be corrected with a thin nozzle and apparatus. That is, the excess material can be carefully cut down or make the necessary grooves and bends. Quite hard work, but if you want you can learn to perform it at a fairly high level.
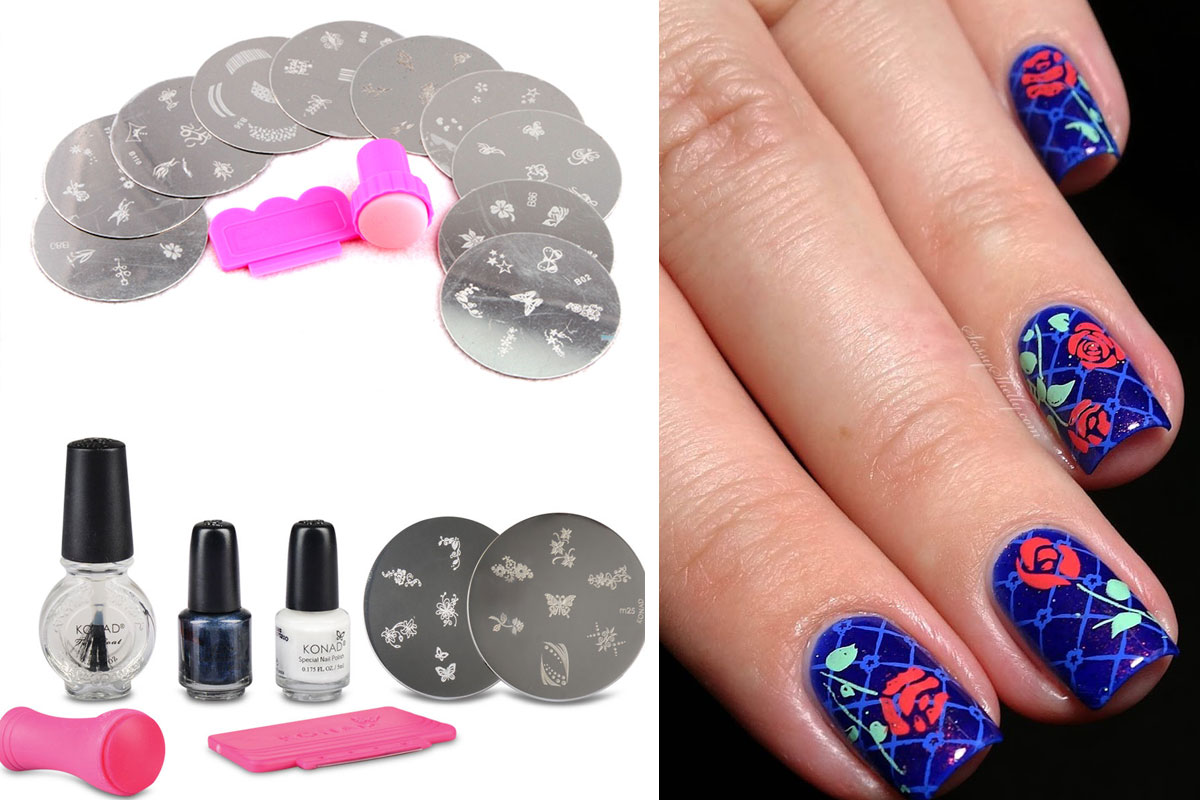
Stamping as a method of application
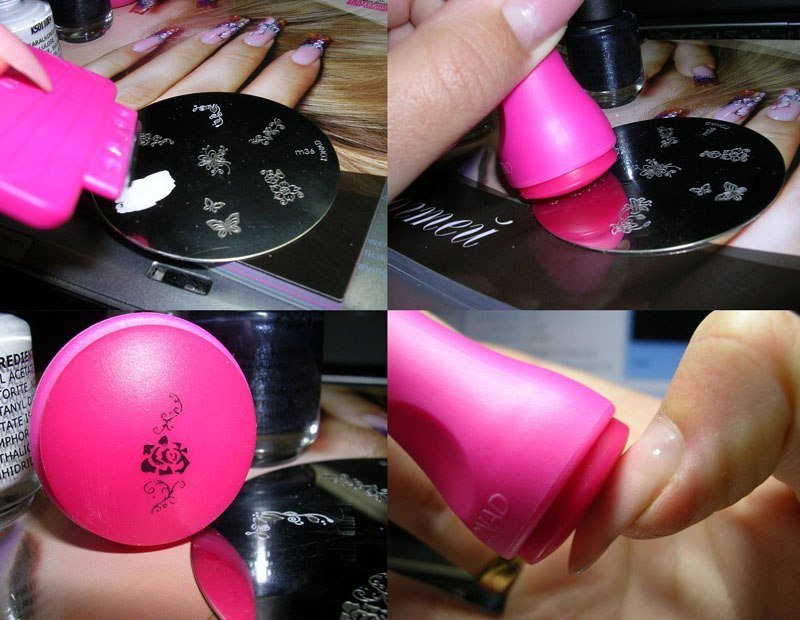
To quickly create the necessary design on the nails was invented and another way, called stamping. It is based on the principle of conventional stamps. Only if, in the seals familiar to us, the three-dimensional image has already been applied to the apparatus itself, then here the principle is somewhat different. We will analyze the application technique in stages.
Special stencils for stemping have recesses in the form of the desired pattern. First, the stencil itself is painted with varnish, after which the excess from the plane is removed with a scraper. Varnish remains only in the grooves (figure). Special soft stamp rolled over the stencil, incorporating varnish.Now we see a drawing, but only already printed on a stamp. We then roll it on one and the other side. It is easy to guess that the picture is printed on the nail plate.
This method, although it seems intricate, is in fact very convenient. The only disadvantage is the high cost of even the simplest set for stemping.
You can visually familiarize yourself with the technology of stepping by watching the video below.
Color variations
There are no special restrictions and rules when choosing the background color or the color itself. The main thing is to follow the sense of proportion. After all, excessive flashiness and an abundance of drawings, rhinestone and volume can border on bad taste. It is better to give preference to discreet but elegant solutions.
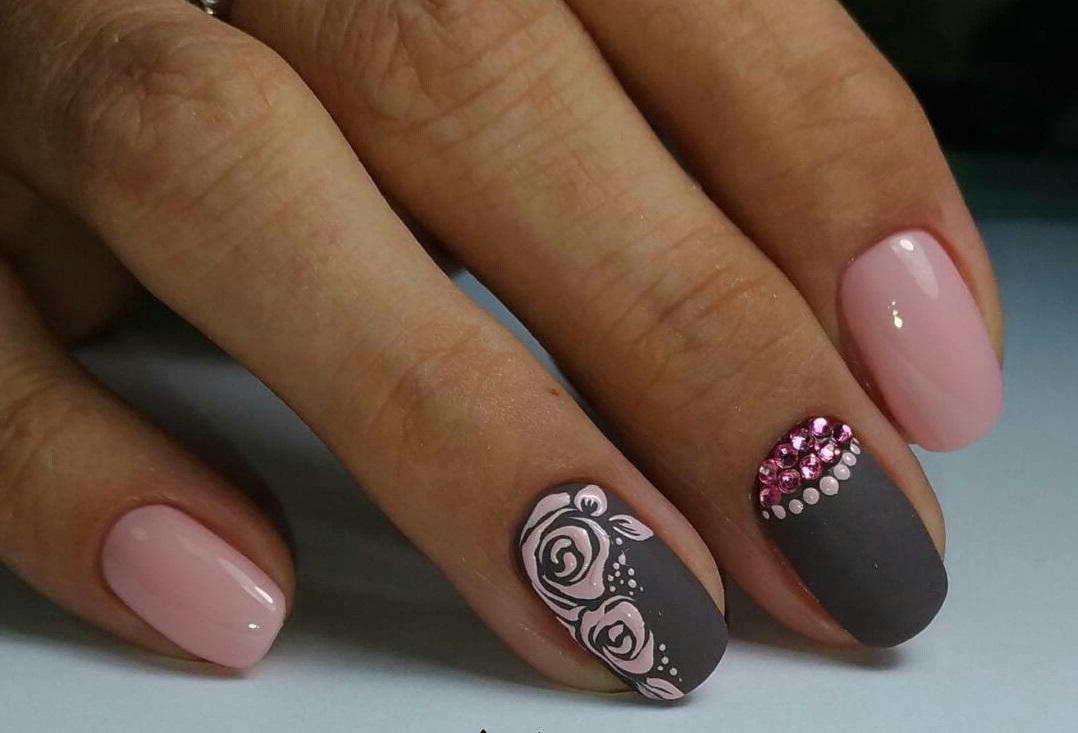
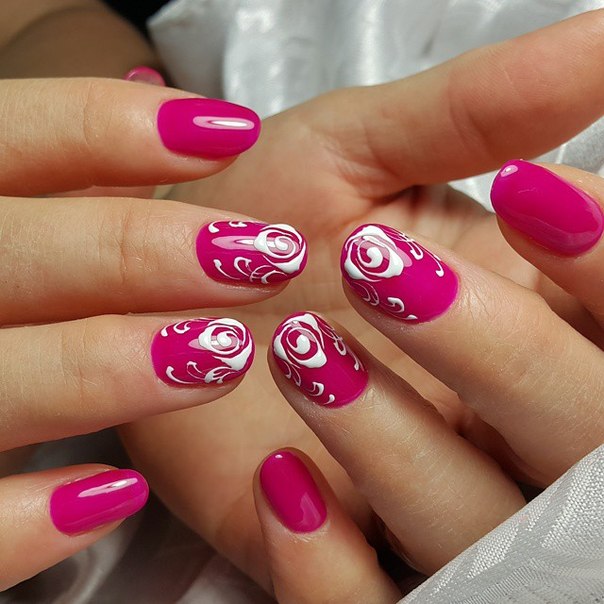
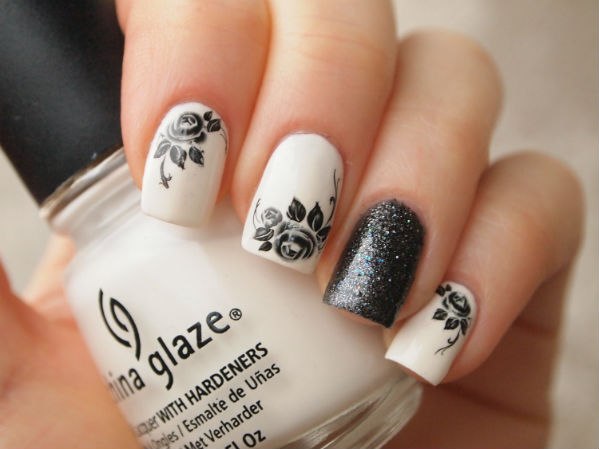
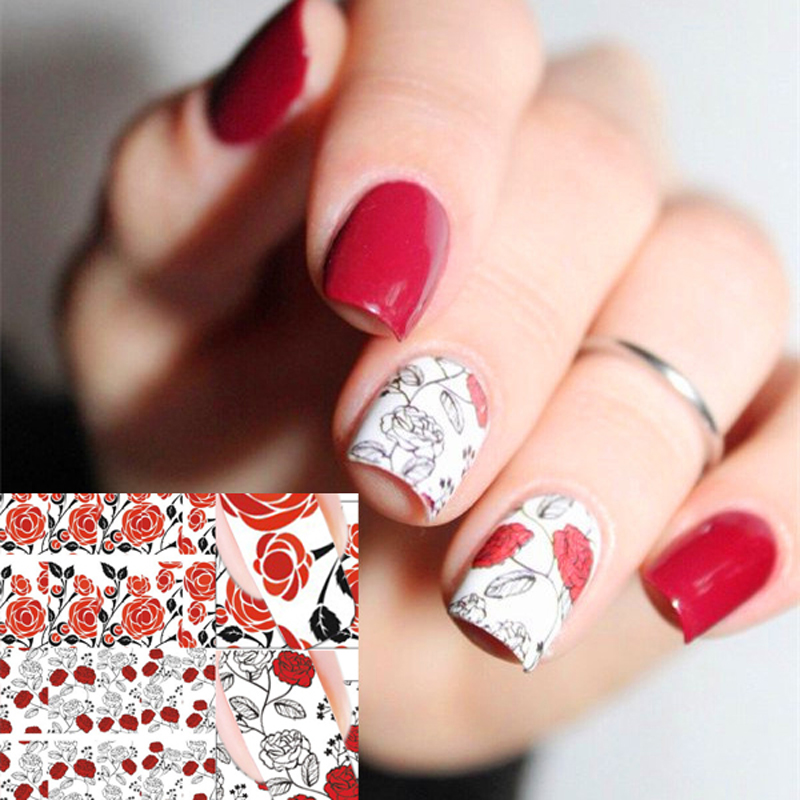
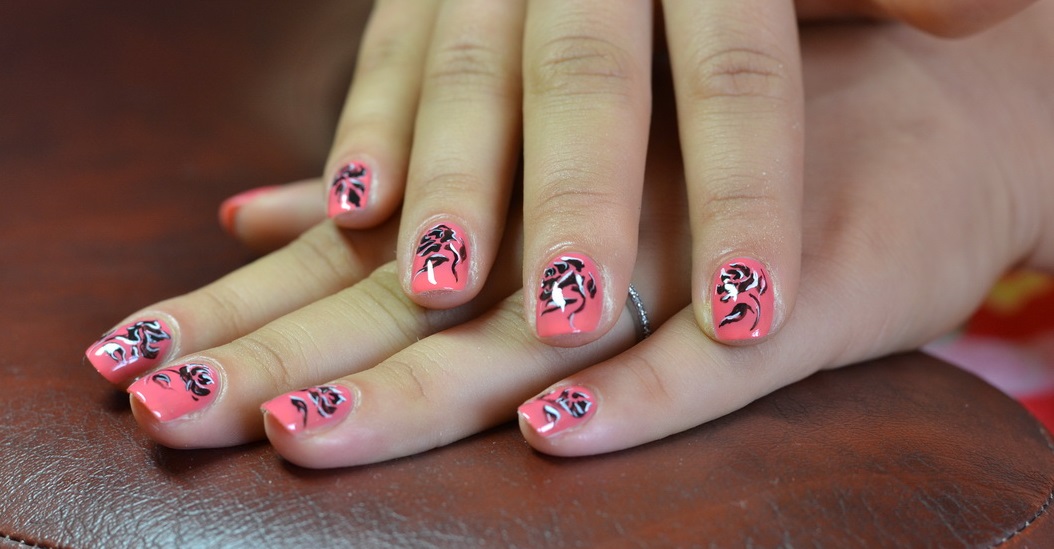
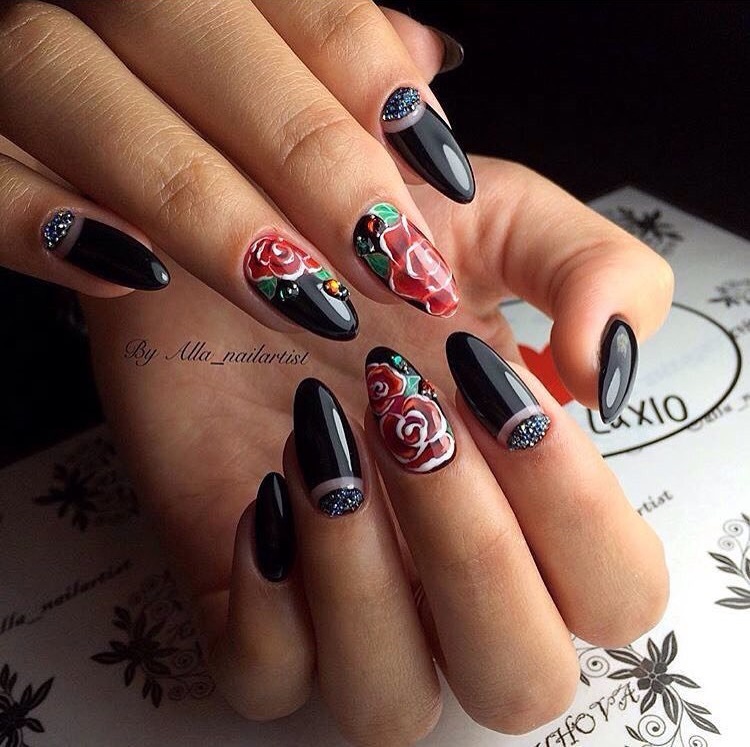
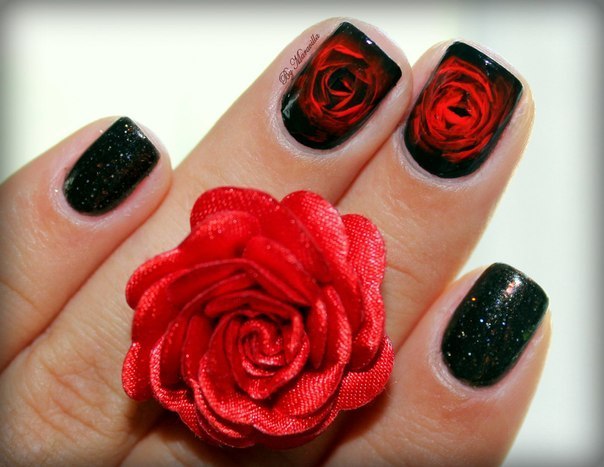
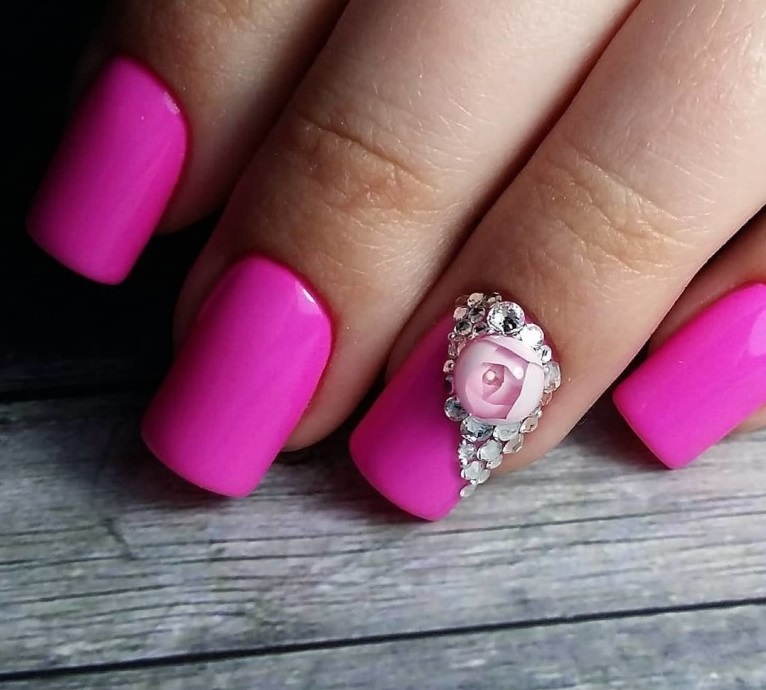
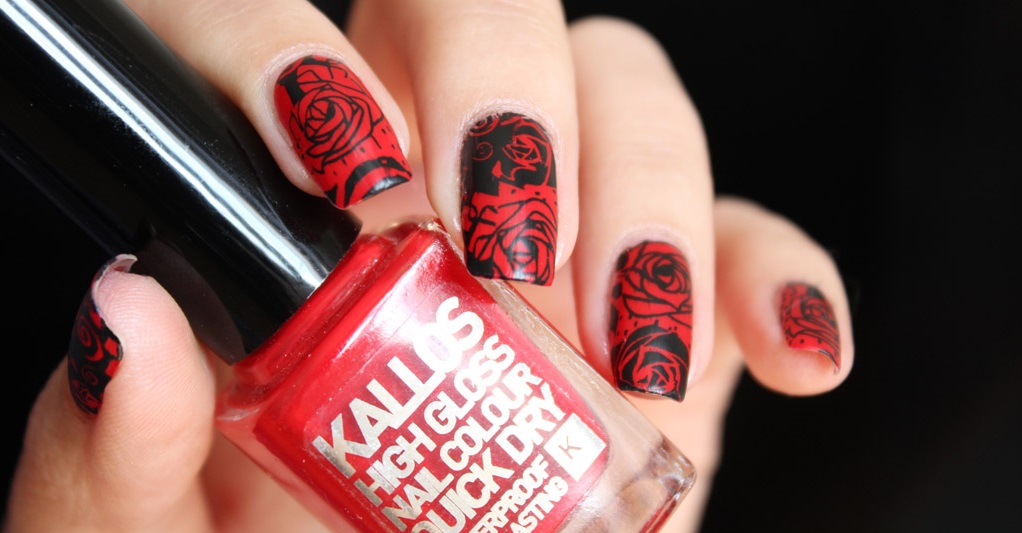
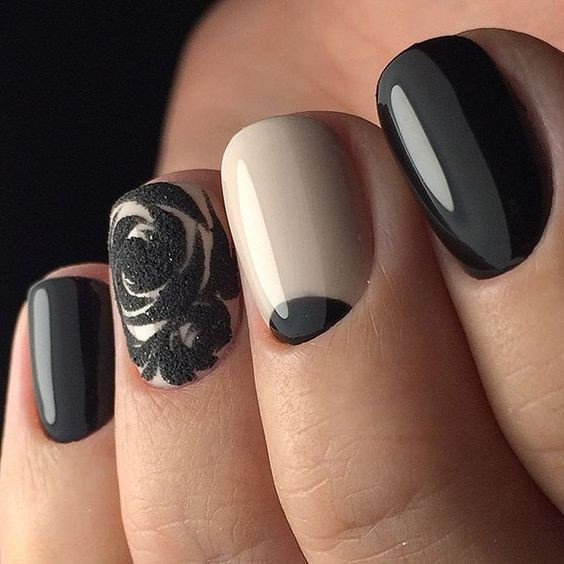
For example, a single black rose can give you a mysterious and interesting personality. A pink color will tell everyone about your romantic character stock. If you can not decide on the color scheme, then look at your own wardrobe. Having executed manicure in the same palette, you will provide unity of an image and style.
Beautiful design examples
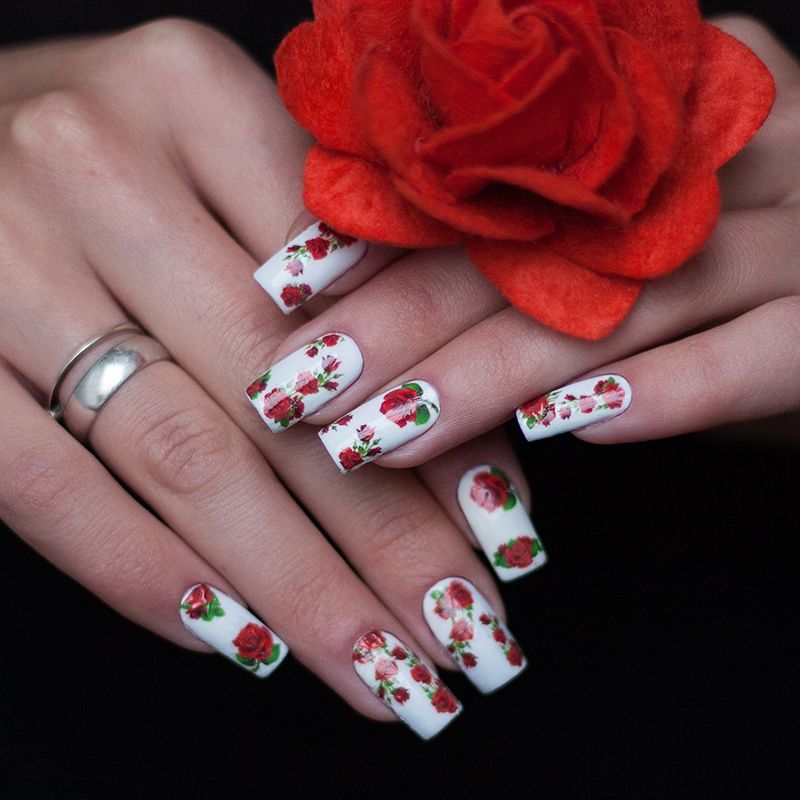
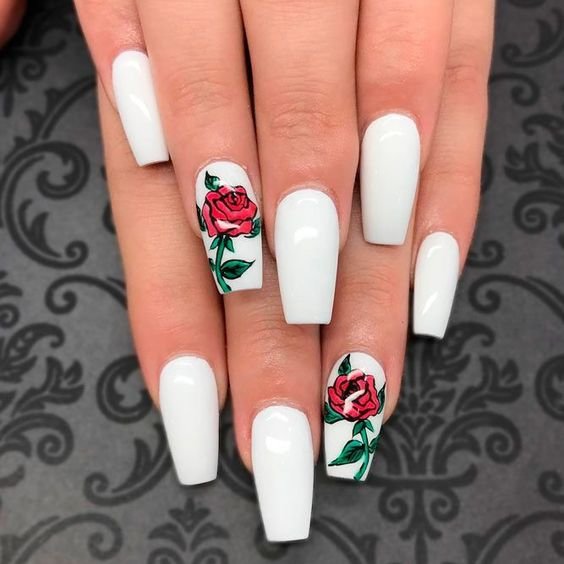
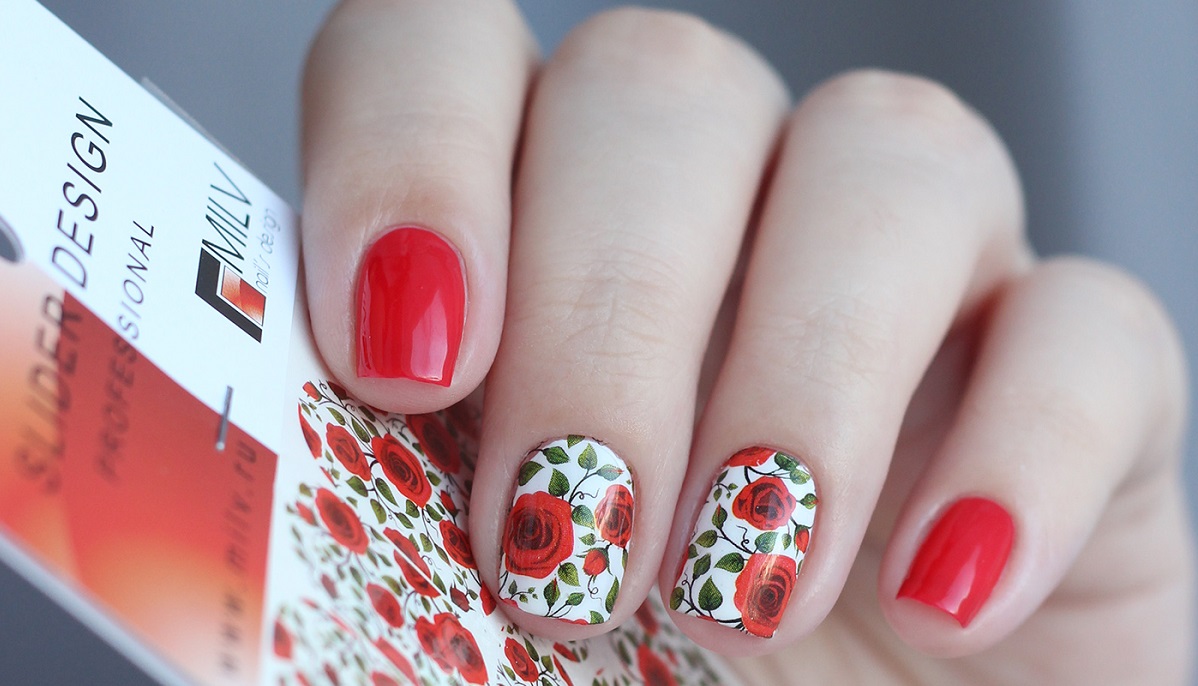
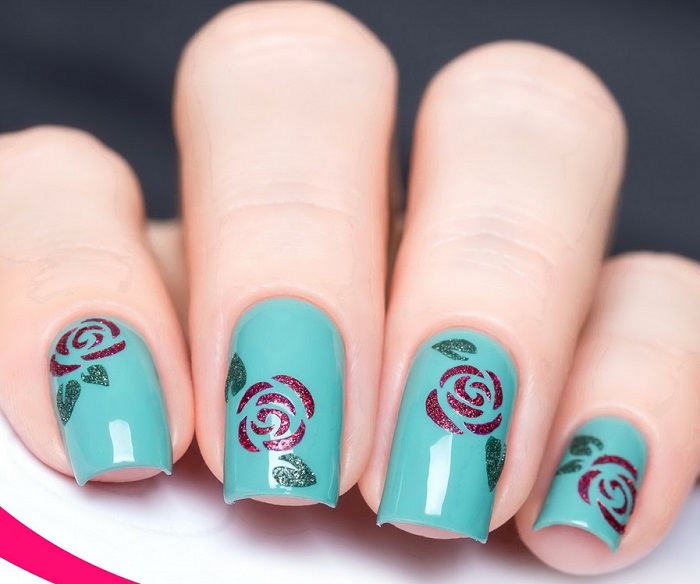
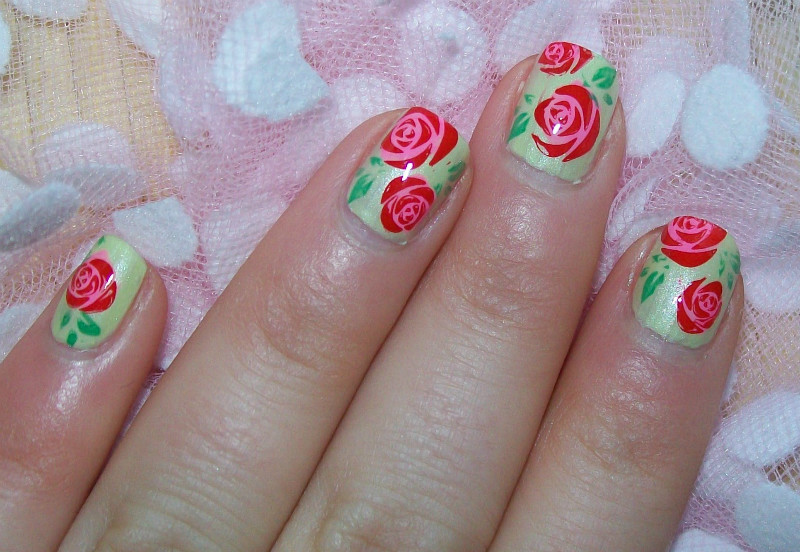
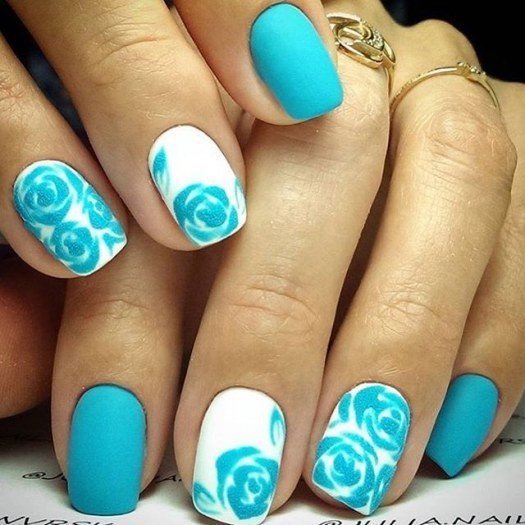
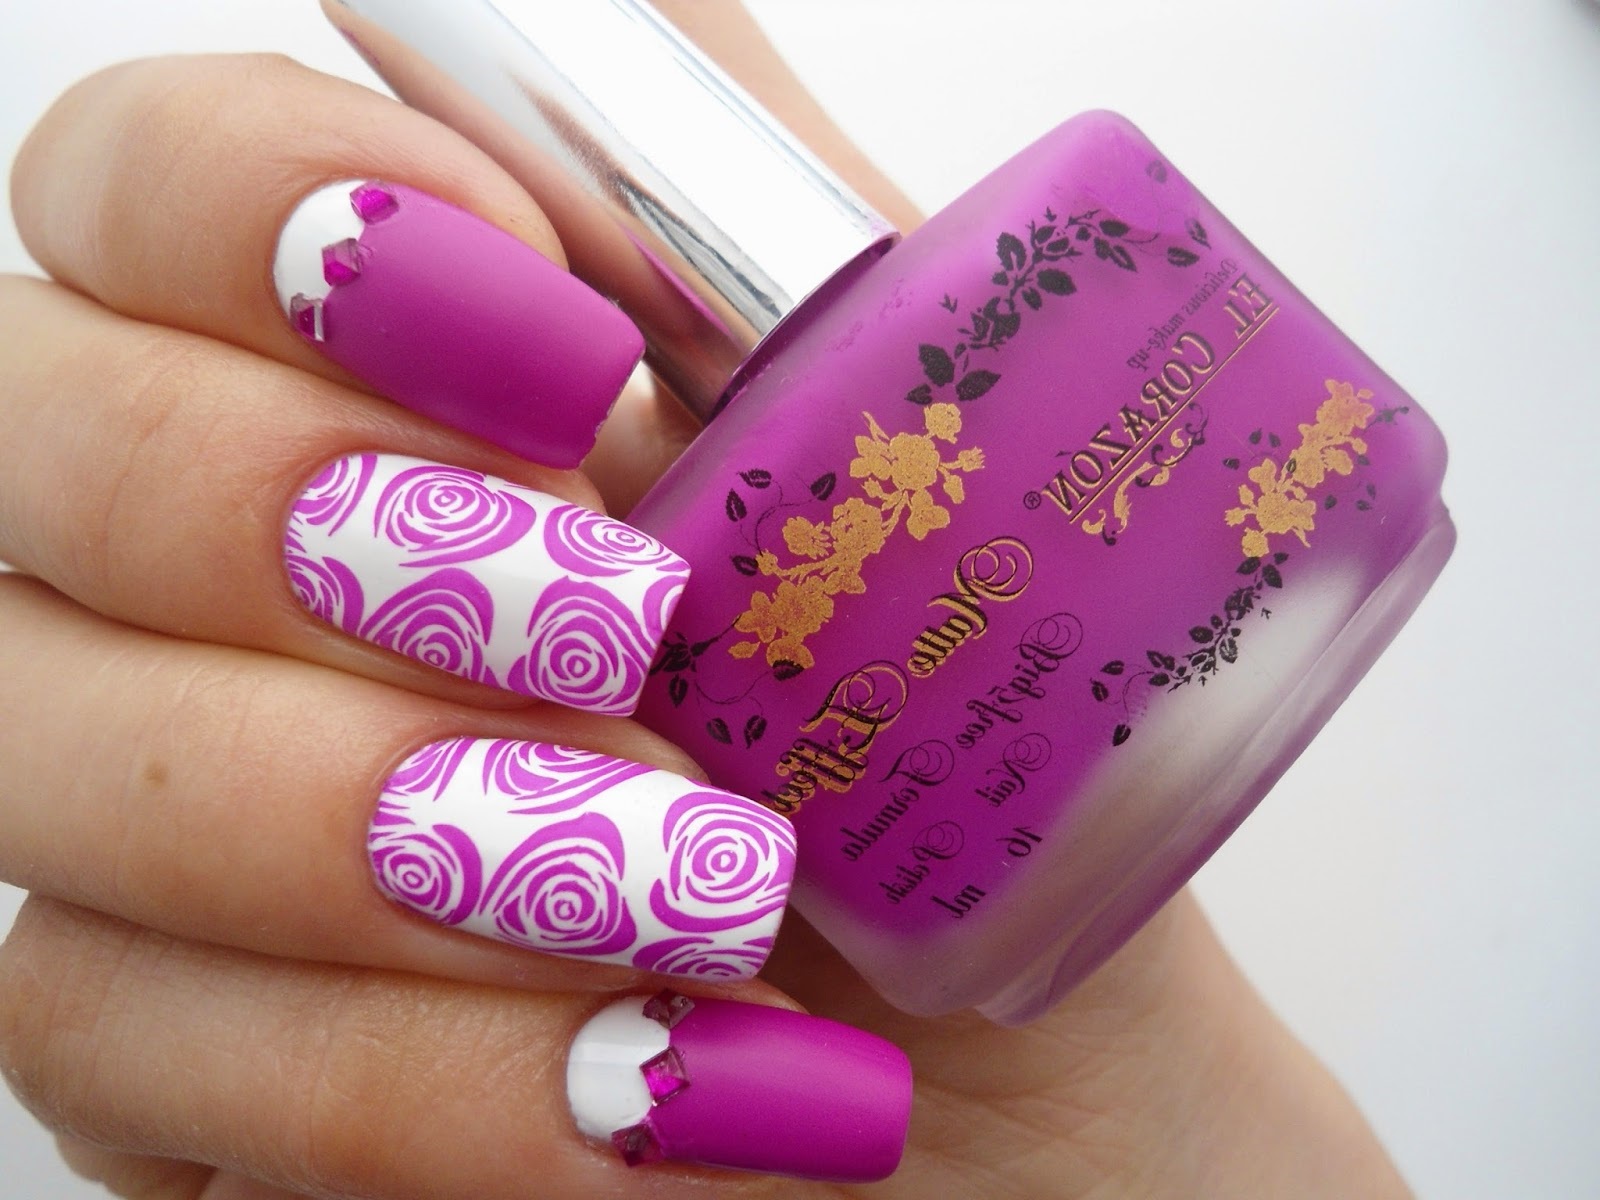
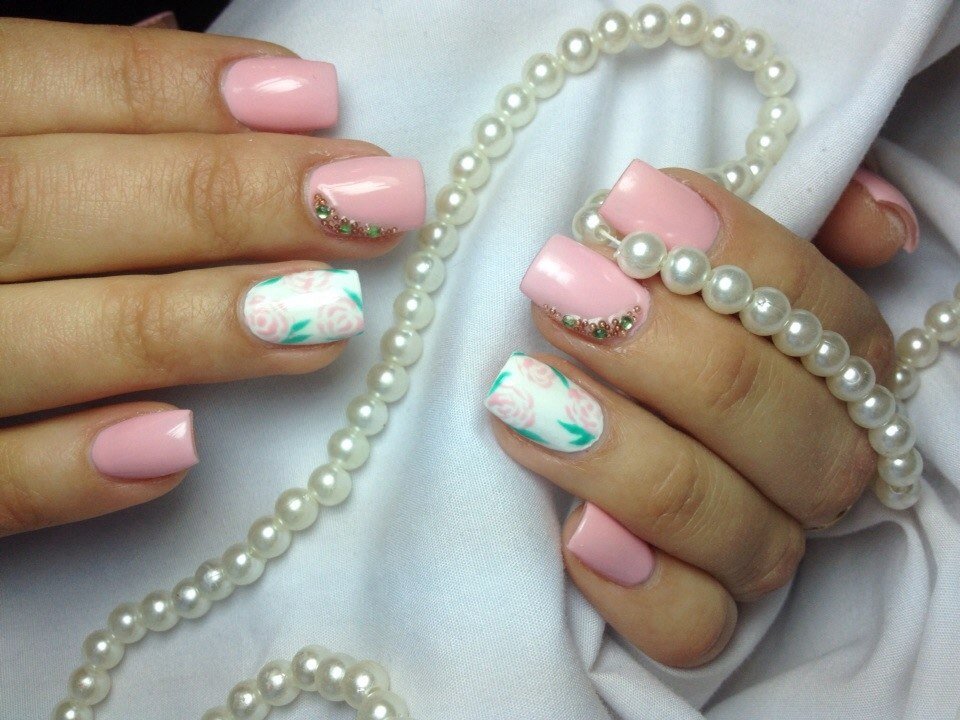
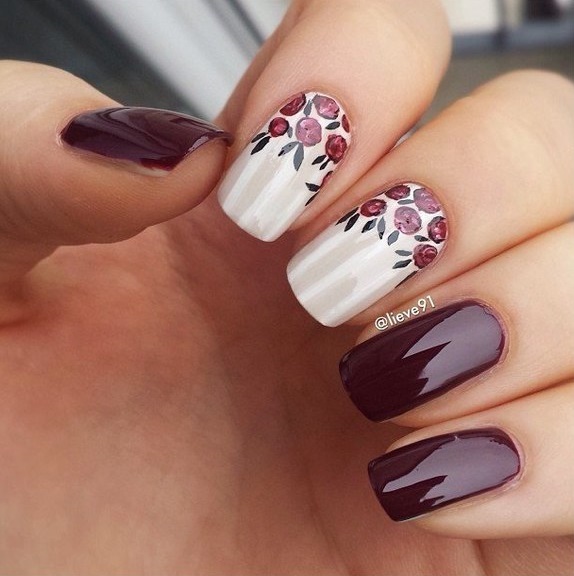
Beautiful stickers on the nails convey the beauty of a living flower. At the same time, they look very harmonious and feminine.
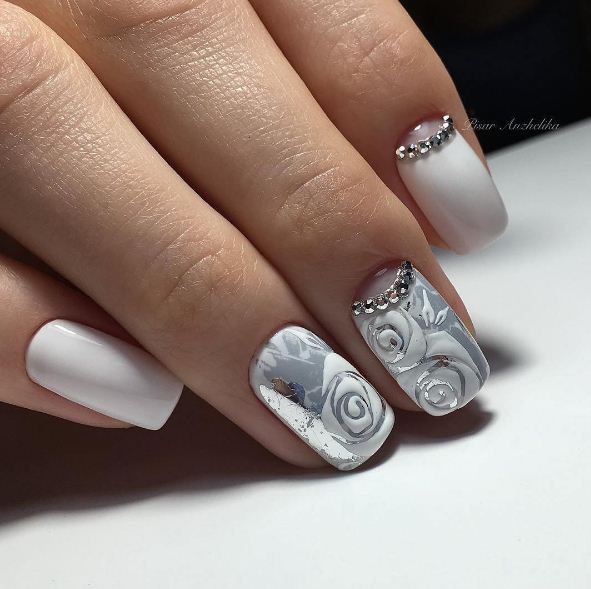
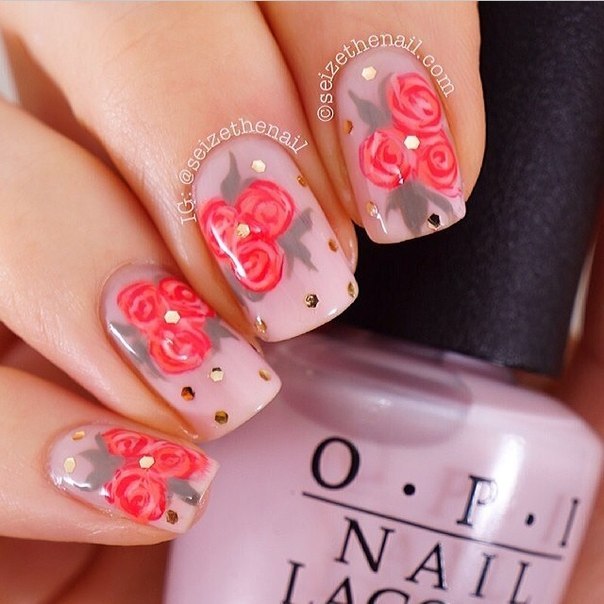
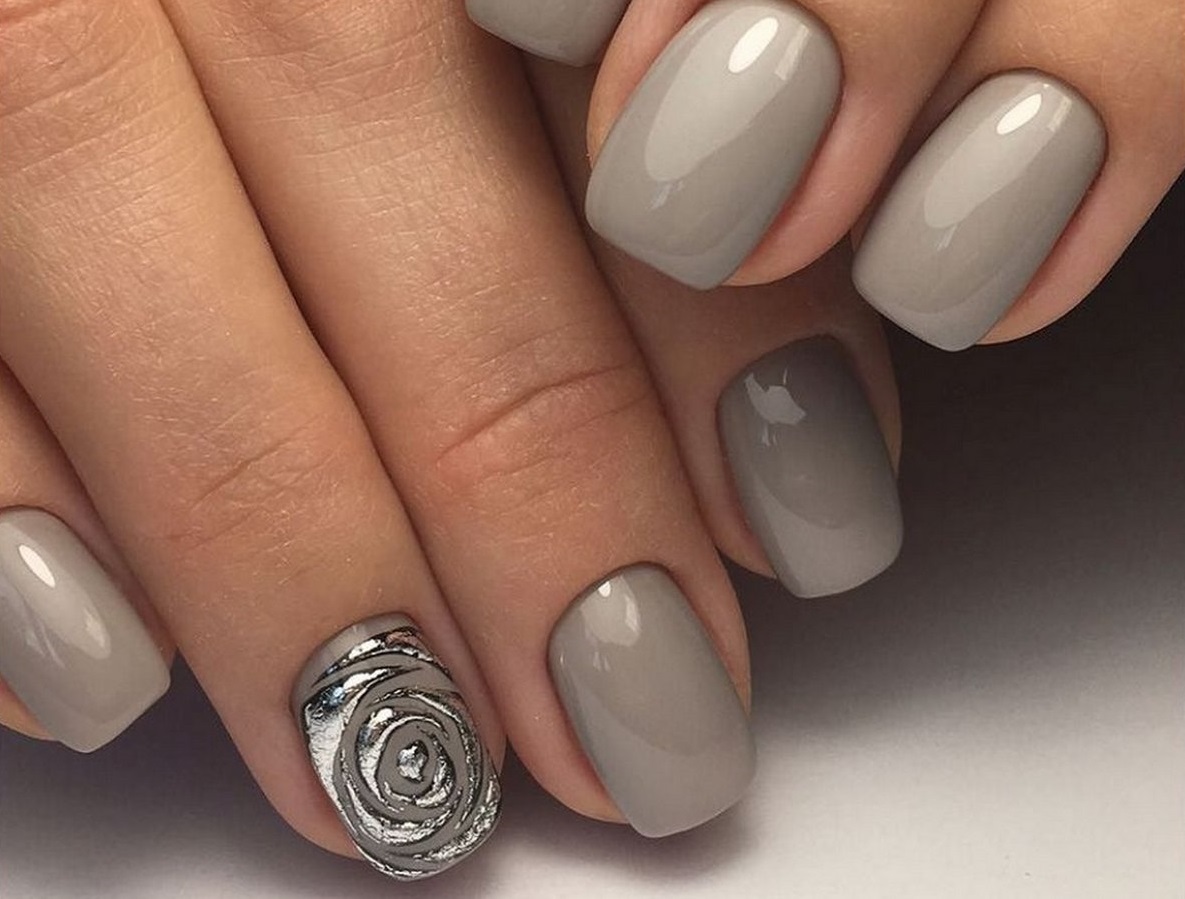
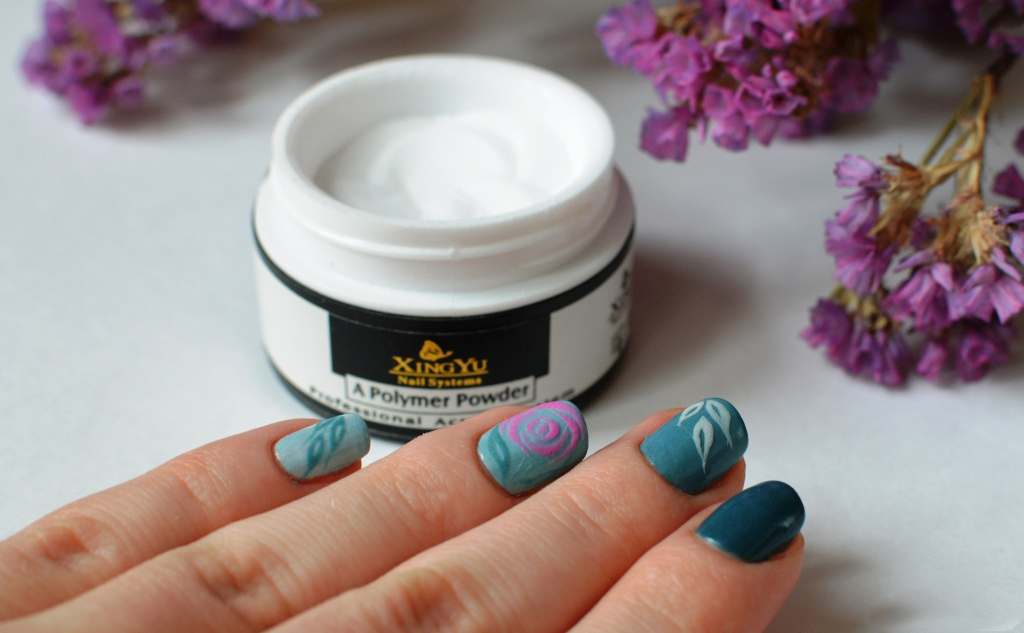
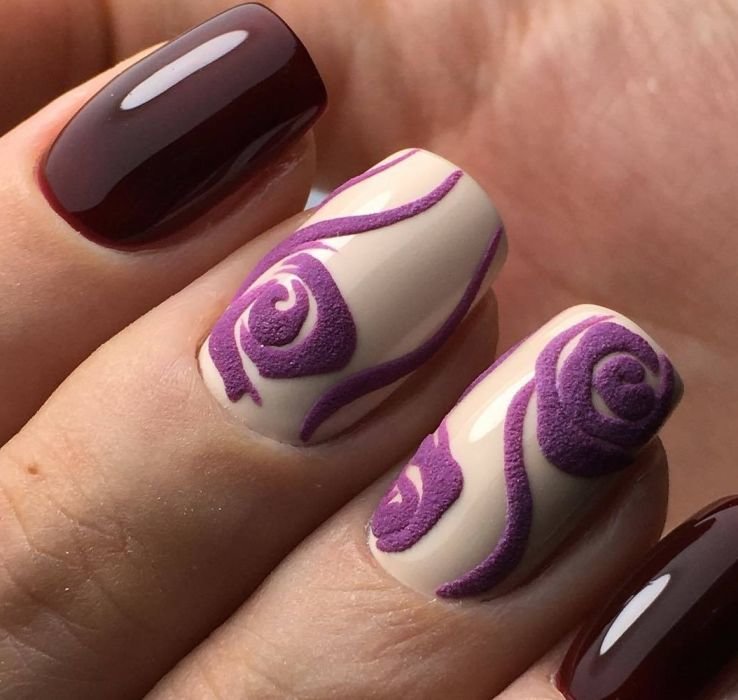
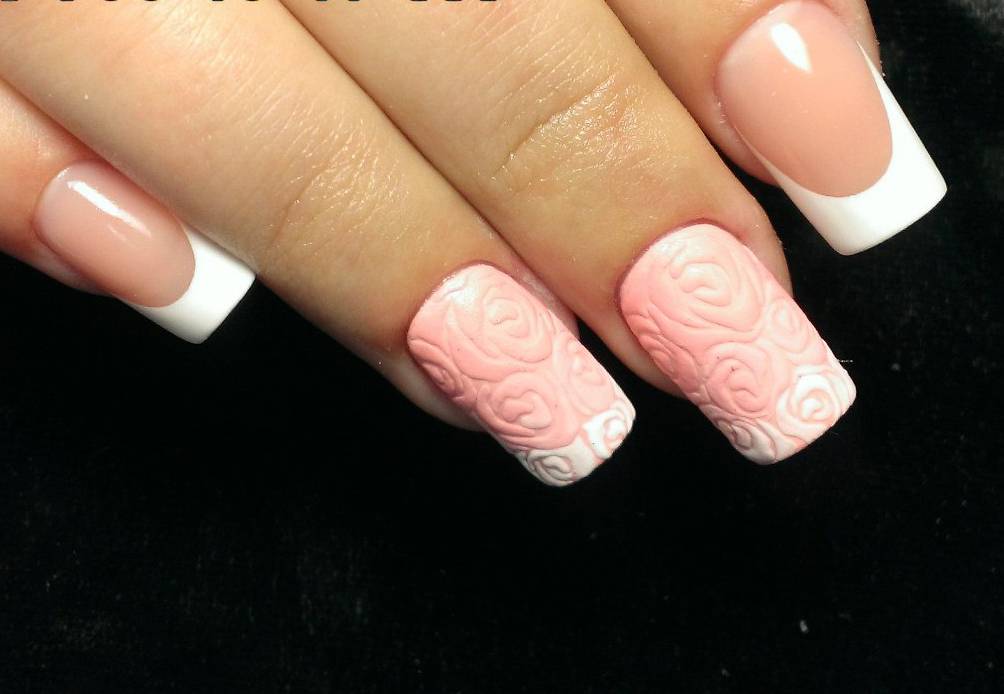
Bulk rose on the nail. A neat execution of the work and inconspicuous colors make the manicure restrained and original.
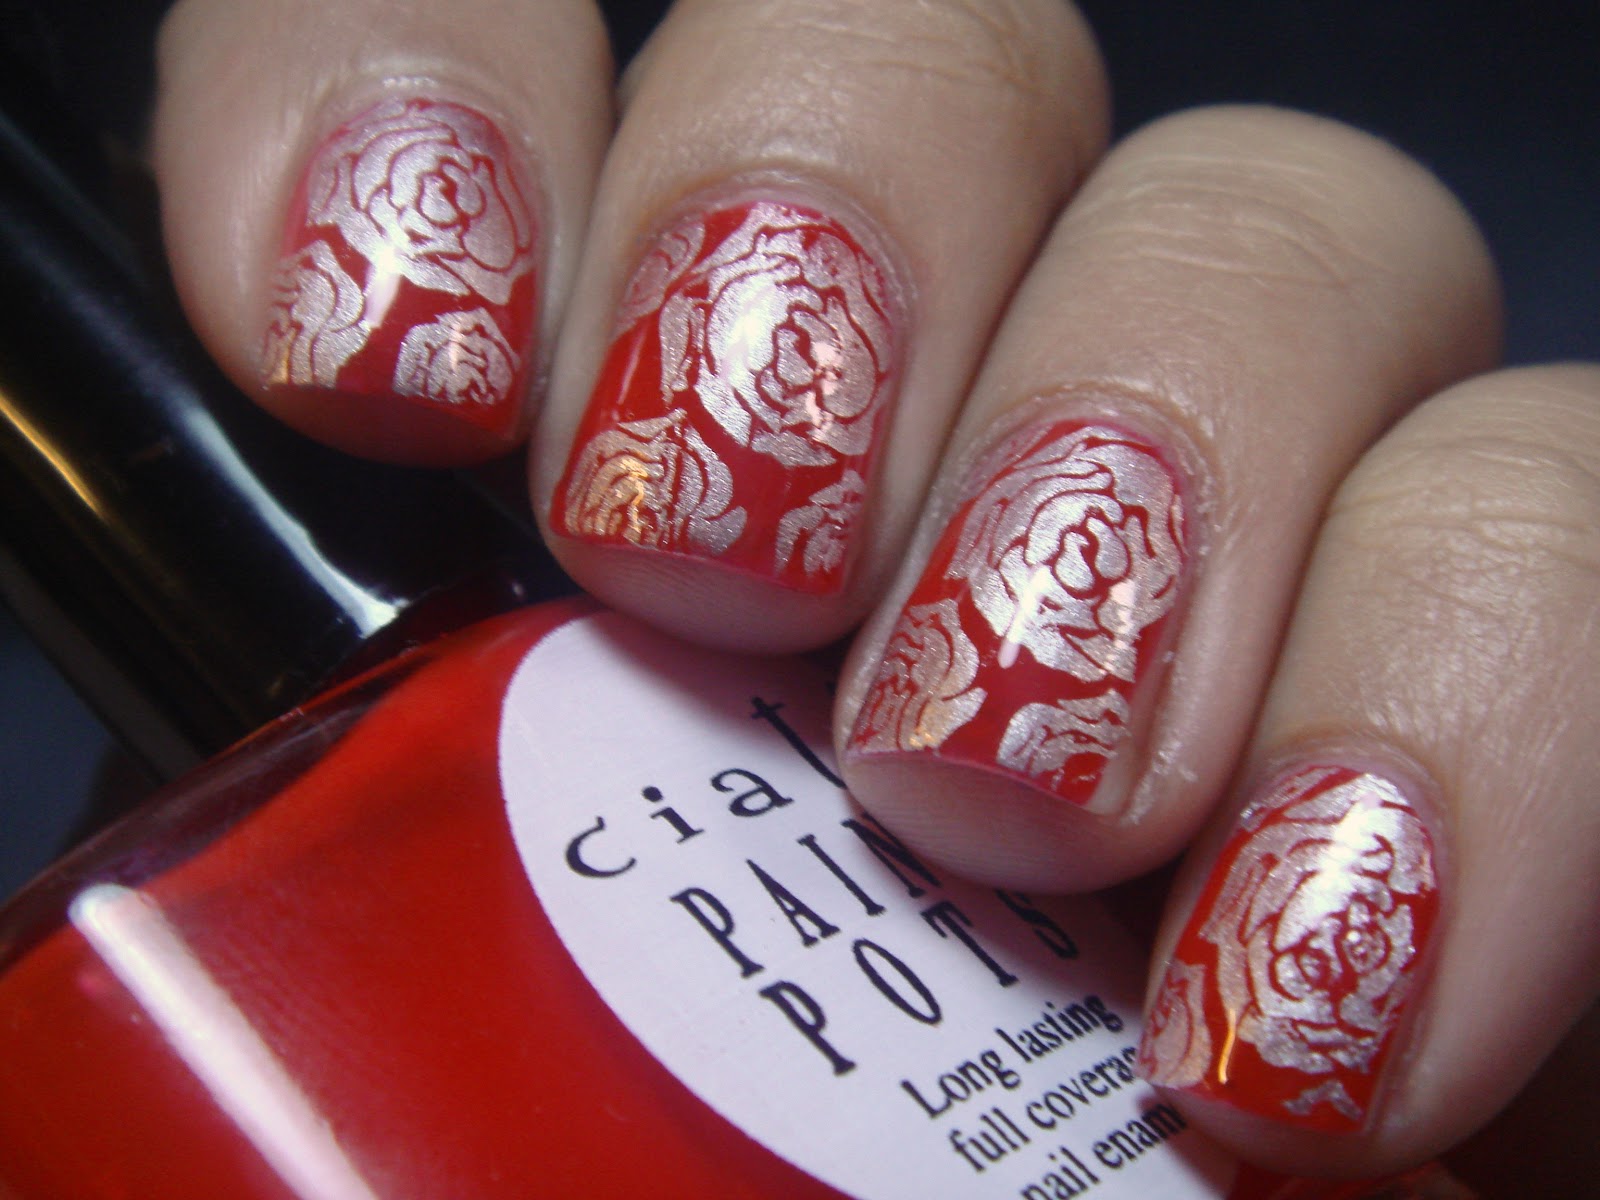
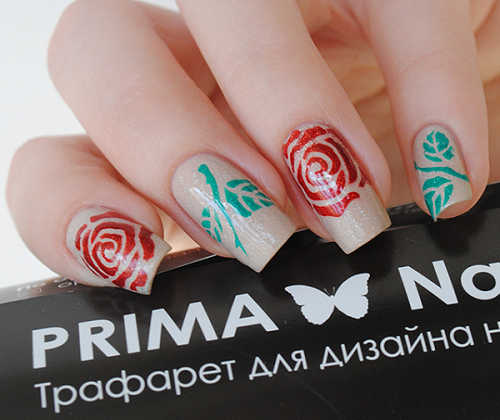
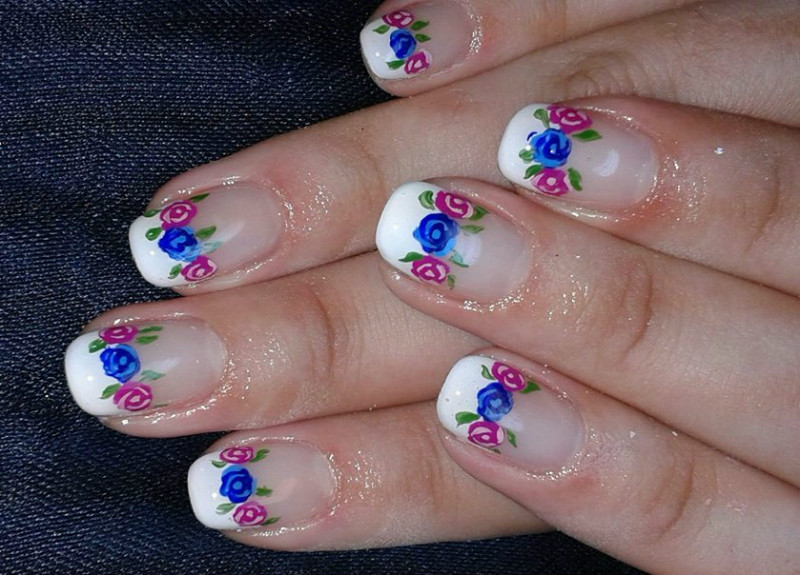
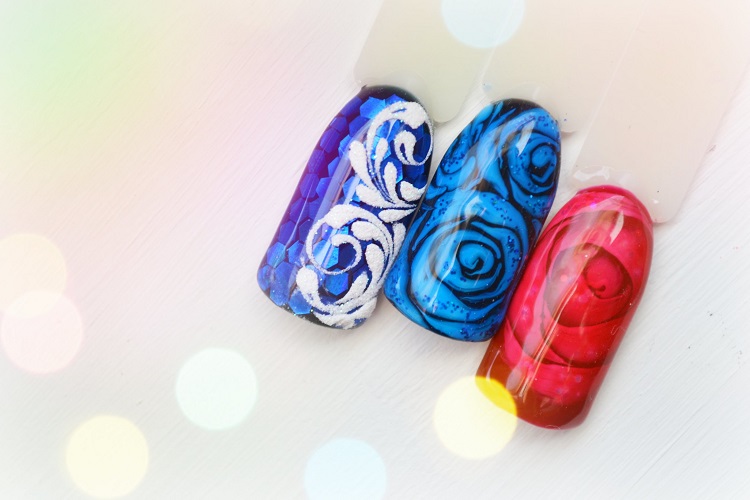
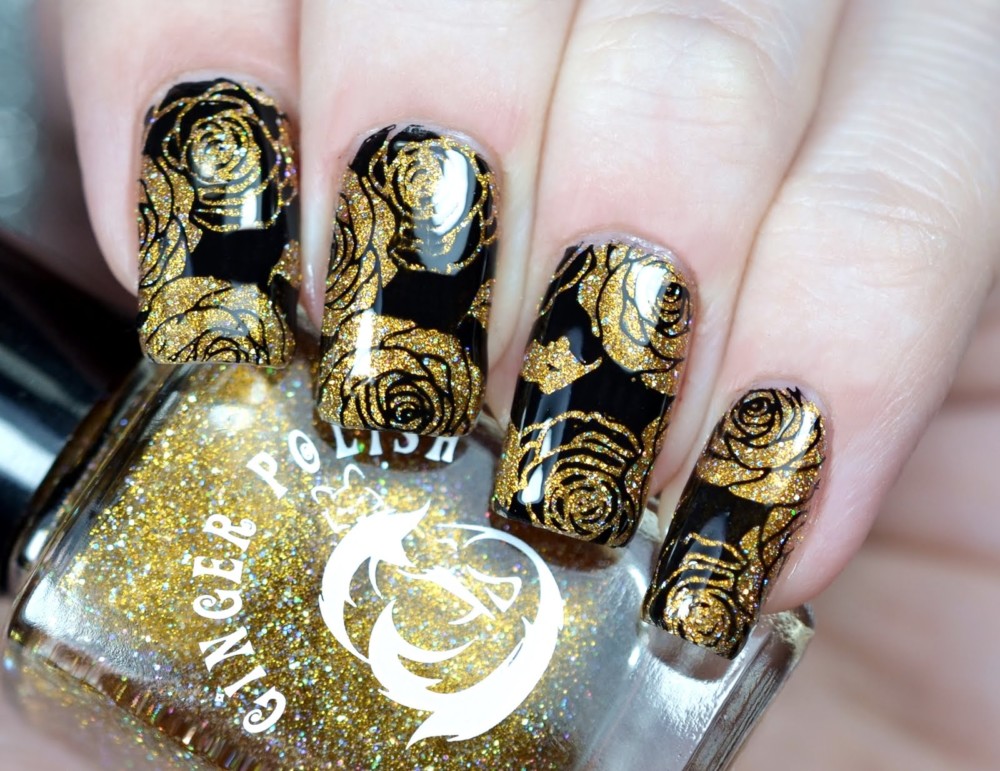
Rose applied to the nail with the help of stemping. No one can guess exactly how you got such a neat and exquisite design.