Modern women are used to beautifying themselves and emphasizing their beauty in various ways. One of these options for creating a unique image is a manicure. Technologies for performing this procedure are constantly being improved, and various auxiliary means and working tools are used for work, among which such subject as dots should be highlighted.
What it is?
Beautiful and well-groomed hands today are an indispensable stroke of any female image. Therefore, a beautiful manicure has become familiar to both housewives and business women. Of course, staining and nail care are performed in different techniques, using a variety of means for painting and a special list of tools used.
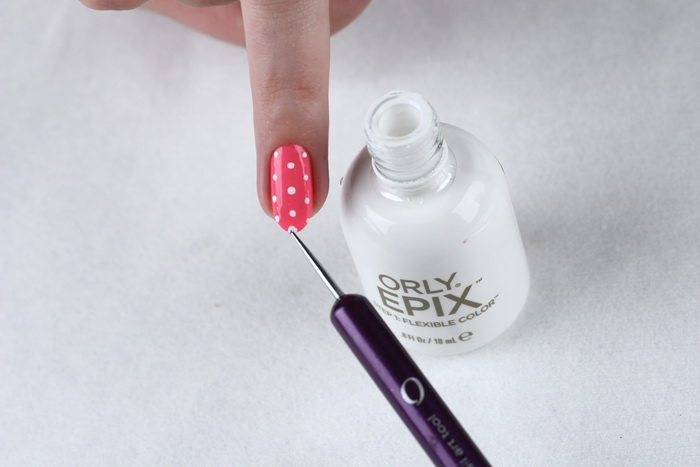
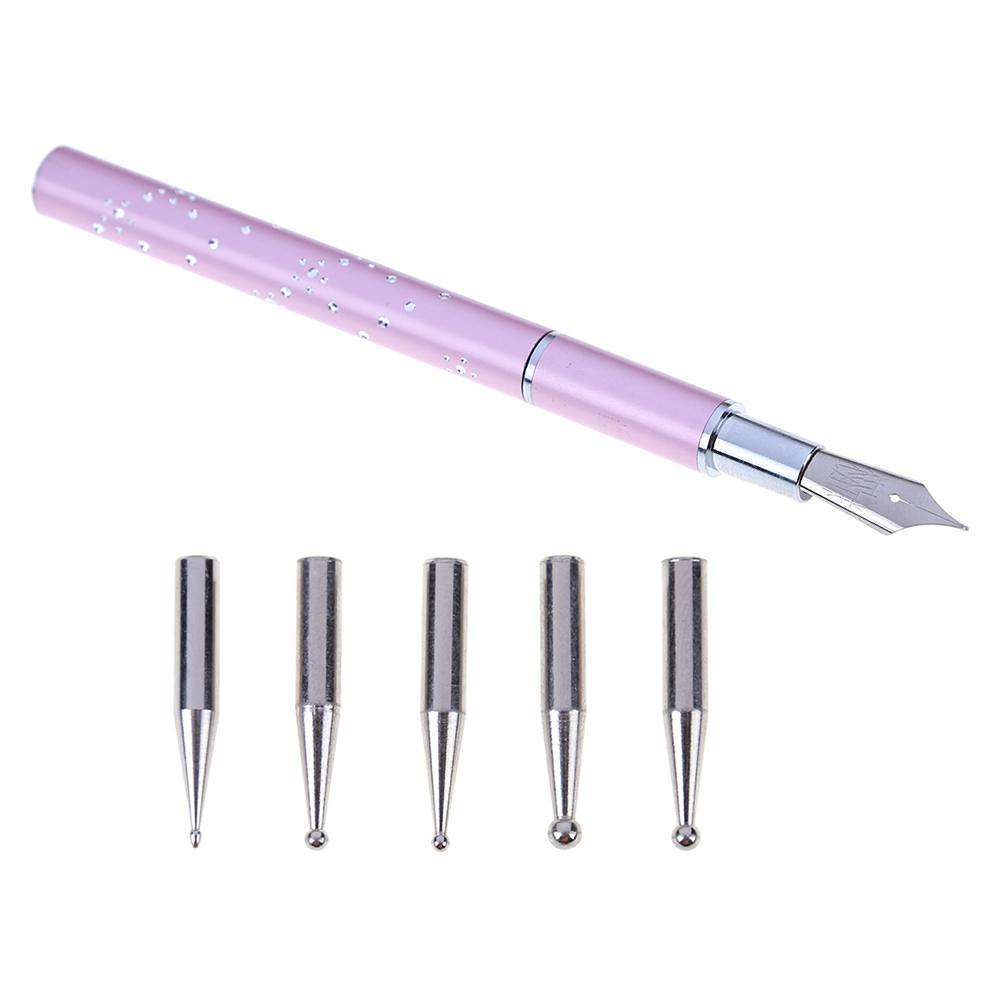
Such a multifunctional manicure device as Dots (or dotter), is a small product designed to create a painting or drawing on the nails means for painting. Most often, the tool has a working base from two ends, made in the form of balls having different diameters. They allow you to draw and design nails.
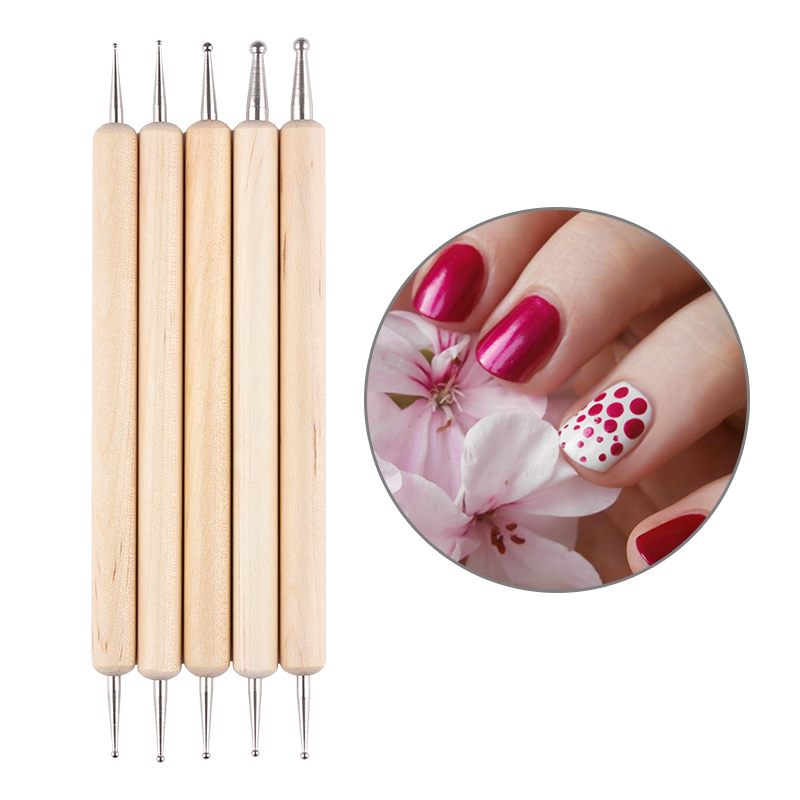


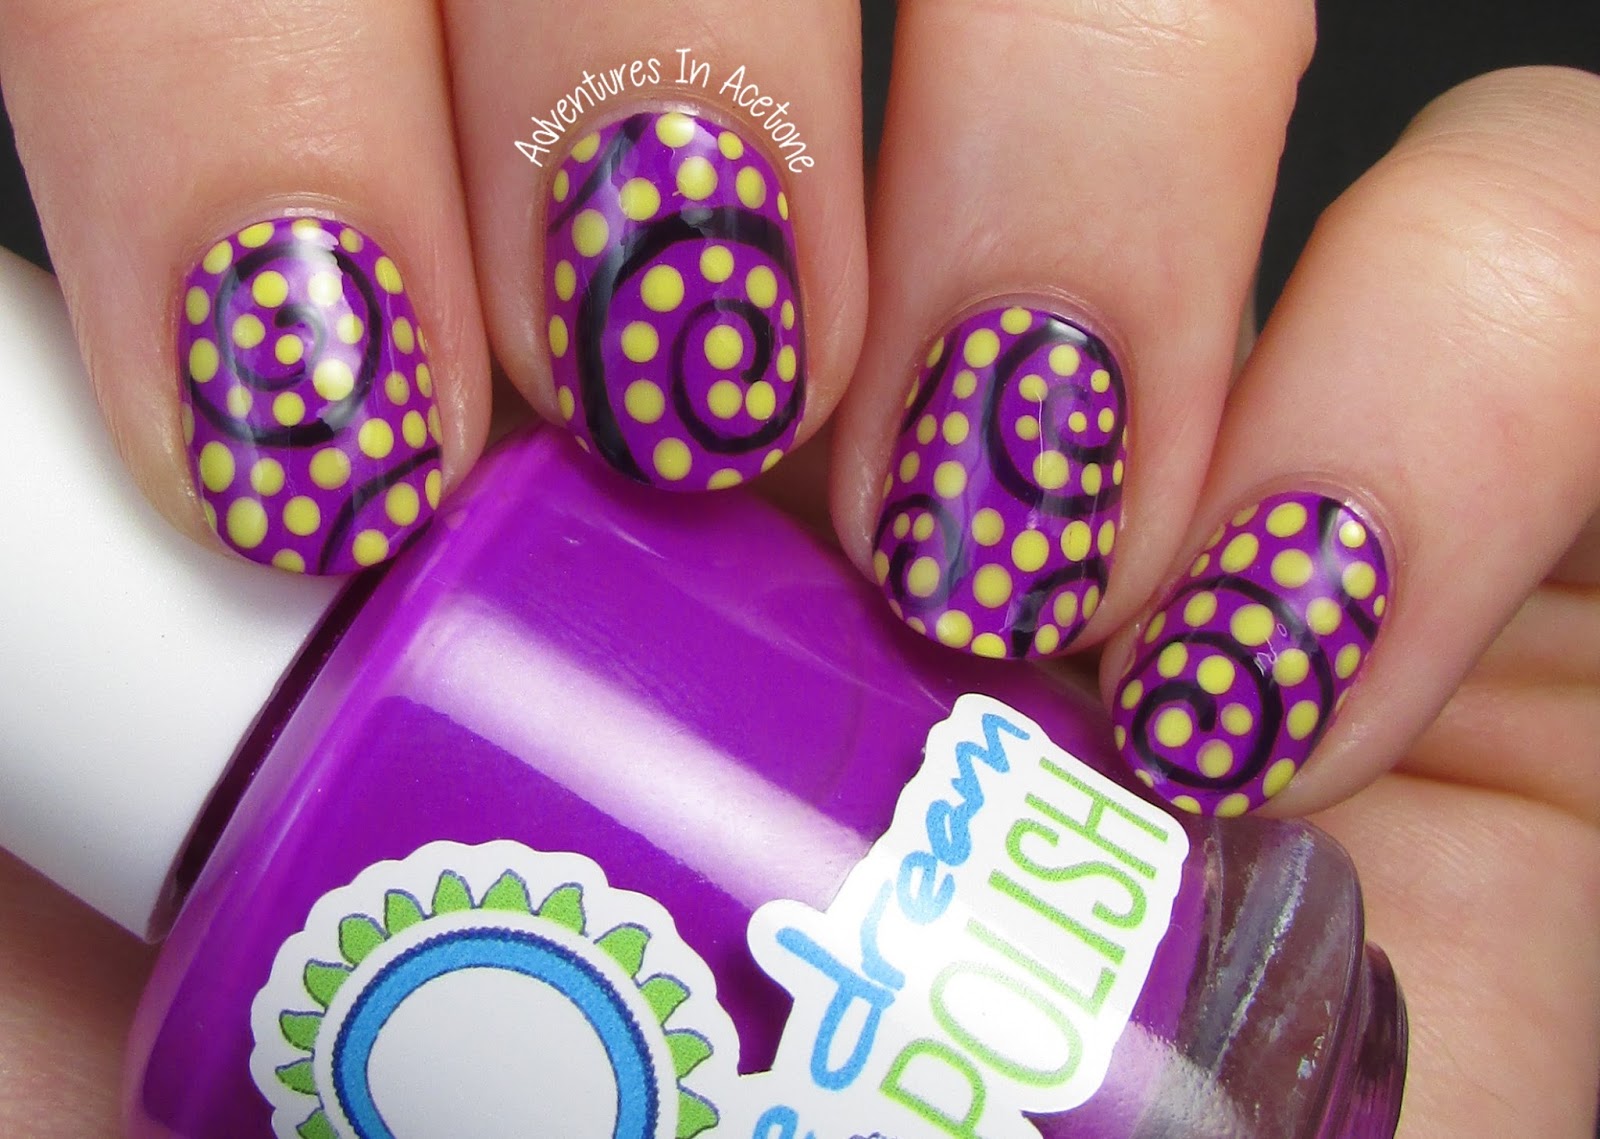
The main functional feature of the dots is the creation of a dotted pattern, which in the capable hands of a professional manicurist or a woman with minimal skills at home allows you to convert a simple manicure into an original “nail art”. Thanks to the balls, you can embody the idea of drawing ordinary dots, ornate lines, colors and much more on your nails.
You can buy a dotter at any specialized department or store of tools and materials for nail care, usually they are sold in sets of several tools. This is due to the fact that in order to create a decor, it is more convenient for the master to arm himself at once with several dots with different sizes of balls at the ends.
Like any other tool, dots for manicure has its advantages and disadvantages. First of all, the positive properties of the device should be indicated.
- With the help of an additional tool the master gets the opportunity to create a mass of various variants of nail design, not limited to certain ideological frameworks.
- The applied drawing or image does not require sticking to the clothes of a particular style. The created decor is perfectly combined with different trends of fashion trends. In addition, this design does not require additions in the form of accessories or a certain makeup from a woman, because it is harmonious in any images.
- To create a drawing with the help of a dots it is not necessary to have the talent of an artist, therefore, it is possible to create a unique “neyl-art” at home.
- The procedure of drawing a picture, as a rule, takes a minimum of time.
- The tool is universal, so different patterns and compositions on the nails can be made with a minimum of working materials and several dotters with balls of different diameters.
- The tool can work with different types of nail polishes.
There are some drawbacks to the dots that arise in the process of creating the decor.
- For the use of Dotter, extreme concentration and attention is necessary, since otherwise a significant overrun in materials is possible.
- In order for the drawing to be attractive, you need to adhere to the rigor of the lines and the scheme to create a clear geometry.
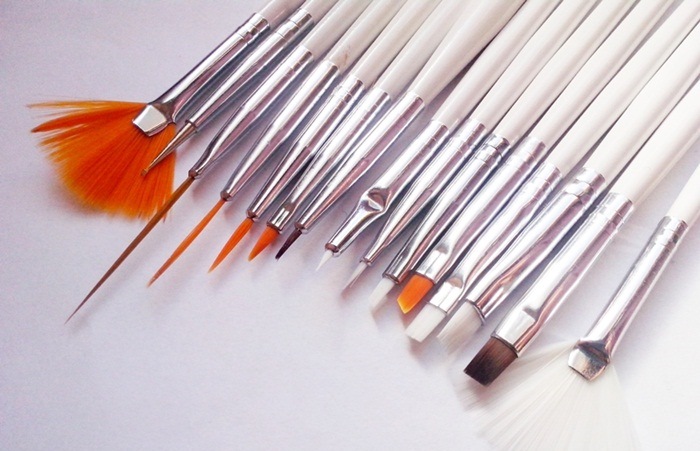
- To decorate nails with complex ornaments, one dots for the master will not be enough, so you should additionally buy special brushes.
- Plastic tools do not have a long operational life; therefore, preference should be given to metal products.
How to use the tool?
As practice shows, everyone can learn how to draw with the help of a dots. However, before you start working with nails, you should practice on models that households can become, or use plastic tips to hone skills. It is very important to understand how to hold the tool in your hand as comfortably as possible in order not to create a constant voltage in the brush during operation. The first time is limited to simple technology and put the usual points on the practical material.
After some time, there will come an understanding of how to control the size of the resulting circles., - their contours will become clearer and more accurate. After that, you can proceed to the creation of nail design with dots.
Using the tool, it is necessary to adhere to some consistent rules of work.
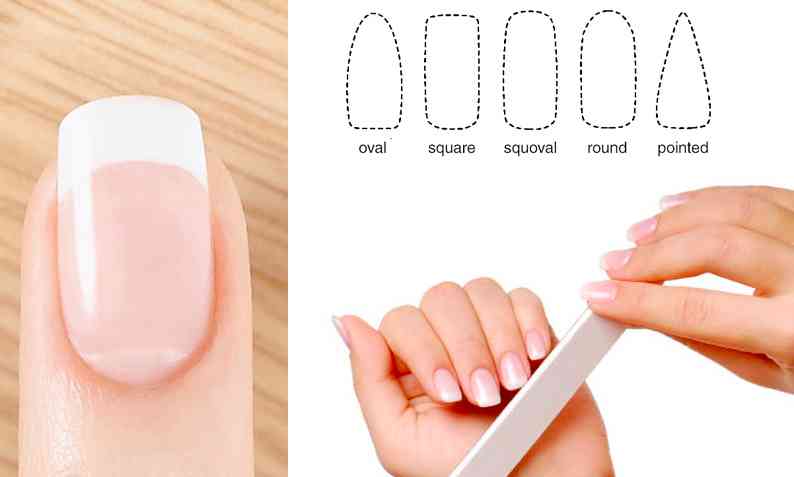
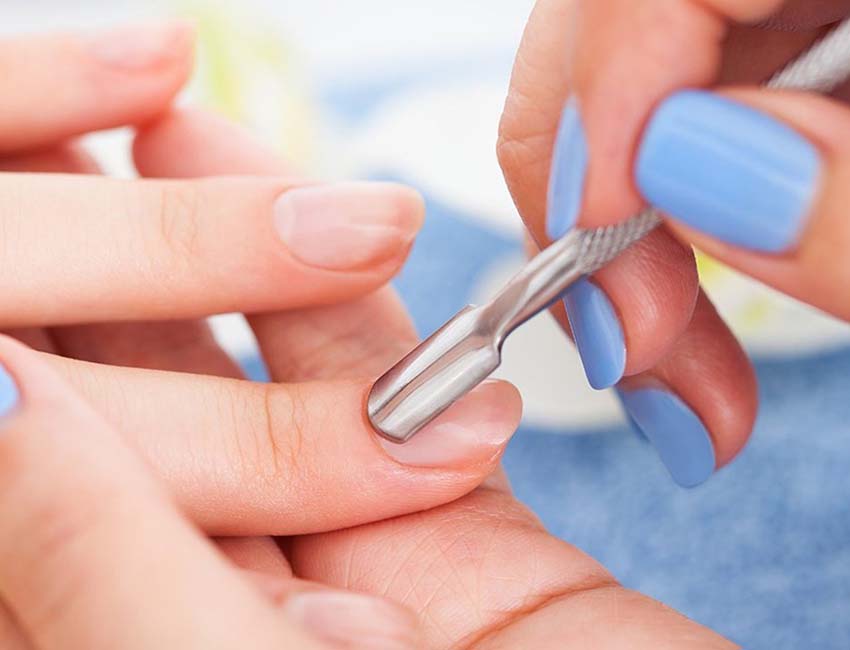
- The first step is to prepare the nail plate for the application of the picture. To do this, give it the selected shape and remove the cuticle.
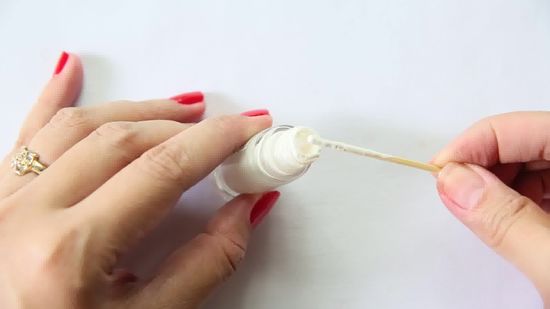
- After the nails need to put a special base that can act as a protection against pigmentation. In addition, the tool will provide an opportunity to preserve the original appearance of the manicure for a longer period.
- Next, the nails are covered with basic varnish.
- For drawing a picture, especially a multi-colored one, it is best to use a special or home-made palette.
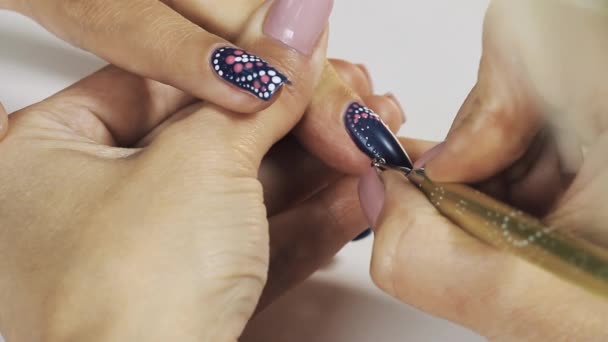
- The tool must be dipped into the composition, ensuring that the entire surface of the ball was covered with a uniform layer of paint.

- To create a complex pattern, first of all, the main points are put, which will act as the borders of the future pattern on the nail. In order for the circles to have even and identical contours, you should position the dots at right angles to the working base.
- After you can proceed to the formation of the remaining points of the pattern, which may differ in color or size from the base.
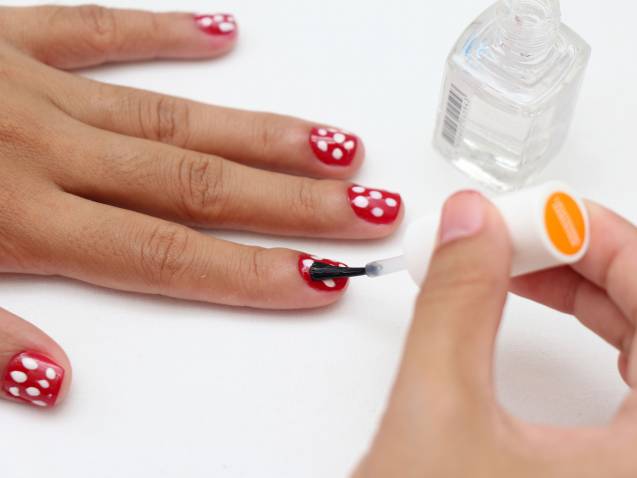
- After drying the picture, the nail should be covered with a special fixing varnish, which will give the design a glossy shine or dullness.
- Upon completion of the work with the dots, you must remove all residual varnish.
Schemes and techniques of drawing
For novice manicurers or craftswomen engaged in the design of their own, it is recommended to start working with dots, using the simplest schemes of drawings. At first, you can take help step-by-step instructions and tips on creating a pattern.
- To the points were the same, before applying each worth pre-dip tool in varnish. Such a method is necessary, since it is rather difficult to visually determine how much coloring matter remains at the end of the dots and was used to create the previous point.
- Conversely, if the drawing requires the presence of circles of different sizes, the end of the tool is dipped once in varnish, after which 2–3 peas are put on the nail. This method is an alternative to the method of creating marks of different diameters, each time changing the tool to another with a suitable ball size at the end.
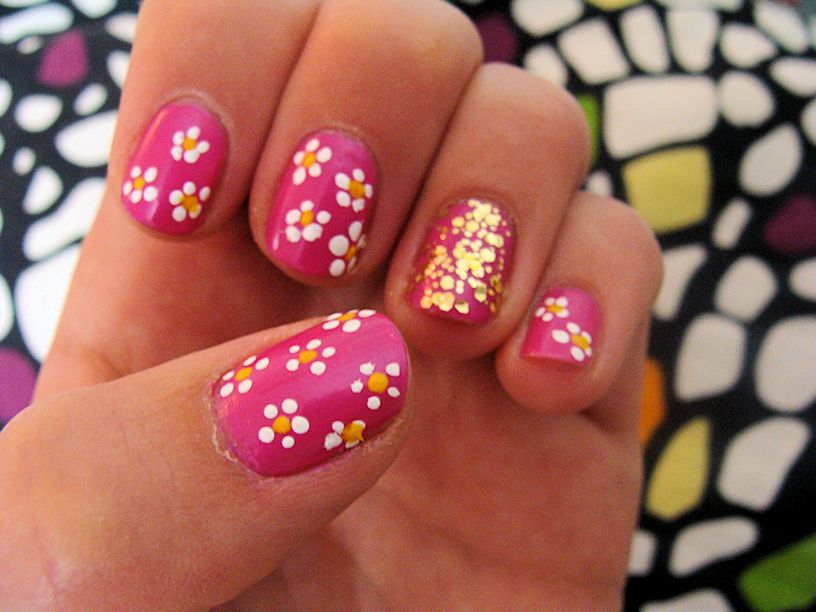
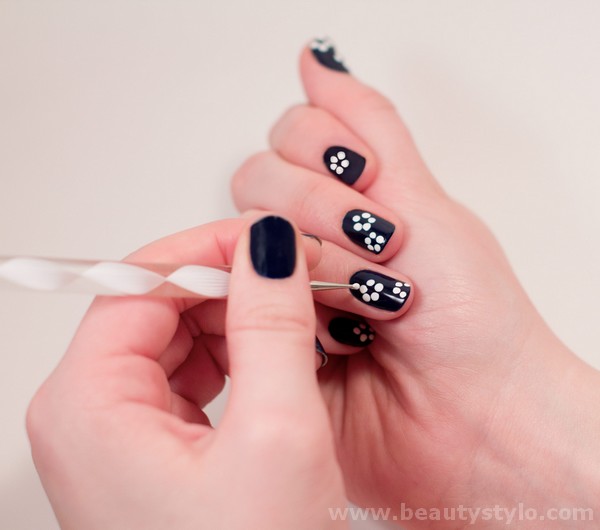
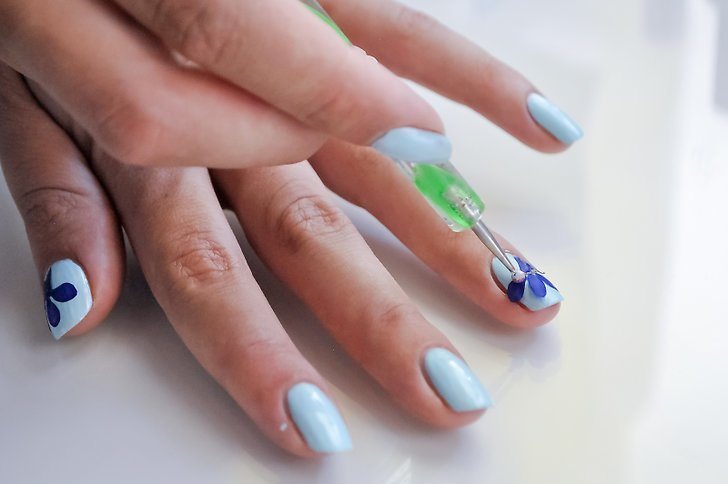
- With the help of the dotter, you can even draw flowers on the nails; to do this, start the work from the center, putting points in a circle with the same distance from each other. In order for the petals of the flower to acquire an elongated shape, the points should be stretched on the nail with a regular toothpick.
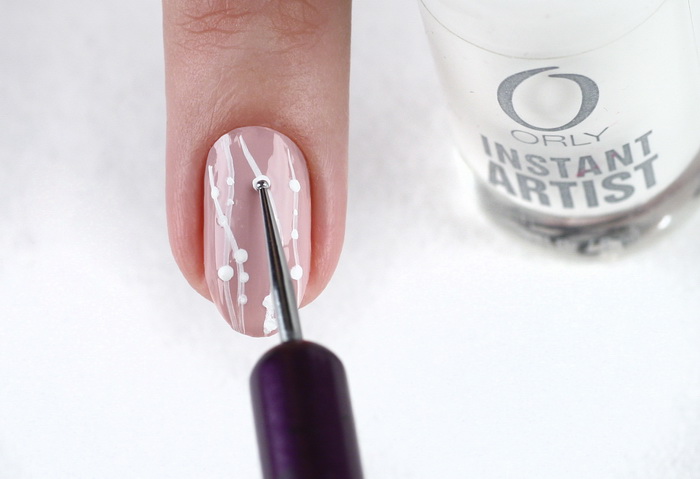
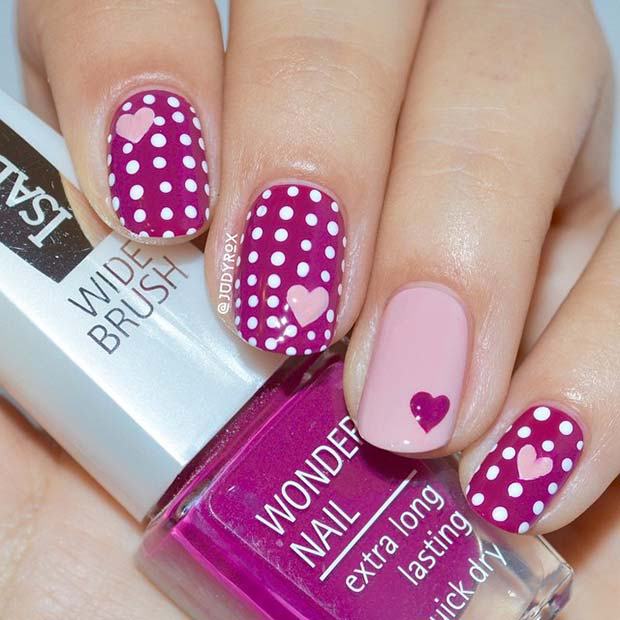
- Dots allows you to draw hearts.The scheme is as follows: it is necessary to make two symmetrically located points at a distance from each other, and with a brush to combine them with lines repeating the contour of the desired figure.
- To fill the pattern from the inside, dipping the ball in the lacquer, you need to make a dot in the center, and then walk the dotter over the entire area, evenly distributing the paint or varnish.
- For masters involved in “neil-art” with the help of dots, the work according to the cubists' scheme, who visually divide the working surface into equal squares, will be useful. In the case of a dotter, dots will act as a pattern base.
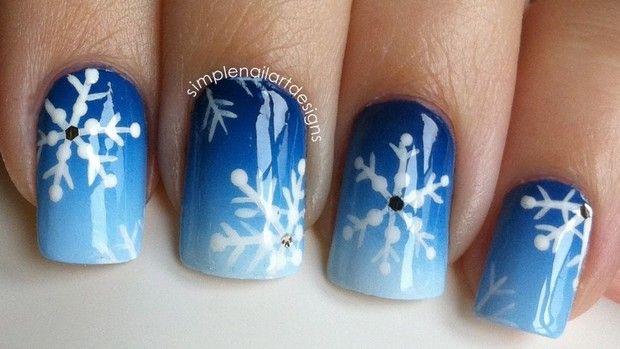
- To make the design of nails in the winter style, with the help of the tool you need to put points that will act as the ends of the future snowflake, with the main mark in the center of the figure. After that, all links must be connected with lines using a brush or toothpick. As a New Year's design can work with dots and sparkles or silver / gold powder. The base color can be monophonic or ombre.
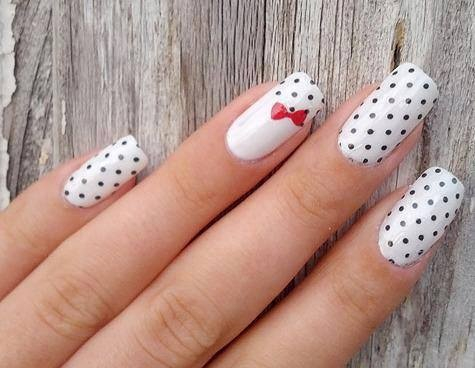
- Summer and playful option for a manicure or pedicure can be an image of a bow on the nails, which is quite easy to do with the help of a dotter. The bow is done according to the following scheme: two large drops should be made on the surface, two more between them should be made with a smaller ball, after which a unifying line should be drawn between them with a thin brush or needle. For a clearer contour, it is necessary to circle a dark shade of varnish and dry it.
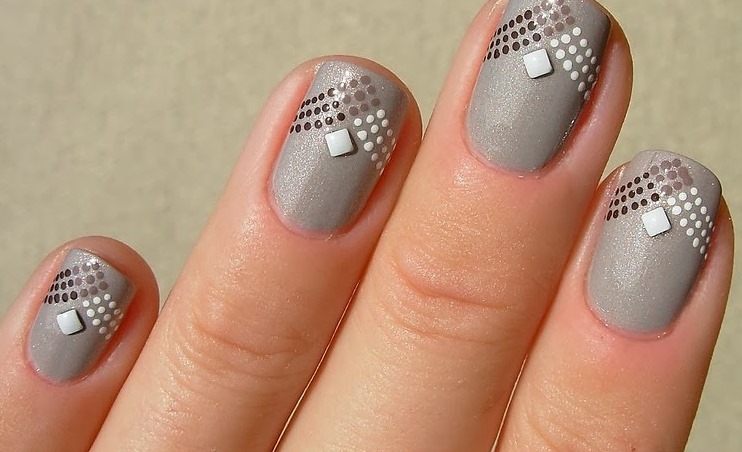
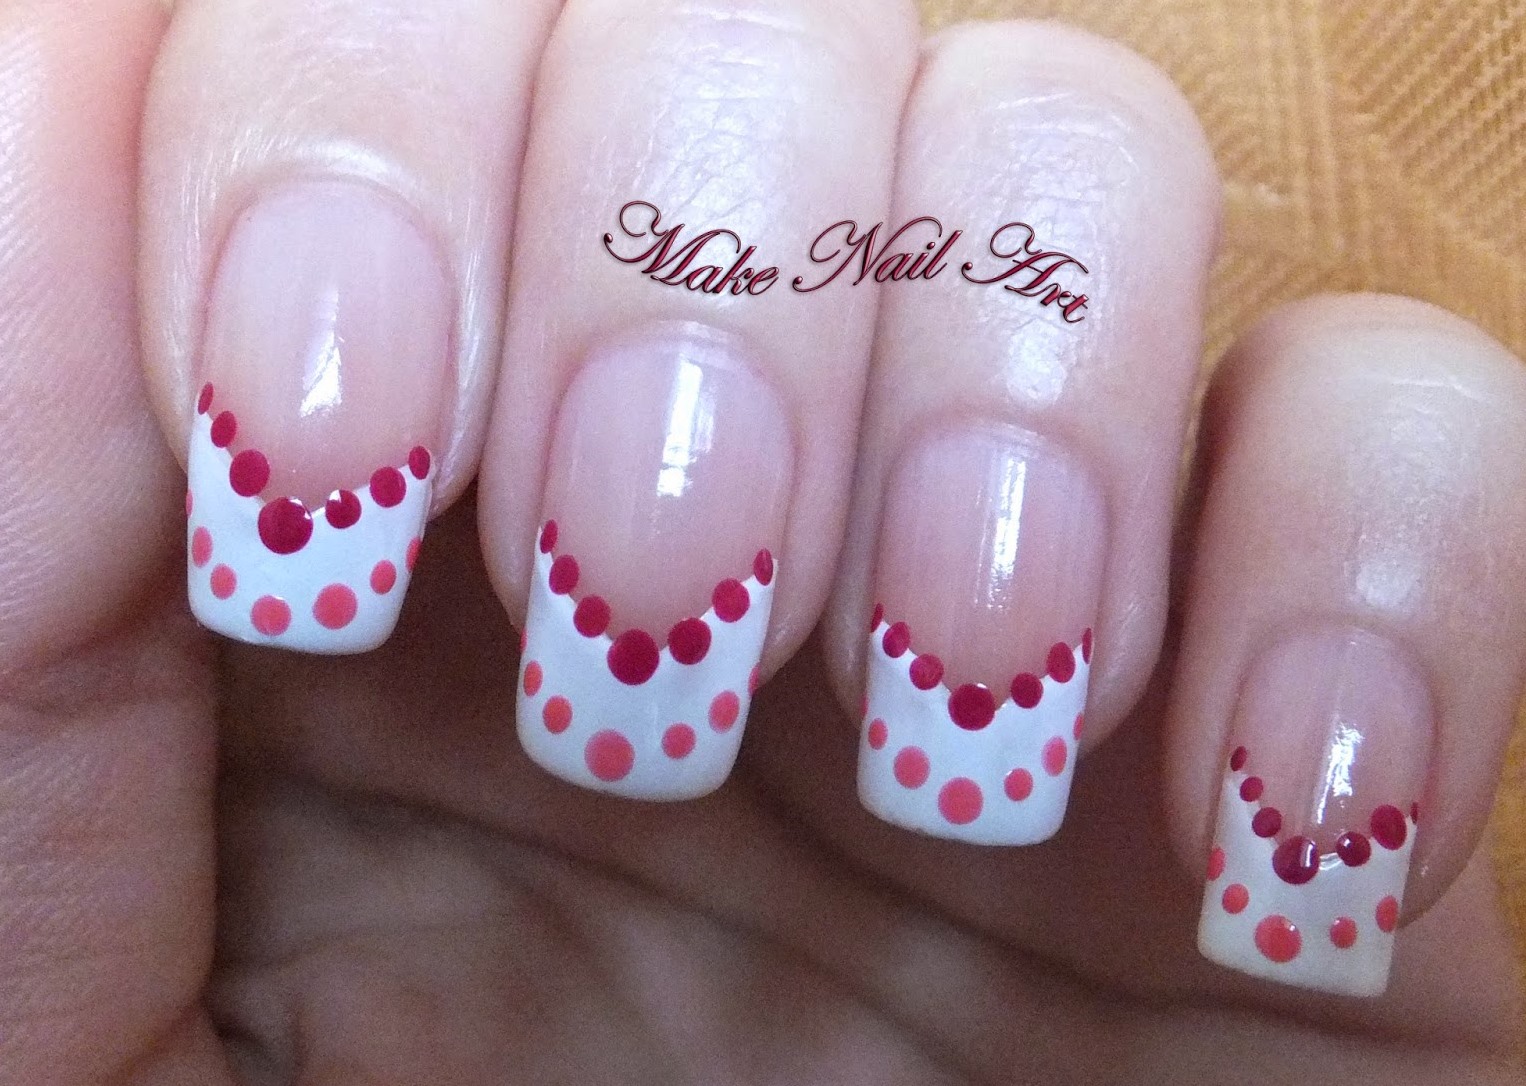
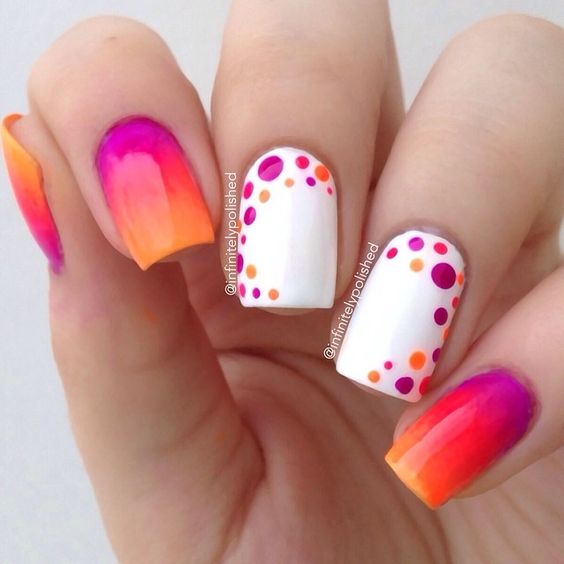
Design options
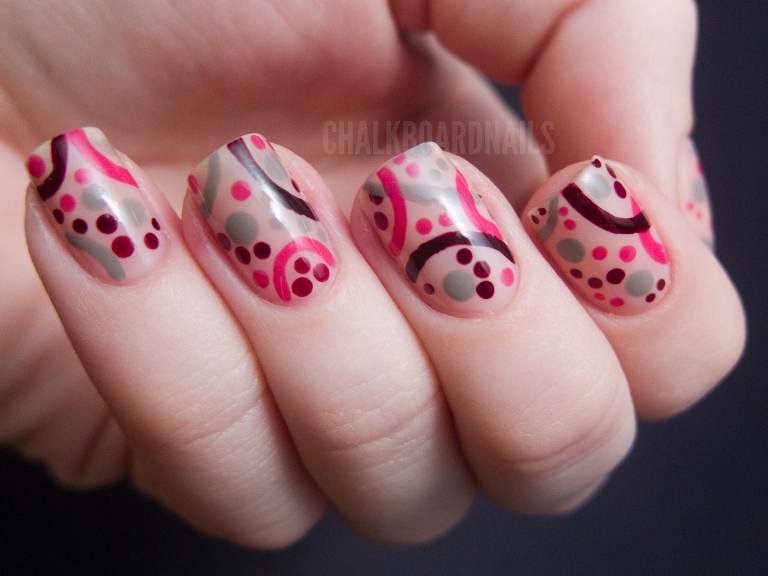
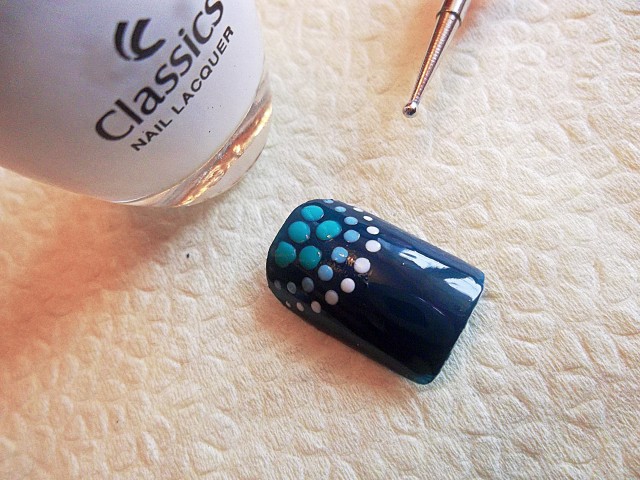
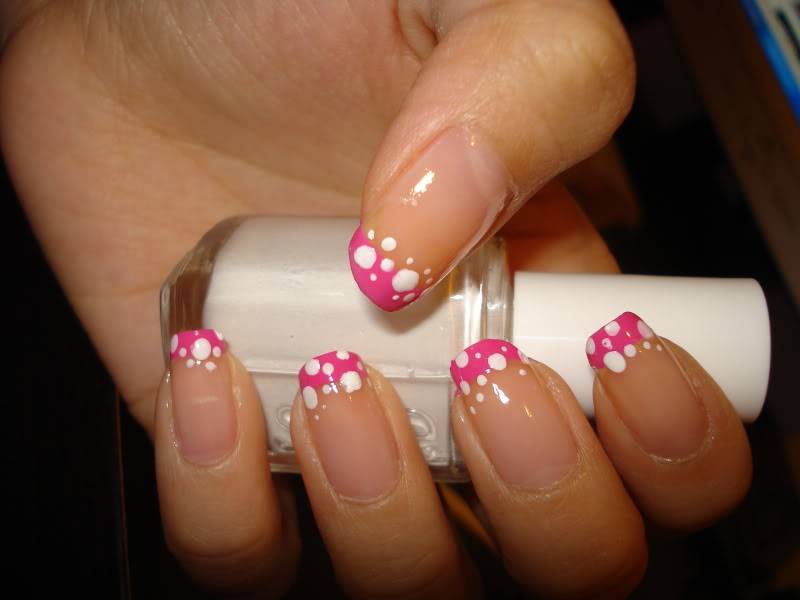
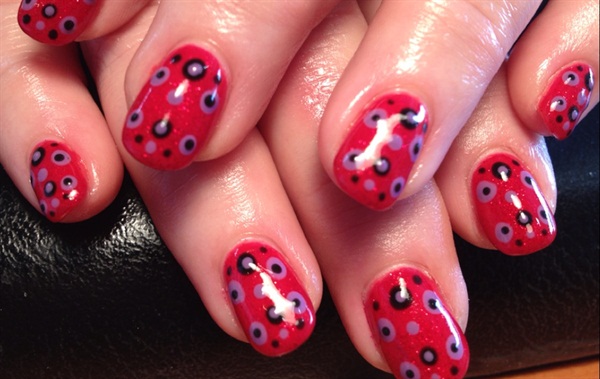
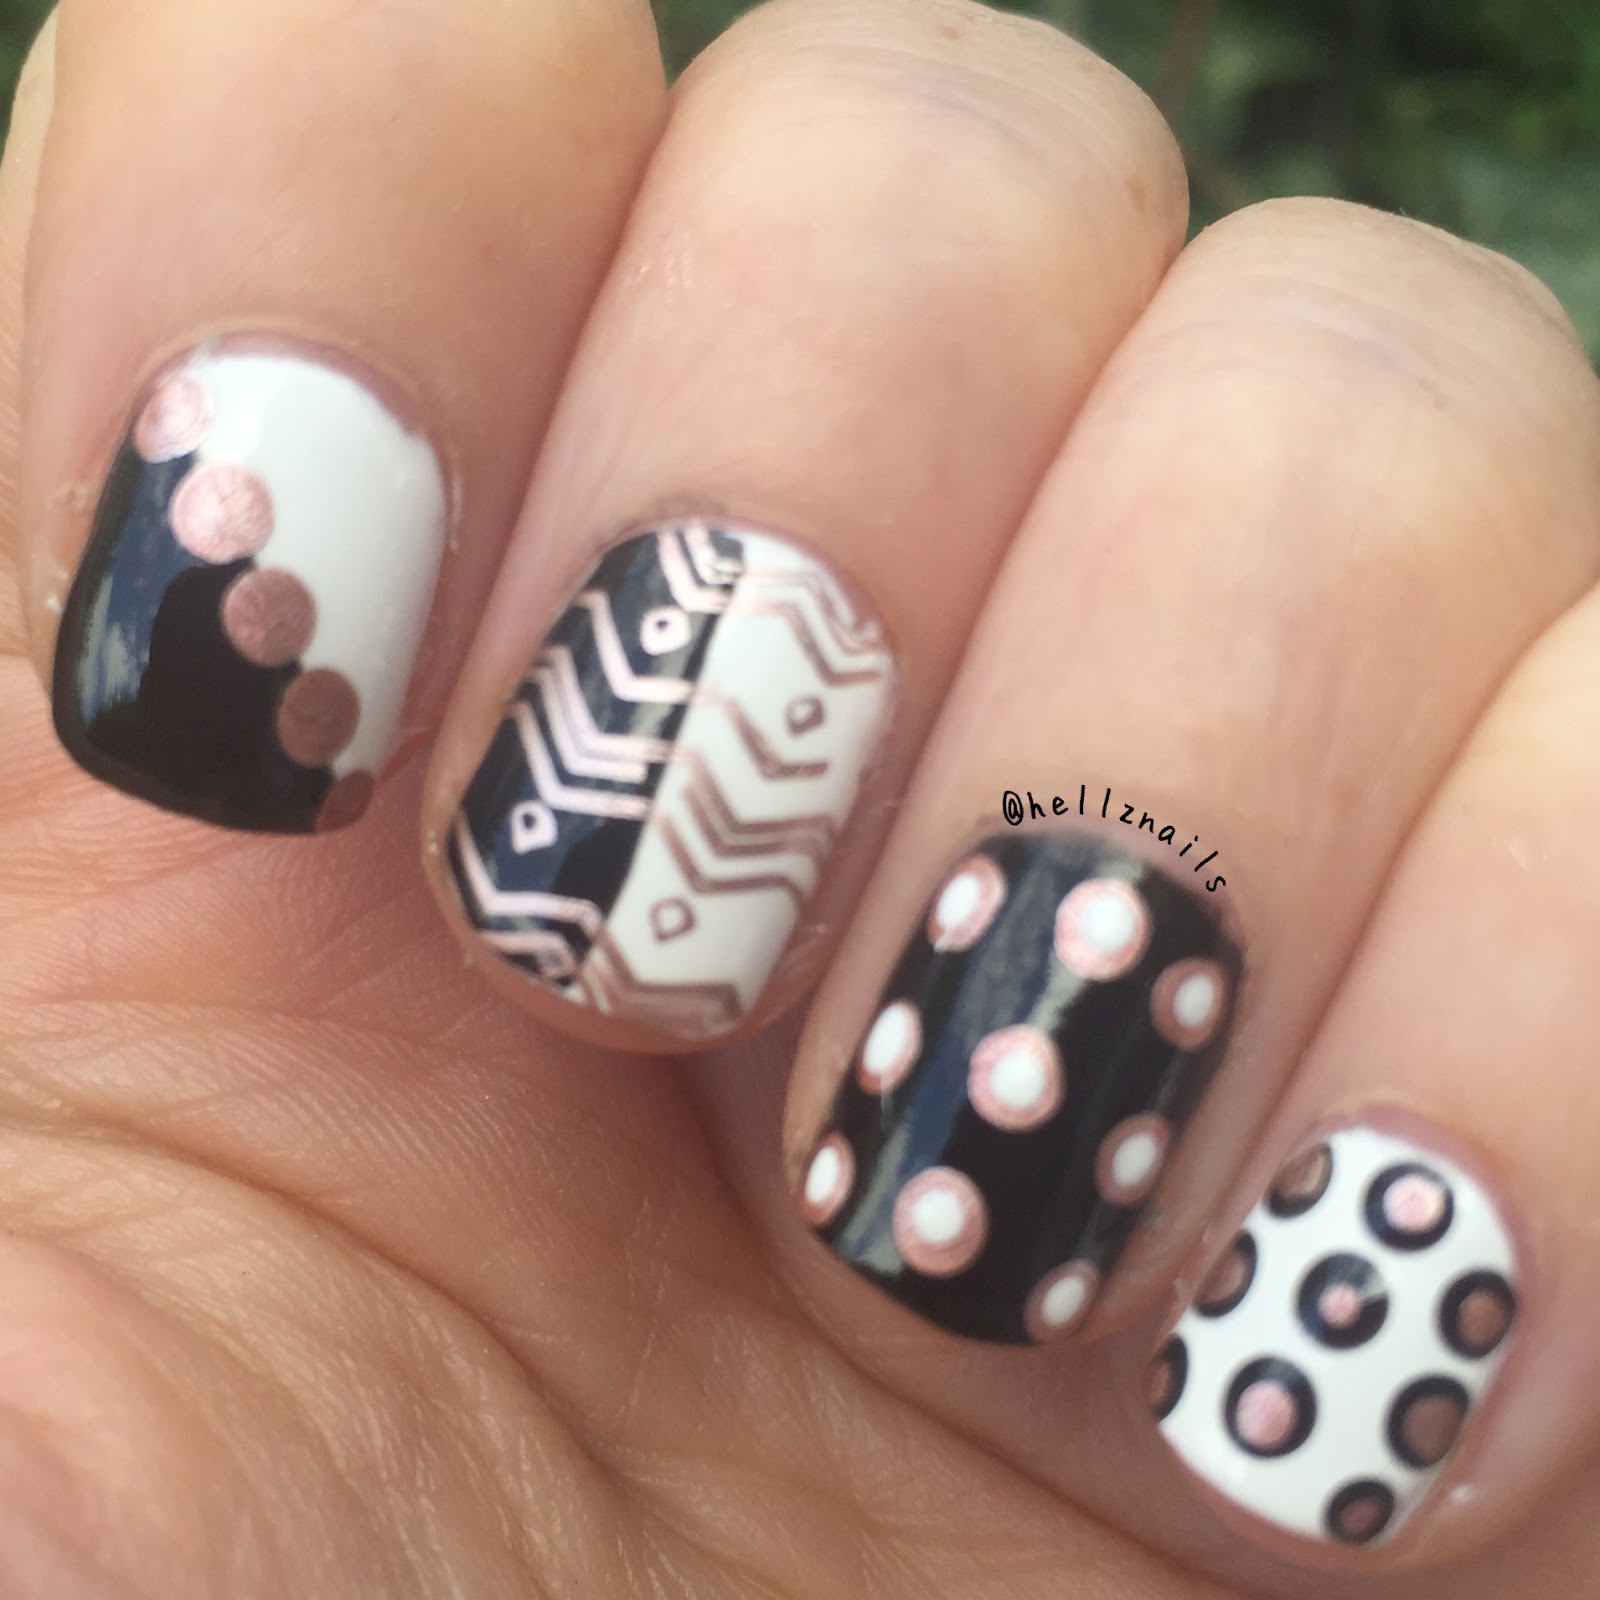
The fair sex, who prefer a modest, but no less spectacular minimalism in the design of nails on the hands and feet, can be safely resorted to using dots in the work. The design of the droplets can be performed as in the center of the plate in strict accordance with the geometry, there and in the form of multi-colored abstraction at the end of the nail or, conversely, closer to the finger. Light and colorful colors of varnishes will help set the spring mood, glitter will be appropriate in the winter versions of creating a design with the help of a dotter. Original will look patterns of droplets of different colors and diameters.
Dots allows you to safely experiment with the brightness of colors and color combinationsWhen focusing on the choice of design on the mood and relevance of flowers in a particular season.
Below are several options for using dots in nail art.

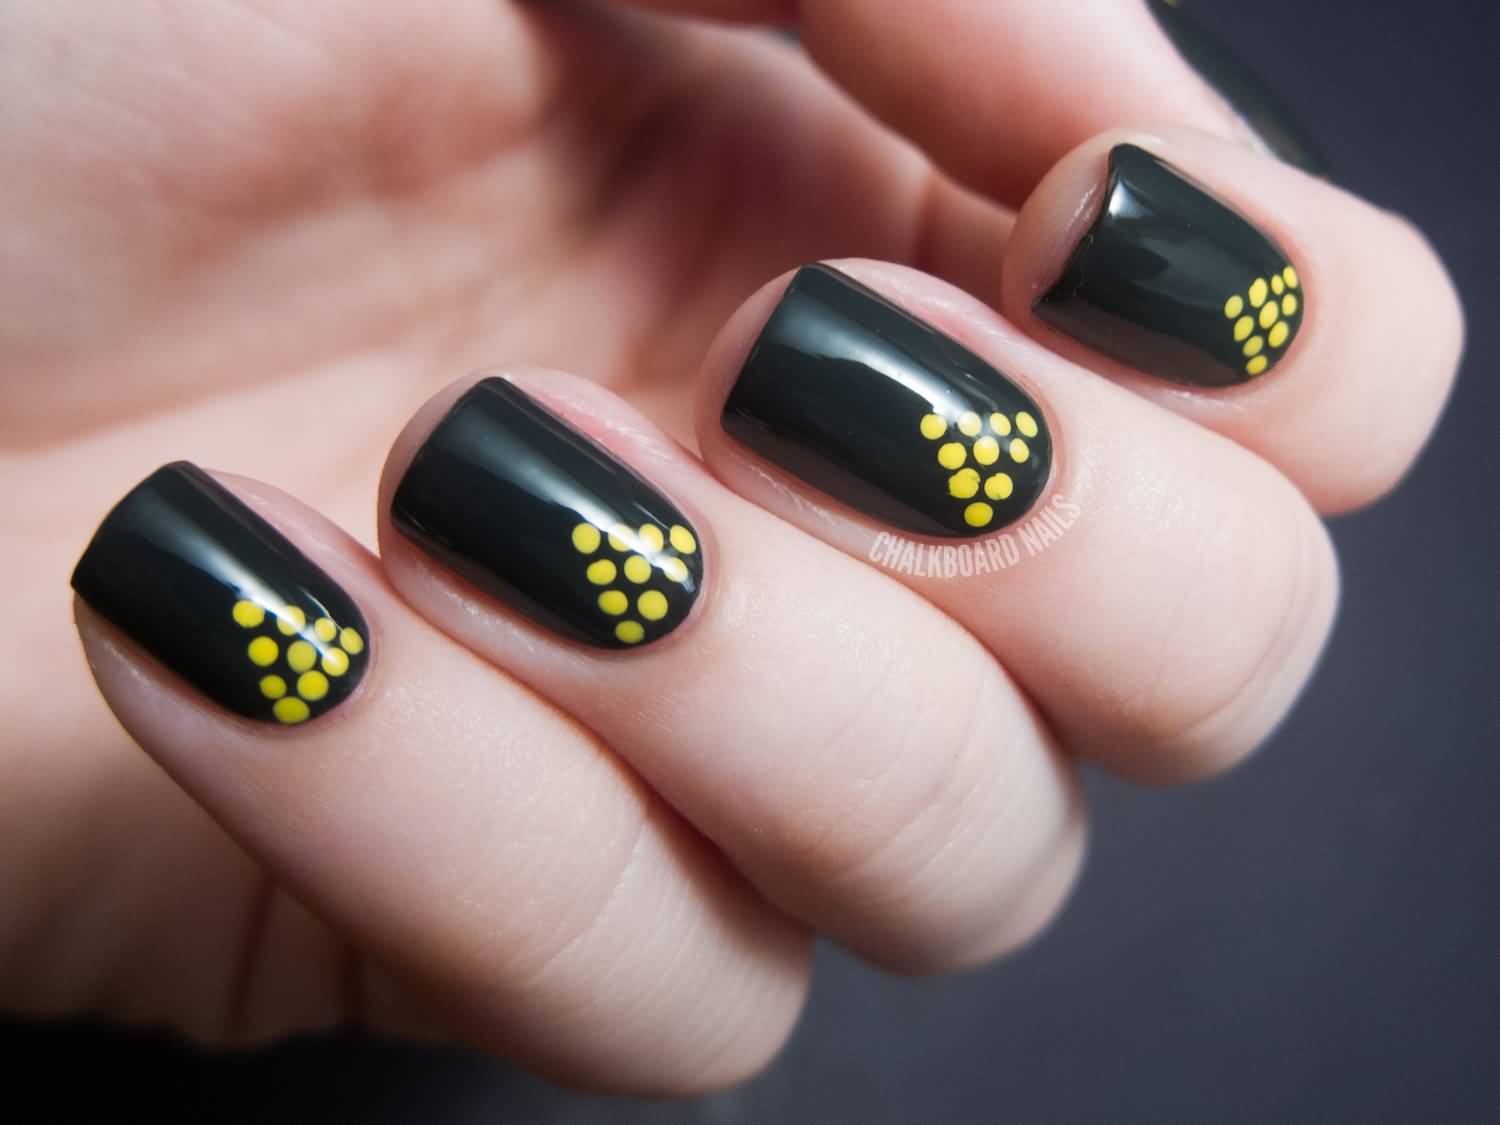

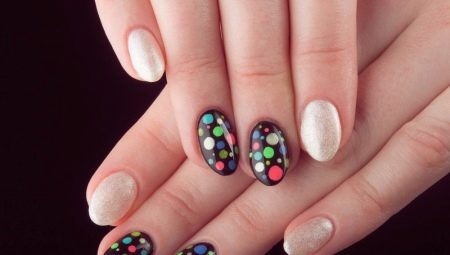
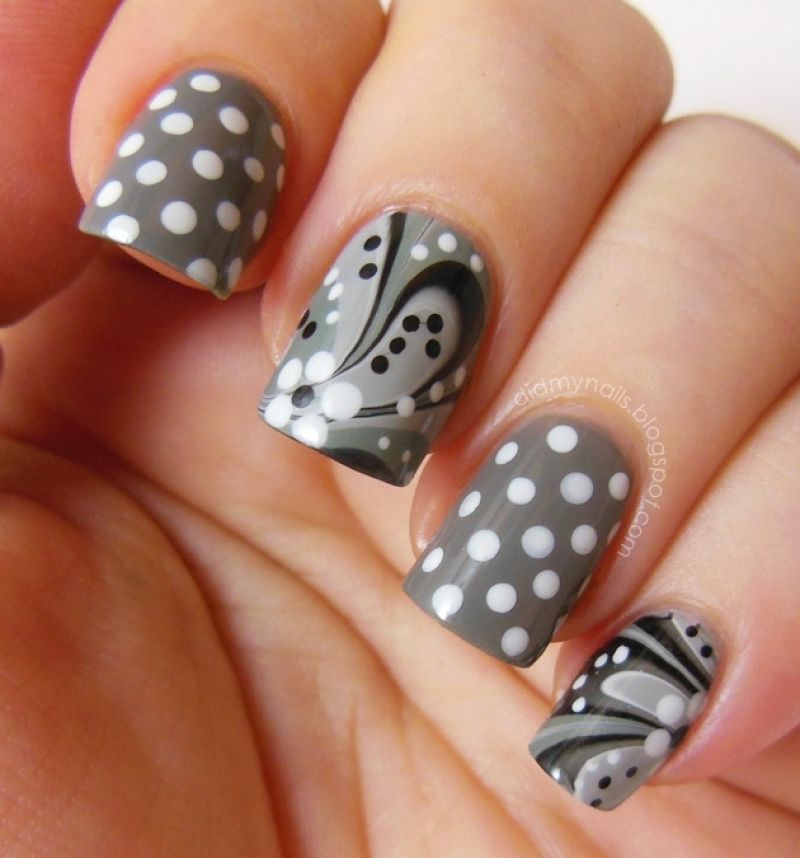
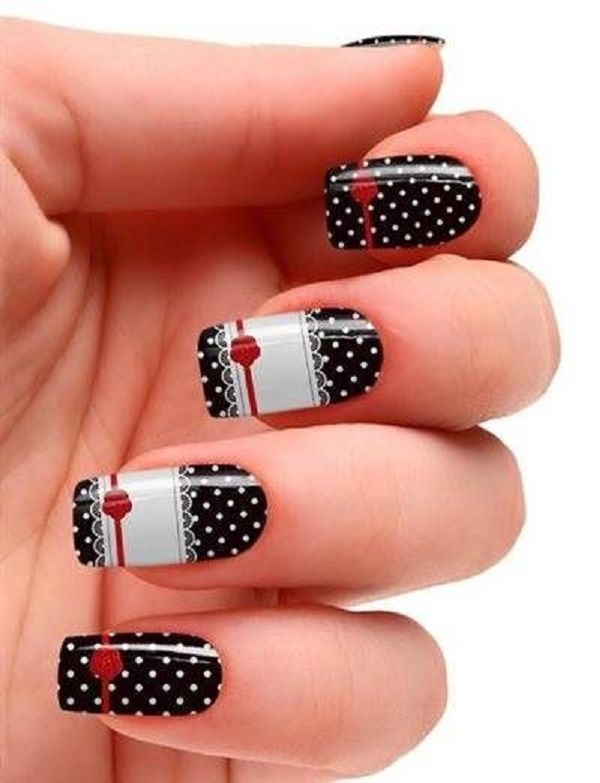
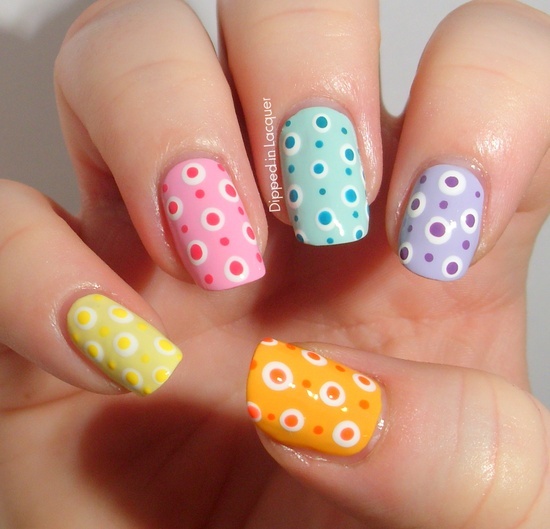
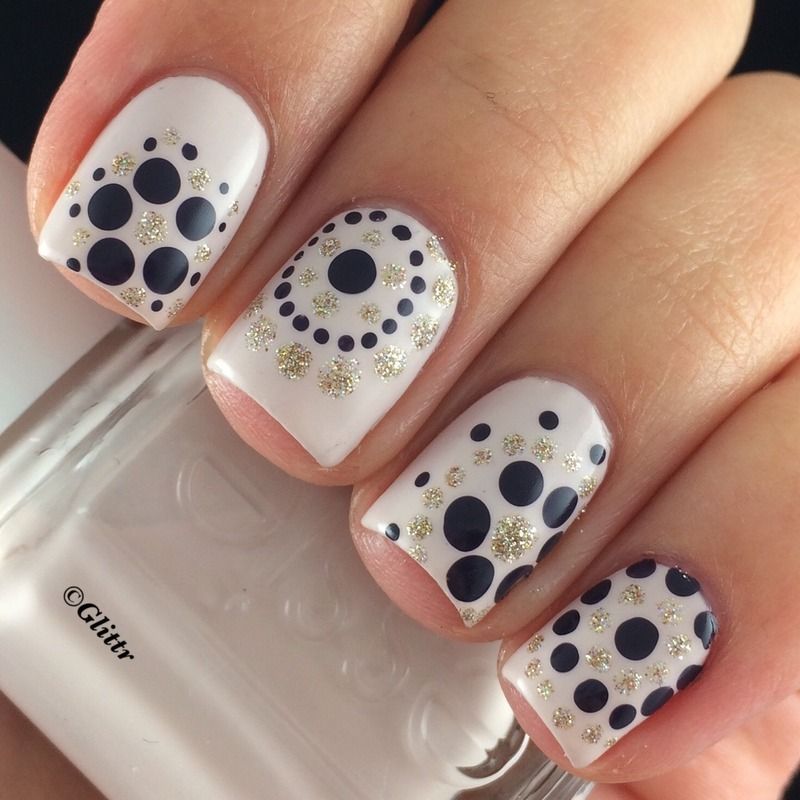
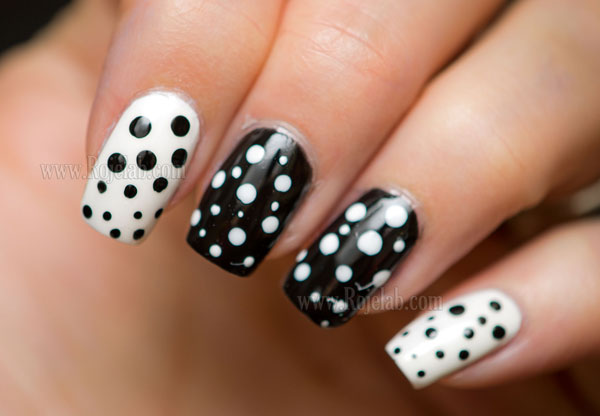
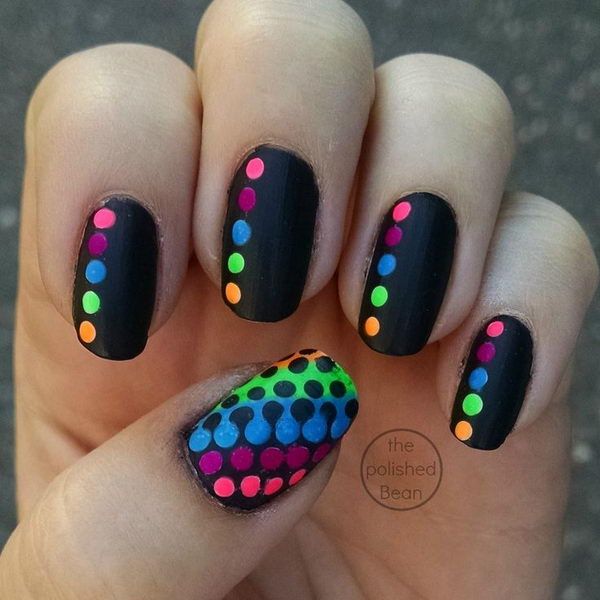
“Black and White Polka Dot Manicure”
The base color of the nails will be black. On the basis, closer to the end of the nail, with the help of dots, points of different sizes are applied. After that, you can select the end of the nail plate with white and cover the manicure with a glossy or matte fixative.
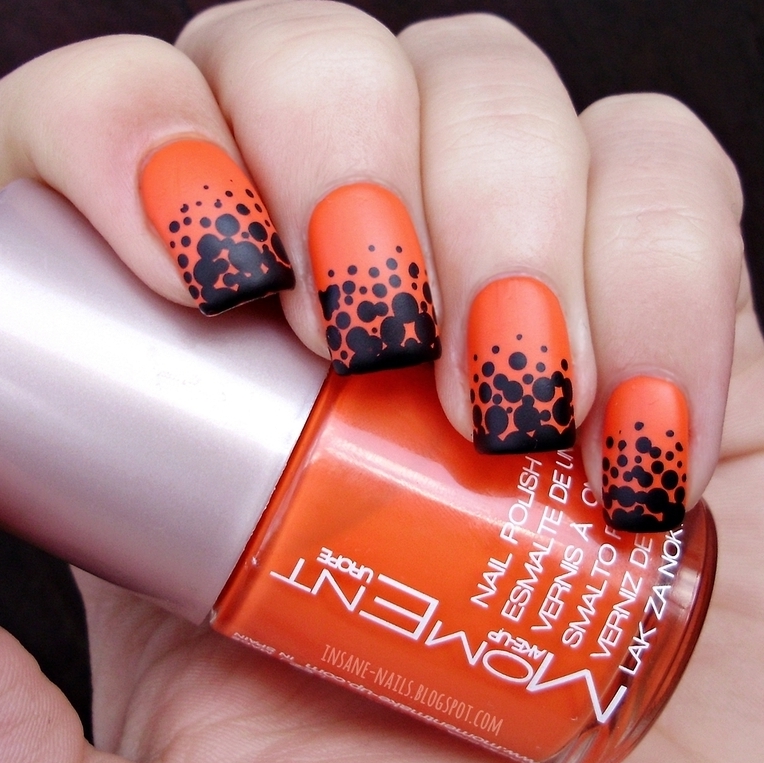
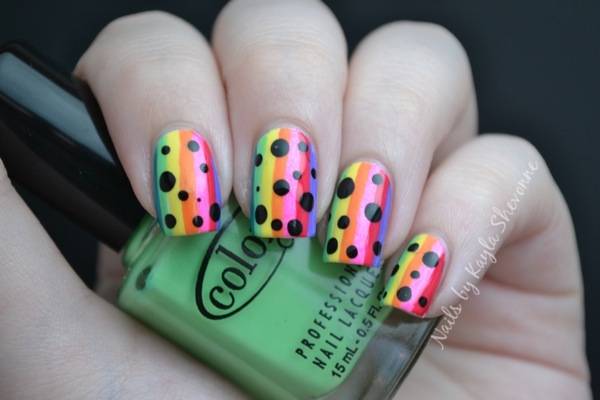
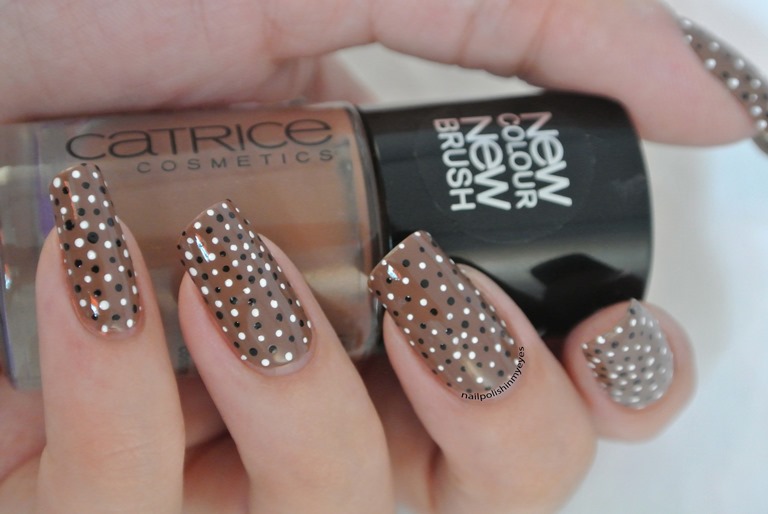
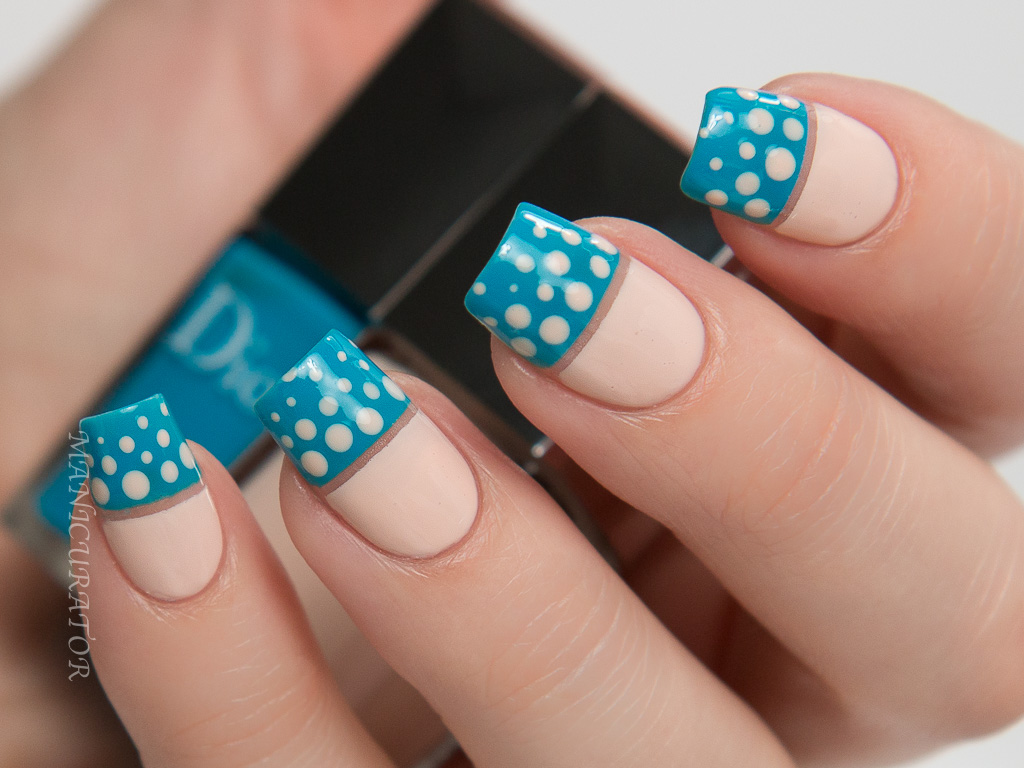
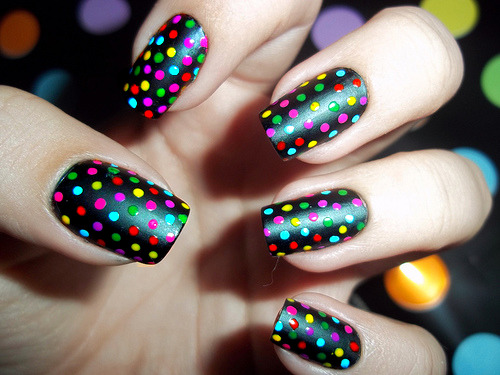
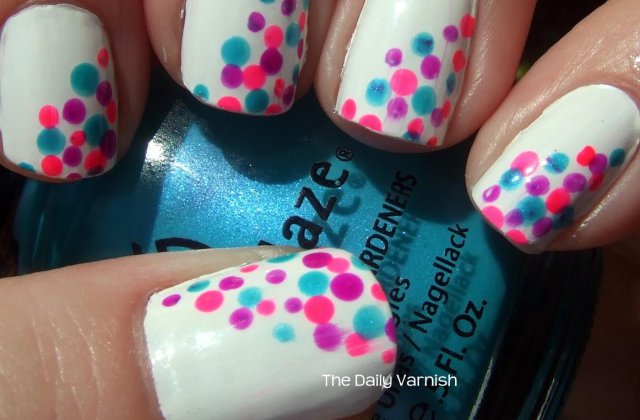
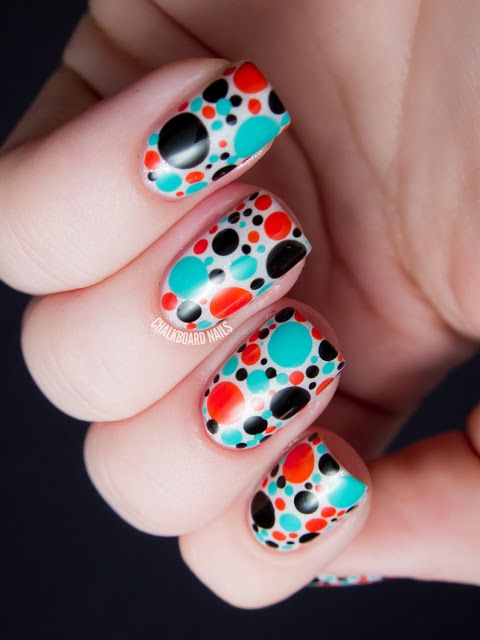
“Colorful Placer”
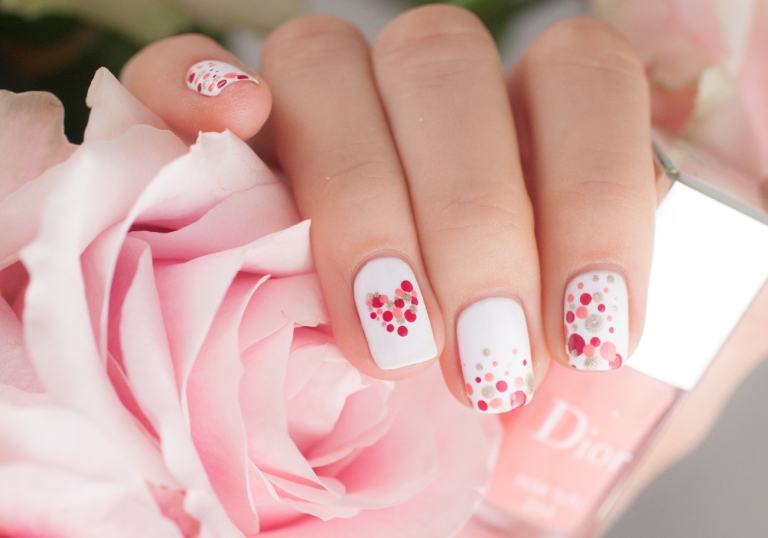
The basis can be taken any bright varnish: white, lilac or pink. After drying the base, multicolored peas are applied on it in any order. You can form an abstraction of circles, where one will go to another. Such a design would be appropriate as a winter decor or to act as a spring and delicate nail design - it all depends on the chosen color scheme.
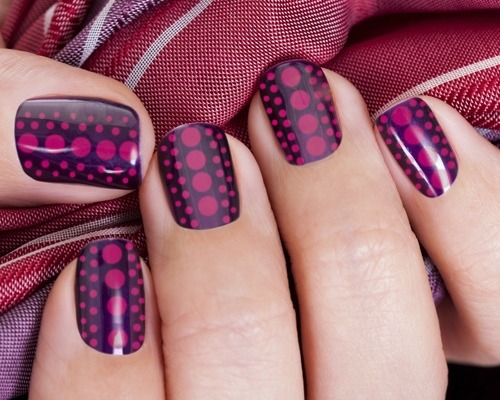
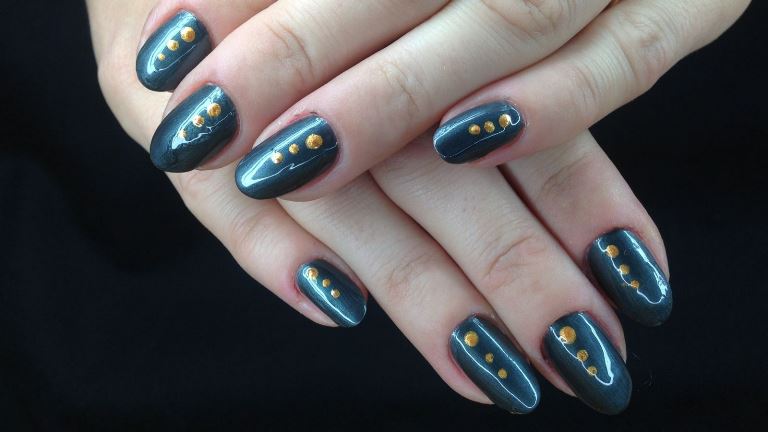
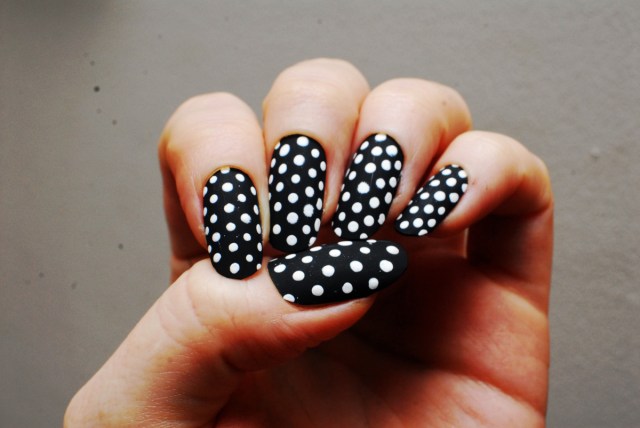
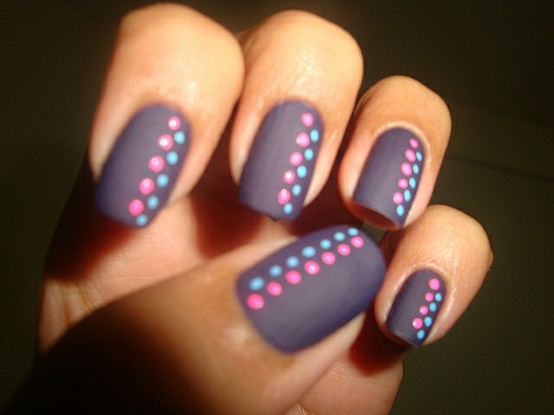
Manicure with dots arranged in straight lines
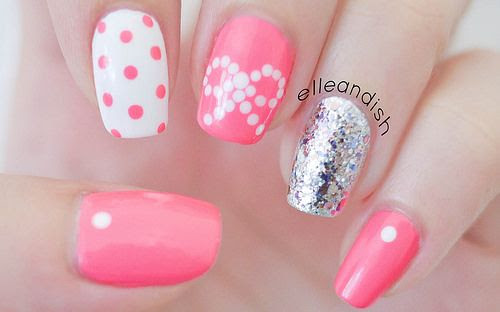
For conservative “nail art” perfectionists, using dots can be done by creating lines of dots of the same size on a light basis. Moreover, the nail color does not have to be the same - for the spring and summer manicure, you can use a combination of the same color in different shades on each finger. For the finished design it is recommended to cover the nails with a glossy fixer.
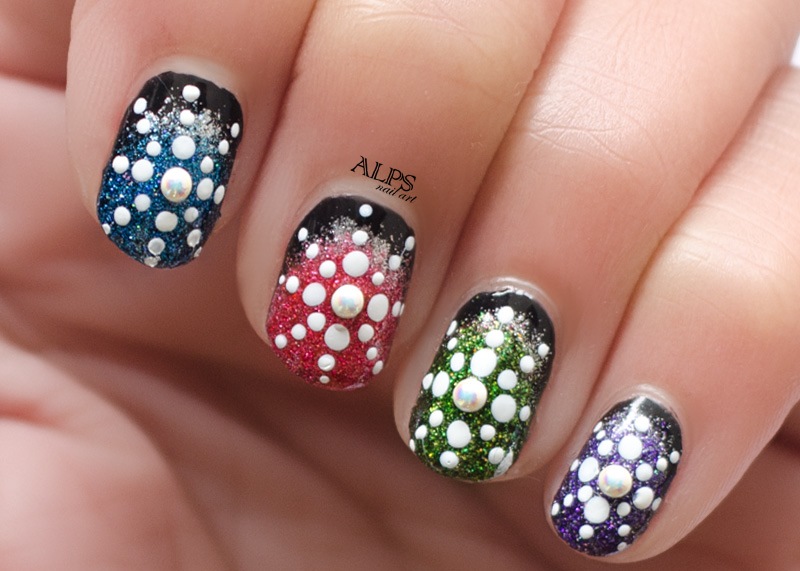
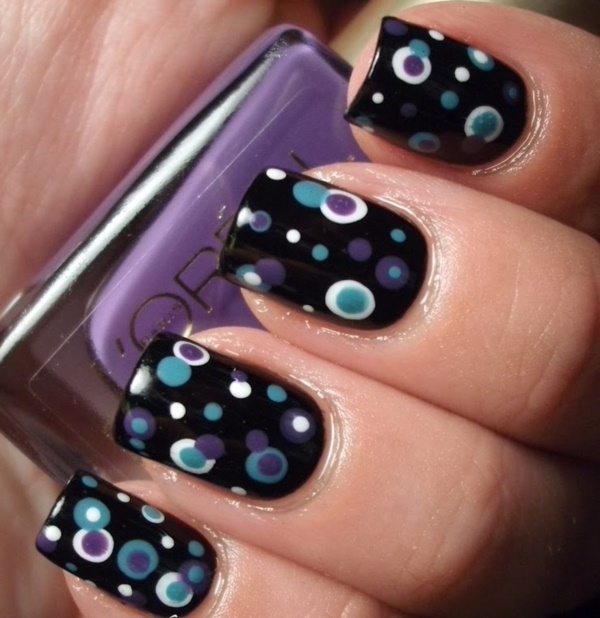
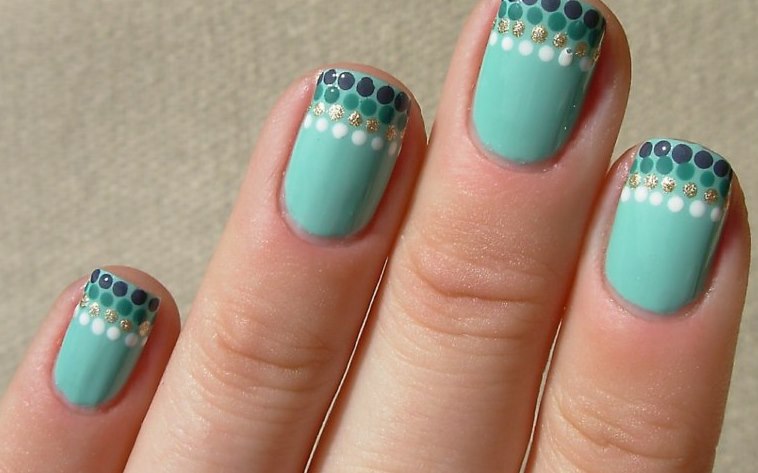
In addition to abstraction or straight lines from points, the tool allows you to draw a nail in the form of a multi-colored pattern of droplets forming a semicircle. Points can be made different in color and diameter. It is easy to form ornate patterns of peas of different sizes on a contrasting basic background.
Holiday ombre manicure with dots
Quite an actual technique of creating a design with the transition of nail color in different colors and tonalities can be supplemented and decorated with dots. To do this, patterns or lines of dots are created on the basis, which can be coated with bright silver powder or rubbing for shine and attractiveness. Such options are relevant to any special occasions.
Dots manicure is waiting for you in the next video.


