
March 8 is a long-awaited holiday for women. On this day, they especially want warmth and attention. What a gift you can make your favorite teacher with your own hands, read this article.
What to teach?
On the glorious spring day of March 8, we are in a hurry to please relatives, friends, colleagues and, of course, teachers. Every day these selfless women go to work, forgetting about their own problems, in order to give our children knowledge and a bit of their warmth.
If the teacher is not just a teacher, but a friend, a reputable mentor whom your child respects and loves, present him with an original gift that will cause joy and admiration.

Hand-made things with good thoughts and warm wishes are what will please a sincere and kind teacher who appreciates your work and talent.
Variants of gifts depend on the creative abilities of the parents. Children can make a gift to the teacher, especially if they have hobbies. In stores for hobbies and creativity, you can look at the kits for making beautiful souvenirs, jewelry and pleasant things.

From younger students
If your child goes to primary school, he can:
- draw a beautiful postcard;
- create an original installation from natural materials;
- make an application of paper or fabric;
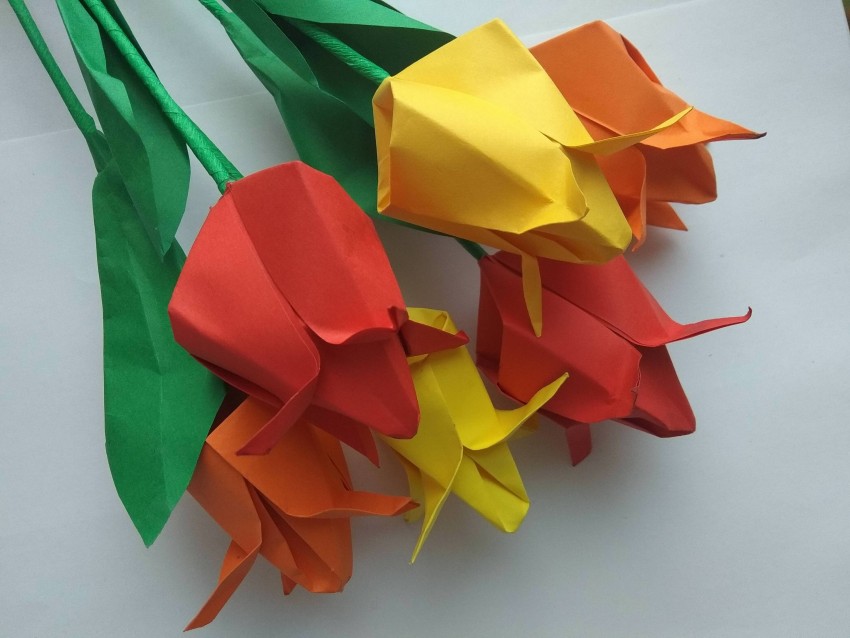
- create flowers using origami technique;
- cut engraving;
- paint a glass vase or a jar for useful trifles with stained glass paints;
- using the device for burning to create a beautiful spring picture;
- make a woven basket of veneer;
- sew casket or purse of felt;
- embroider a small napkin;
- make fridge magnets out of plaster;
- crochet original key rings, bookmarks for books.
From high school students
High school students can:
- make a festive wall newspaper, a collage with photos of students and a teacher;
- create an original presentation on a computer and burn it to a disk;
- shoot and independently mount a kind and cheerful film for the teacher with wishes from all students and parents;
- make a brooch, hairpin using kanzashi technique;
- tie a beautiful napkin;
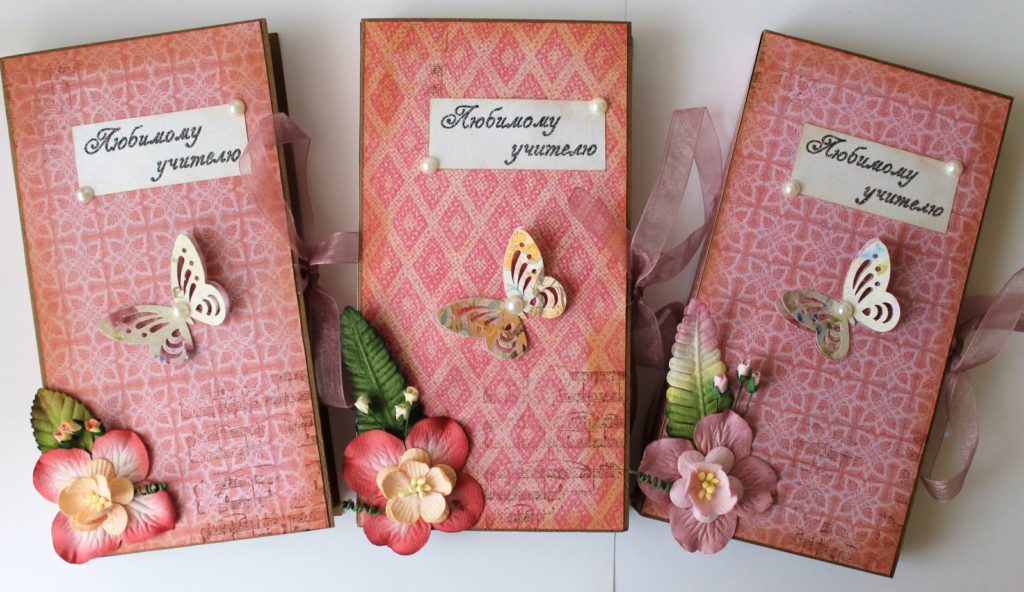
- present an album for photos made using the scrapbooking technique;
- make candles, soap own work;
- on technology lessons, girls can sew a wonderful set: pot holders and an apron;
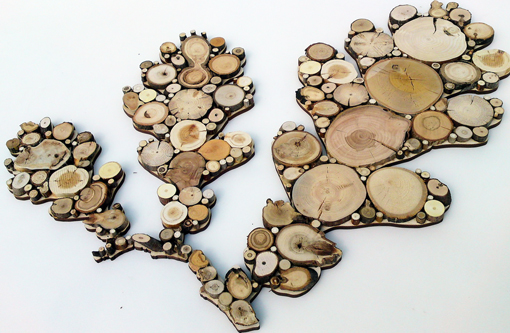
- boys - to make coasters for hot, for books, interior decorations in the form of panels from wooden saw cuts.


However, not only students can make a gift for their favorite teacher - a surprise from their parents will also become something special and memorable for him.
From moms
Moms can create:
- interior decorations: curtains, tablecloths, napkins, lovely amigumi toys;
- knitting or crocheting things the taste of the teacher: a scarf, hat, mittens, gloves or stole;
- embroidered picture or portrait teacher, taken from a photograph;
- diamond mosaic pattern;
- decorations from marshmallow foamiran;
- bijoux from cold porcelain;
- cushion pads, bedspreads, original handbags, if your teacher appreciates it;
- purse, clutch, earrings and belt from genuine leather for the teacher of elegant age;
- stylish brooch and handbag, knitted from wool;
- backpack from denim for a young, energetic teacher who loves an active lifestyle;
- cakebaked and decorated with his own hands.


From dads
Dads can present:
- wooden frames with photos of the teacher, boxes, shelves, jewelry;
- organizer for the table;
- interesting coat hanger for clothes;
- original flowerpots and flower stands;
- basket, vase, casket from the vine;
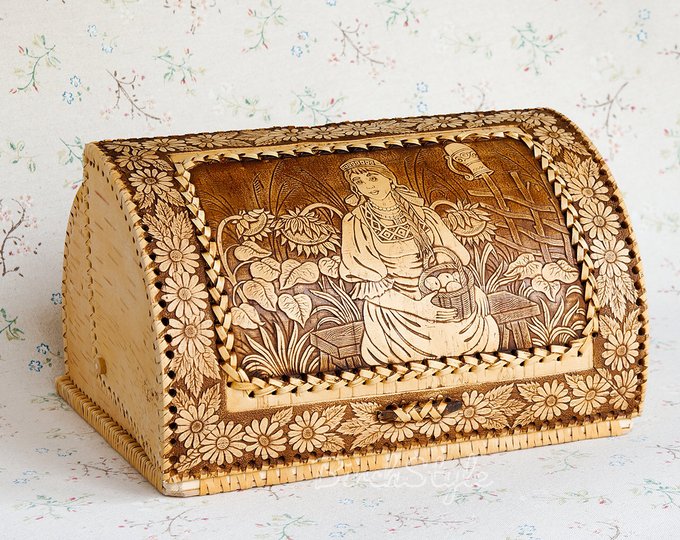
- birch bark box under jewelry or bread box;
- table lamp with a beautiful shade.


Making a bouquet of fruits and flowers
If you don't own any of these handicraft arts, don't be discouraged.
There are unusual gift options where you can express your creativity and create an extraordinary surprise. This may be, for example, a bright festive bouquet of fruit and spring flowers.
To do this is technically easy, if you have the desire, patience and a little practice. Fruit floristry is now at the peak of popularity. Such a gift will cause a lot of emotions from the addressee and will be a chic decoration for a festive table, which you can eat with pleasure if you wish.
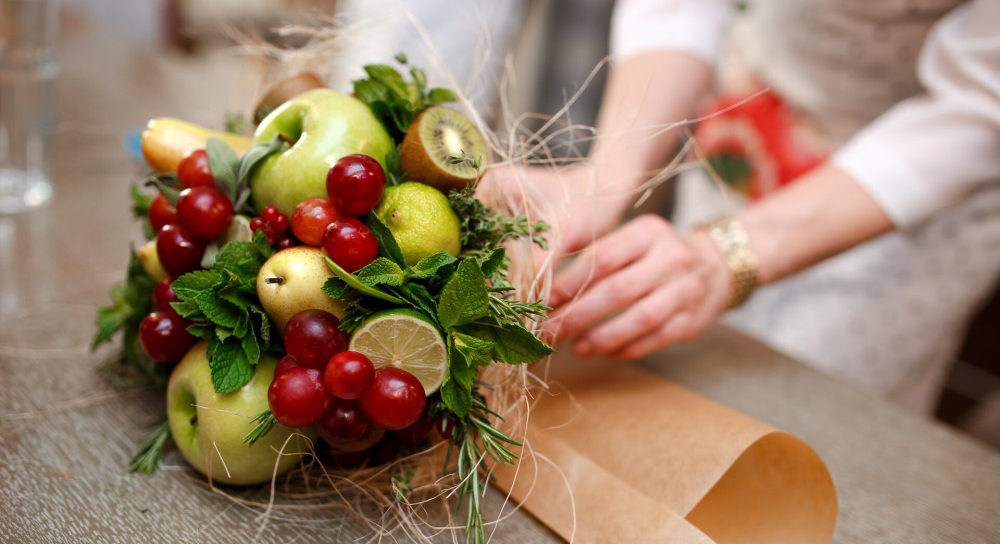
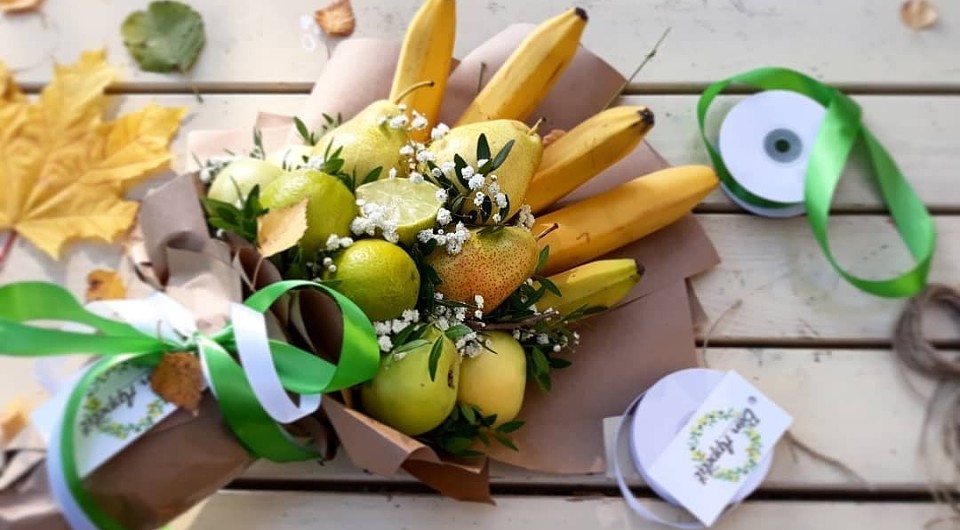
We offer to make a bouquet in bright, sunny, orange-yellow tones, creating a great mood.
To do this you will need:
- wooden skewers not less than 30 cm high;
- food film;
- knife;
- scissors;
- cutting board;
- beautiful ribbon;
- technical rope;
- kraft paper (4 sheets of rectangular shape 50x50 cm).
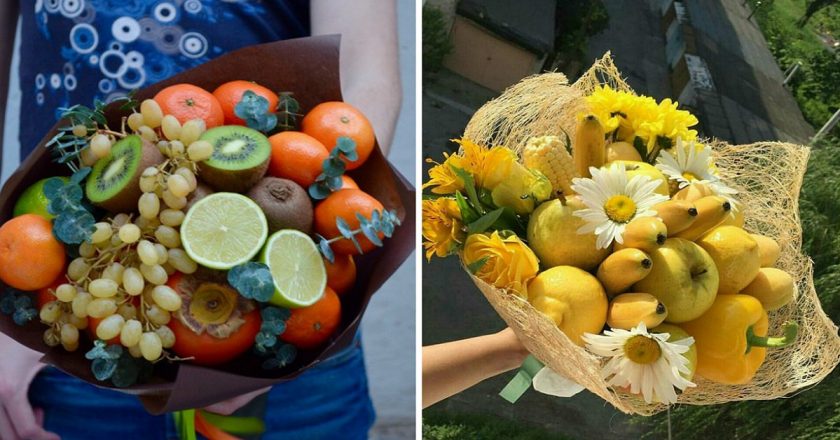
Fruits:
- grapefruit - 1 pc .;
- Quince - 2 pcs .;
- yellow apples - 2 pcs .;
- tangerines - 5 pcs .;
- a bunch of mini-bananas of 8 or 10 pieces.
Flowers:
- several fluffy branches of mimosa 40–45 cm high
The amount of fruit can be reduced or increased according to your desire. Do not take a lot of fruits for the first time: the more components, the larger they are, the harder the bouquet will be and the harder it will be to work with it. Fruits can be replaced: instead of a quince, take apples, replace the grapefruit with a small pomelo.

Important! Fruits choose dense, immature, without defects. The color of the fruit should be juicy, saturated.
Training
We invent a composition:
- fruit wash and dry;
- lay them out beforehand as they will be in the bouquet, play with the composition;
- large single fruit is better placed in the center, the rest of the fruit placed around it;
- bananas will look good on the edges of the bouquet, opposite each other;
- Citrus fruits look beautiful in a cut - determine which fruits you want to cut to create a bright accent in a bouquet.
Making a frame
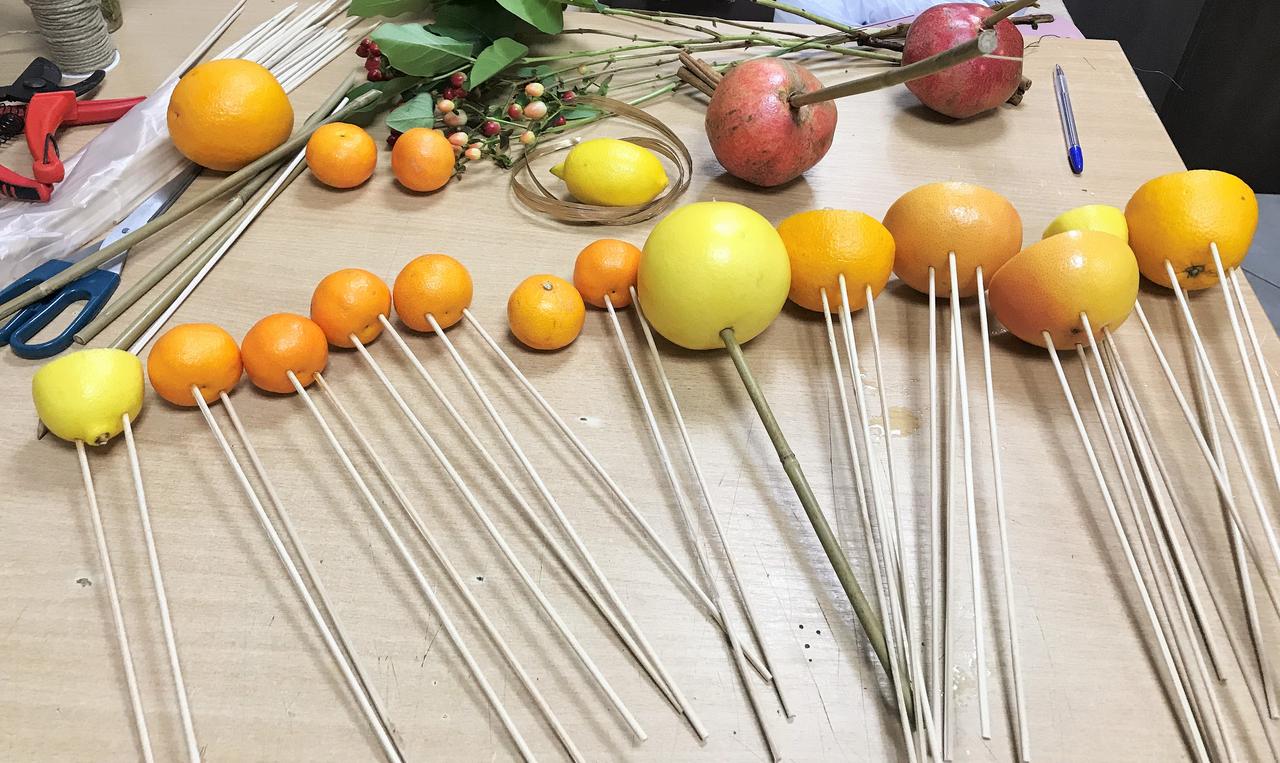
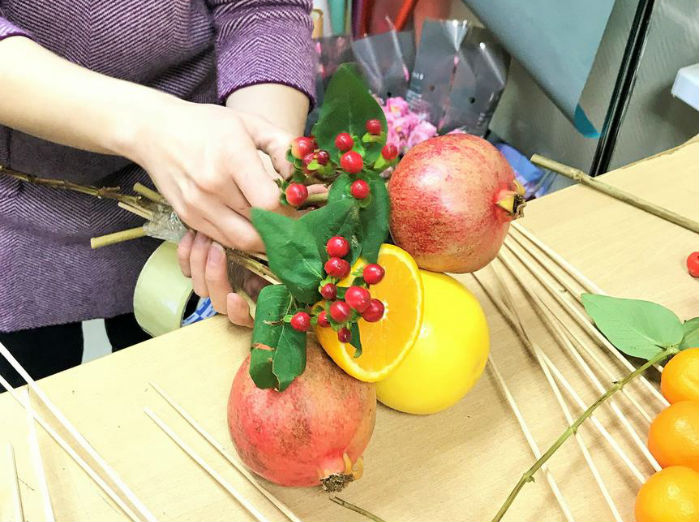
Insert fasteners:
- we put skewers into each fruit (2 pieces each);
- in a large grapefruit or pomelo it is better to insert 3 skewers;
- place them in the pulp at an angle, towards each other;
- stick skewers in order not to pierce the fruit;
- You can insert fastenings from any side, however you like;
- one fruit can be positioned with the bottom side up, and the other - sideways or tail;
- we divide a bunch of bananas into two (4–5 pieces each);
- In each banana we insert on the stick from the side of the tails.
Creative process
We make accents:
- gently cut the "ass" of fruit to open a beautiful "wheel" of pulp;
- do this with a central grapefruit and two mandarins;
- tightly close the cut-out place with plastic wrap so that the fruit does not give juice, does not become dusty and will not be weathered.
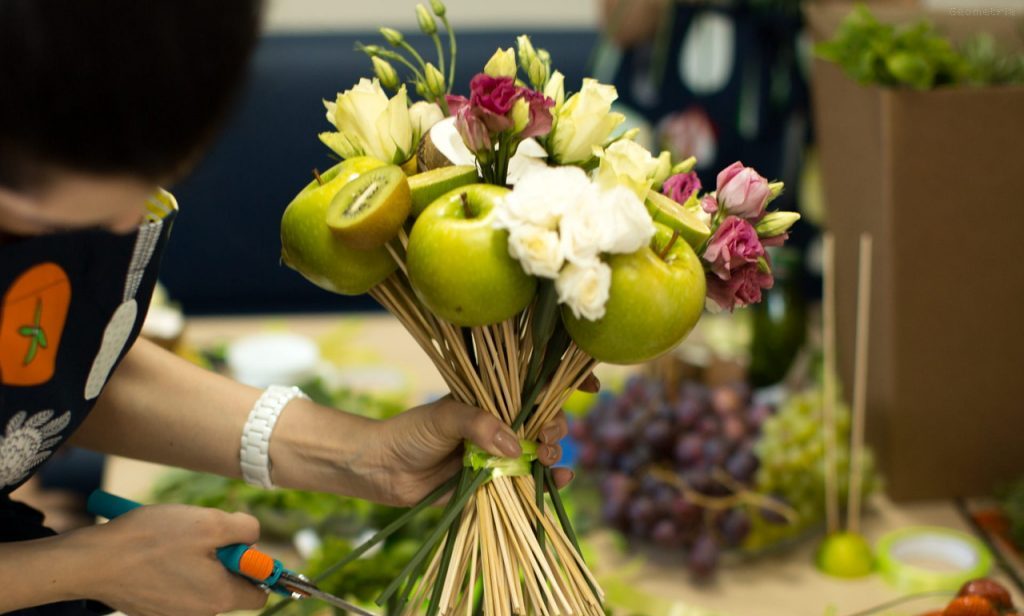
Putting composition:
- Take the central fruit by the sticks in one hand, and add the next element to it with the other hand;
- The bouquet collected in the spiral floral technique looks spectacular, but if you do not own it, then collect the bouquet as you like;
- turn the bouquet to see it from all sides;
- so that the skewers do not slip out of the hands, you need to make an intermediate stitch: put the bouquet on the table "head" down and pull the sticks in the center with a rope (ask the household to help you);
- if the bouquet is already heavy, continue the assembly on the table;
- add fruit by turning the bouquet and dressing it again;
- lift the composition and consider, correct carefully what is necessary;
- At the very end of the work, we place sprigs of mimosa along the perimeter of the bouquet so that they slightly rise above the fruit;
- make a strong final bouquet bouquet with a rope.
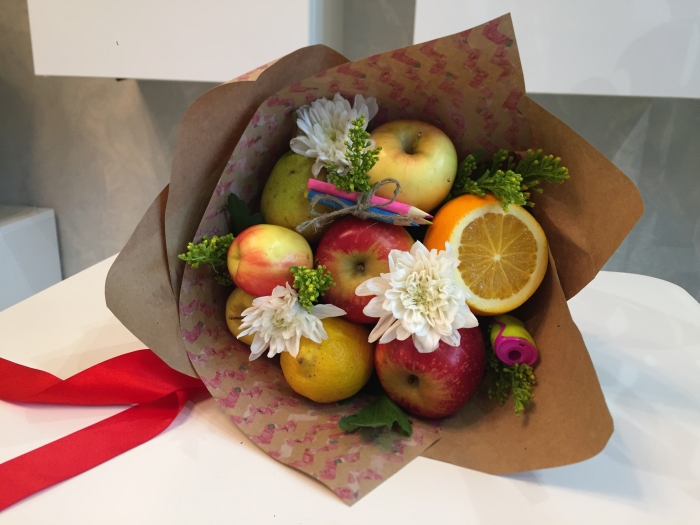
Beautiful packaging
Wrapped in kraft paper:
- put on the table 1 sheet of paper;
- we put our bouquet on him with our feet to hide them;
- if there are skewers that interfere, we cut them under the total length;
- lift the edges of the sheet up and form around the legs;
- we tie up the leg of the bouquet with a rope;
- The remaining 3 sheets of paper are folded diagonally, without connecting the ends;
- put the resulting triangles one on one with a shift on the table;
- we place a bouquet on the first leaf in the center;
- we wrap the first triangle around the bouquet and firmly hold it;
- turn the bouquet to the second side and twist to the second sheet;
- we perform the same operation with the third party and the last triangle;
- we take a ribbon and tightly bandage a bouquet with it, and then form a beautiful bow;
- A wonderful gift for the teacher is ready.
You can learn more about gifts to the teacher on March 8 in the next video.


