
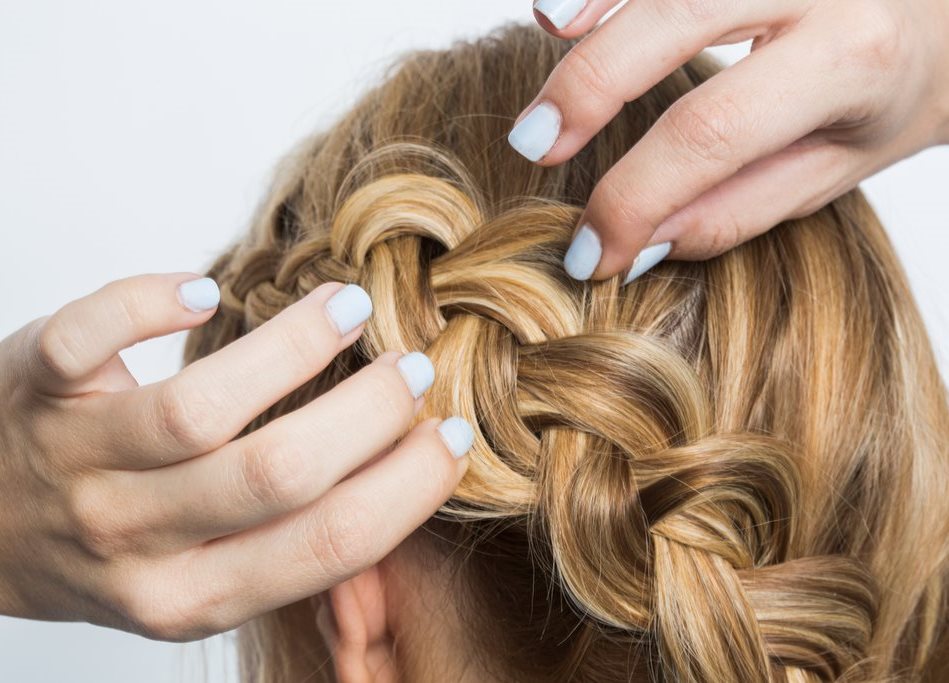
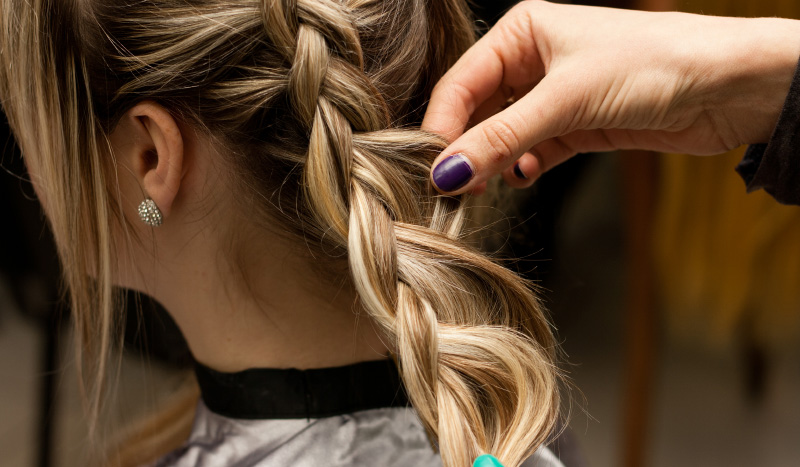
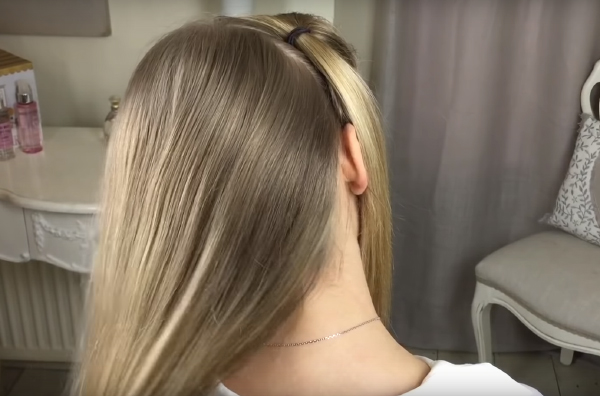
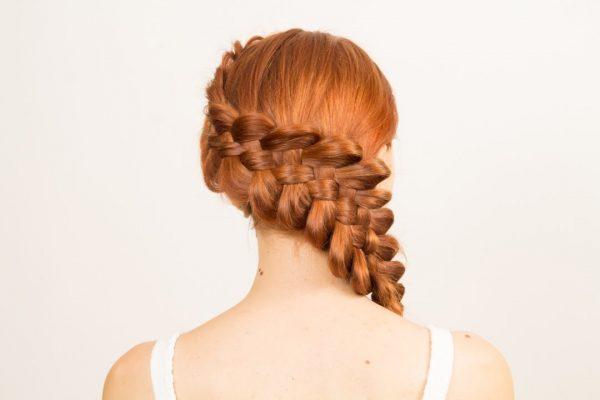
Ever since the times of Ancient Rus, the braid is considered a symbol of the feminine principle. The longer the spit was, the more attractive the girl was. Today a rarity - long, thick and healthy hair, braided in a magnificent braid. But the variants of its execution since that time appeared an incredible set. One of the frequently used stylists, hairdressers is the reverse (or French) braid. She looks so impressive that many mistakenly believe that it is difficult to weave. Although this is fundamentally wrong assumption, because everyone who can weave a simple pigtail, is able to master this technique of weaving.

Turning off a braid to learn how to weave is a snap if step-by-step instructions are taken into account.
Classic
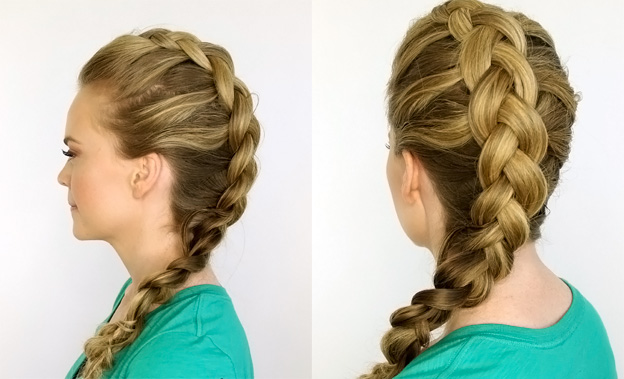
Weaving reverse pigtails (or French braids) has no complicated technique. Having trained two or three times, you can master this weaving, and later it will take no more than five minutes depending on the length of the hair, of course.
To weave necessarily need to acquire:
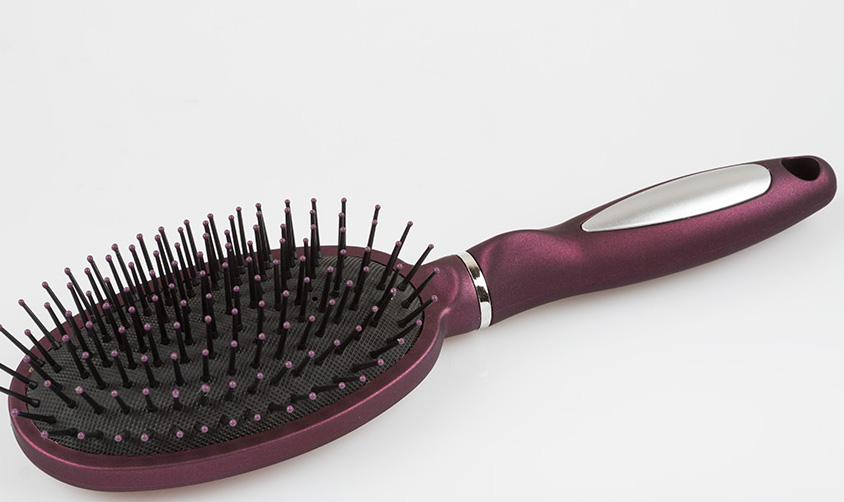
- massage comb without metal teeth - they will scratch the scalp, applying micro-cuts, it is recommended to give preference to comb made of natural bristles;
- spray with water;
- elastic band - contrasting or matching hair color for minimalist lovers;
- fixing hairspray.


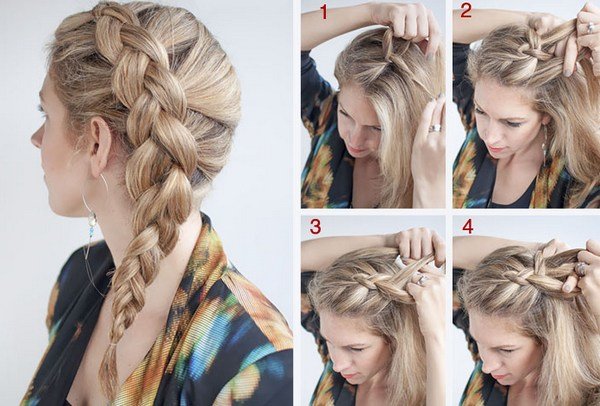
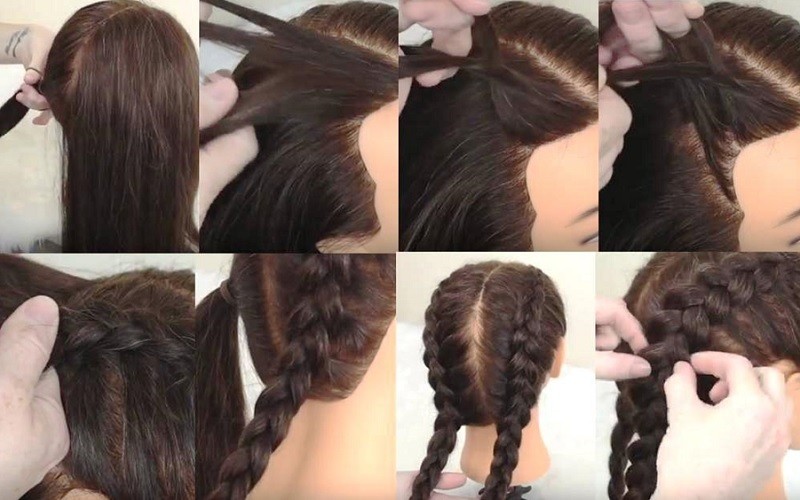
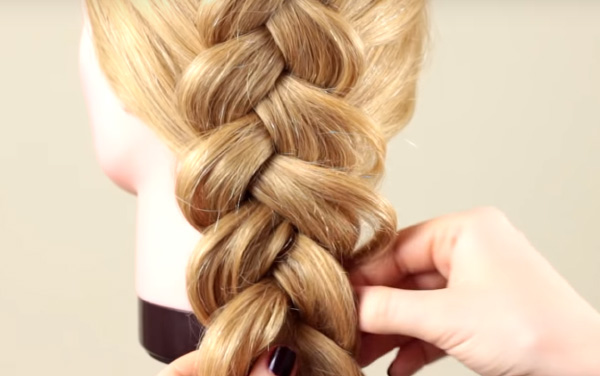
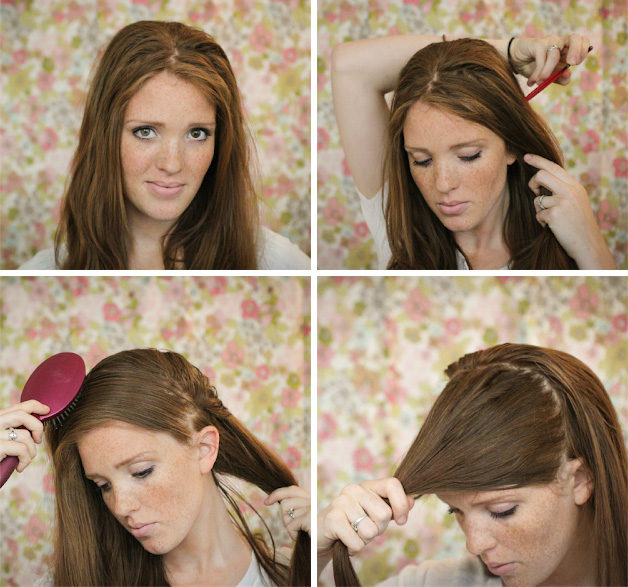
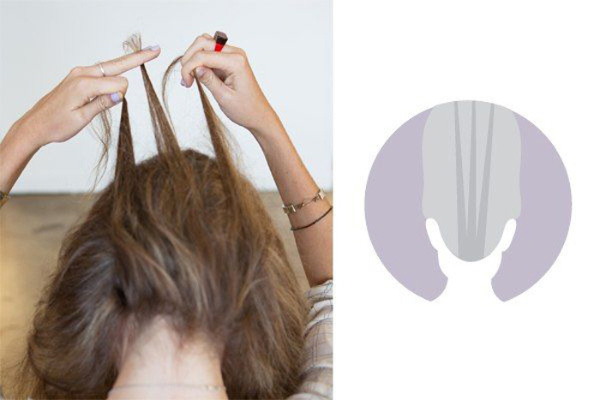
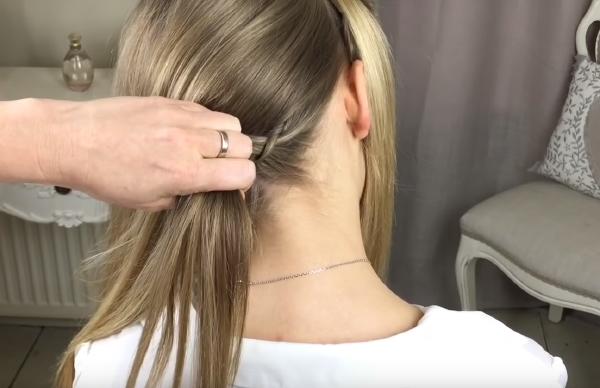
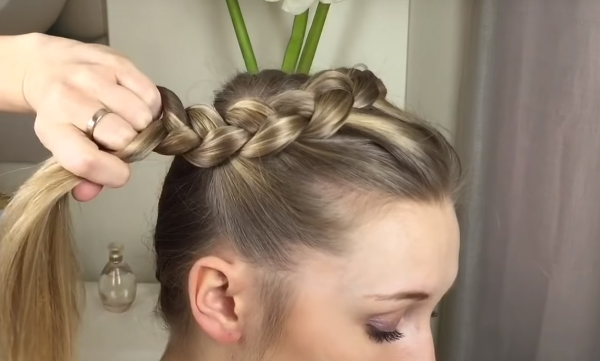
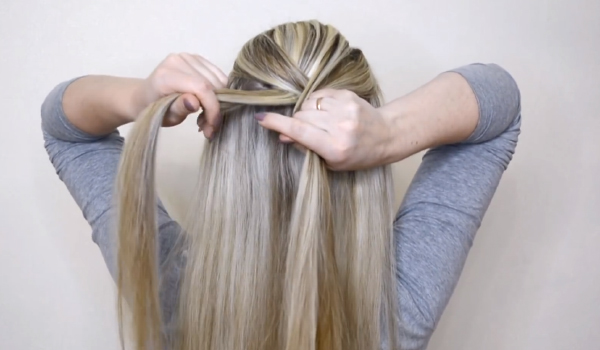
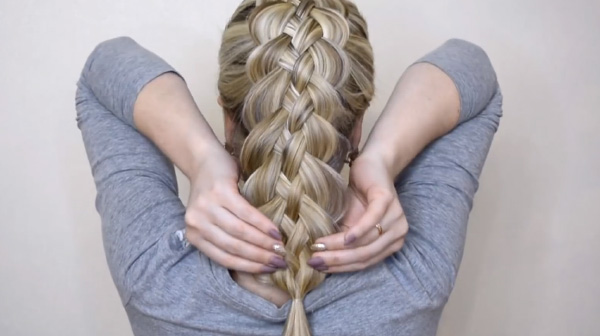
A pigtail will help to make a detailed scheme. For the first time it is recommended to strictly adhere to each stage of the technique of weaving the French braid inside out.
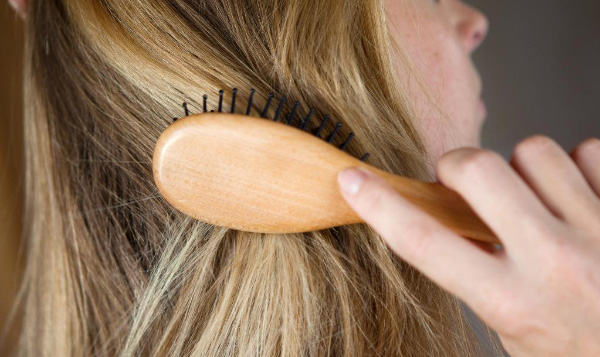
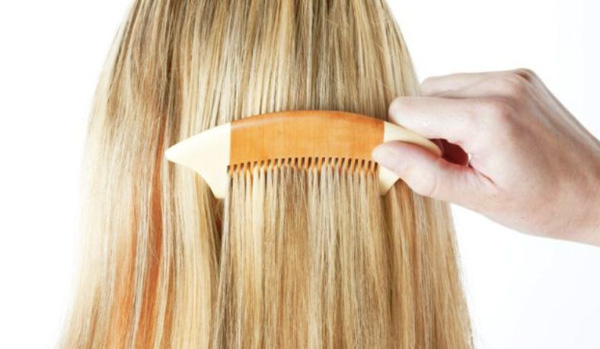
- First of all, it is desirable to thoroughly comb the hair, not forgetting to massage the head. Few people know, but the long wearing of the braid (for example, during the whole working day or school day) provokes fatigue and heaviness of the head. This is particularly pronounced by the end of the evening, when you want to quickly weave hair and massage your head. A light massage in the morning or before the event will help reduce the feeling of a constricted head.
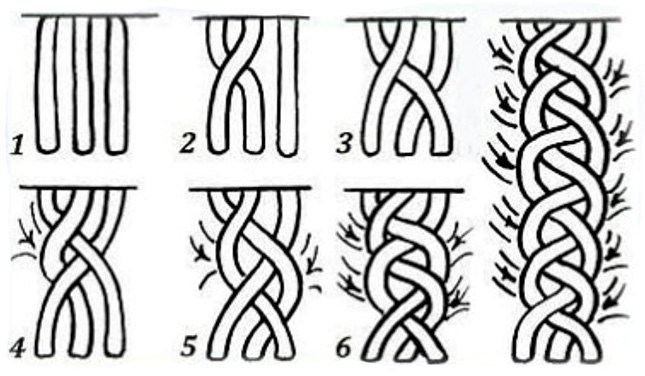
- Next, you need to separate a small strand of hair just above the forehead. The thickness of the strands can be very different depending on your desire. The appearance of the French braid from this will not undergo major changes.
- Then we divide the order into three identical sections. The hair is slightly sprayed with a spray with a little water, which makes it possible to simplify the process of separating each of the strands.
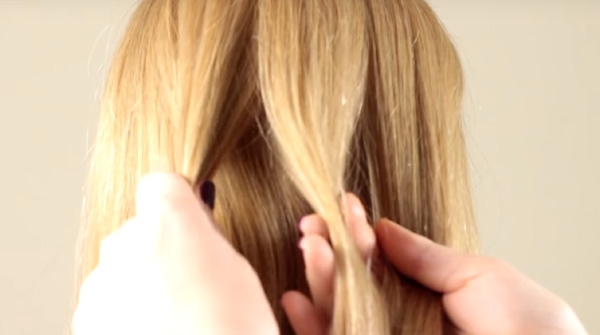

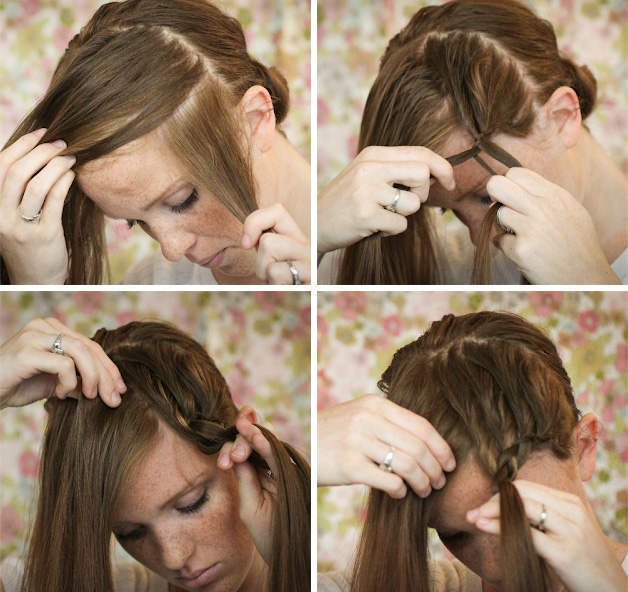
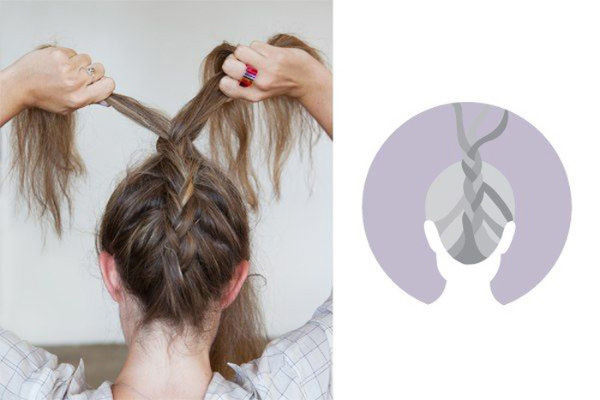
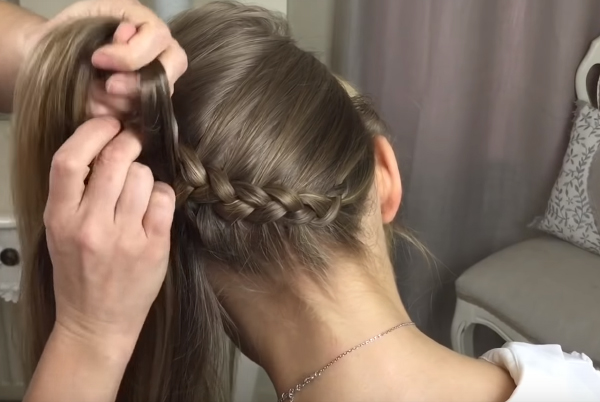
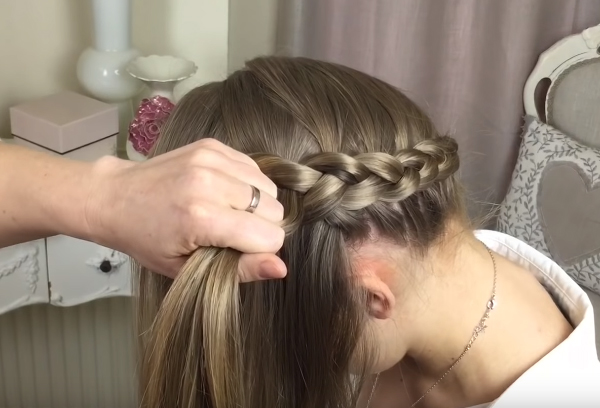
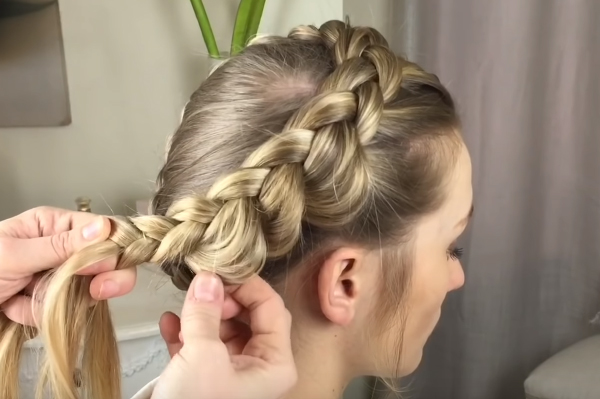
- Next begins the process of weaving. The left strand is gently placed on the middle one, and the right strand, on the contrary, is placed on top of it. After that, the left is placed on top of the right strand.
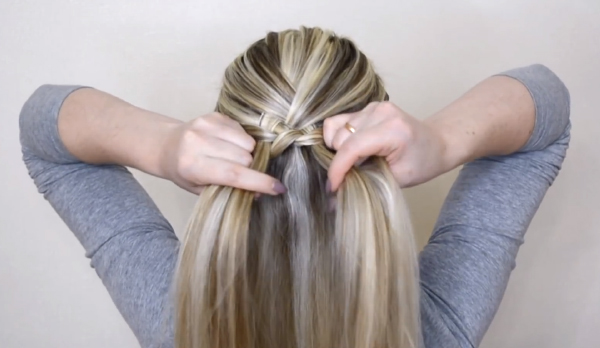
- In order for the back braid to last longer and look more presentable, it is recommended to tighten each intersection more tightly.
- Shift the hair in your right hand, thereby leaving the left free - lower it with your palm downwards. Both extreme strands turn upwards so that the left strand is in the middle.
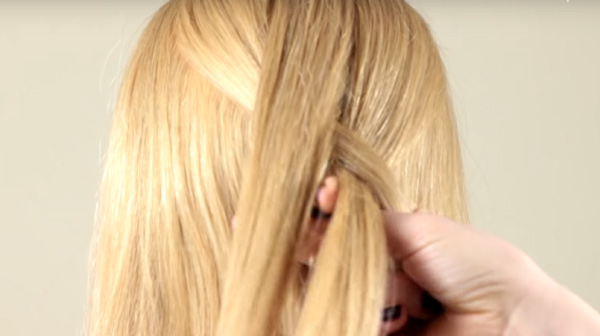
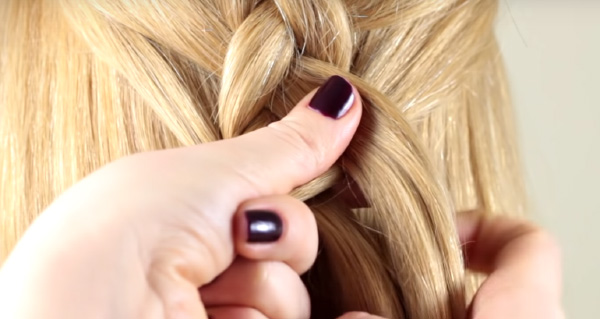
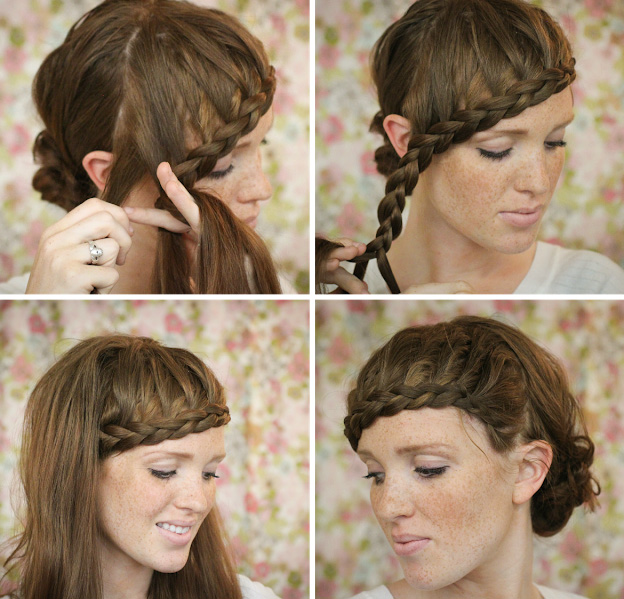
- "Diving" under the extreme strands on the left side, you need to take a small part of the hair and put them to the middle strand. It is advisable to take locks of the same volume as the main one - so the hairstyle looks more presentable.
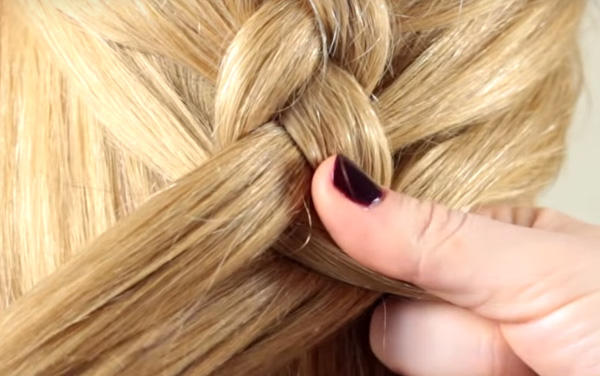
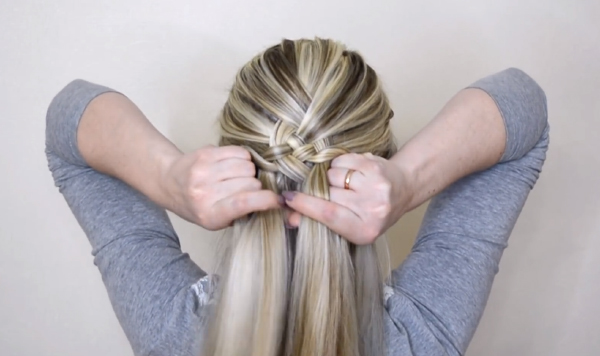
- Using your left hand, you will need to fix the base of the pigtails - this will allow you to let go of both extreme strands and turn them upwards. Next, the process of weaving is repeated. Extreme strand, but from the right side is shifted to the middle with a small curl, taken from the entire stack of hair.
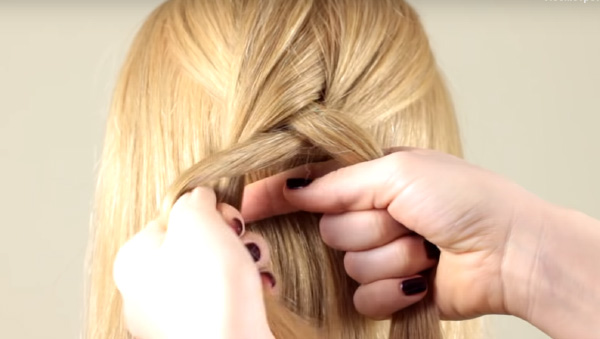
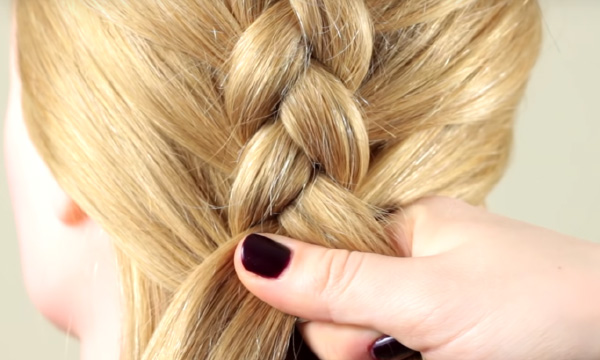
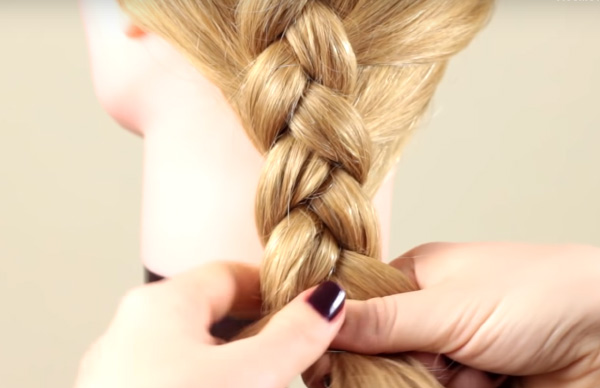
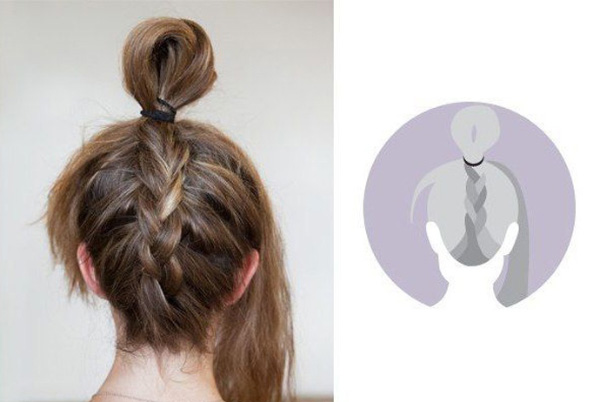
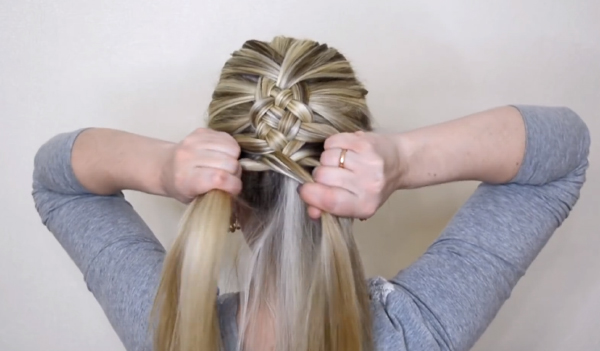
- Observing the principle of intersection, the braid finishes to the required length.To create a voluminous French braid, the tip of the braid is fixed by means of stealth to its base.
Back braid on bangs
A little accent in the form of a back braid, the weaving of which begins with a bang, is perfect for flowing hair. This is a quick way to create a neat and attractive hairstyle for those who grow bangs.

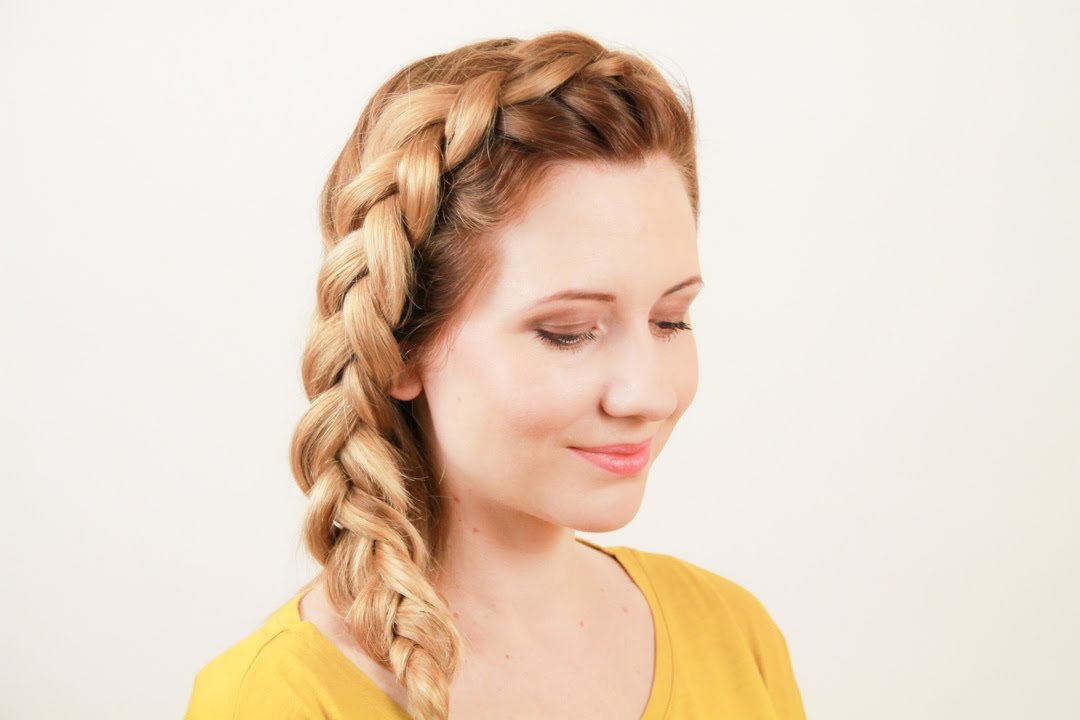
The process itself is much easier than classical weaving for the entire length of the hair and will take no more than two or three minutes.
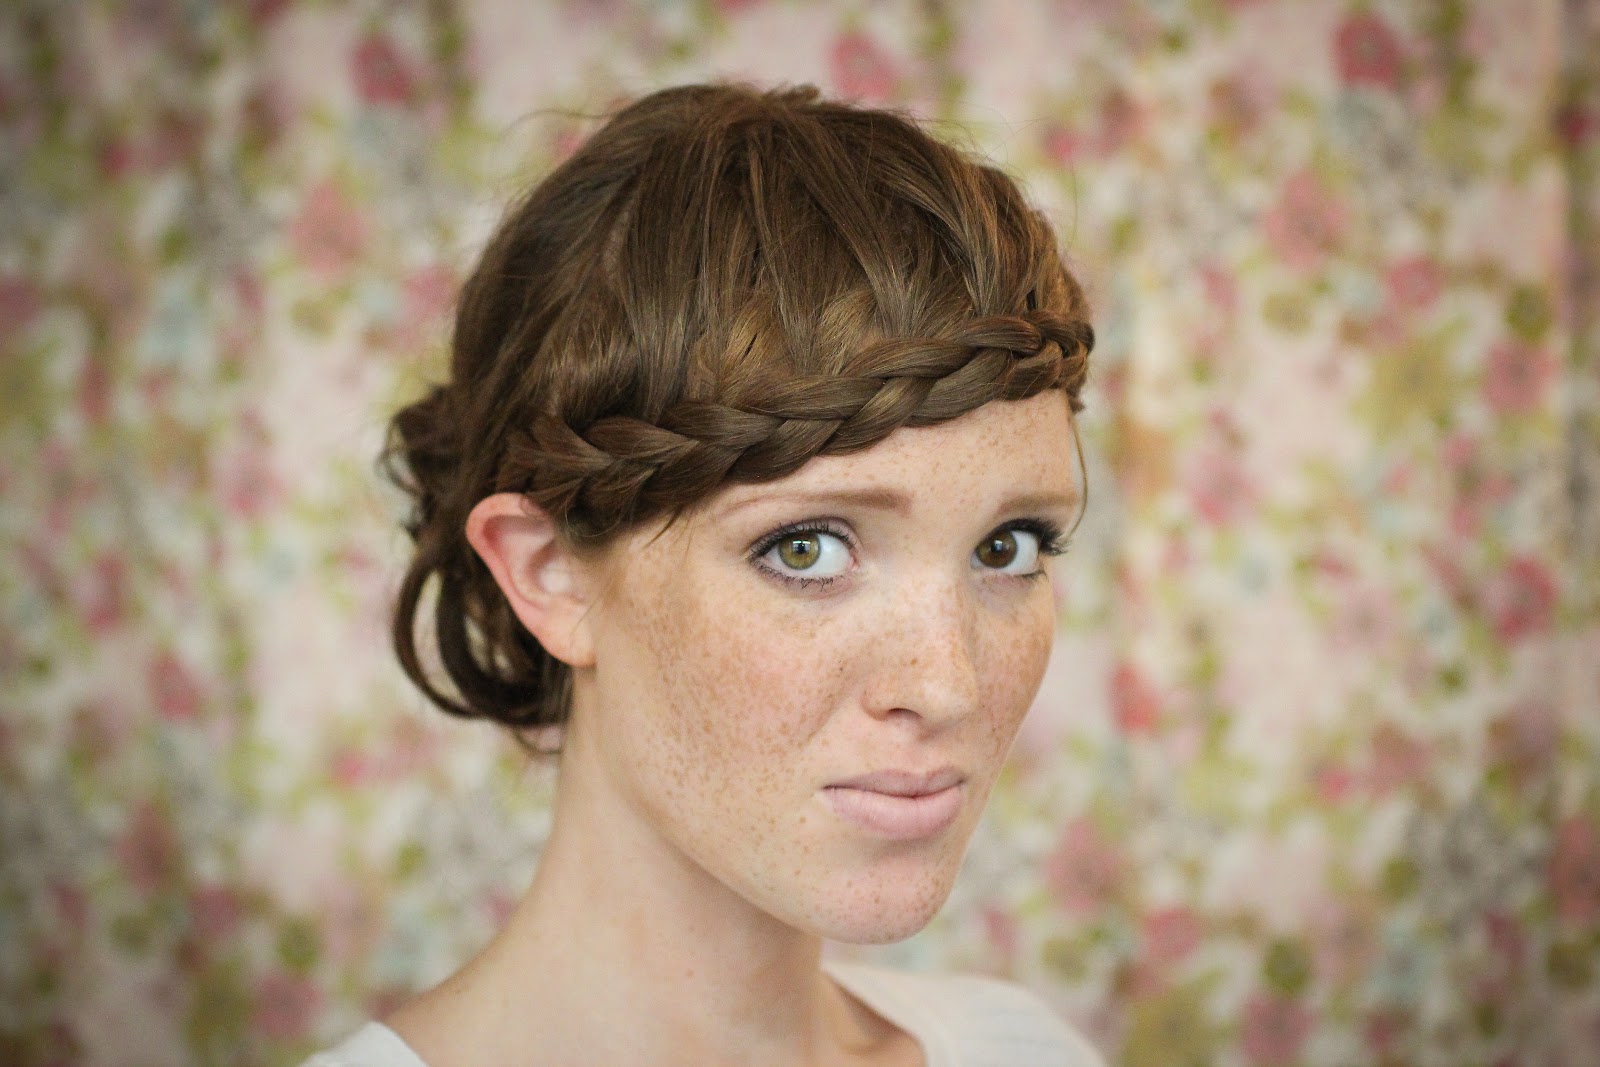
To begin with, it is recommended to comb your hair well so that weaving is easier. Next, you need to separate the bangs. If there is none, then a strand of the required size. Then, starting from one auricle to the other, a braid is woven in the classical way indicated earlier. The tip of the back braid on the bang is fixed with the help of invisible so that it does not catch the eye.
In order to hold the hairpin better on the hair, it is recommended to sprinkle it with varnish, after which you immediately fix the necessary strand.
The rest of the loose hair slightly curled curlers or curling. The final touch will be sprinkling with lacquer, which will keep your hair throughout the day.

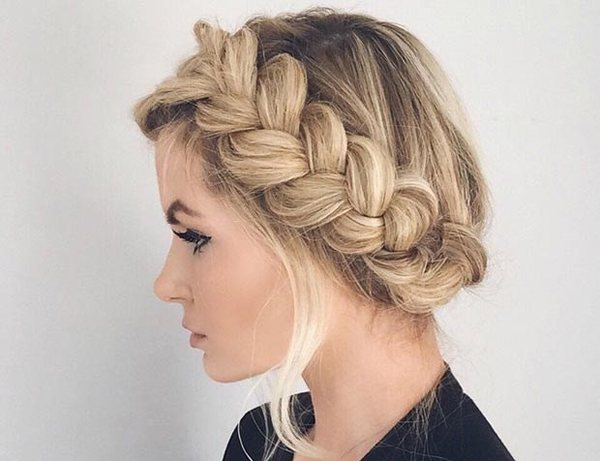
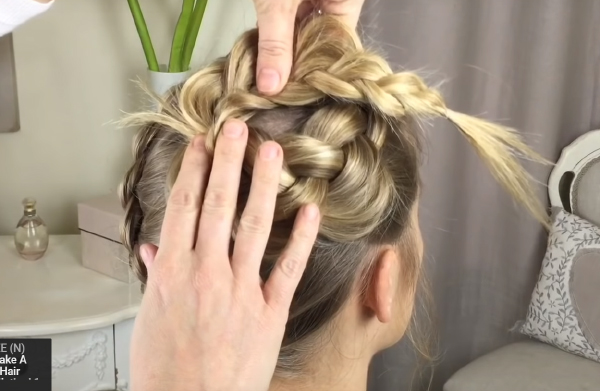
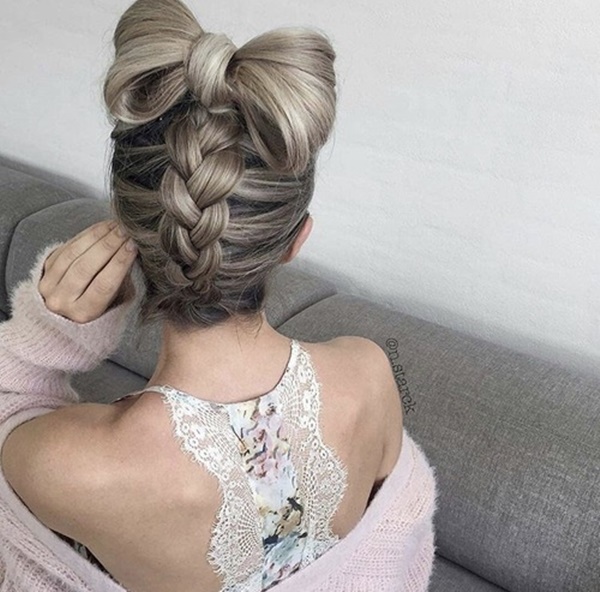
Hairstyle with a bunch
Original hairstyle that visually looks very impressive. Preferring the French spit out with a beam, the woman will certainly be fascinated with admiring glances.
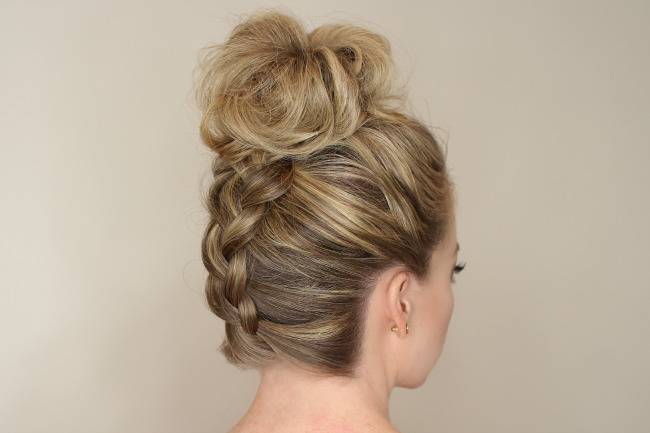
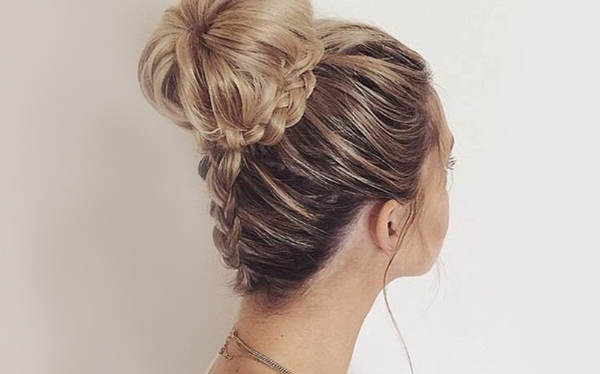
Despite the so-called neat collection of this hairstyle, it is perfect for wearing on weekdays.
Having disentangled several faces and ears, the reverse braid with a bundle takes on a less solemn appearance, creating a feeling of slight negligence.
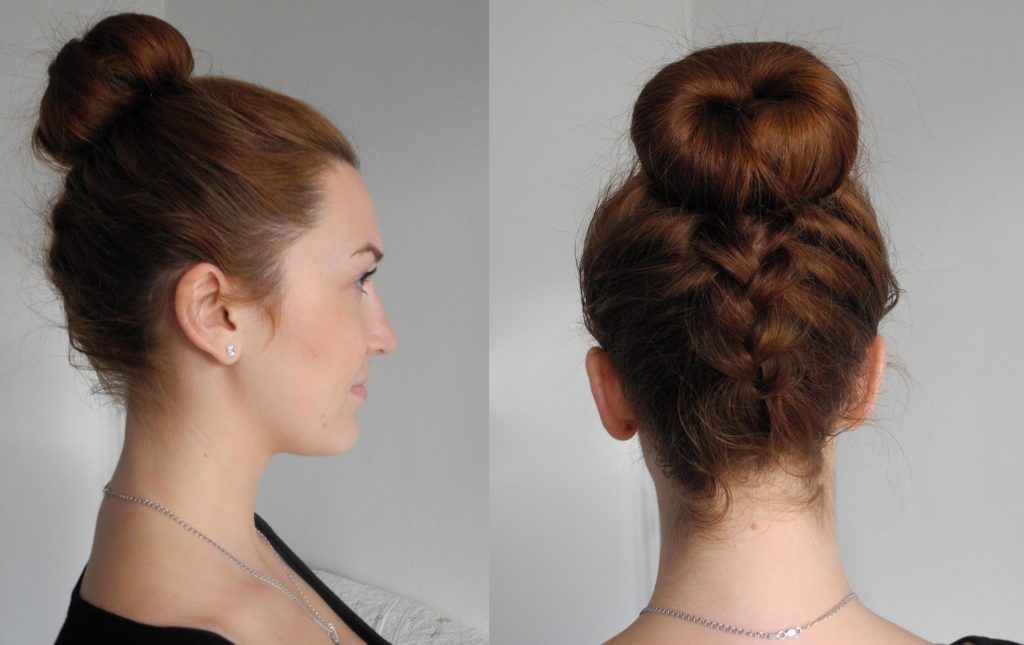
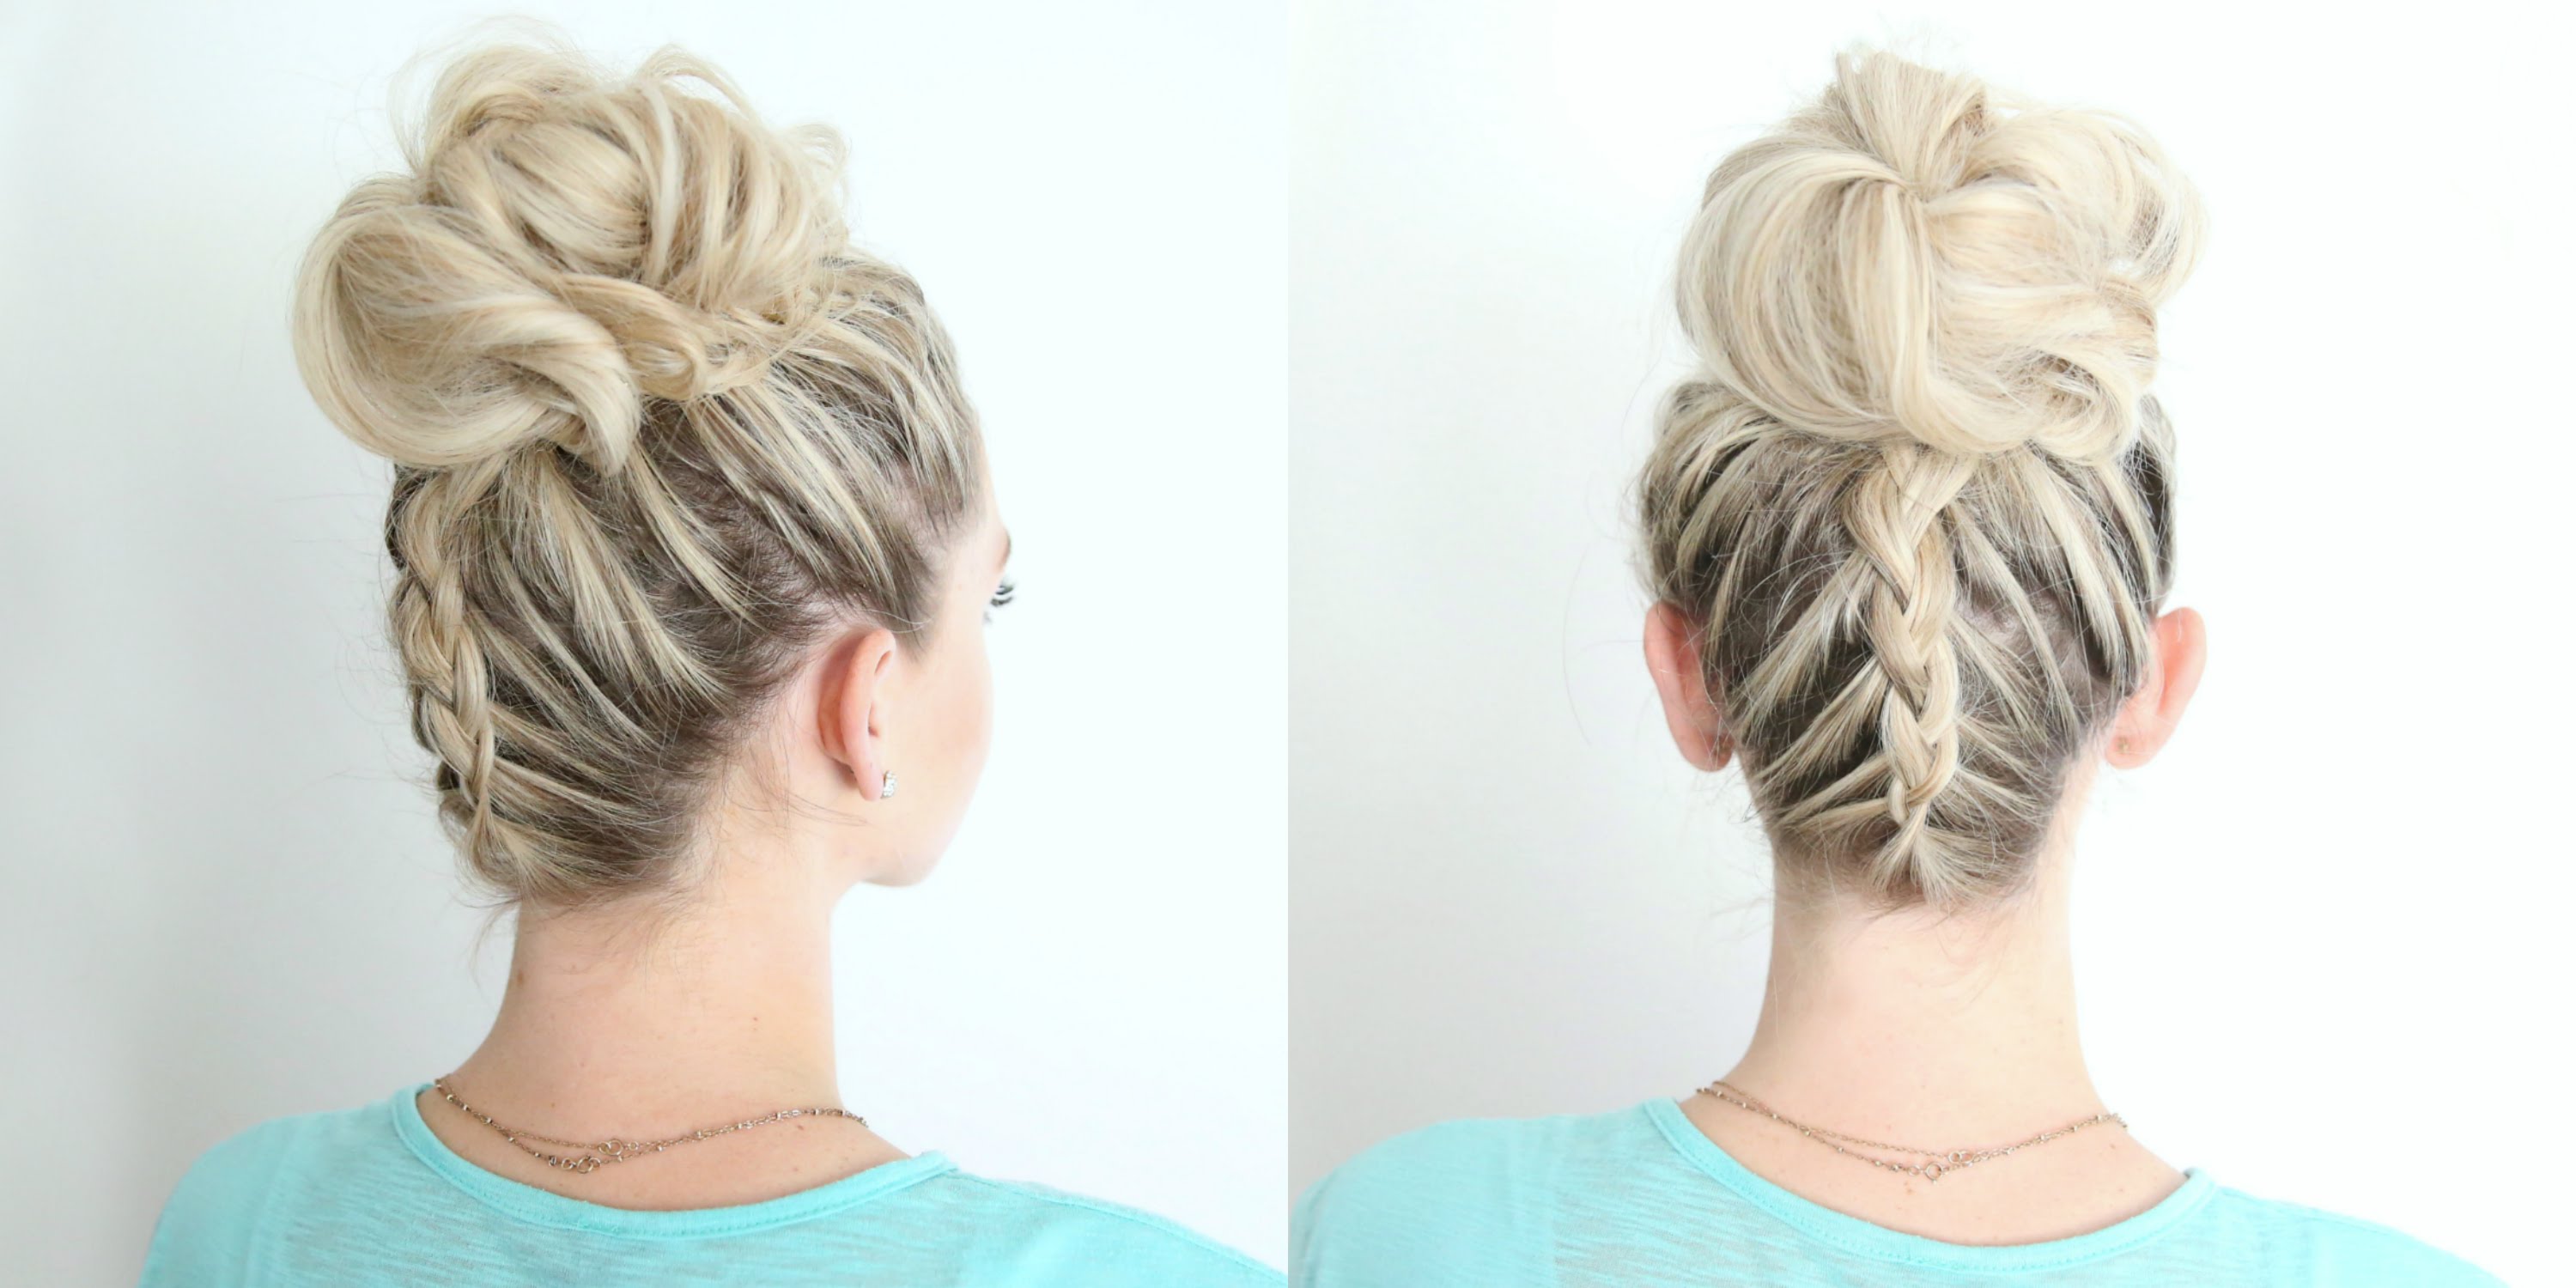
The weaving technique of this reverse braid, although there are no significant differences from the classical weaving, nevertheless, at first, it may take a little longer. Due to the fact that weaving is carried out from the base of the head to the crown - this can create some difficulties.
But you can always master this technique on your own or ask for help from a close friend.
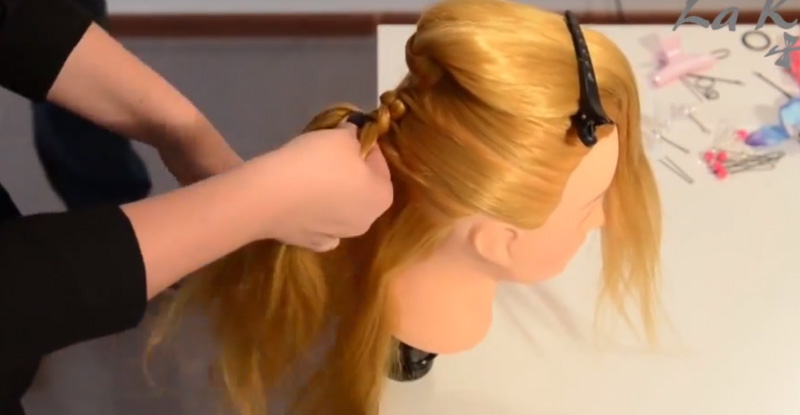
Starting from the base of the neck, observing the classical technique, the back braid lags until the beginning of the crown. The remaining strands are collected in a beam, which is fixed invisible and studs. To create a volume in front of the hair slightly combed. You can decorate the resulting hairstyle with a bright bow or elastic hair contrasting with hair.
To create a natural look it is recommended to use medium fixation.

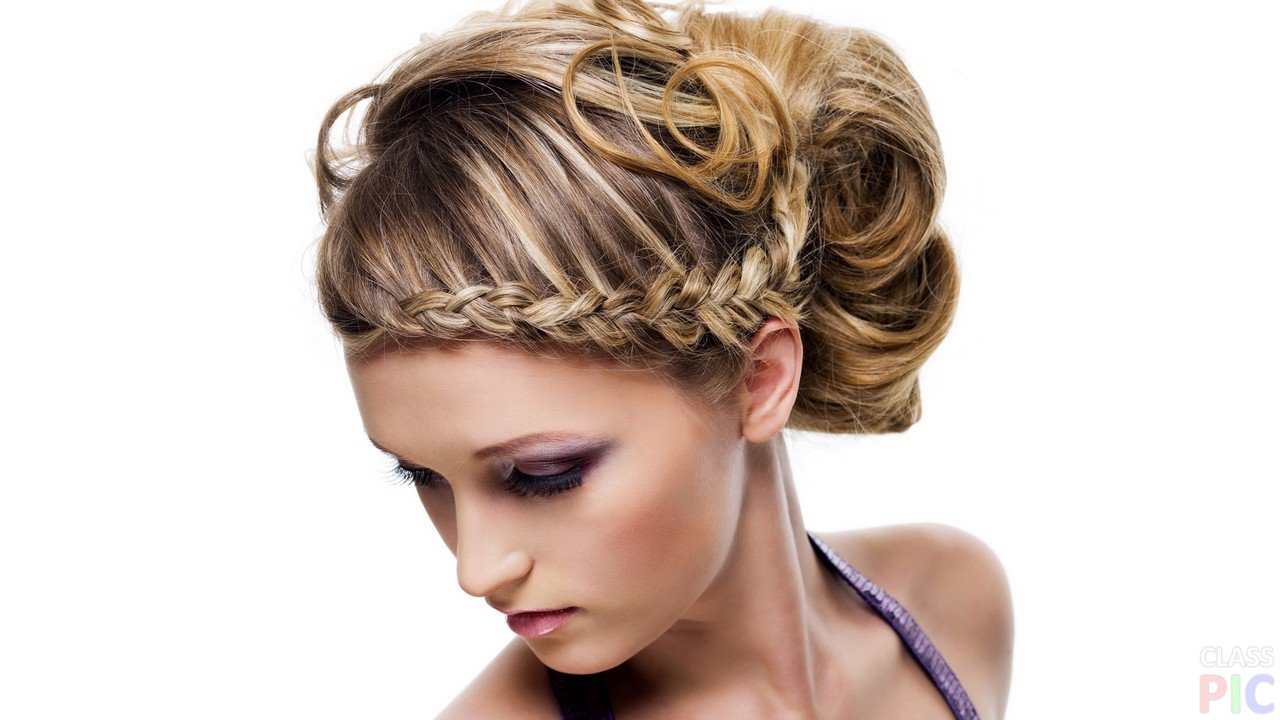
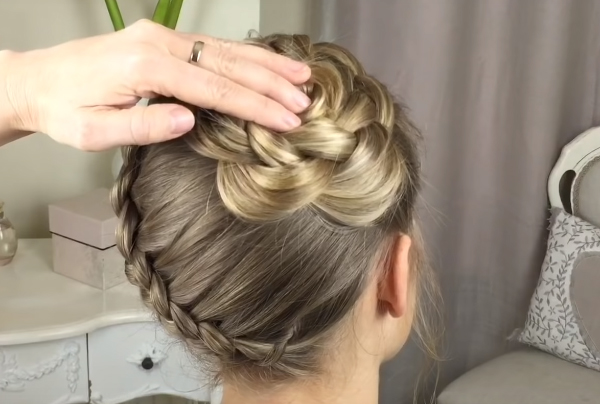
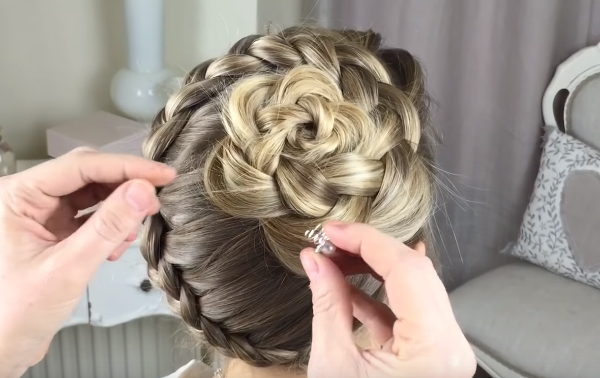
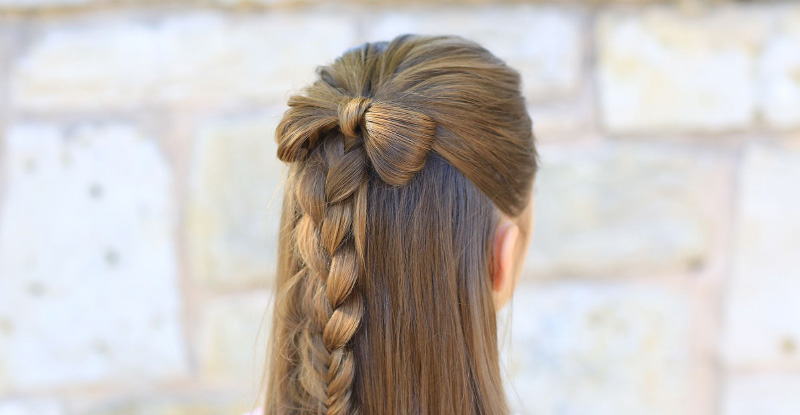
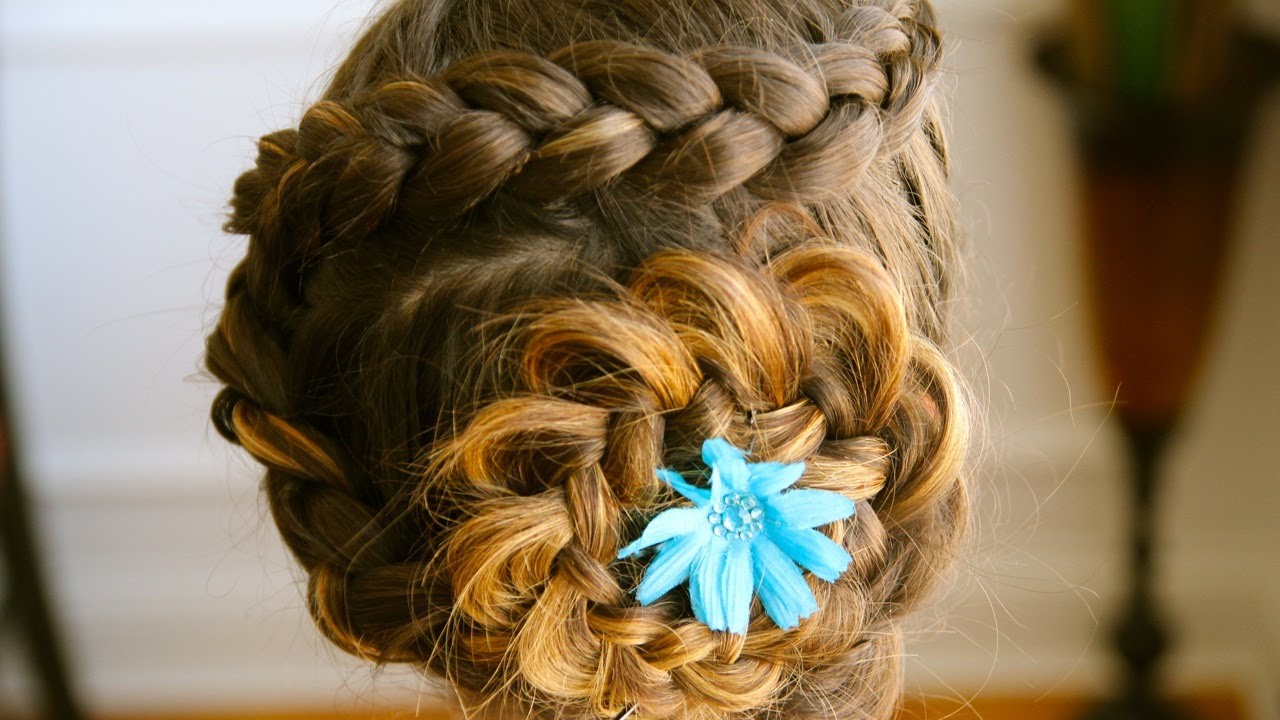
Original flower
Surely anyone who had the pleasure of being at the wedding of a relative or close friend could observe the magnificent and intricate hairstyle of the bride. The seemingly complicated weaving visually resembles the original flower, adorned with a small shiny pin, shimmering from the sun or spotlights. It would seem that only a professional hairdresser, who has achieved unprecedented heights in his profession, is able to create such beauty from a shock of hair.
However, many do not even realize that you can perform such weaving independently at home.
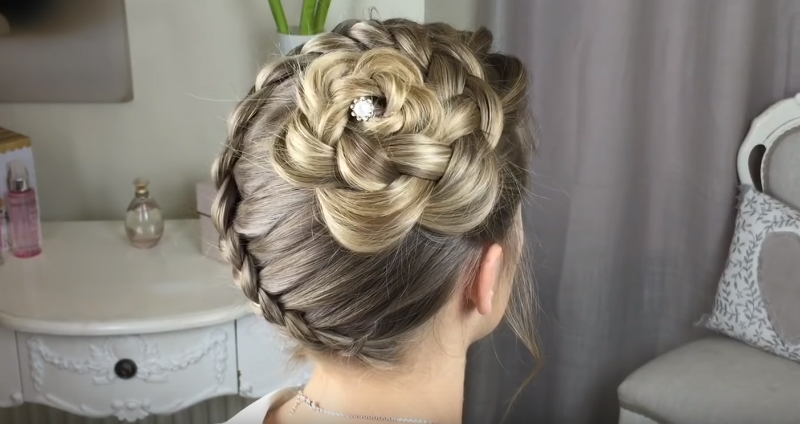
The technique of making the French braid in the form of a flower really does require some skill, but if by the time the hair is created, the classical reverse braid technique has already been mastered - everything will definitely work out. Below is a step-by-step instruction on weaving a flower.
- As before, the hair is carefully combed to not only make a light massage of the head, but also to get rid of tangles. Next, you need to separate the entire shock of hair in a side parting.
- In the part where the hair turned out to be larger, and there will be a beginning of weaving. Following the classic technique, the French braid is woven, not forgetting that in the reverse braid the extreme strands are put downwards.
- When performing weaving, it is necessary to weave the strands from each side part each time.
- Having finished weaving the back braid to the opposite side, it makes a smooth turn in the opposite direction and braids on the same principle.
- Learned braid is fixed with an elastic to match the shade of the hair and wrapped in the shape of a flower. The whole structure is mounted on stealth and heels, pre-sprayed with varnish for better fixation.
- For solemnity, it is recommended to place a bright hairpin in the center of the resulting original flower, made of French braid.
- Upon completion, the hairstyle is sprayed with a light lacquer for fixation.
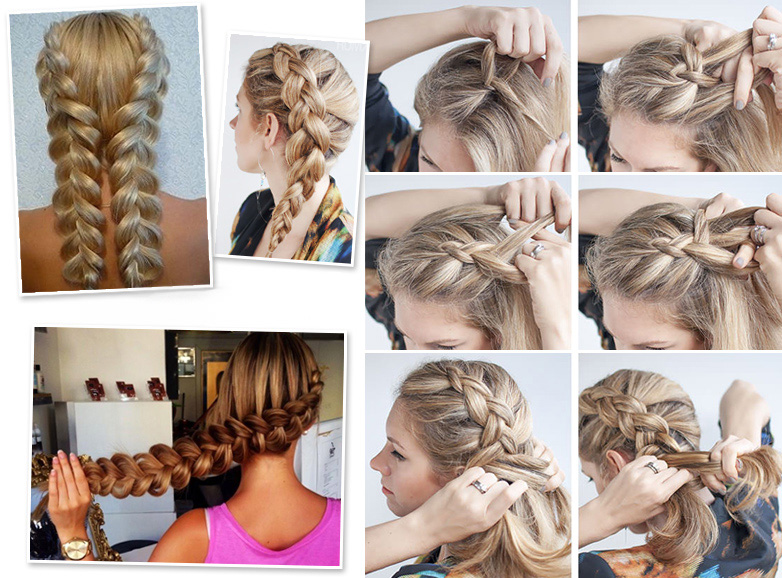
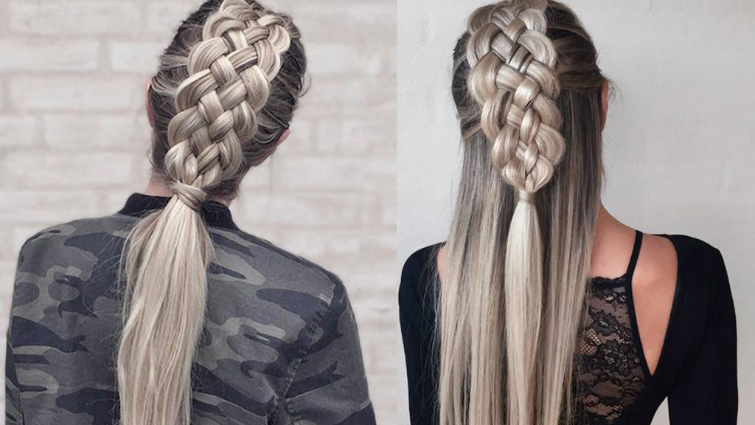
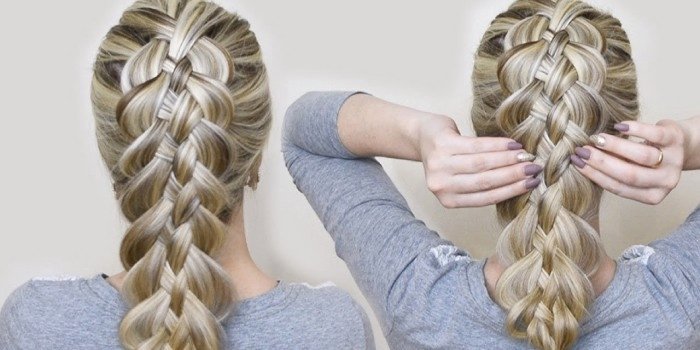
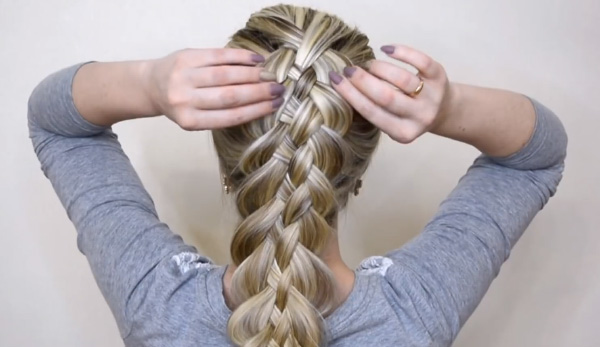
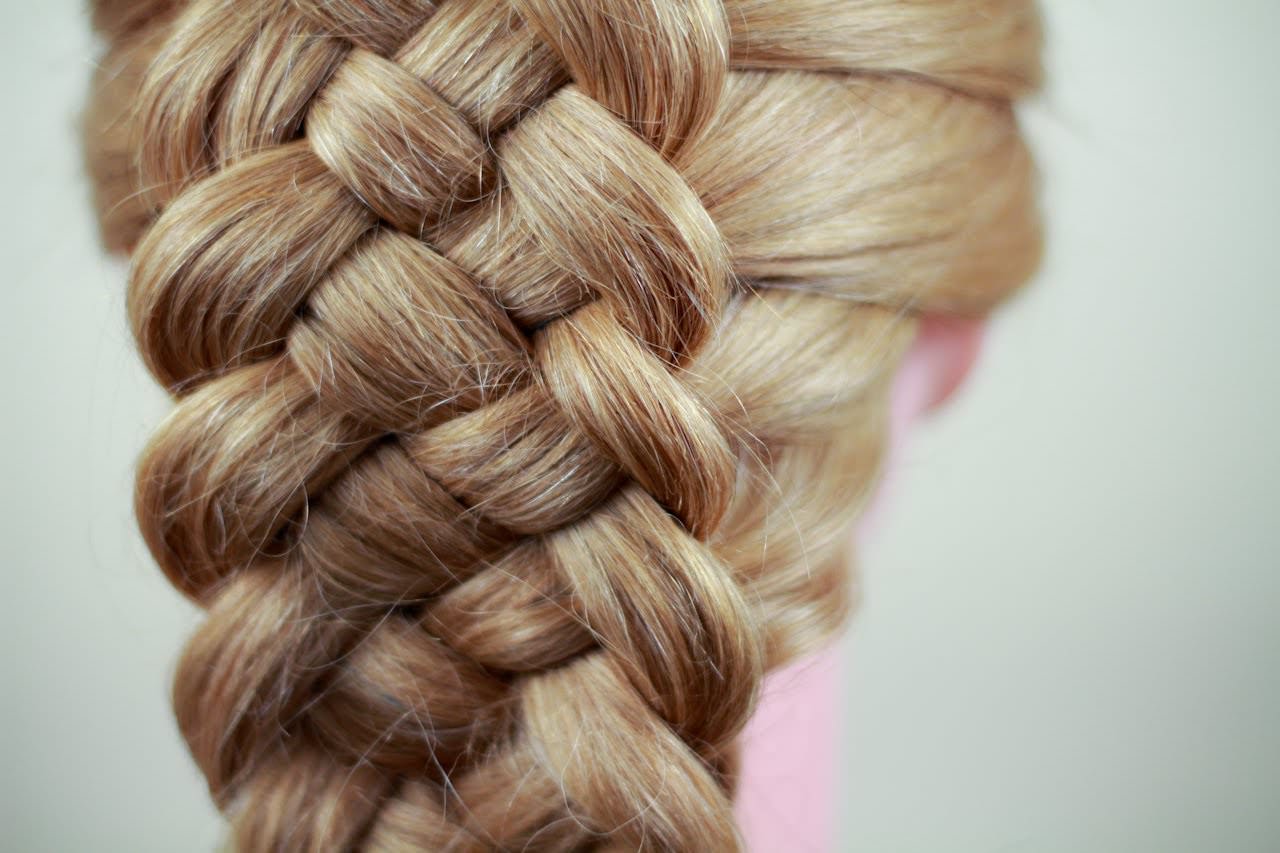
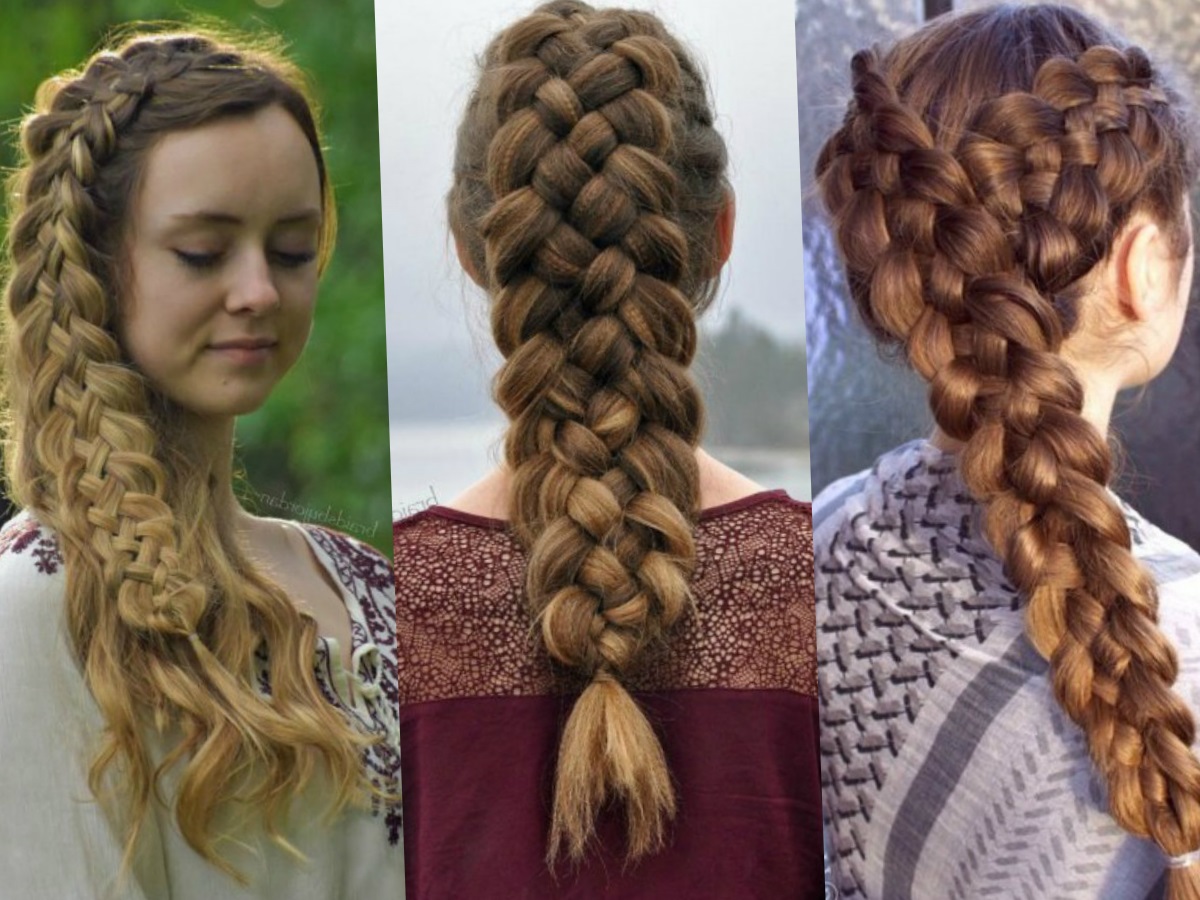
Of five strands
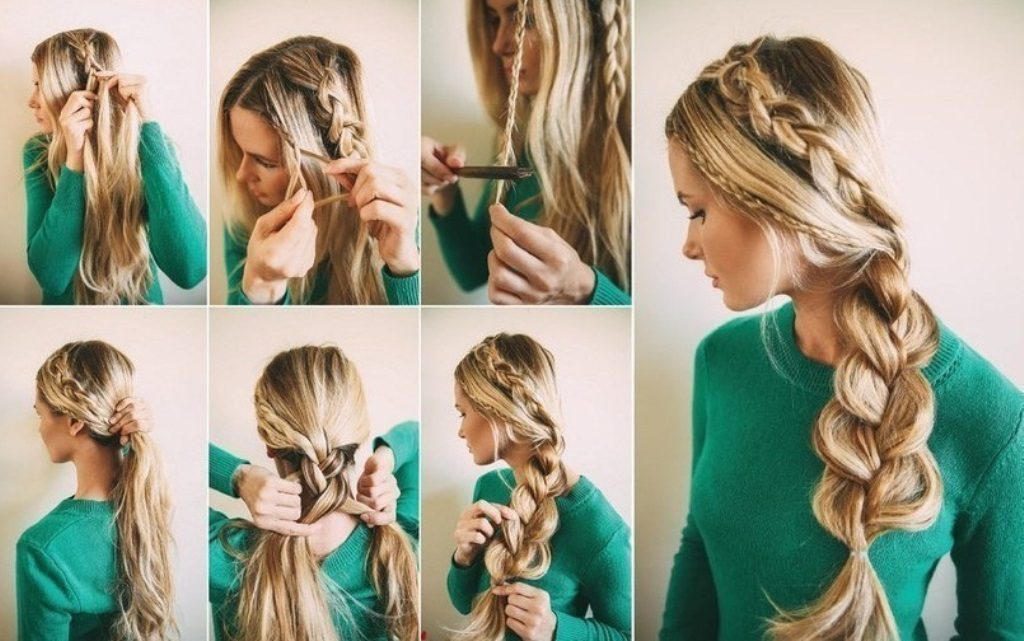
The French braid, made of five strands, is perfect for owners of long and thick hair.
On short hair, it will be much more difficult to make such weaving; moreover, length is required in order to enjoy the beauty of the pattern.
For self-fulfillment of this hairstyle it will take a lot of effort, because the hands will be in constant tension. Help close friend will not be superfluous.
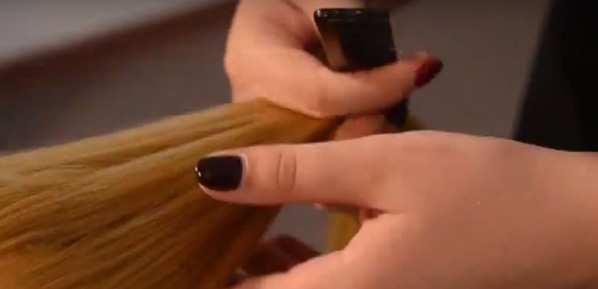
So, starting to create a French braid of five strands, it is necessary to comb the hair along the entire length, periodically sprinkling them with some water from a spray bottle.
This will protect them from the possible occurrence of the so-called gun, and the hair will not be electrified. In turn, this contributes to a strong grip strand, wet, they practically do not slip out of the hands.


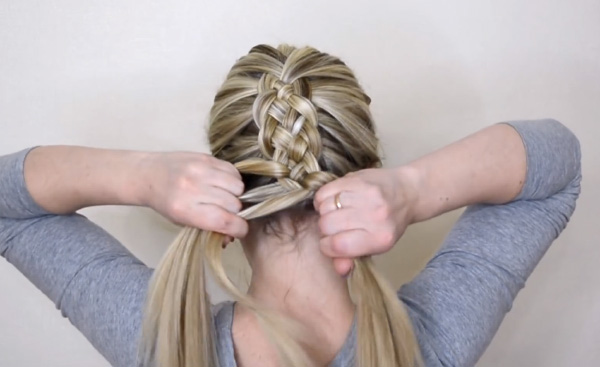
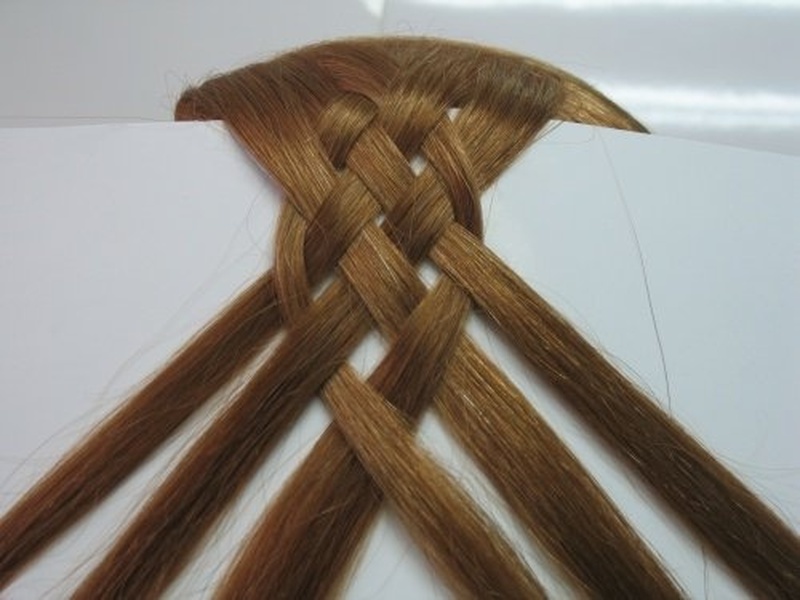
The algorithm of weaving the reverse braid of the five strands includes a number of steps.
- Selecting a small curl at the temporal part, it is necessary to divide it into five strands. Two of them, which are closer to the forehead, are taken in the left hand, and the rest - in the right hand. Depending on which side the curl was taken from, the arrangement of the locks in the hands may vary. Thus, it turns out that in each palm two strands and one of them in the middle.
- In order to make it easier to master this weaving technique, we give each strand a digital value. The strand that is closer to the face will be under the first number. Accordingly, the extreme will be the fifth in a row.
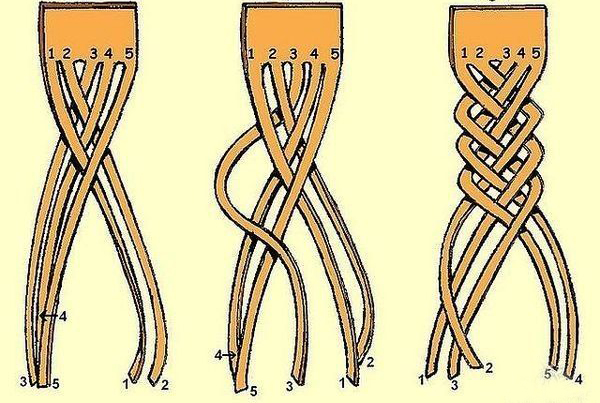

- It is necessary to start weaving from the fourth strand, which is placed on top of the third - after which the fourth strand turned out to be in the middle is covered with the second. For the first time, especially when weaving to another person, it is recommended to fix colored strings at the base of the strands. This will help not to get confused, having correctly carried out complex weaving.
- After that, the order that is under the digital value of 3 and when dividing the order was in the middle, if correctly done, the weaving should be near the fifth strand. Thus, the third order goes under the fifth.
- Then, perhaps the most difficult stage, as it may cause some difficulties in implementation. It takes the same extreme strand and slips through all the others in a checkerboard pattern, not excluding the first strand. In other words, if initially it passes through the bottom of the strand, then it is necessary to carry it through to the next. If done correctly, this strand will be closer to the forehead, taking the place of the first strand. The first row of five-strand weave backspit is completed.
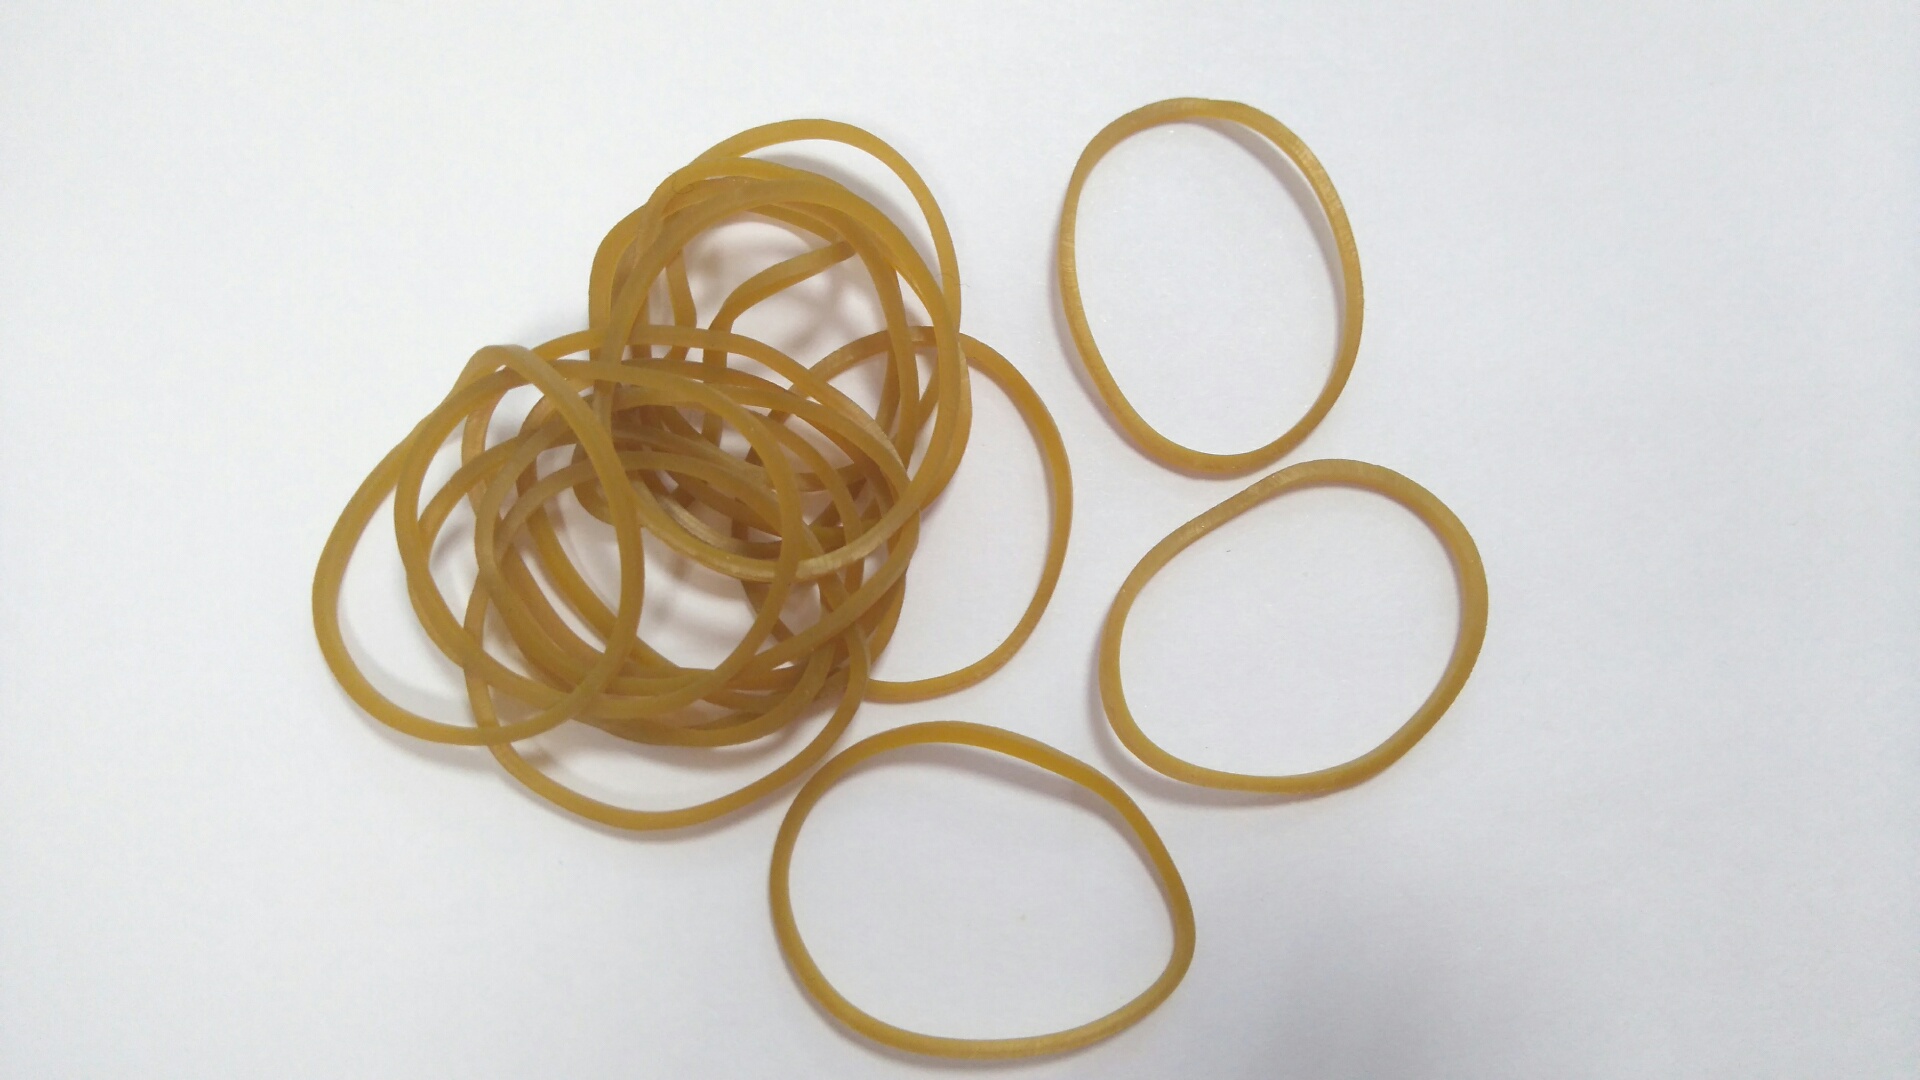
- Further, weaving is carried out according to the same principle, without losing sight of the fact that the strands, which previously had a numerical designation, changed their location. Redefining the strands (starting from the forehead) from the first to the fifth digit, weaving continues to the required length. The tip of the resulting original spit is fixed with a rubber band.
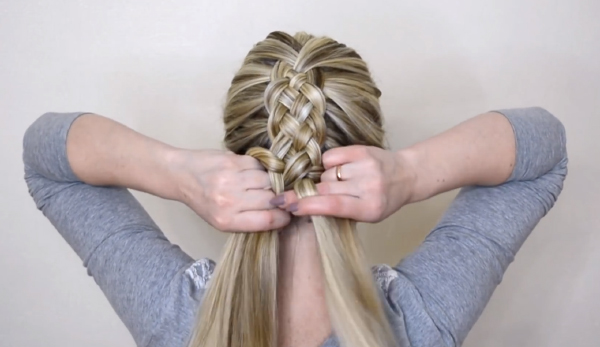
This weaving technique may resemble the hairstyle that our mothers did in childhood - a basket.
There are some simple manipulations to make the spit pompous and voluminous. It is necessary to grab the side strands with your fingers and slightly pull them, pointing to the side.
Thus you can achieve the required volume, making the hair visually thicker.This trick is often used by hairdressers, making even the thinnest and weakest curls look luxurious.
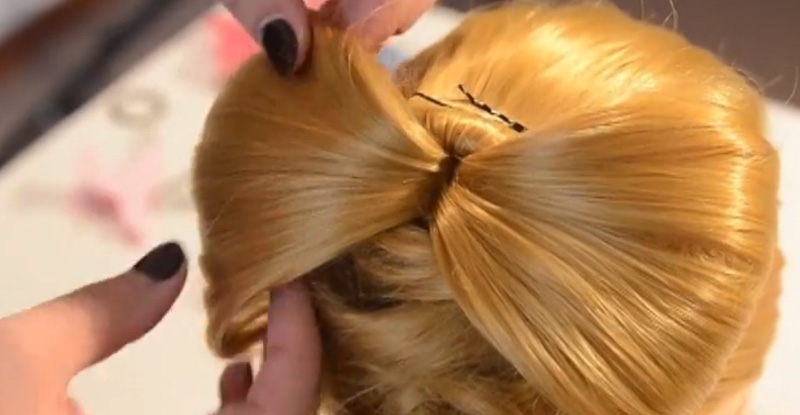
Malvinka with bow
Malvinka gained popularity a couple of years ago and still remains an actual hairstyle for publication. You can upgrade it by adding emphasis in the form of a back braid on the back of the head. The technique of doing this hairstyle is not the easiest, but having trained, it turns out just a stunning result.
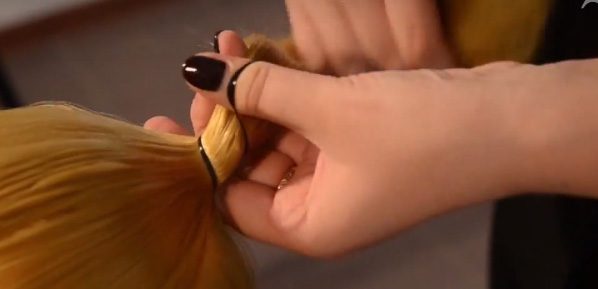
So, first you need to comb the hair back. To create a bow, a small mop of hair from the top of the head is required. The separated part must be tied back and wrapped in a small strand that will allow the gum to be closed. At the time of throwing the tail forward, go to the weaving pigtails.
The remaining hair on the back of the head is used to create a French braid. Following the recommendations of the classic weaving, braid dopple to the base of the tail.
To give it a trace of openwork, it is recommended to periodically pull out the strands when weaving.
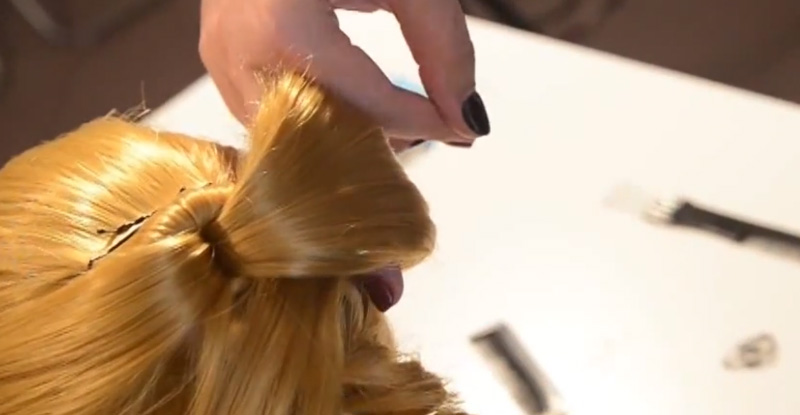
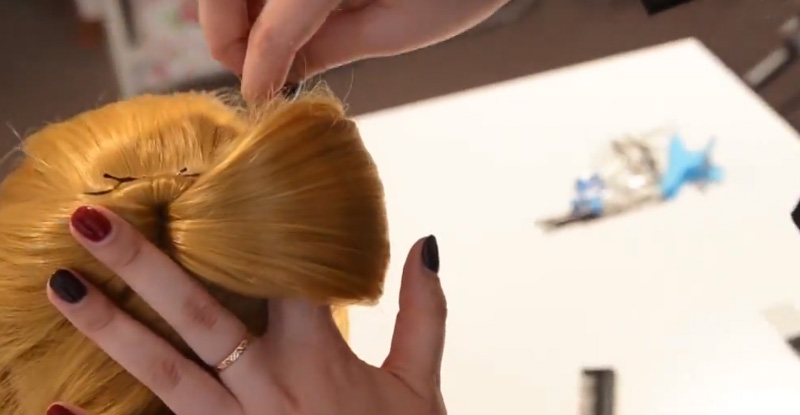
Go to the tail. To create a neat bow, it is divided into two parts, each of which is wrapped in a so-called loop, forming the future bow. Fixing them with the help of stealth to the base of the tail, the tip hides. The same is done with the other part of the tail. Having straightened the bow, it is advisable to slightly spray the resulting hairstyle with varnish.
Beautiful examples
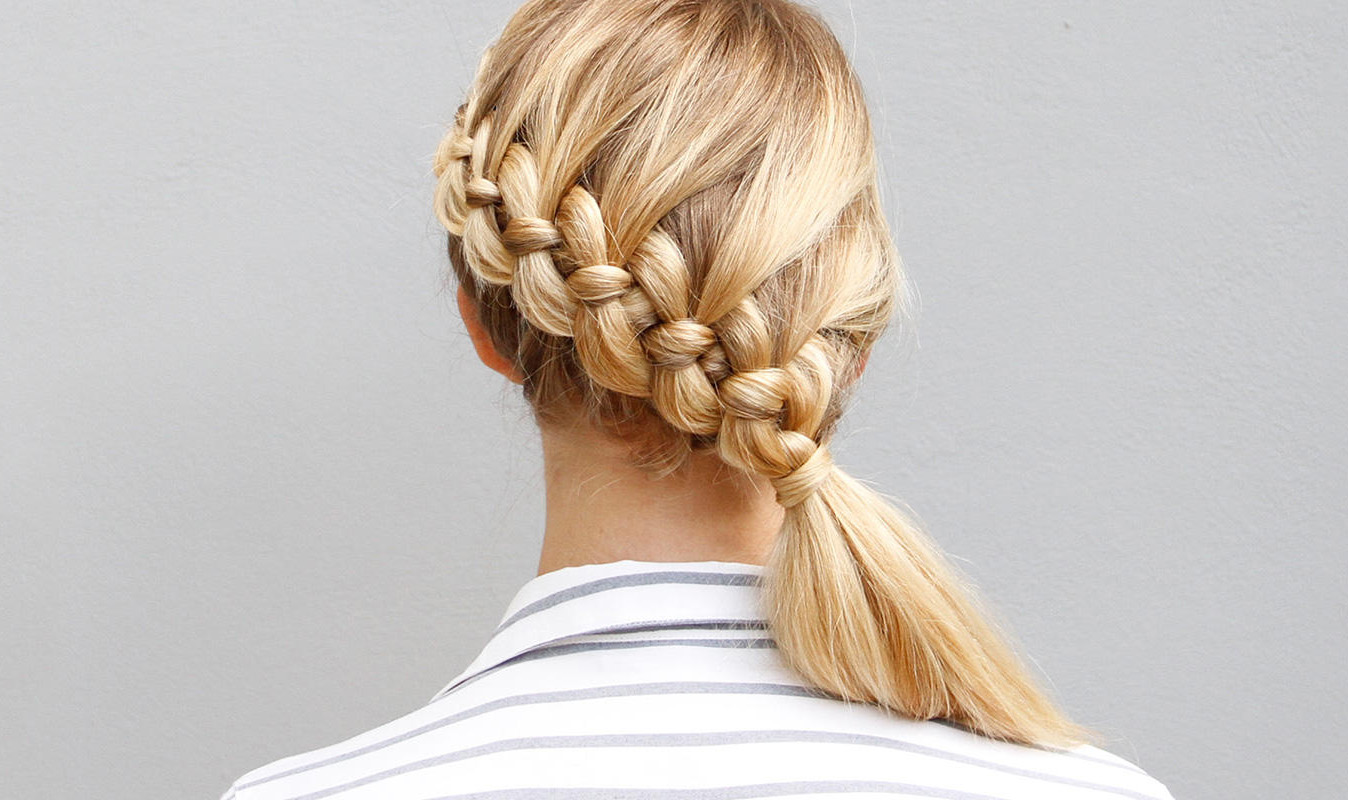
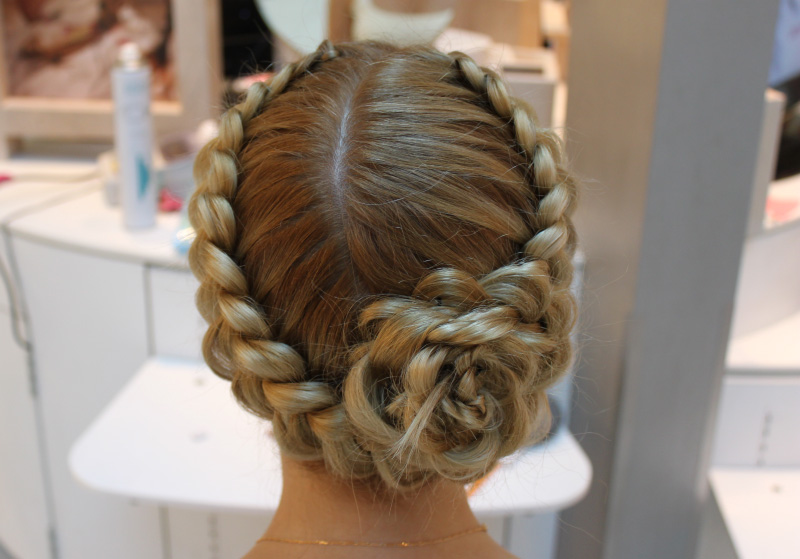
Excellent proof that the French (or reverse) braid can look impressive even on medium hair length. Non-contrast gum, which is ideally matched to the shade of the hair, does not distract from the beauty of the performance hairstyle. As a rule, the French braids weave for a trip to the beach - this allows the curls not to interfere during swimming or other type of active recreation, and at the same time look neat.
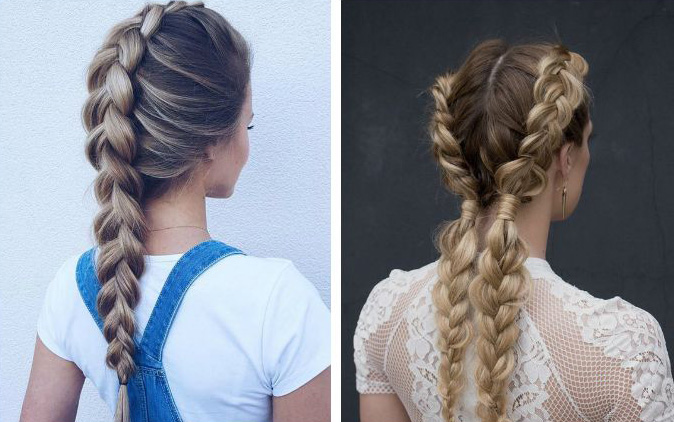
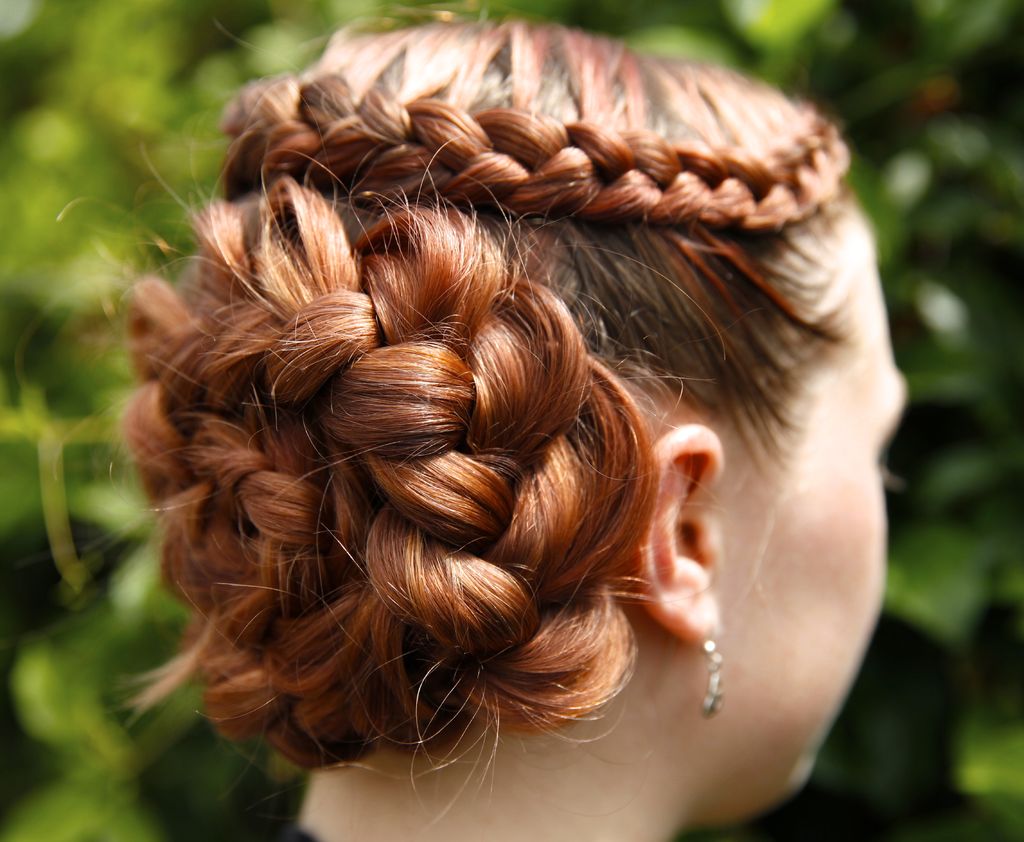
A volumetric French braid of five strands must be recommended for all owners of thick and long hair.
Such complex weaving is able to emphasize the natural beauty of the curls, visually giving the curls more volume and thickness.
It is rather difficult to carry out this weaving technique independently, however, having mastered it, you can forget about the usual bunches and tails forever.
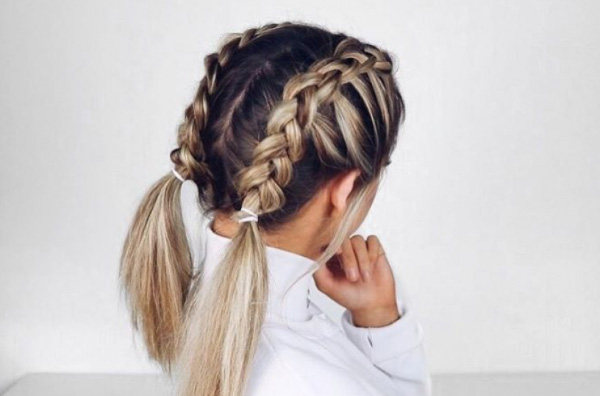
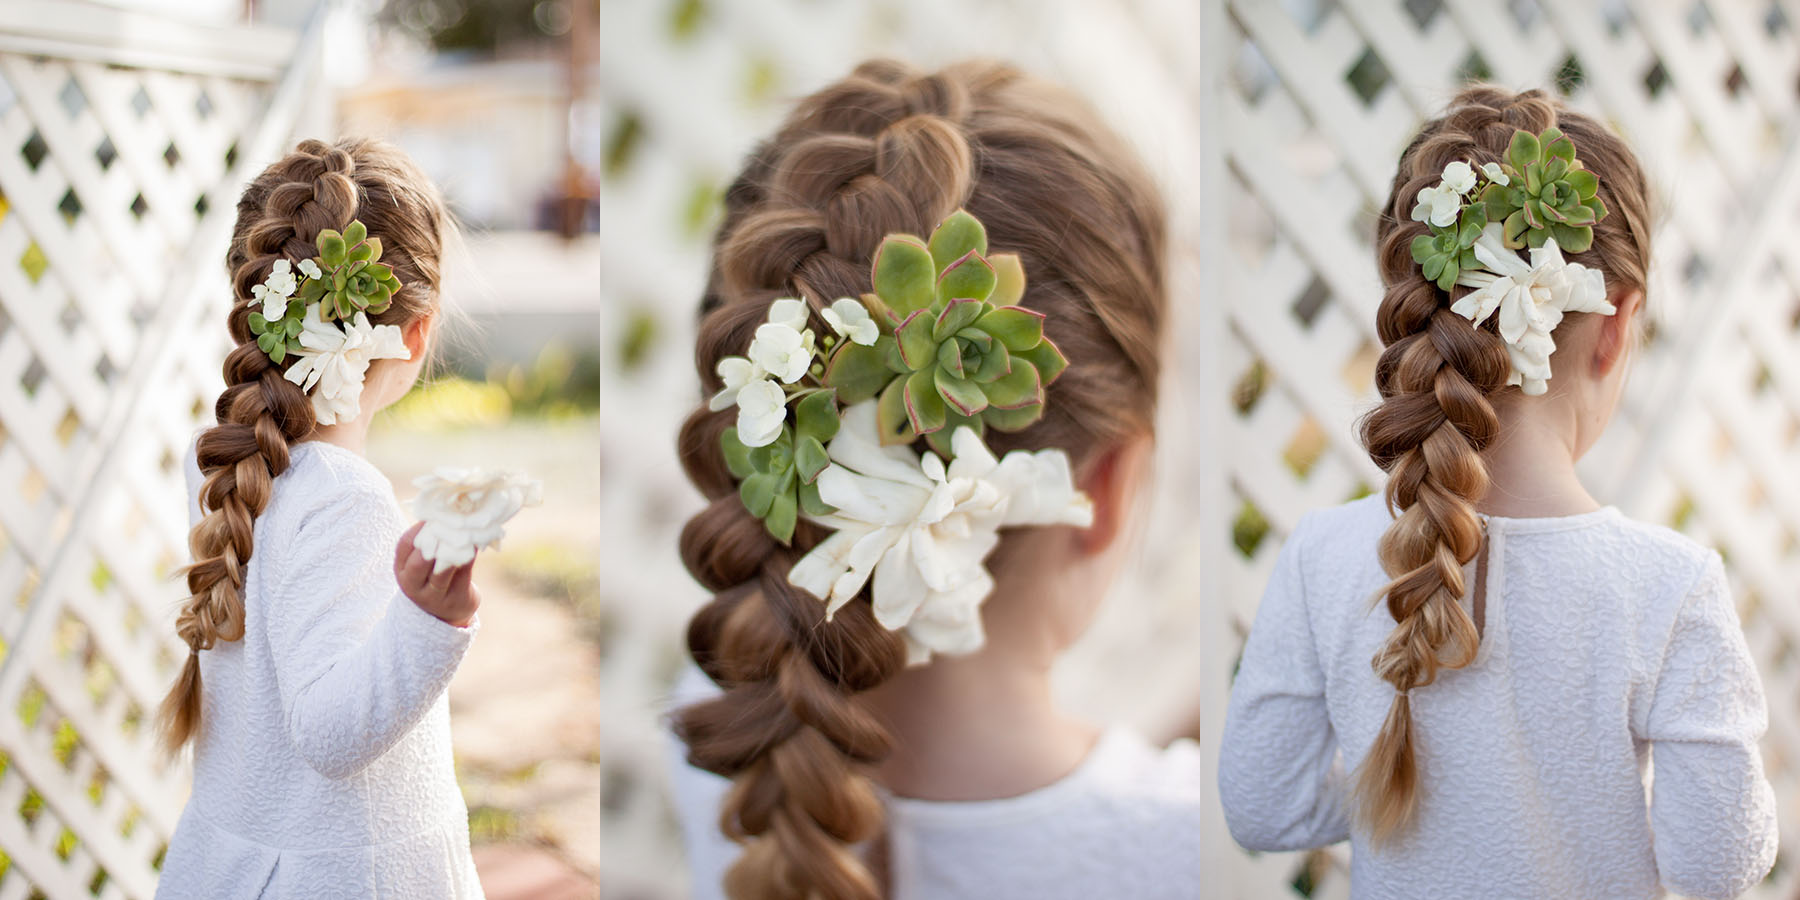
A classic example of backspit. Despite the simplicity of execution, the hairstyle looks more spectacular and more beautiful than a simple braid.
It will look great in a strict office atmosphere due to its rigor and elegance.

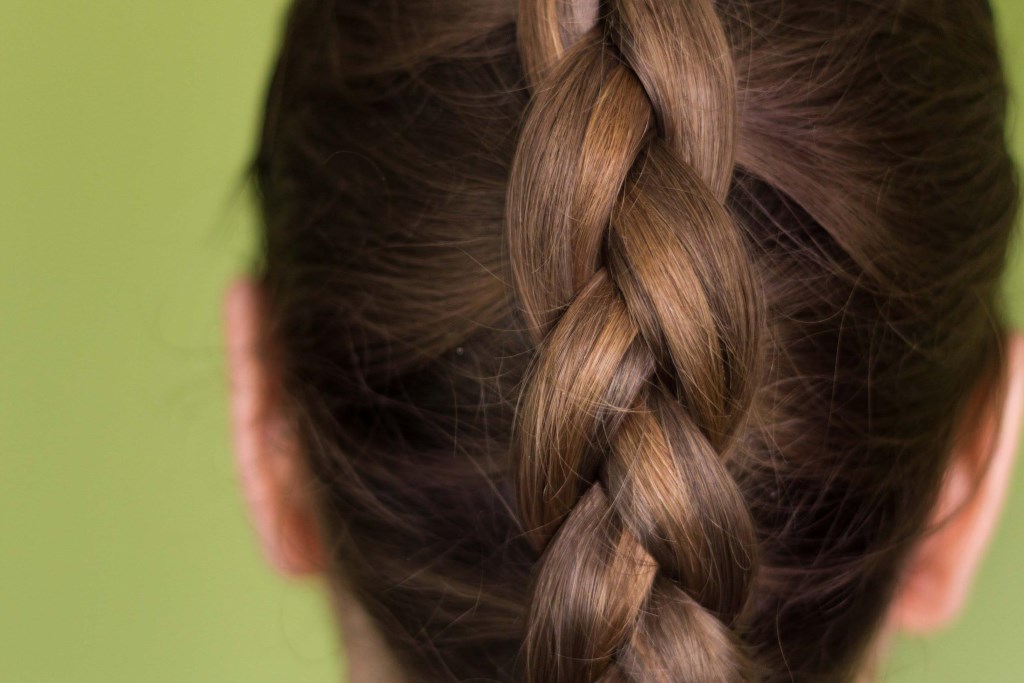
And by adding some bright accent in the form of a luxurious hair clip, giving a touch of playfulness and charm, you can safely go to a solemn event.
The French braid, originally laid in a delicate flower, has been very popular among brides for many years. This type of weaving of the French braid can be mastered by any girl and daily enjoy herself and the surrounding curls with her beauty, neatly arranged in an elegant hairstyle.
How to weave a classic reverse braid, see below.


