Find a finished cage for chinchilla is extremely difficult. This acquisition is too much impact on the family budget. Therefore, the ideal option is to make a cell with your own hands. And with the help of step-by-step instructions the necessary product can be made without even having experience in carpentry work.
Requirements
It doesn't matter which cell option is selected. In any case, she is obliged to meet all the requirements:
- be dry;
- comfortable;
- not too cold;
- with good lighting;
- with ventilation.
We must understand that the chinchilla is an incredibly mobile animal, therefore, it needs as much free space as possible. Therefore it is necessary to build on the minimum size of the cage per pet:
- length and width not less than 50 cm;
- height - 75 cm.
However, loneliness is not for these rodents. So, if there will be more than one, then the house should be large. And the gaming zone can not be forgotten. After all, movement for them is life, and it is extremely difficult to sit in one place. Otherwise, the animals may get sick.
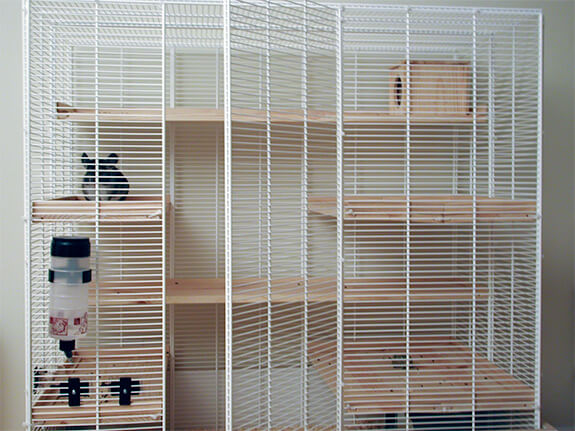
If chinchillas begin to live in a private house, then you can build a real spacious aviary where they will climb and climb with great pleasure. In another case, it is worth choosing a vertical structure with several floors in the form of shelves. In addition, it is wonderfully suited for small areas.
Kinds
There are a large number of different types of products.
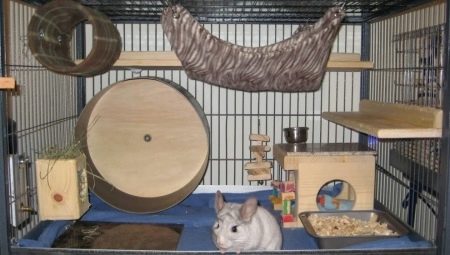
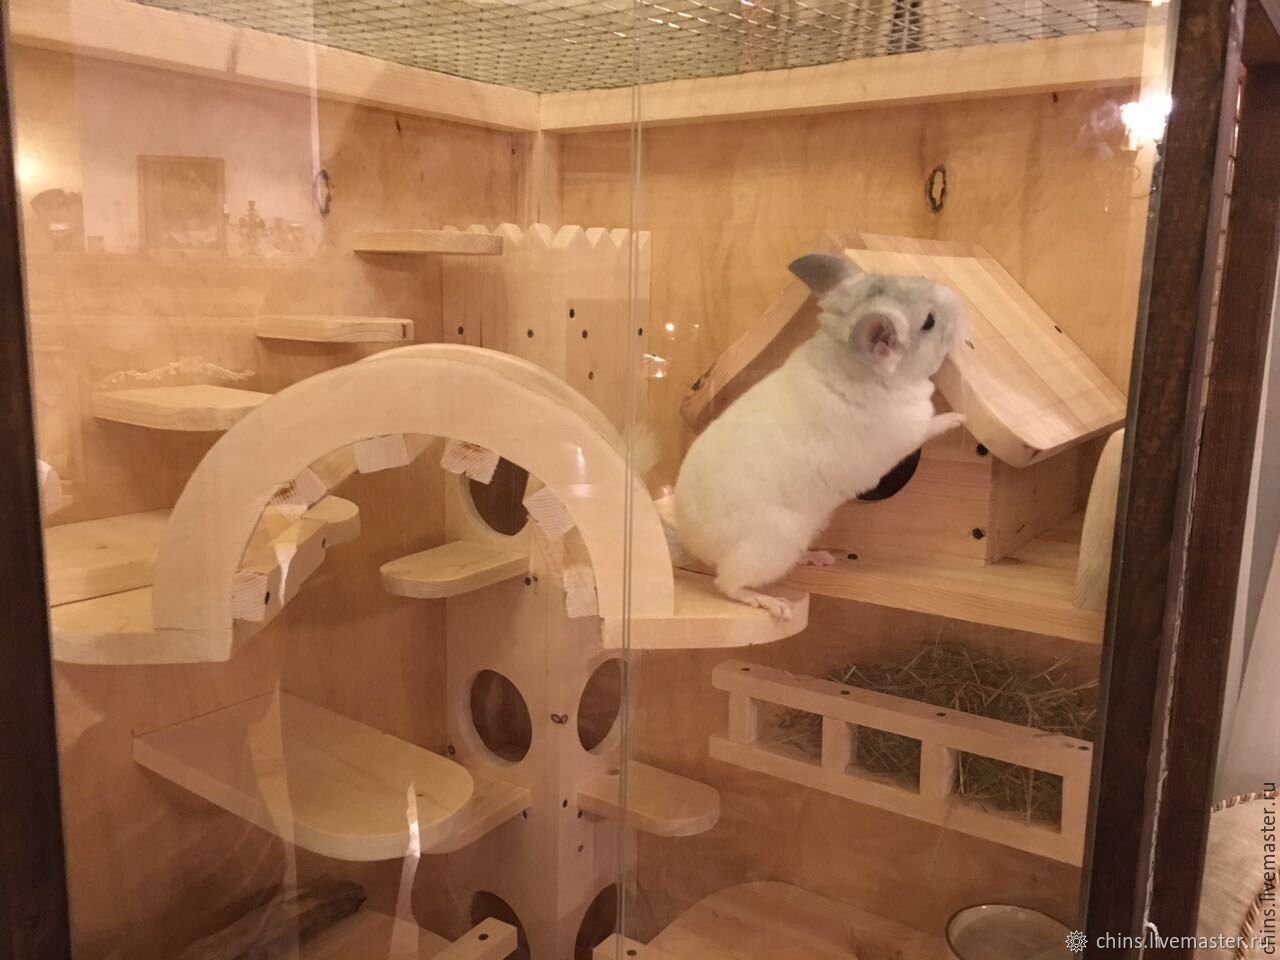
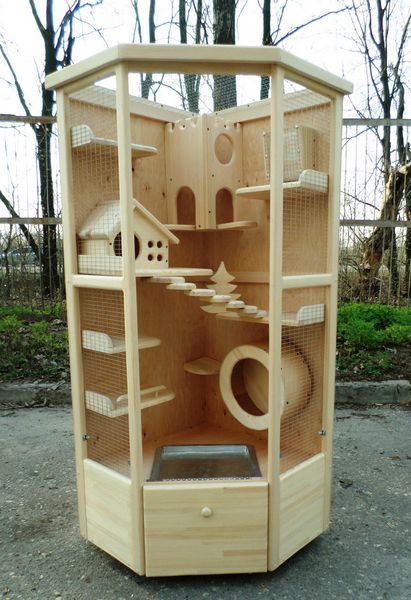
Showcase Cage
The tree is taken as a basis, it is considered to be the cleanest eco-friendly material, attractive in appearance, which is well suited for breeding chinchillas. However, there is one big drawback - rodents can easily gnaw through the cage. Therefore, it must be sheathed with a harder material. And this is extra waste. And in order that from inside there was no audible sound, the sides should always be closed with glass.
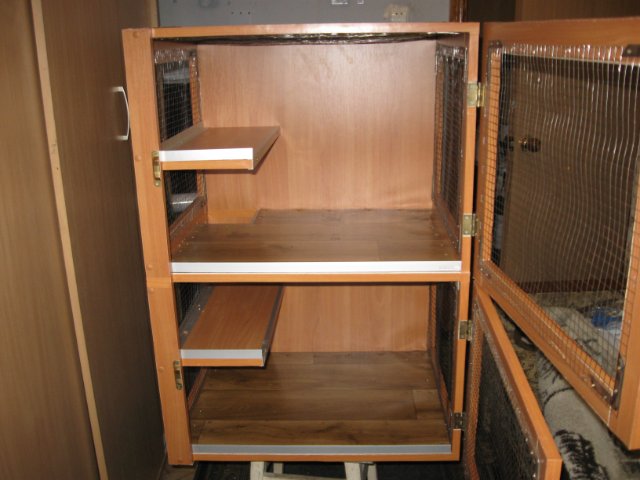
Homemade option
Typically, this type of cell is in great demand, because you can use a variety of materials that are easy to find at home at any time, not even have to go shopping. For example, an old wooden bedside table or a wardrobe is suitable for no one. Only the minimum of additional materials will be required:
- metal mesh or glass to close the free space;
- plywood for plating.
One minus - for the manufacture takes time, which is often not enough.
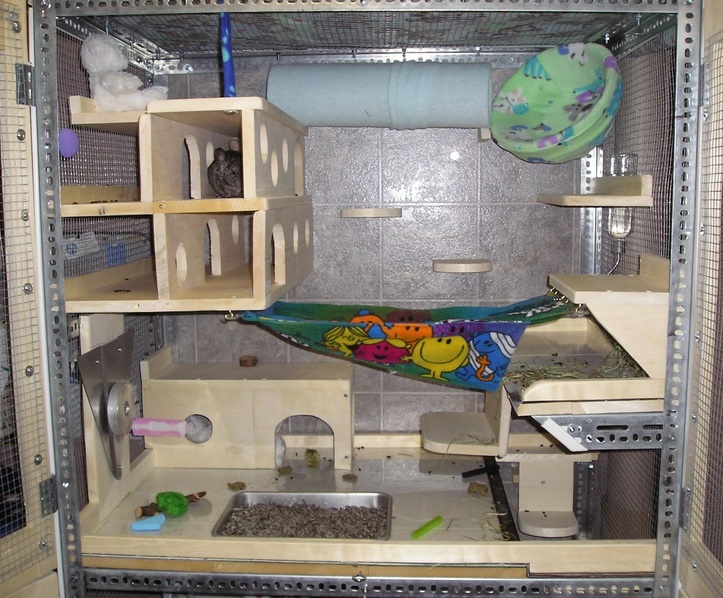
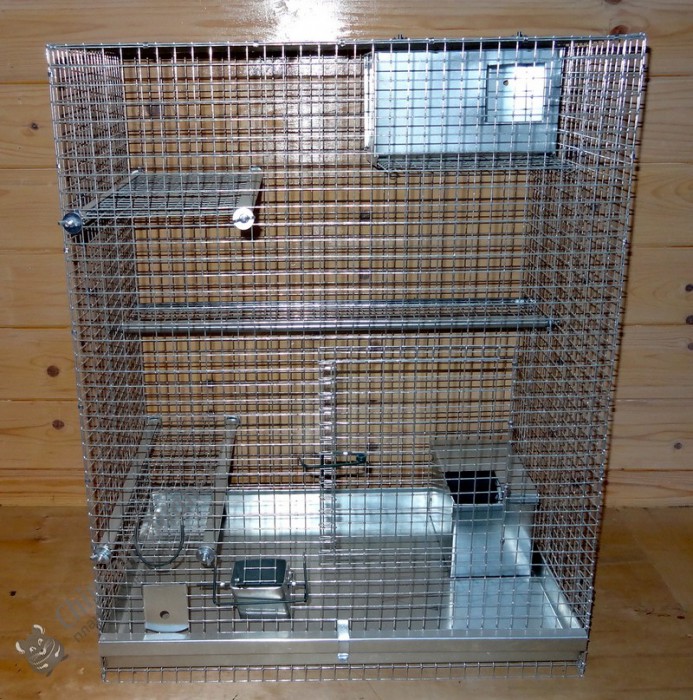
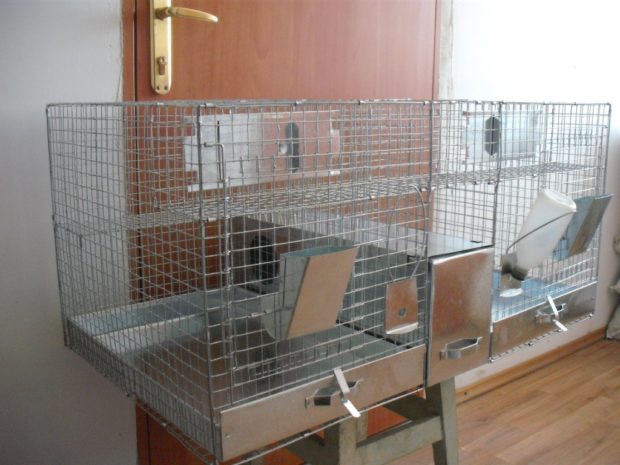
Metal cage
This design, consisting of a ready-made house, is very affordable and convenient during transportation. It is only necessary to disassemble in parts and put in a bag. And still the cage can be cleaned and disinfected easily. However, there are several drawbacks here - the sounds and noises coming from the cage, when the animals run intensively and climb the stairs, are not suppressed by anything. Everything else can be easily adjusted.
Tools and materials
To build a cage for chinchilla at home, you should purchase the safest materials made of natural wood only: birch or pine. It is they who work well, and they are not too expensive. For a strong frame fit edged boards, bars or lining. Ordinary boards may be suitable for future shelves.
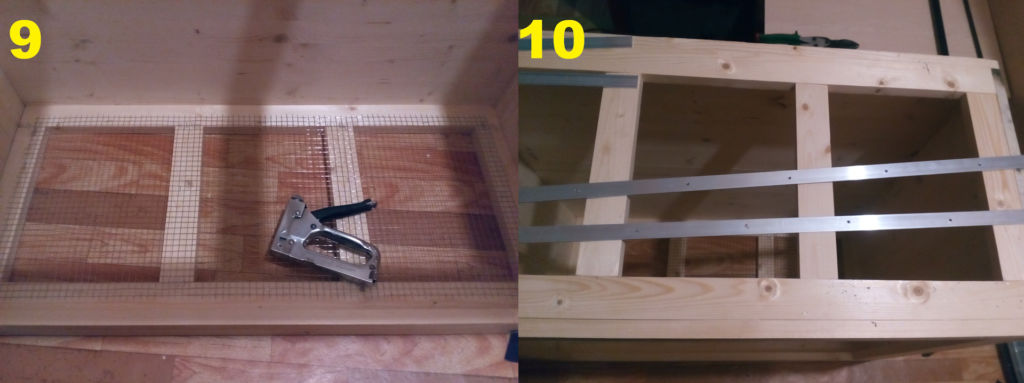
And in order to tighten all the holes, you will need a grid of strong metal, but with small cells, no more than 3 cm, which should be placed on one side or on two opposite. It is necessary for good ventilation. At the same time, it can be made from ready-made sections, or you can make your own from wire, preferably from high-quality material. Positioning the net is recommended above the bottom. This way you can easily reduce the amount of garbage that falls to the floor. And do not forget to buy a special tool that protects against corrosion to extend the life of the cell.
But if there is no extra money, then you should pay attention to the old, already useless cupboard, bookcase or nightstand. In this case, it is enough just to drag all the existing doors with a regular grid, and in the shelves to cut holes for future ladders.
This design is very convenient to use, and a lot of money is not necessary to spend. You can do the minimum investment.
From the tools you need only:
- hacksaw;
- hammer;
- scissors for metal;
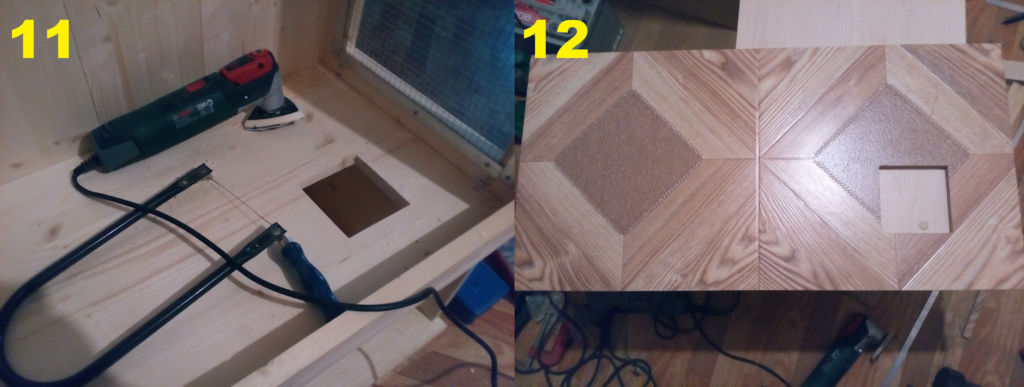
- electric jigsaw;
- marker;
- drill and drill for wood;
- knife;
- ruler.
Accessories are also needed:
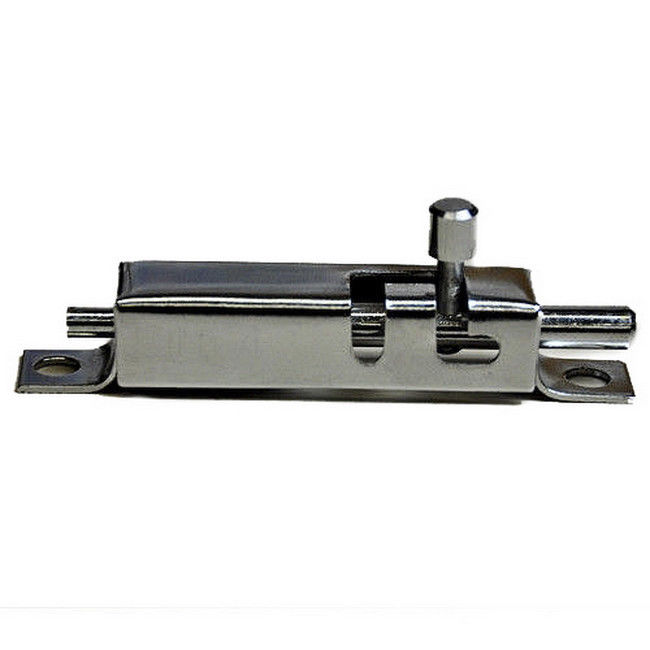
- ready locks so that the doors can close well;
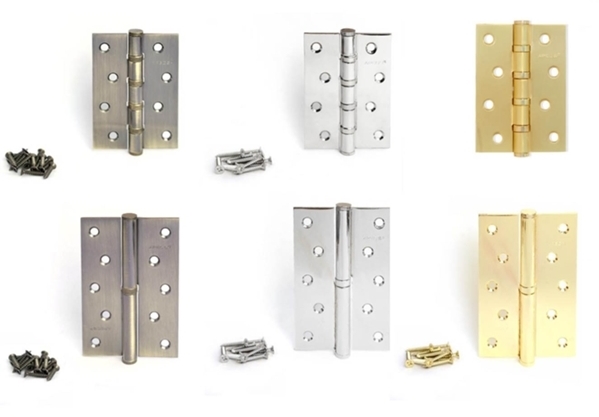
- hinges for doors;
- castors for mounting.

Manufacturing
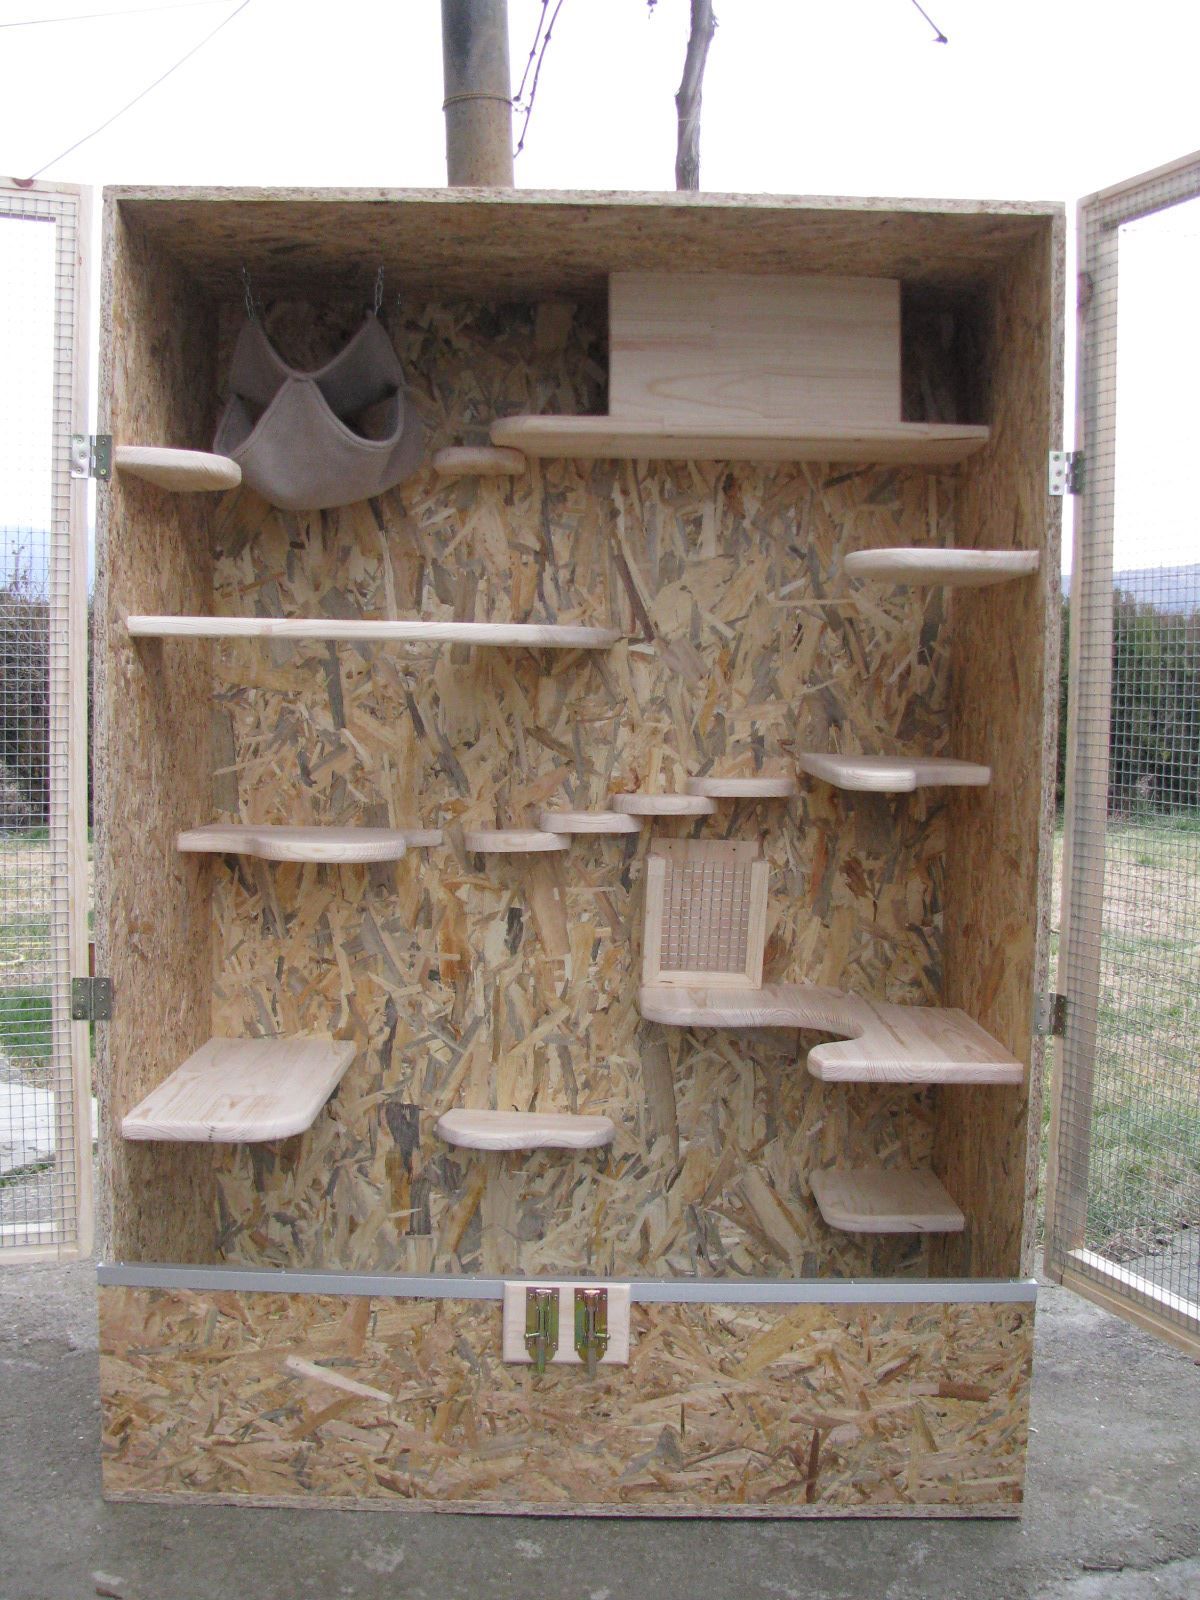
When there is nothing in the house to fit for reworking under the window, then the most budgetary option would be to make a shelter out of chipboard. The main thing is not to forget to purchase the necessary tools, building materials and accessories.
For work you will need:
- Laminated chipboard as the main material;
- galvanized metal mesh with small cells;
- plexiglass for doors;
- wood plates under the shelves;
- adhesive tape for processing the edges of the cage, especially in areas of cutting;
- screw screws and drills;
- nuts, screws, screws;
- fittings for glass doors;
- welding machine;
- Bulgarian;
- self-tapping screws.
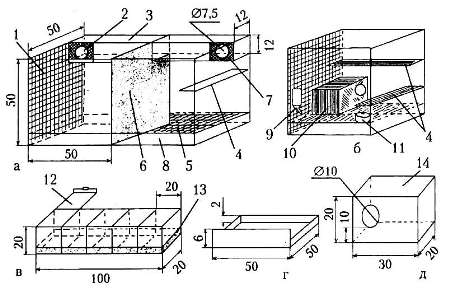
Before proceeding with the design, it is imperative to compile a drawing, which can be found already ready or come up with something of their own. Then you should cut out all the necessary details. And it can be done both independently and contact the workshop. And only then begin work. Do not forget to allocate for this free space.
At the time of manufacture should follow a specific scheme.
- According to the measures taken in advance, prepare a drawing. It is advisable to thoroughly double-check everything several times before starting to cut out any important detail.
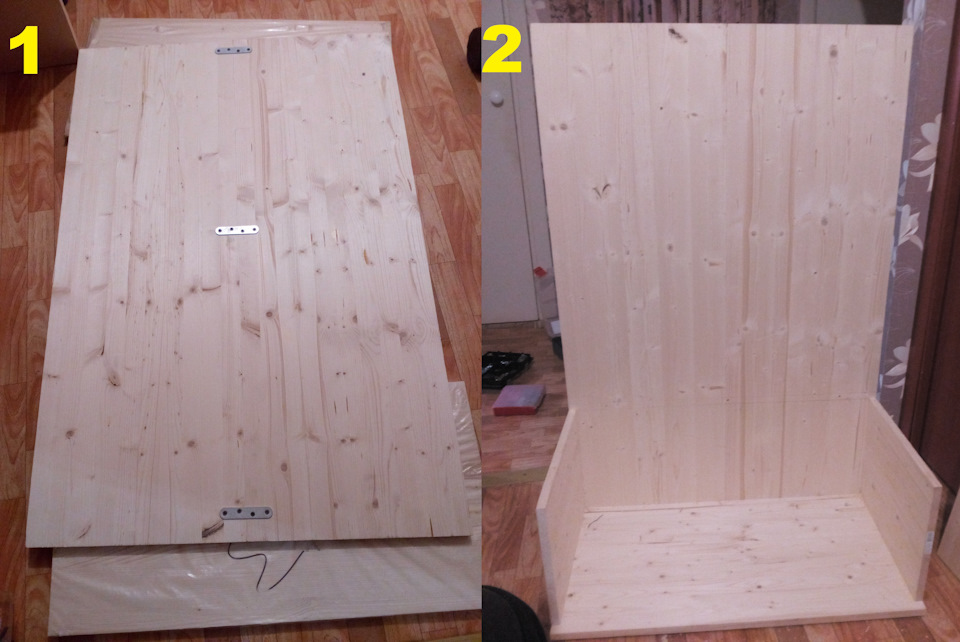
- Based on the measurements indicated in the drawing, make a rectangular base from the bars, and then sheathe a sheet of sturdy plywood in one layer.
- If the removable tray will not be installed, then the base must be carefully processed using silicone sealant that will help save the tree from the appearance of a variety of odors, as well as the absorption of liquid.

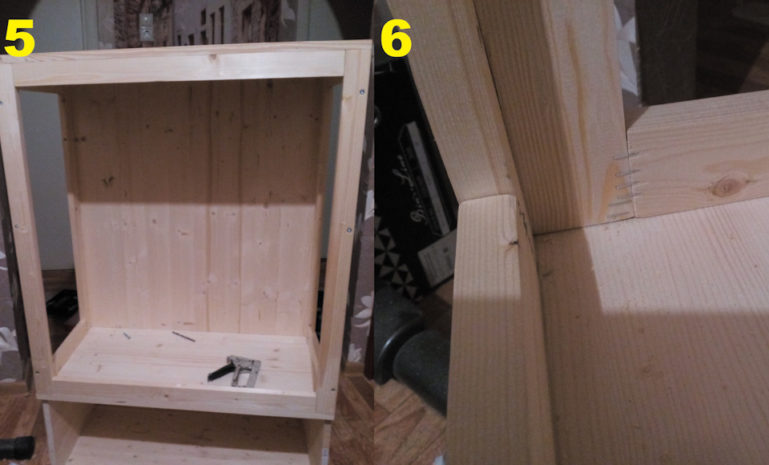
- Then you need to increase the frame of the vertical bars, which should be fixed at the corners of the base with long nails or screws.
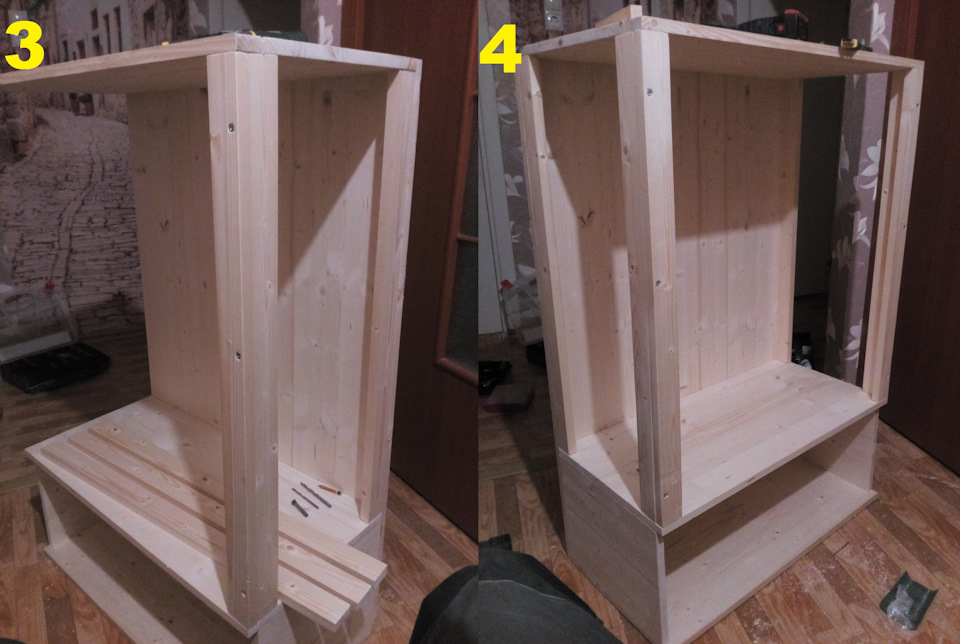
- For greater stability, it is worth making a couple of crossbeams along the wall height. On them in the future it will be possible to fix the necessary shelves.
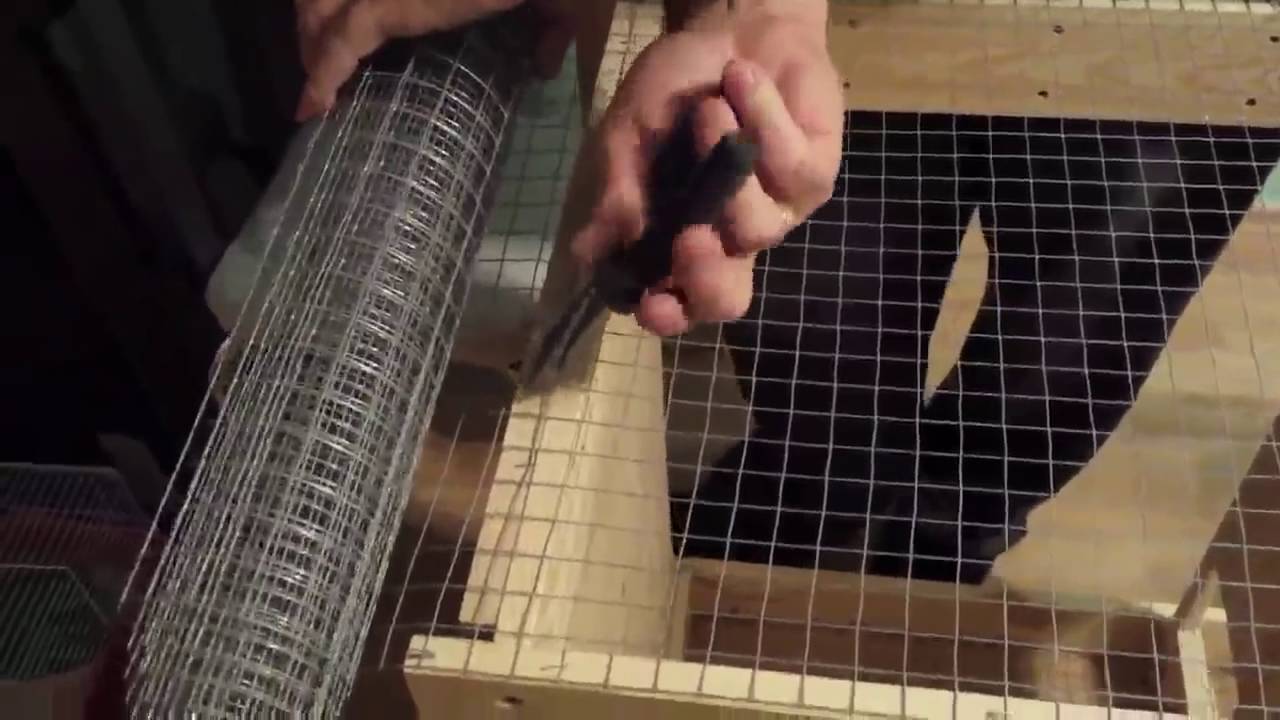
- The roof and walls should be tightened with a strong mesh, using screws with huge hats. And so that the animal could not get hurt, biting the sharp edges, install metal profiles.
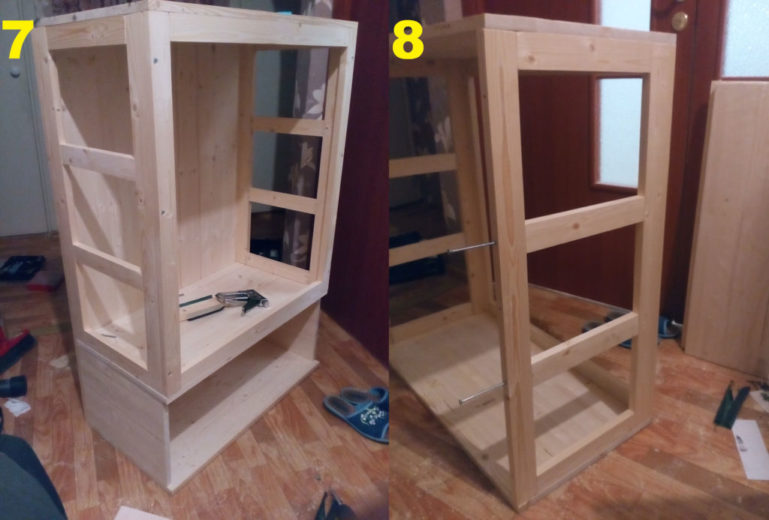
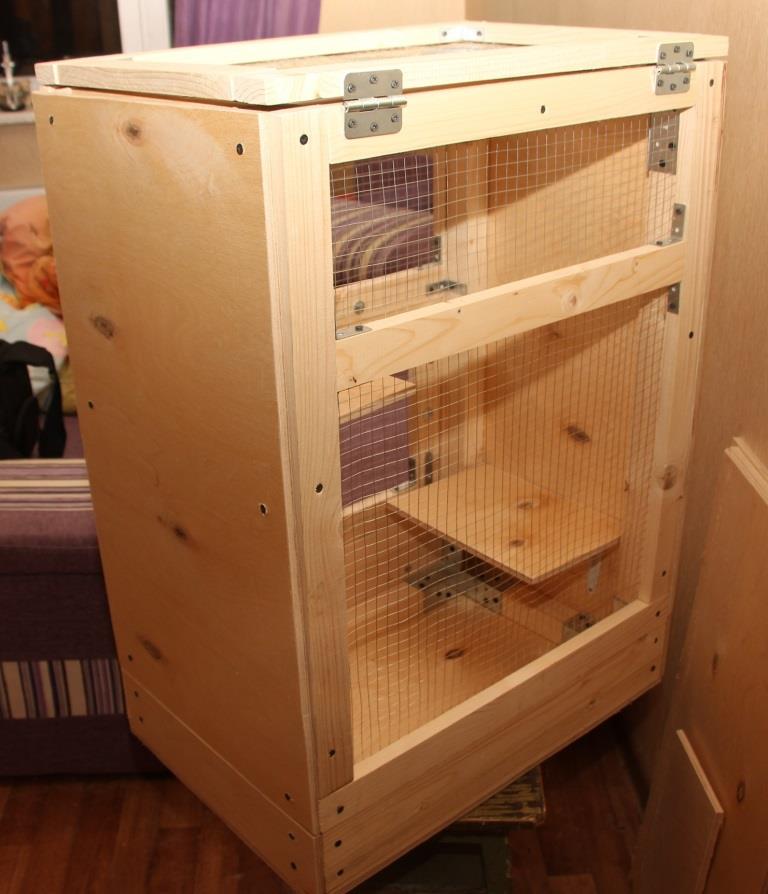
- In order to further clean the cage it was easy and simple, it is desirable to make a pair of doors from different sides, as well as a removable cover. Frames to perform lining, and fixing the door to put on metal hinges.
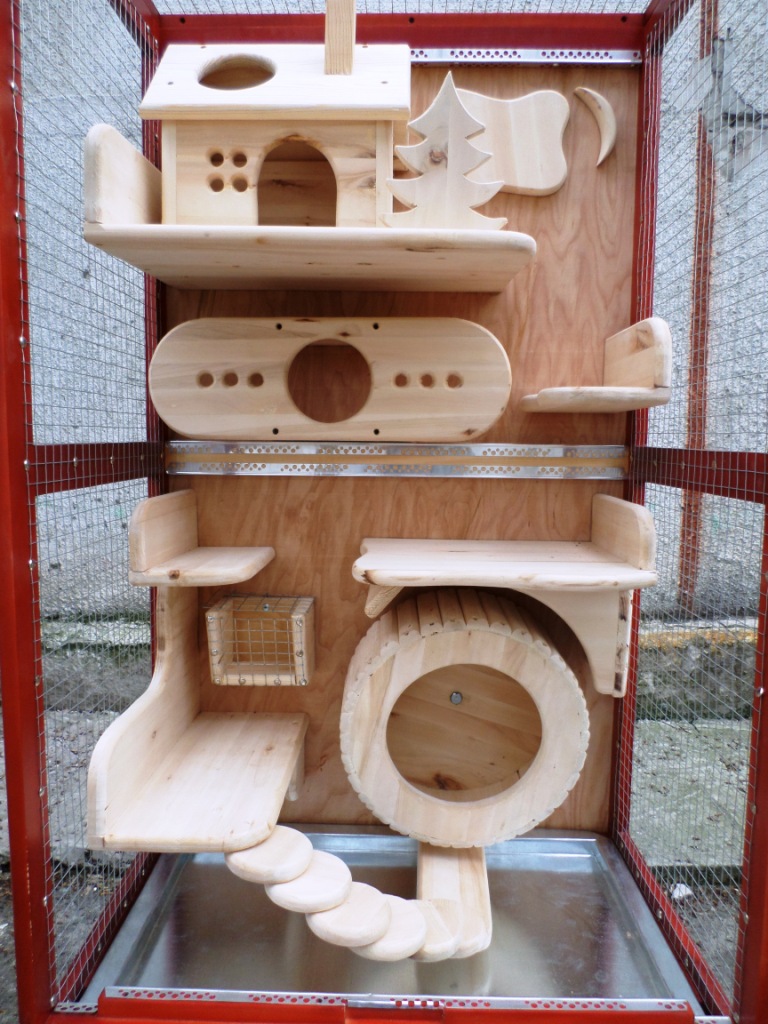
- For future shelves, it is better to choose solid boards on which small holes should be made so that you can move freely along them, getting to any floor.
- It is desirable to close the back wall, as well as one side of the cage, with one large sheet of plywood to protect against drafts.
At the same time, the entire structure should be raised slightly from the floor in order to protect the thermophilic pets from frost.This will help strong legs or a special stand in the form of cabinets. Moreover, the resulting free space at the bottom of the cage can then be used: food, sawdust and other supplies can be stored there.
Lastly, the entire cell is recommended to be treated with a special impregnation. Paint the outside with varnish, and treat the inside with a waterproof, odorless, anti-bacterial anti-bacterial, safe for animals that are sold in any hardware store.

Tips
Making a cage is not difficult if you use step-by-step instructions that are very easy to use. You just need to take into account some of the nuances in the work.
- The skeleton of the cell should be placed only in an upright position. The beast is too active and therefore a wide and low house does not fit, it will be inconvenient to live in it.
- Materials that will be needed to make the cage should be safe. It is best to take a wooden shelf. However, over time, they need to be replaced, since the rodent likes to sharpen its teeth.
- To ventilate the cell, a galvanized mesh with small cells is required, which is located on one side or on both sides.
- Glass used in the arrangement of doors or walls will help maintain order. At the same time it is necessary to take only high-quality accessories in order to avoid the loss of any elements that can easily injure the animal.
- On the doors it is desirable to install locks - magnetic or with a key. Chinchilla is very curious and loves to crawl through the gap. And if, during a jump, he accidentally hits the door, he can easily open it and quickly escape.
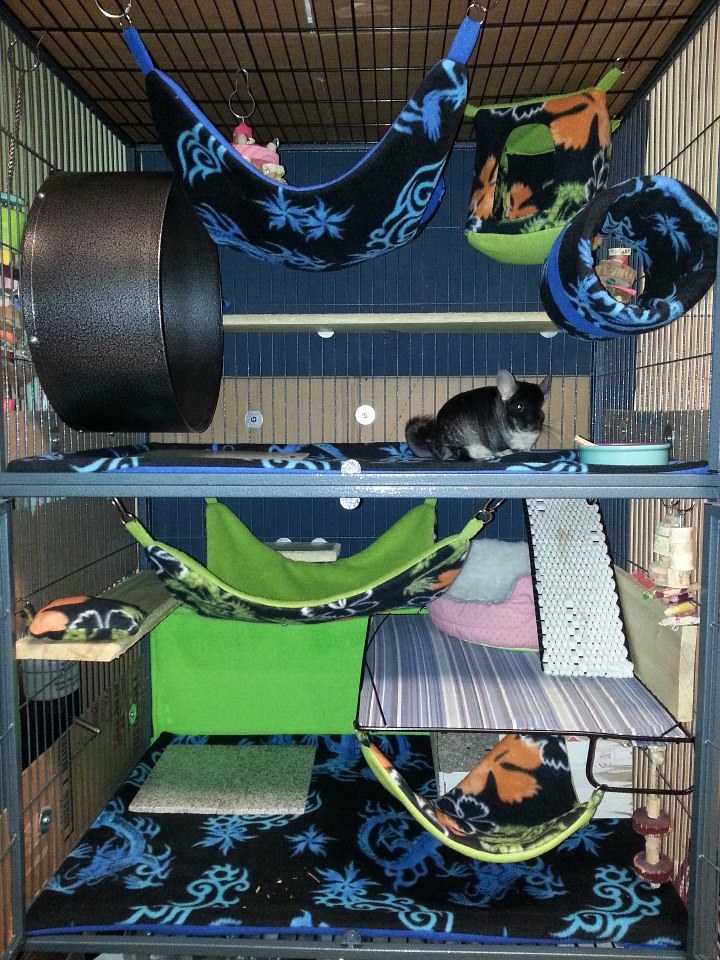
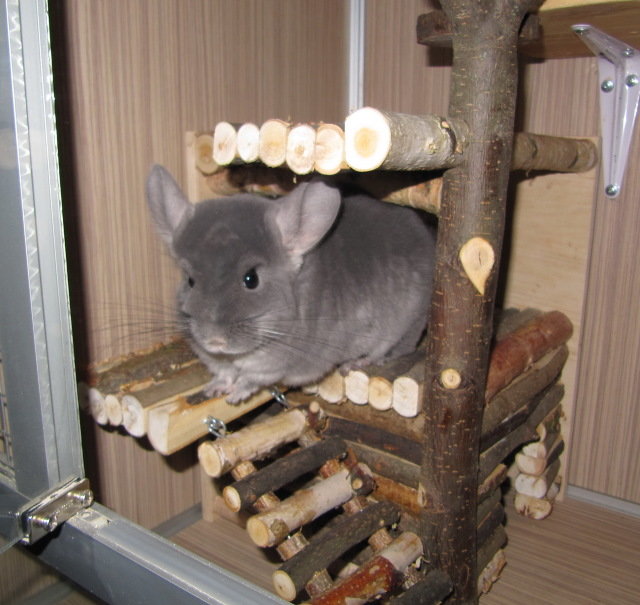
- Be sure to buy a special hammock or sew it yourself. It is intended not only for entertainment, but also for recreation. On it you can be happy to swing.
- The main thing is that the animals in the cage should live comfortably, and the owners - it is convenient to clean.
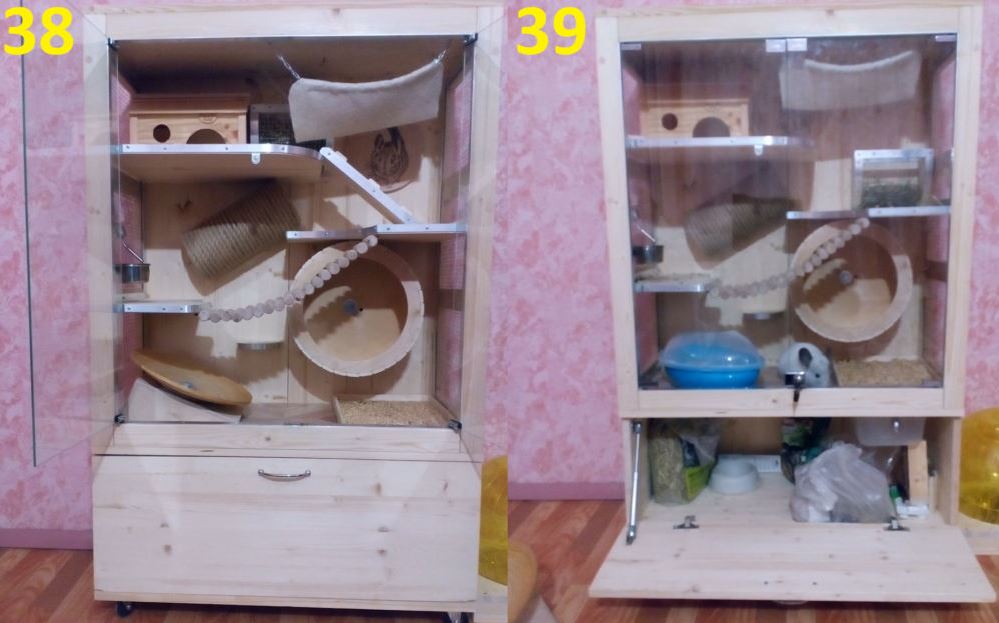
Chinchillas bring incredibly much joy to all family members. In addition, they live very long, of course, if you eat right and spend a lot of time in motion. And for this you need a lot of space. Consequently, the finished cells purchased in the store, in this case are small and inconvenient. As a result, preference is given to self-made shop windows.
How to make a cage for chinchilla do it yourself, see the next video.


