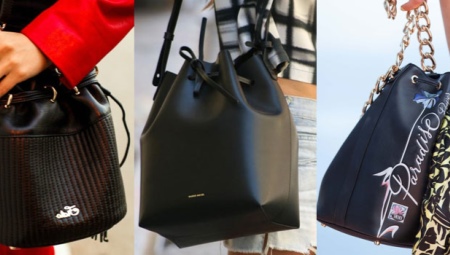
With the help of the bag, every woman seeks to emphasize her individuality and complement the carefully created image. High-quality original accessory that meets fashion trends, is very expensive. But for ladies who love needlework, stitch a unique bag, taking into account fashion trends, is very simple. Recently, bag-bag in various versions has been very popular.
How to sew a bag-knot fabric?
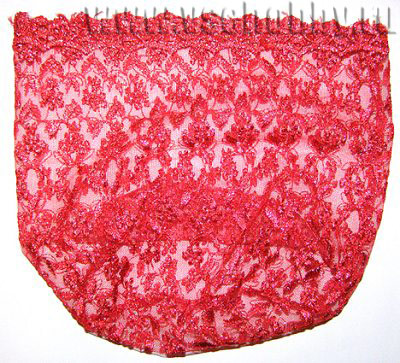
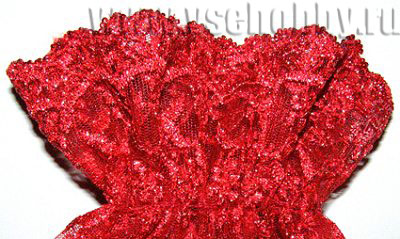
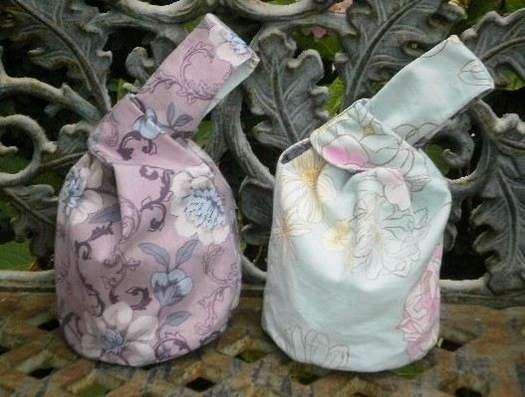
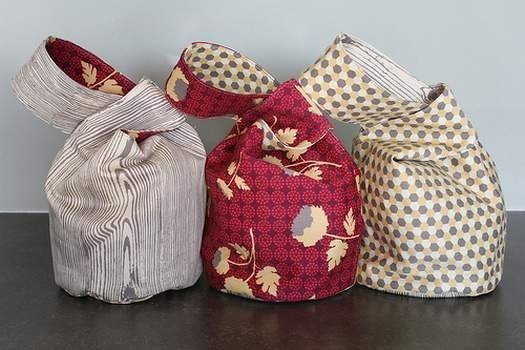
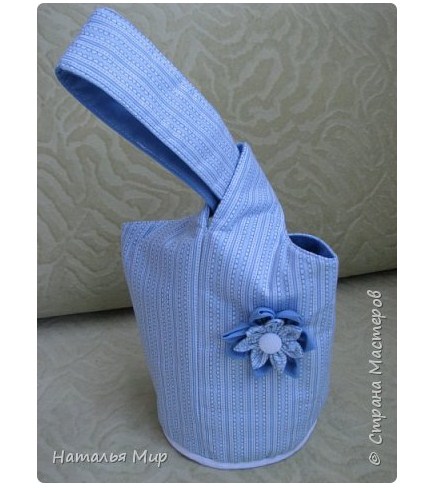
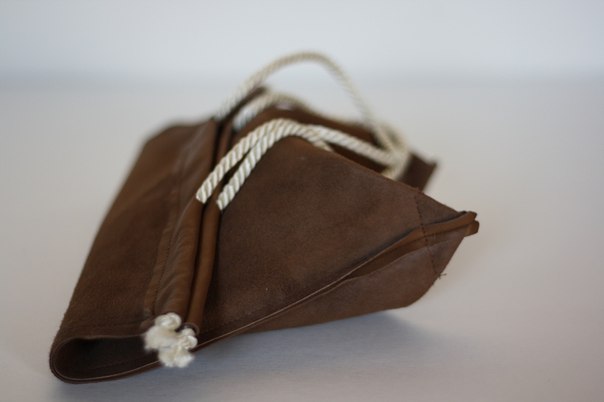
The original and at the same time simple in form, the bag-knot is distinguished by different lengths of handles, which serve as a kind of "lock". The long handle is dragged into a shorter one, reliably closing the contents of the bag from prying eyes. The resulting loop is worn around the wrist.

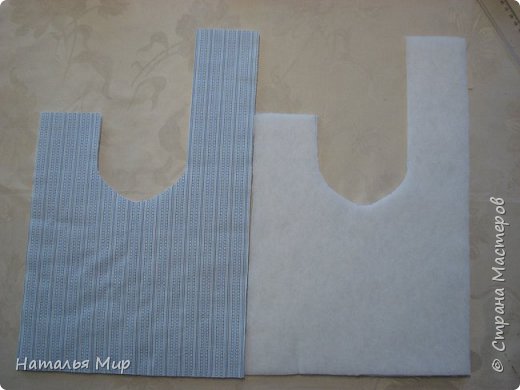
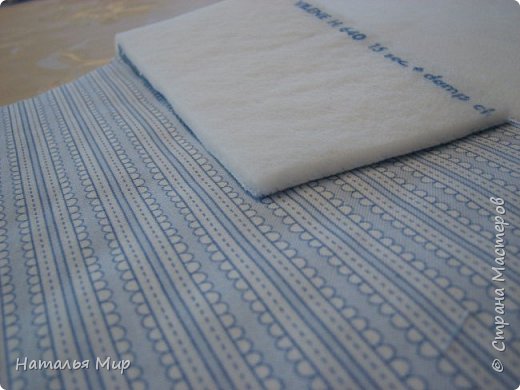
To sew such a handbag with your own hands, you will need two types of fabric, one will be the main one and the other will go to the lining. You will also need pins, scissors, threads to match the fabric and sewing machine.
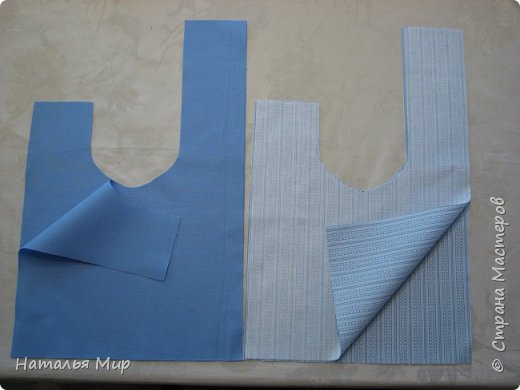
Pattern for the future accessory is drawn on paper. If a small bag is conceived, then a landscape sheet is suitable for the pattern. If you want a large accessory, you can take a tracing paper or graph paper.
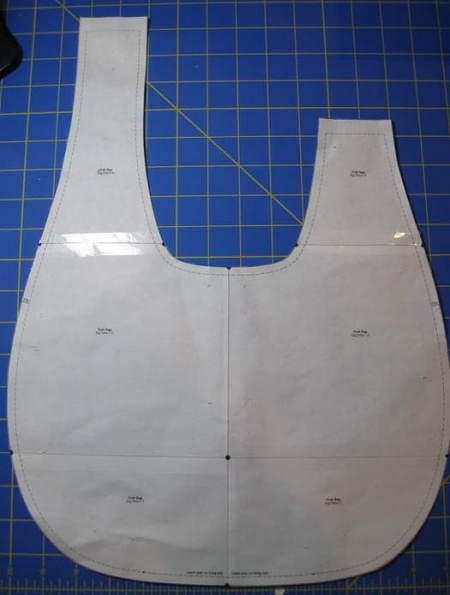
If we take the album sheet as a basis, the width of the handbag will be 21 cm, and the height together with the longest handle is 29.7. On each side of the sheet, the width of the handles should be set aside by 5.5 cm at different heights. On the one hand at a height of 29.7, and on the other - at a height of 23.2. We divide the width of the sheet in half and set aside 15.5 cm from this point and tick it off. Then we connect three points with the help of a curve, as a result of which an armhole is obtained.
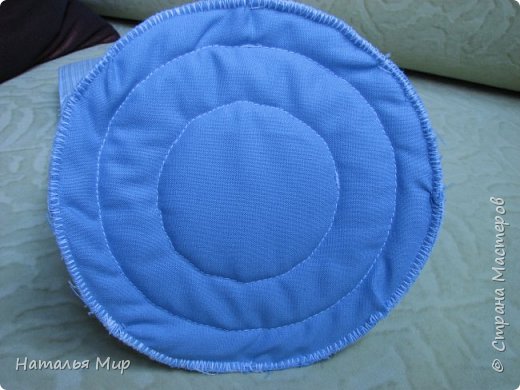
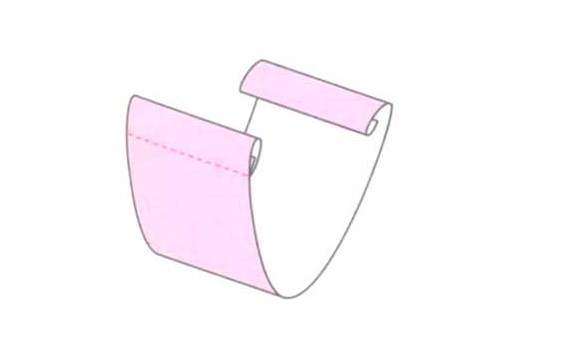
For the round bottom of the bag it is necessary to calculate the diameter. To do this, the width of the sheet (21 cm) is multiplied by 2, we get 42 cm, which we divide by 3.14 (Pi value). The resulting number is 13.3 cm and is the diameter of the bottom of the bag. Now you can begin to open.

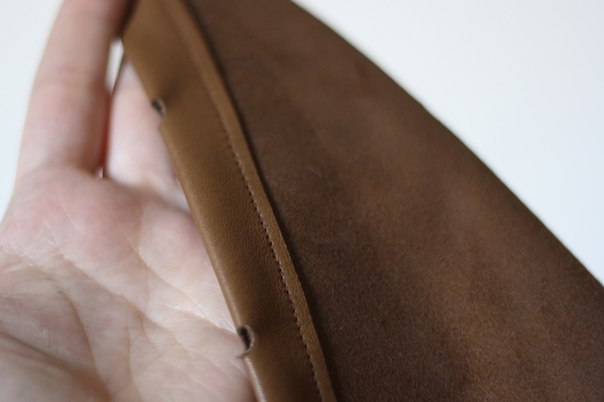
On the prepared fabric, folded in two times with the seamy side up, we lay out the pattern, we trace the details, taking into account the allowances for the seams, except for the bottom. Cut and get two blanks. Further, focusing on the armhole, draw a line that defines the beginning of the handles. Along the long handle make a cut to the marked line. Now you can start sewing.
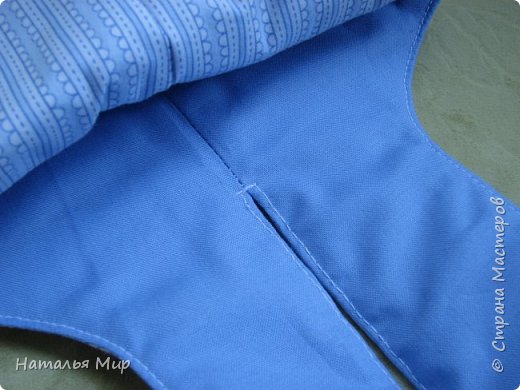
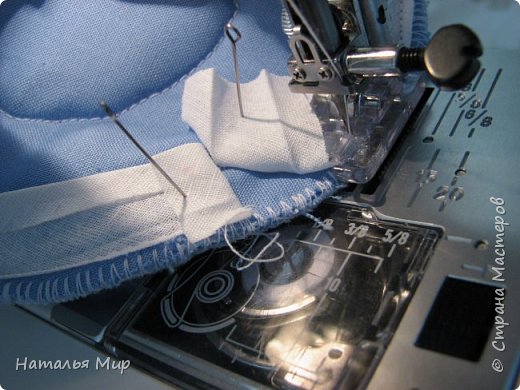
In each workpiece we grind off the side line, on the side of the short handle before the armhole and then sew the bottom to each. The resulting two parts are put into each other by the front sides. Then we grind both parts along the armhole line on each side. We connect the short handle with a seam, we do not sew the side line, through it we will turn out the product.

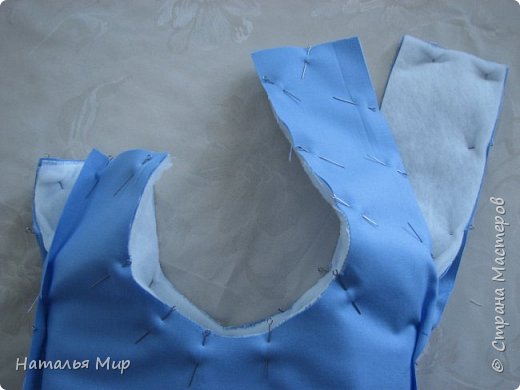
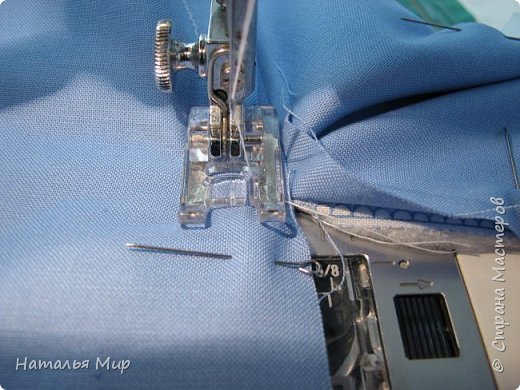

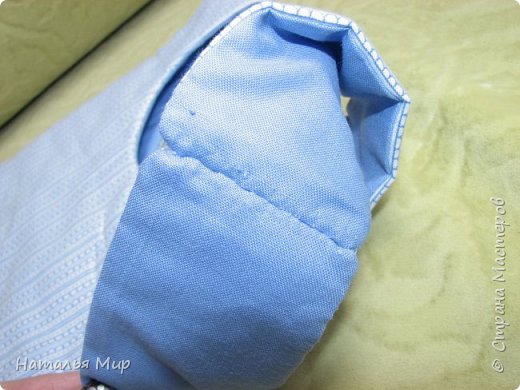
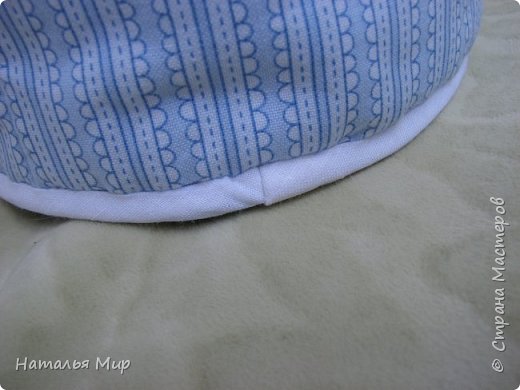
At the long handle we grind down the details, but we do not join them together. Before turning out the product, you need to make small incisions in the area of the armhole, so that the seam does not pull. We turn out the handbag and flush the side line from the side of the short handle with a secret seam, and then we join the long handle. Sew the bottom.
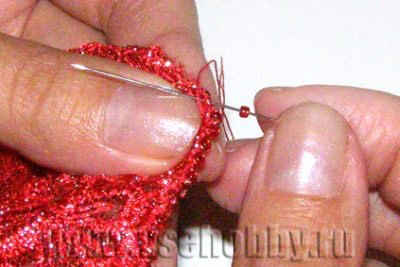
The finished handbag can be decorated with applications, beads or other decorative elements.

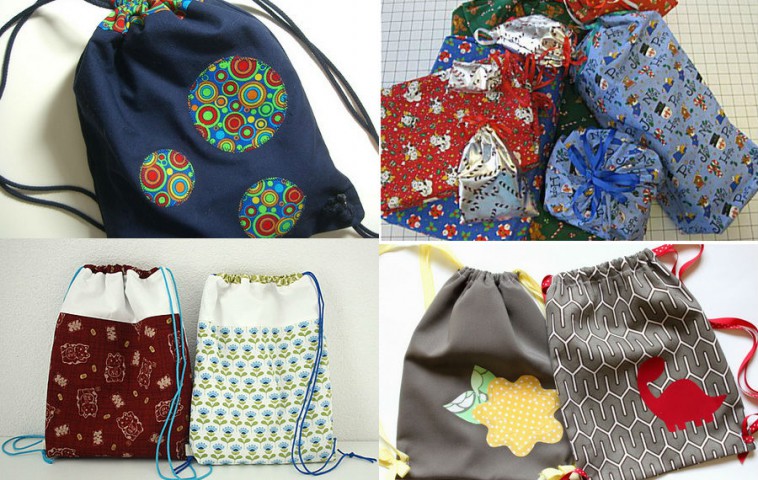
Simple bag bag
Bag-bag is sewn easily and quickly, but it looks very original. The usual rectangular shape, pulled together by ropes, which are handles. You can sew this accessory from any material.

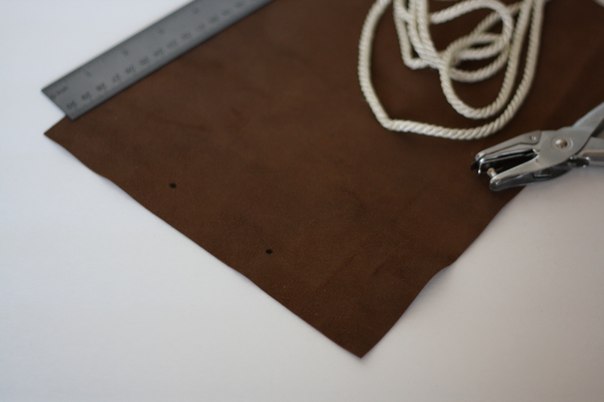
You will need two types of fabric basic and lining, lace, hole punch, thread and sewing machine.

Sewing technology is as follows:
- We take the main fabric and do the workpiece. We add 1.5 cm to each desired width on each side (seam allowances). The desired height is multiplied by two and add 10-12 cm (for bends).That is, if you need to sew a 22x30 bag, you need to take a piece of fabric 25 by 70-72 cm or two pieces of 35-36 cm wide 25 cm. Sizes may vary, depending on the desired size of the bag.
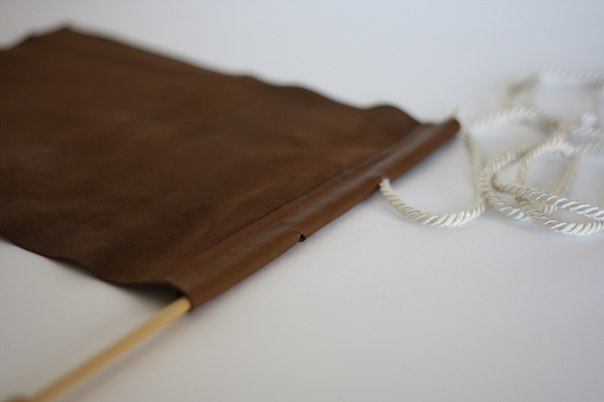
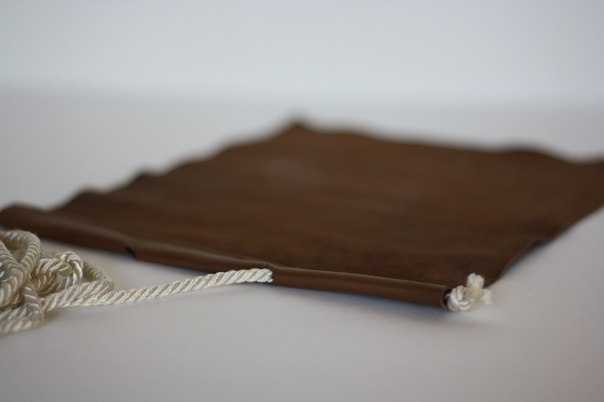
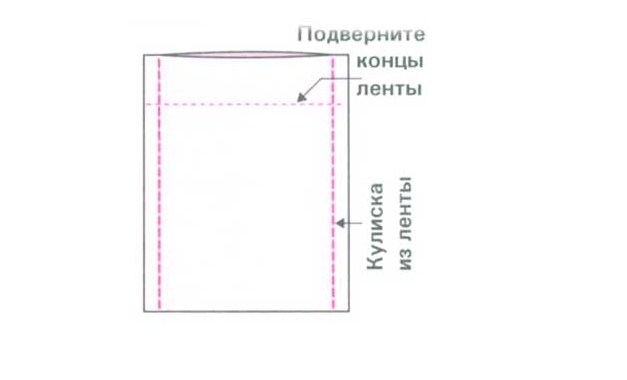
- On each side with a hole punch we make two holes, retreating from the edge of 2-3 cm, the distance between them should be slightly less than the third part of the width of the part. If the width of the part is 22 cm, then the third part is about 7 cm, which means that the holes can be made by stepping back from each edge by 8 cm. We sew the side seams of the main fabric, without finishing about 5-6 cm. In the resulting segments, we turn the sections to the wrong side and flashing If the product was made of two halves, stitch the bottom edge.
- From the lining fabric we make a similar billet, but a little smaller. We turn out the main fabric and insert the lining fabric into the main blank face up. Fold the upper section of the main fabric so that the holes are left on the top of the front side. Fasten the lining fabric to the main one with pins, bending inwards by 1.5 cm. Then we sew the lining in a circle to the main fabric.
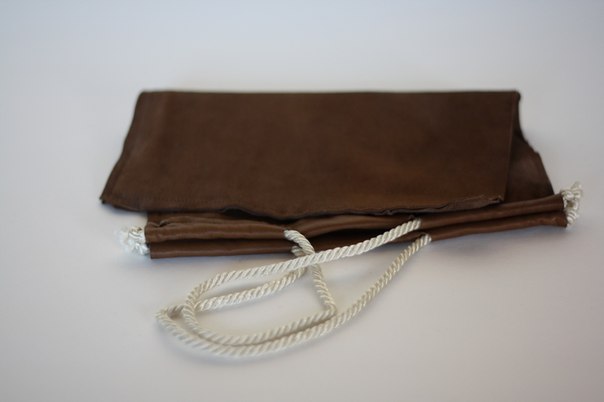
- We divide the cord into two parts and insert into the upper part of the finished product on each side, tying the ends of the cords in knots. Bag is ready!
If desired, you can sew a bag-bag with a round or oval bottom, having previously correctly calculated the diameter. One such example is discussed in detail in the following video:
Evening
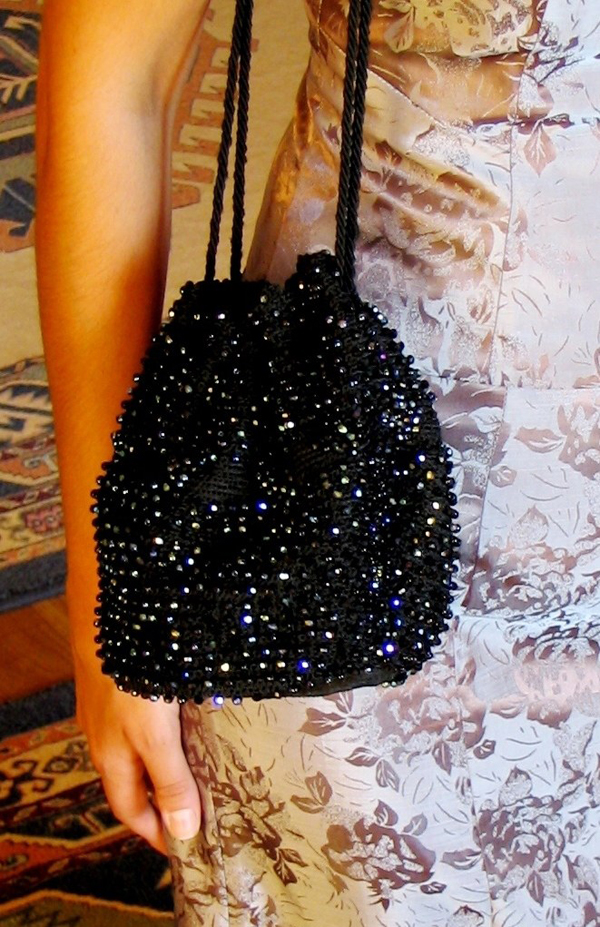
The handbag-pouch is a suitable accessory for an evening out. Recently, this model is very popular. It is not difficult to sew it with your own hands, the main thing is to choose the right fabric sample for the chosen dress.

To sew this accessory size 10x18, you will need a piece of any elegant fabric size 13x46. In addition, you must purchase two types of tape. One ribbon for the outer drawstring is about 25 cm long (nylon, silk or satin), the other for the draw is about 65 cm long and 7 cm wide, similar to the main fabric.
The assembly technology is as follows:
- Cut a piece of fabric of the desired length and width and bend 5 cm of fabric on each side. We hem the hem on the front side with a secret seam. Then we fold the fabric with the wrong side up and perform the side seams. Then turn the workpiece on the front side.
- Cut the tape for the drawstring in half. We take one part of the tape and with the help of pins we pin to the fabric, having previously rolled up the cuts located at the side seams, to the wrong side. The tape must be positioned so that the fold line is covered. We pin up the second part of the tape in a similar way. We sew a drawstring on each side of the fabric with two parallel seams so that an opening is formed.
- Insert the prepared ribbon for the tie into the resulting narrow opening of the drawstring, pre-cutting it in half. This is done with the help of a small pin. After these manipulations, two free ends of the ribbon are formed on each side, which must be connected to each other. Bag-pouch ready.


If desired, it can be decorated with beads, rhinestones, ribbons and other decorative elements.