Today, the beauty industry has gone so far as to surprise no one with a classic manicure. That is why fashionable women reproduce amazing and unique designs on their nails. Patterns are applied with various techniques and materials, one of which is a multi-colored gel polishes.
Where to begin?
It is possible to learn to gel polish even at home, without resorting to the services of expensive salons.
It is important to start stocking up with the necessary tools and materials, as well as knowledge. For this it is enough to study various videos and master classes of masters.
Instruments
Basic set of tools required for gel manicure, usually consists of the following elements.
- A file with a rough abrasive for coarse polishing.
- Baf to add shine and improve the adhesion of gel polish to the nail surface.
- Ordinary sewing needle. You can use a pin, it is more convenient to hold. Needles help to draw thin patterns, but you need to be careful not to scratch your nail.
- Toothpicks. Unlike needles, they do not scratch, but because of their substantial thickness, the drawings are less clear.
- Manicure wooden sticks. By analogy with toothpicks, they are used to apply any large parts.
- A set of dots with balls of different diameters. They put dot patterns and curls.
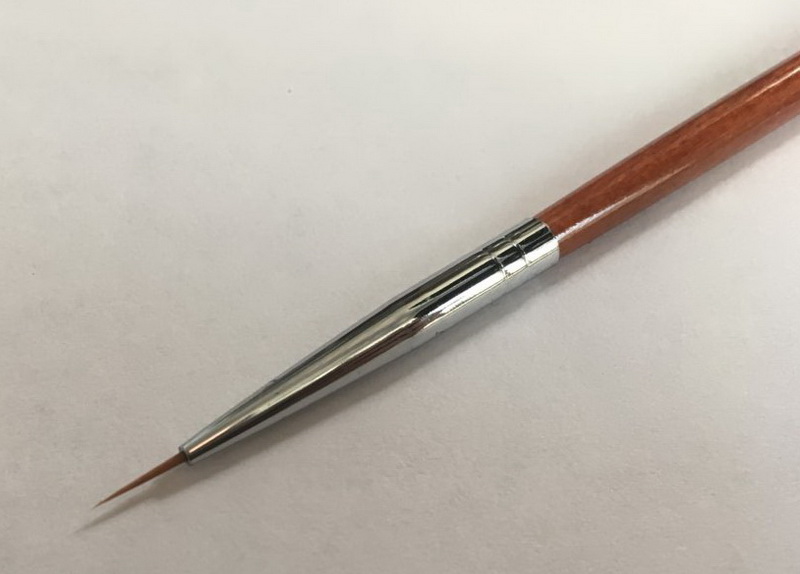
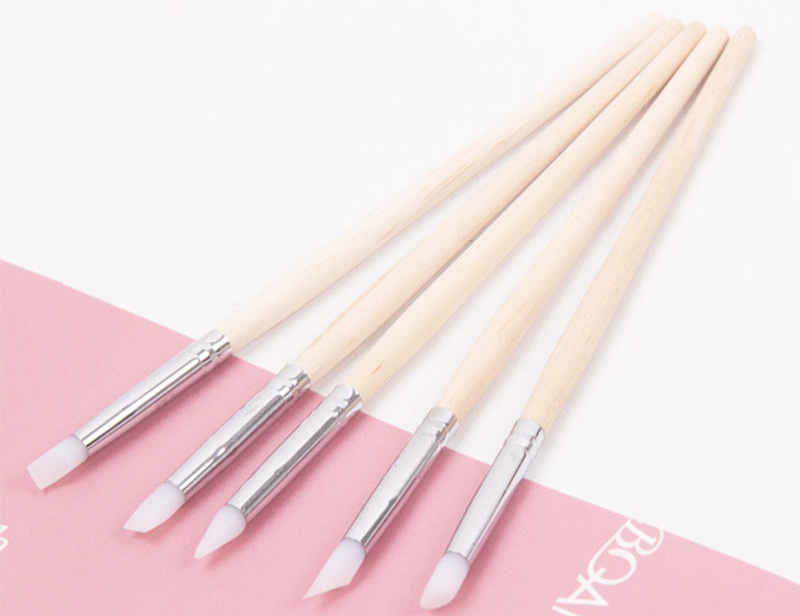
- Set of brushes. Professionals advise to choose models from natural pile.
- Several sponge or sponge pieces, which are designed to create gradients or mix colors of different shades. Also, depending on the structure of the sponge, the texture is attached to the manicure.
- Cotton pads and lint-free wipes.

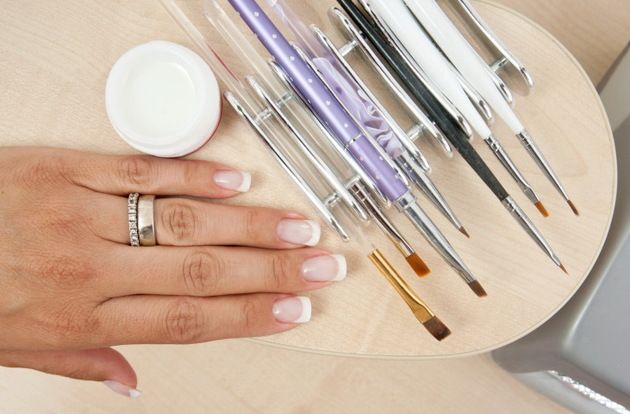
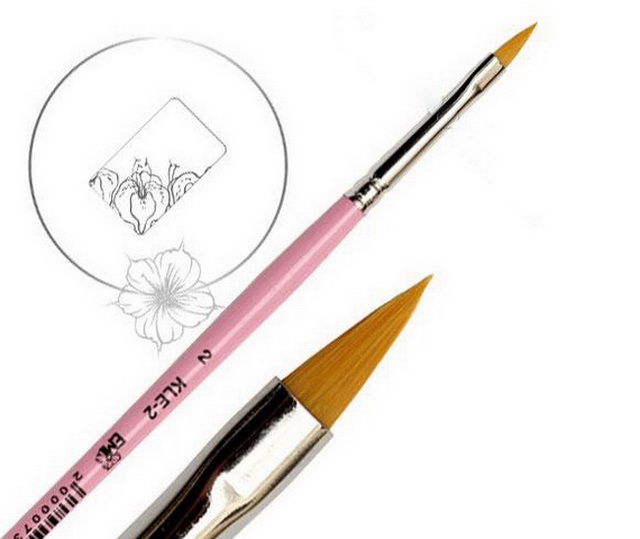
The minimum set of brushes should contain the following types of brushes.
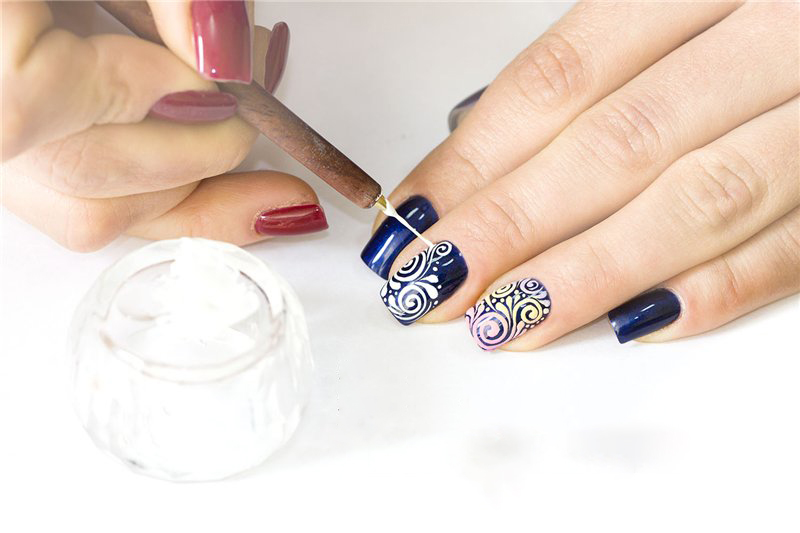
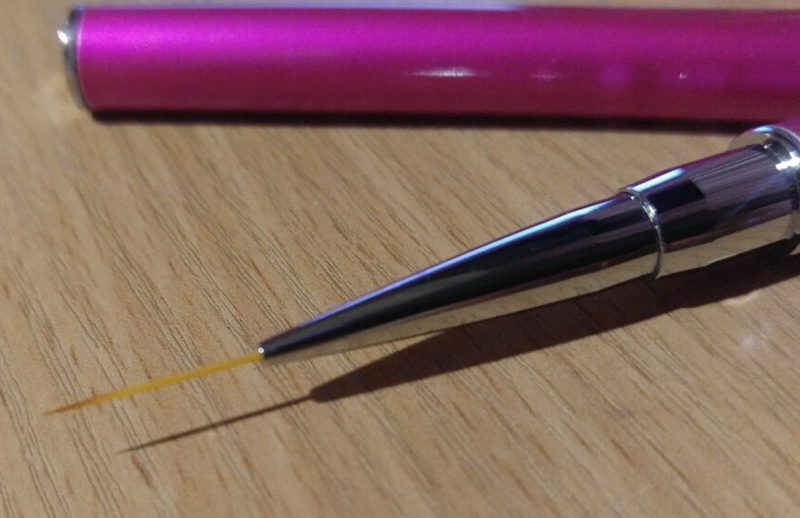
- Spot. Pile tool collected at the tip of a pointed peak. During the work, the brush is held vertically and only the tip is dipped into the lacquer. Initially, it put an end, and then a pattern is pulled out of it. The tool will need to reproduce small elements, colors and laces.
- "Hair". Professional name - liner. The brush has a cylindrical shape. It is very thin, the length reaches two centimeters. As a rule, 2 liners are needed: a long one - for drawing lines, a short one - for curls. In contrast to the point, the pile of this brush should be dipped completely into the varnish. The tool is indispensable for geometric patterns, floral designs and monograms.
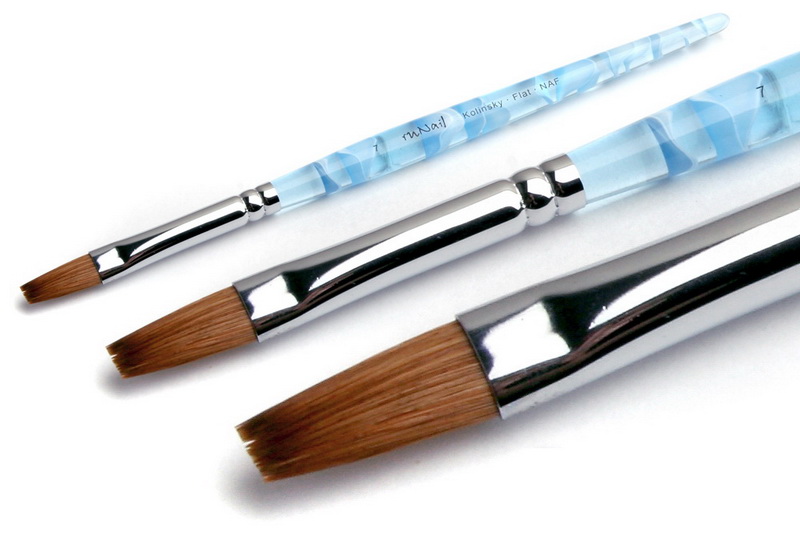
- Normal flat. The brush has a rectangular shape and is designed to produce gradient transitions, applying glitter, acrylic powder, rub-in and other decorative elements. With certain skills, she draws various patterns in the Gzhel style or medium-sized flower ornaments.
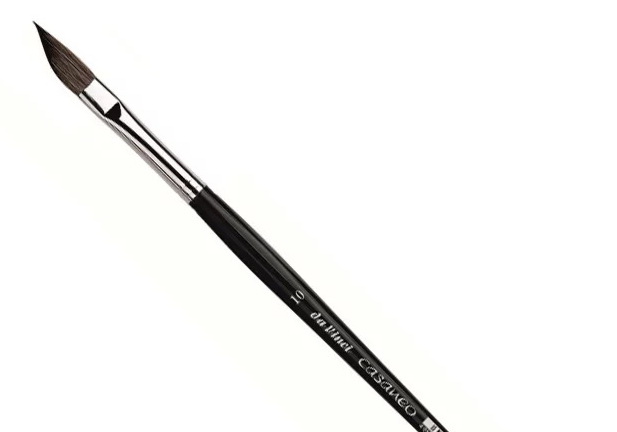
- Dagger-shaped. The shape is similar to a flat brush, but its tip is cut at an angle of 45 degrees. It is convenient for drawing small or thin drawings. Bevel brush is used for writing hieroglyphs and other elements of oriental painting. Volumetric figures are also included in the zone of its capabilities. It is convenient for her to display "smiles" for french and moon manicure.
- "Petal". The form is flat, cut from two sides to the middle, forming a thin tip. It can easily replace the pinpoint and dagger-shaped, because with the proper skill, it copes well with tiny details, painting, sparkles and rubbing.For the French manicure petal is also indispensable.
- Fan. A very wide and flat brush in the form of a fan is necessary to align color transitions, to design abstract or landscape images, to evenly distribute the decor in the form of sparkles or powder.

In addition to natural brushes, manufacturers offer their silicone prototypes, which are called shypery. For beginners, they are a more suitable option, since gel polish does not spread on them, they are easier to wash, hairs do not bristle with time. In addition, the shapers are cheaper than natural tools, so they are not so pitiful when training.
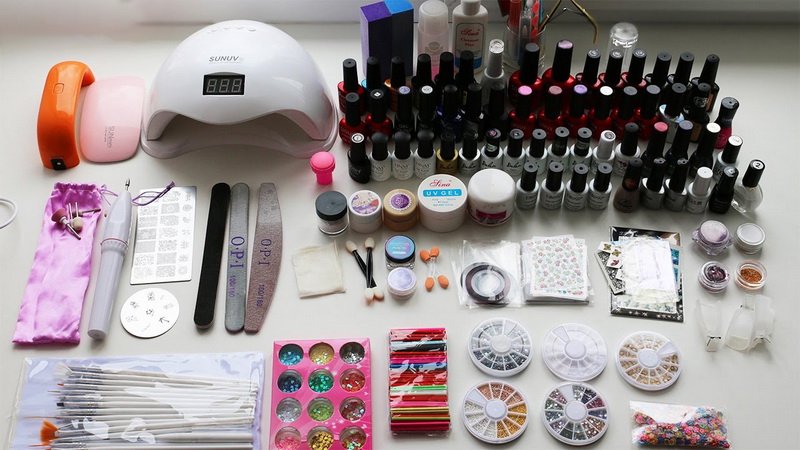
Coating Materials
The list of materials may be no less broad, but we list the main ones.
- Degreaser. At home, you can use nail polish remover or alcohol.
- Base. This transparent coating is necessary to strengthen and align the nail plate. Also, the latest innovations contain various vitamin complexes.
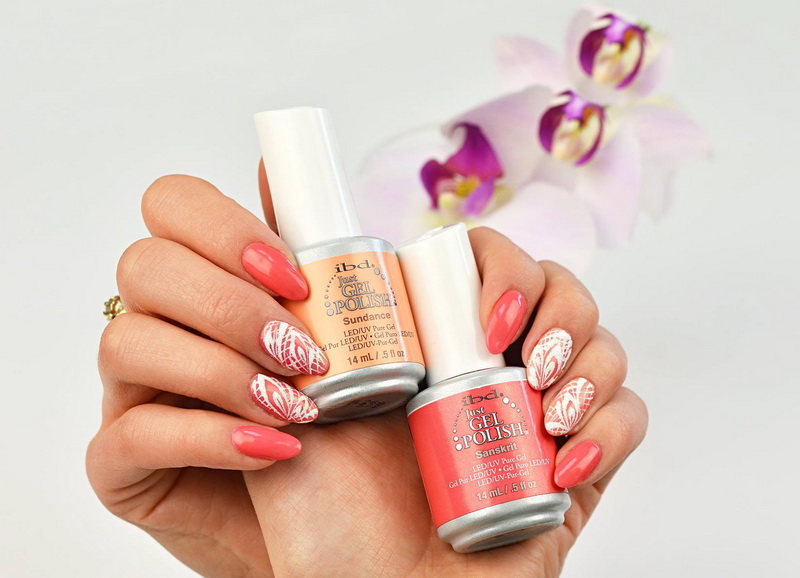
- Gel polishes in different shades.
- Finishing top. A transparent tool fixes the result, making it complete.
- Decorative details: sequins, rhinestones, foil, beads, acrylic powder.
- Stencils greatly facilitate the work when creating a manicure. As a template, not only special purchased ones will be suitable, but also made and available tools. For example, for geometric patterns, you can use a narrow masking tape, and for an openwork pattern, a piece of lace or tulle.
- Adhesive for fixing the decor.
What can you draw?
Many novice masters wonder what you can paint on nails covered with gel varnish.
It turns out that there are many options for this.
Patterns can be applied:
- ordinary varnish;
- acrylic paints;
- watercolor;
- acrylic powder sand;
- shallak;
- gel polish.
The most common remedy is lacquer. It is available, diverse, easy to use. To create the simplest design, you need only two shades - for the background and for the pattern. The downside is the thick texture of gel polish, which causes difficulties for beginners in reproducing thin and small drawings. But in fact, this is a matter of technology, it needs to be worked out.
Acrylic paints are considered another recognized manicure material. They are easy to use, better lie on the surface, have a wide color palette, do not crack, do not spread, dry quickly. It is very easy to work with them, they do not need to be diluted with water. The only drawback is that they are quickly washed away, so they must be covered with a fixing layer of the top.
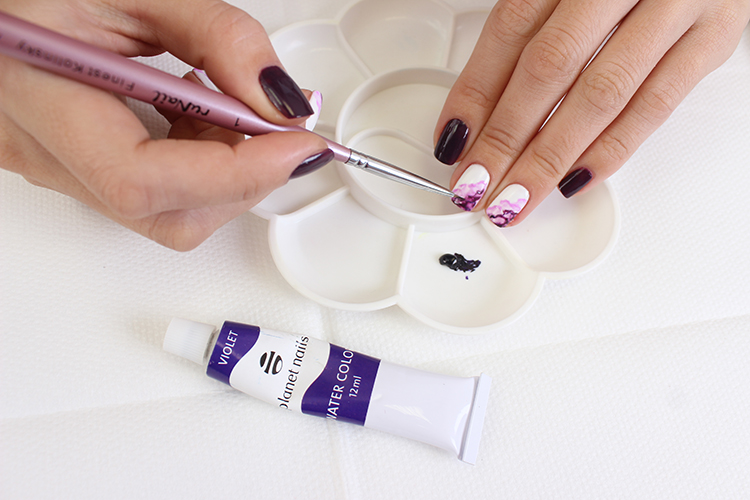
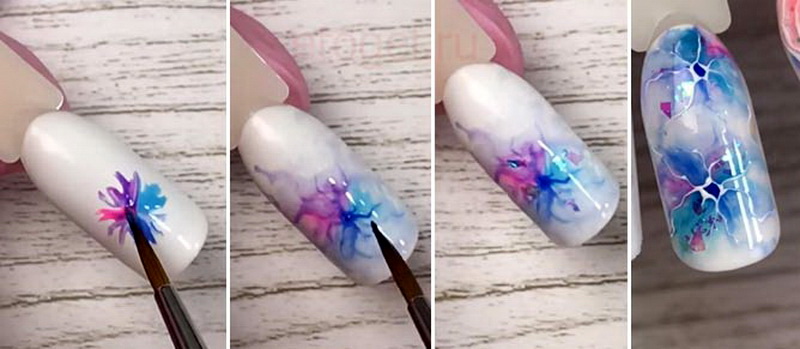
Unlike acrylic, watercolor requires the addition of water, so it dries slower. Watercolor paints allow you to create landscape compositions, but it is difficult to work with them. The technology must be worked out for a long time.
Popular drawings step by step
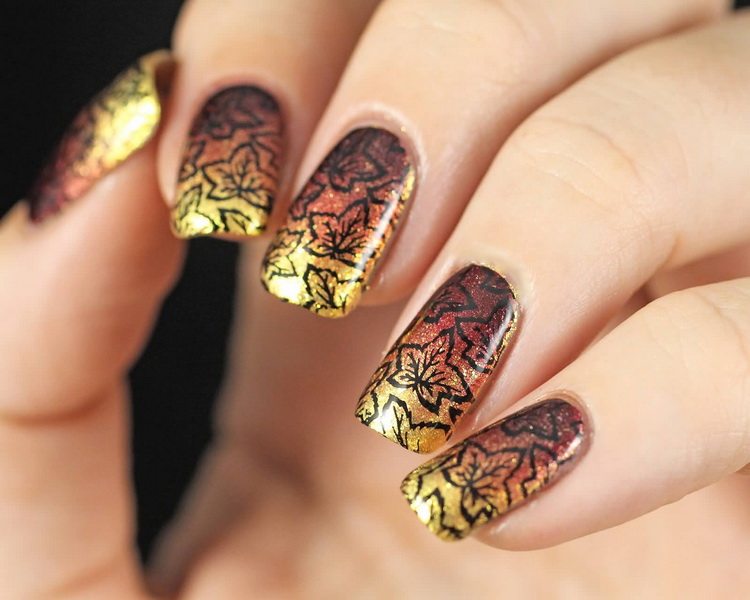
The demand for a certain type of drawings depends on the season. It is no secret that snowflakes are popular in winter, blossoming tree leaves and buds in spring, flowers and berries in summer, and autumn leaves in autumn.
Consider the algorithms for creating the simplest drawings.
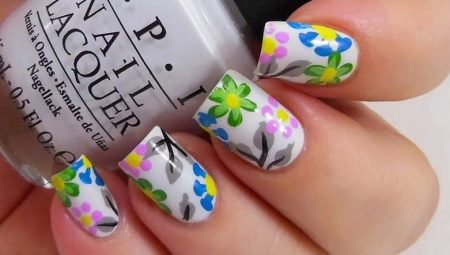
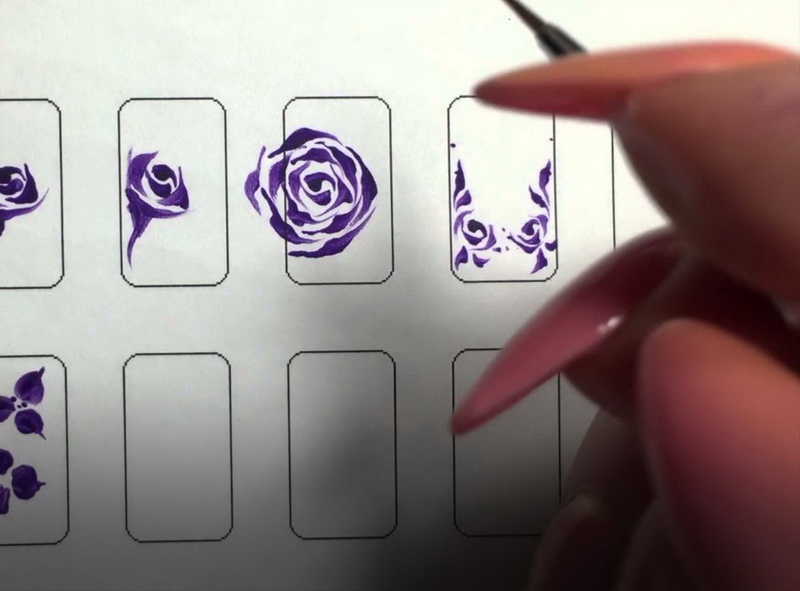
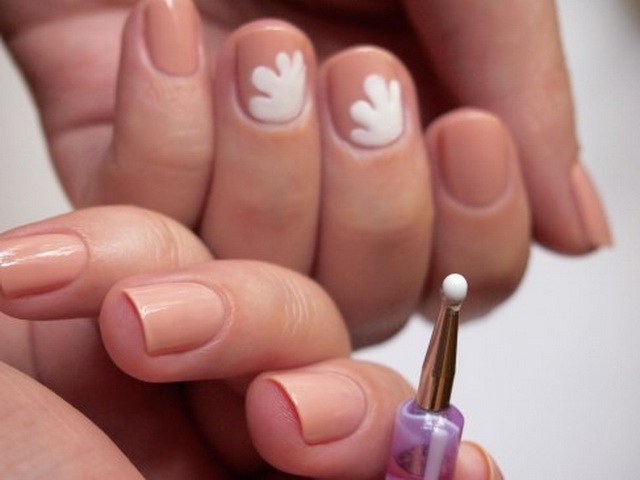
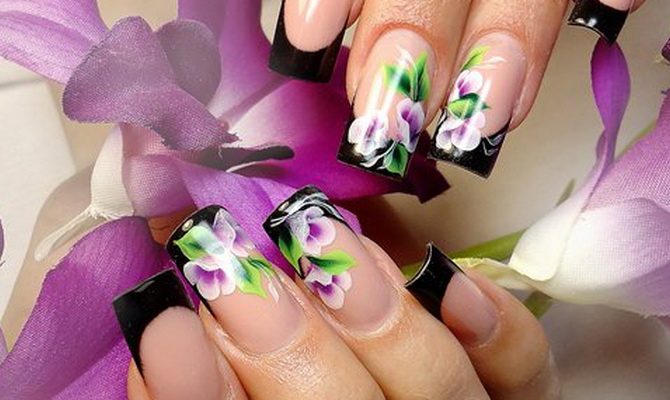
Flower
The easiest way is using dots. In this case, first gel polish is collected on the ball and the middle of the flower is placed at the desired location of the nail. After the larger diameter dots, round petals are marked around it.
Petals can be painted with a brush, beveled or “petal” will do. To do this, you must first put a drop, and then from it a thin tip to draw out a petal shape. Or immediately start drawing, starting from the middle of the flower. The tip of the brush is pressed to the beginning and, without tearing off, they make a wavelike motion in the shape of a semicircle, then the same is repeated on the other side. The result is an elongated elongated petal in the middle.

Floral ornament - one of the most complex patterns in nail art. Therefore, you should train, you can even on a sheet of paper.The better you own the instrument, the more accurate the images will be.
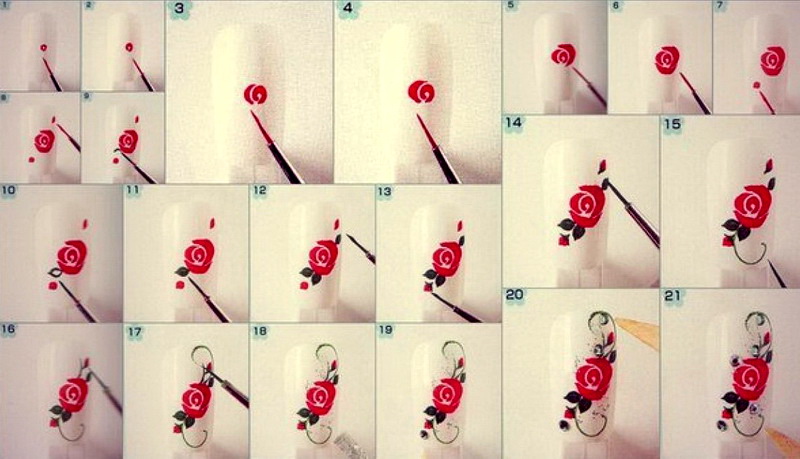
Reproduce quality rose is not obtained by all masters. But the simplest sketch can be done even with your own hands. To do this, you need a dot brush or a short liner. We start to draw a rose from the center. Dip the very tip of the brush into the lacquer and, holding it vertically, put a dot, and from it draw a comma. The next arcuate line is twisted in the other direction. And so in a circle several times, increasing the length of the arcs. That's all.
Flowers sometimes paint not on a dried basis, but on a “wet” layer. In this case, the background is not dried, it immediately begins to work in another shade. Drops are applied at the locations of the petals and gradually stretched with a needle, toothpick or fine brush. It turns out a kind of watercolor effect, as the gel varnish spreads.
It is customary to glue rhinestones or beads in the middle of flowers, which will enhance the decorativeness of the design.
Maple Leaf
Autumn designs are often associated with bright leaves. Maple variants are often reproduced. Technician to get them a lot, but we consider the most simple.
Before starting work, it is desirable to remember what it looks like in reality. Experienced artists suggest that it is better to start with center lines, and there are five of them at the maple leaf, like fingers on a hand. Using a needle, we put five points, which will be vertices, from which we draw axes: one central, turning into leaf cutting, two to the right and two to its left. We make vertices in the form of arrows - these will be sharp edges. Then you can work with either a medium-length liner or a thin brush, making out the edge of the sheet with wavy lines.

After receiving the contour, further actions depend on the desire of the master. Drawing can be tinted or leave only the sketch. Some draw internal veins on the sheet, but someone does not.
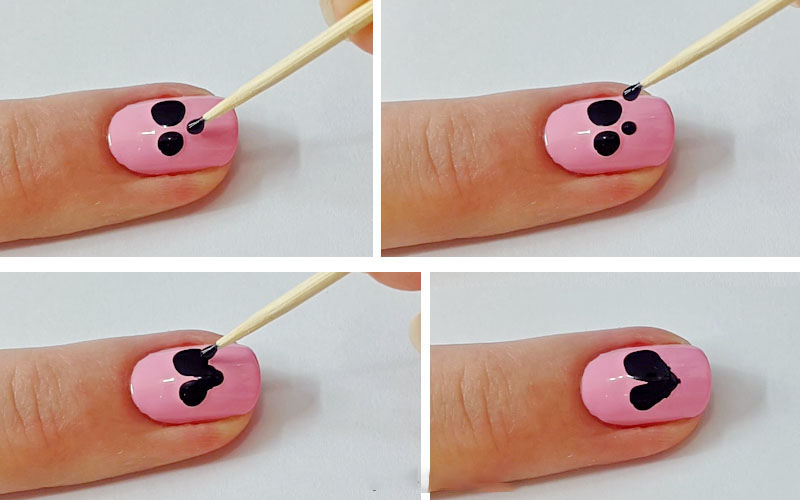
A heart
A favorite pattern of young girls are hearts. It turns out that it is very simple to execute them; even beginners can handle it the first time.
To do this, you only need a toothpick or dots, which at the location of the heart are put two parallel points. The distance between them is equal to the width of the pattern.
Then from each point a sharp toothpick pulls tails down to the middle and connect together. That's all, heart is ready.
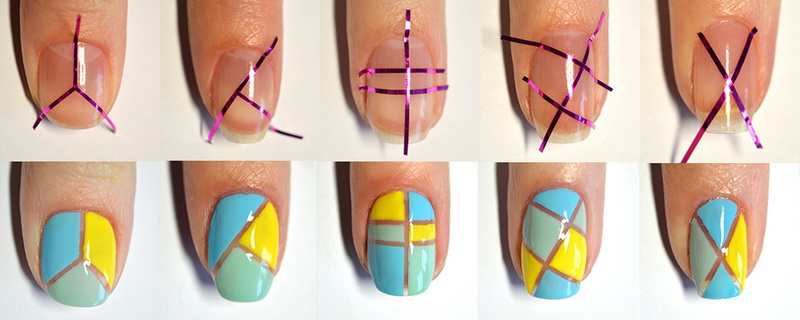
Geometry gel varnish
Straight, wavy or broken lines, geometric shapes and points - have always been popular among fashionistas. Trends in recent years confirm that geometric patterns are still in trend, in demand, and most importantly, simple to play.
To get even strips, it is enough to use ordinary masking tape, making them stencils for drawing. More complex templates are offered by manufacturers of manicure materials.
One of the elementary methods involves the use of a narrow manicure tape with a sticky seamy side. Strips stick on the base manicure in random order. The gel polish of the selected shade is applied on top. After drying the coating and removing the adhesive tape, we obtain a monochrome pattern with stripes of the base color. If you need a pattern of contrasting tones, then before the tape you should cover your nails with colored varnish.
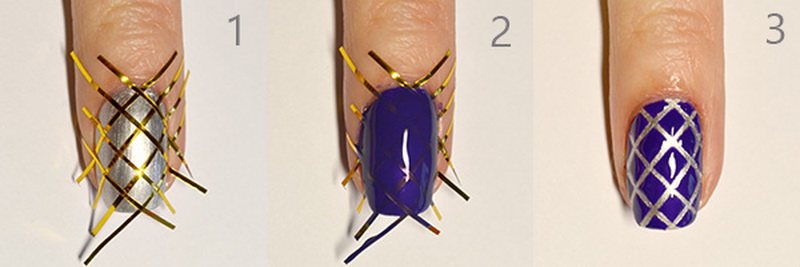
Another way. On the base of the tape is superimposed on the desired pattern. The resulting areas are filled with gel varnishes of different shades. After drying, removing the stencil and fixing the top we get a kind of geometric mosaic.
Summer manicure
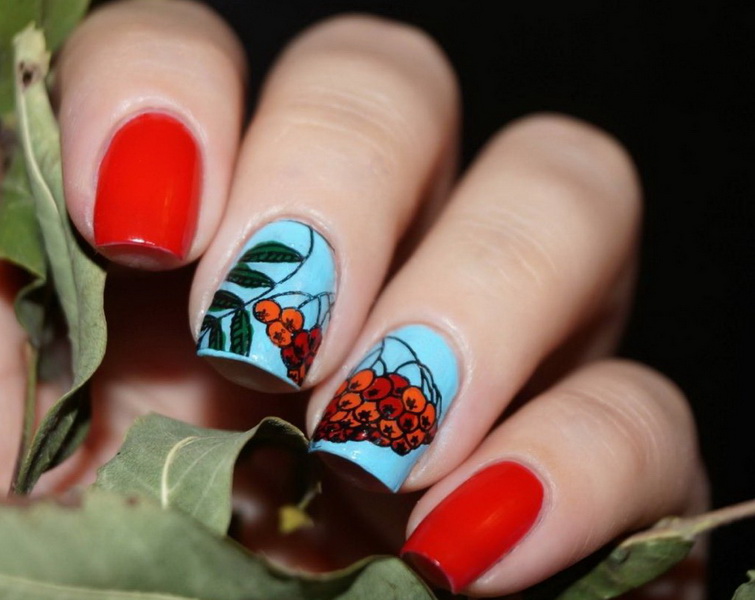
Another category of popular patterns are summer models. These include palm trees, fruits, berries. In the summer you can often find a manicure with a sketch of a watermelon or strawberry, ladybug or sunflower. Some prints are simple to create, others should be crafted to create.
There is nothing complicated about drawing a palm tree. Any thin brush will be required. The drawing begins with drawing the trunk from the hole of the nail plate.The line should turn out with a thickening from below, thinner from above and with an inclination. Then a drop of varnish is applied to the top and palm leaves are pulled out of it in different directions. Usually from 4 to 5 pieces. The jagged edge is better to draw with a needle or if you have skills with a brush tip.

Classic
With the help of gel polish, classic manicure types are well made out: french and moon. It is important to properly use manicure tools.
The holes can be painted with a dagger-shaped brush, and the edges of the French manicure are either the same or the usual flat one. To do this, the tool is applied first on one side and the line is led to the center, and then on the other side, also to the center.
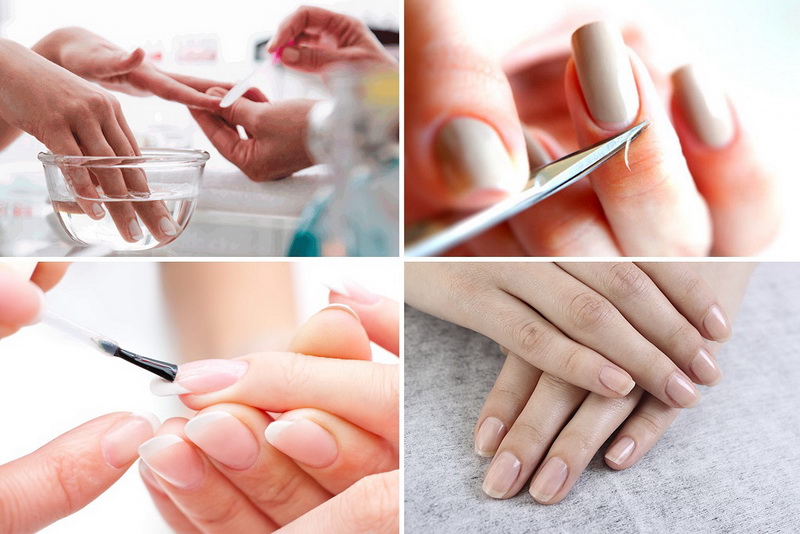
Workshops and lessons
Beginners, in order to learn how to reproduce gel polish, should improve their technique. It is not necessary to do it on false nails, spend money on them, it is enough to paint with a brush on paper. Drawing should be smooth and clear.
You should not start with complex patterns, it is recommended to start with simple ones, such as points, commas, arcs, geometric figures, and then gradually complicate the drawings.
Consider a few master classes in which some simple ideas are laid out in stages.
The technology of stamping has become very fashionable in recent days, which simplifies the application of drawings on the nail. The name comes from the English stamping - stamping. In other words, to reproduce the pattern, silicone stamps with engraved sketches are used. Consider one of the master classes for this method.
- First you need to prepare all the tools and materials. Lacquer is better to choose a special, which has a dense texture.
- Next, for 25 minutes, place the hands in warm water with sea salt for steaming the cuticle and its easy removal.
- Then, each nail is treated separately: remove old, hardened skin, cuticle, burrs. Give the nails a well-groomed look.
- Then, using nail scissors, cut the nails to the desired length and polish the cut with a nail file, giving the desired shape.
- After that, the nail plate is carefully degreased with a special tool.
- Then you can sand them with a buff to ensure good adhesion to the gel polish and shine.
- Then you can begin to apply the base. The entire surface of the nail should be covered with it completely. If it is impossible to distribute the product around the side rollers with a native brush, then it is better to take another, thinner one. After applying the hand is to turn the palm up for a few seconds, so that the tool evenly glass to the middle, and then dry under a UV lamp.
- The next stage is colored gel polish. The method is similar to working with a base coat. The only difference is the number of layers. As a rule, 3-4 saturations are enough for saturation, not forgetting to carry out drying in each lamp after each one.
- After drying, the sticky dispersion layer should be removed from the last layer, for which use either a specialized means - klinsser, or medical alcohol, or a medical antiseptic.
- Next, proceed directly to the design. On a metal plate with a pattern you need to drop a couple of drops of gel polish and distribute the plastic scraper so that all the grooves and grooves are filled, it is better to remove excess varnish. With a silicone stamp, gently press on the plate, the sketch should be imprinted on it without smudging.
- After drawing is transferred to the nail: a cliche is applied to the nail surface and rolled from left to right. No unnecessary movements are allowed, otherwise the pattern will be broken.
- All nails are treated in the same way. After each stamp must be cleaned.
- If there are fingerprints on the finger near the nail, they should be removed with a cotton swab dipped in nail polish remover.
- Finally, the manicure is fixed with a transparent top and dried.

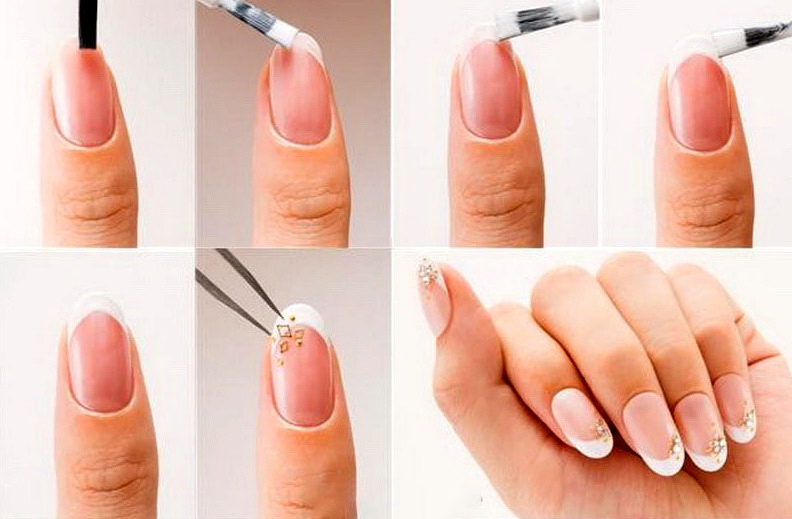
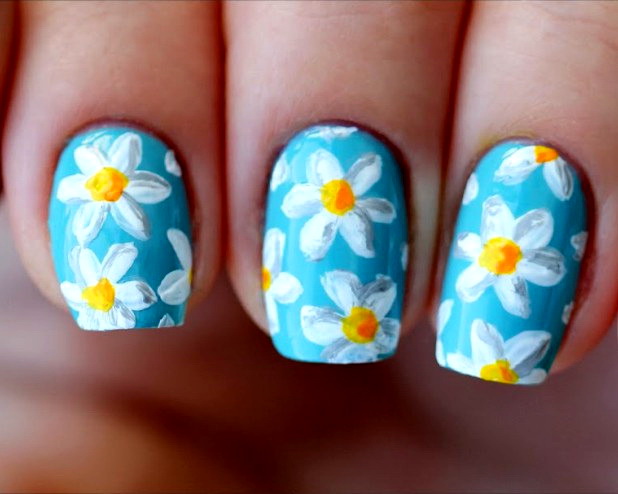
Master class in summer design.
- Standard nail treatment, creating a basic manicure.The procedure involves cleaning, shaping and shaping the base coat.
- Creating a french. French manicure in warm pastel colors: beige base and a slightly pink smile on the tip of the nail. First, the gel polish is applied to the background, dried and processed with a clinzer. Next, a brush draws a smile, is processed in the same way.
- Then proceed to the creation of chamomile pattern. With the help of a dots or ordinary toothpicks, yellow drops are applied at the locations of the daisies: on the little finger and index finger one by one, on the middle and ring finger - two each. Usually the pattern is arranged symmetrically. Therefore, on two fingers on the hand, chamomiles will be to the left of the center, on the other two - to the right.
- While the yellow color is not dry, add a little brown tone on one side for saturation.
- A dotted or beveled brush with white lacquer paint the petals, starting from the outside to the middle. On those nails, where two flowers, one of them is better to make a little smaller.
- The pattern is dried under the lamp and covered with a finishing top.
- If desired, rhinestones can be glued into the middle of the daisies to enhance the decorative effect.


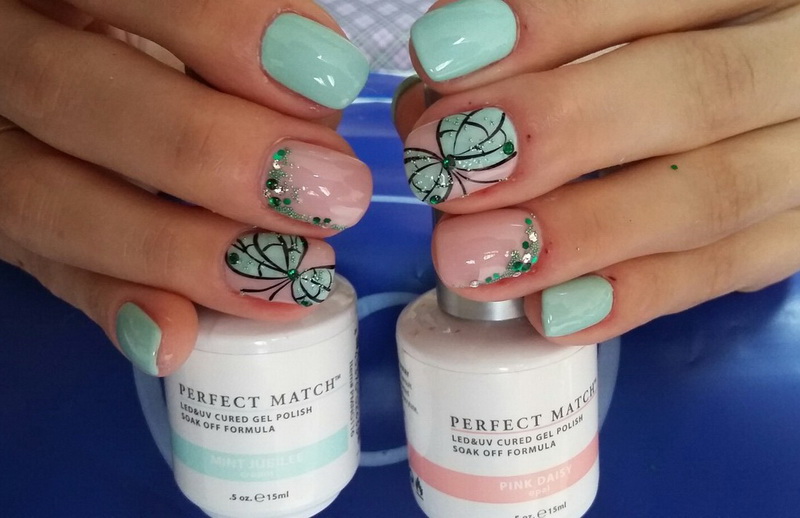
Beautiful examples for inspiration.
Design with drawings is always unusual and unique. It can be selected according to your mood, under the season or under a certain style.
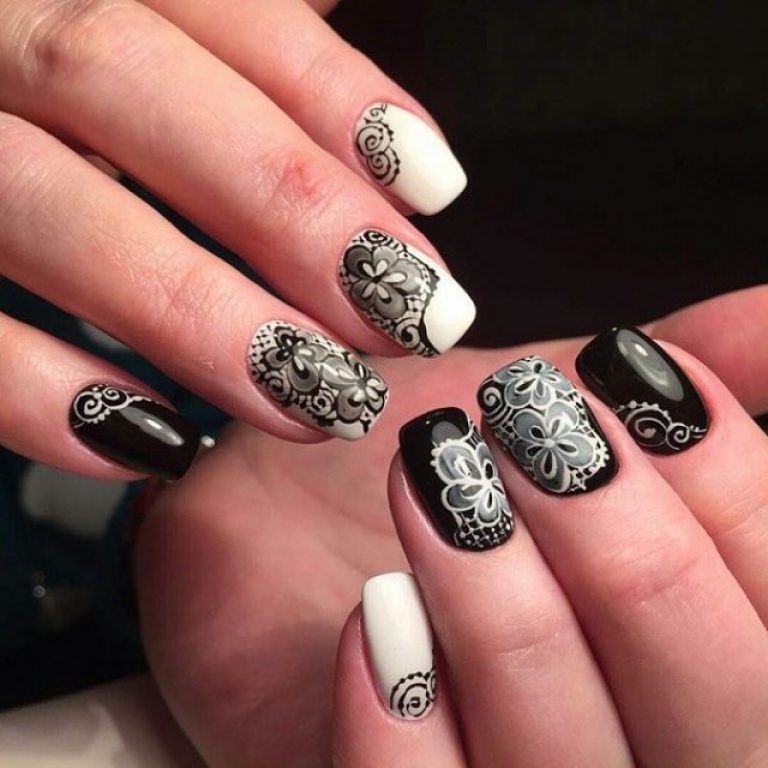
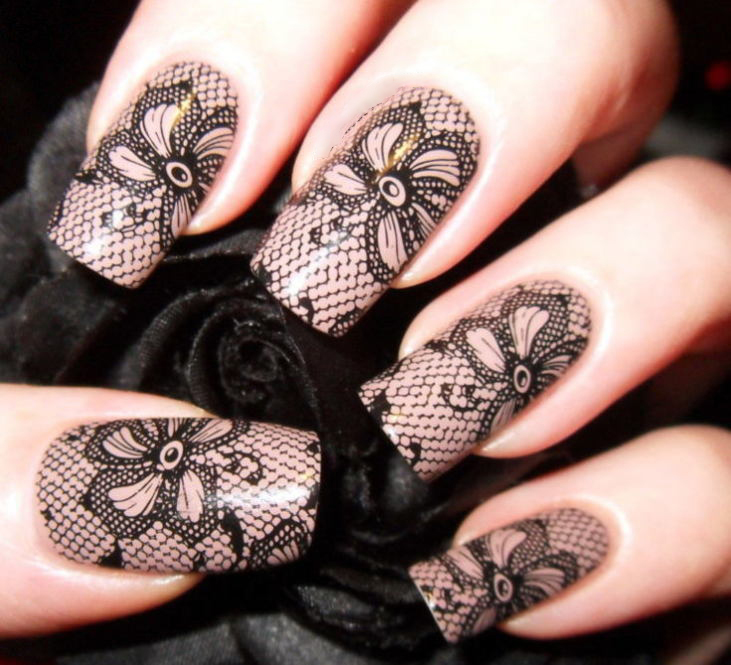
For example, laces and nets were always at the peak of popularity. Openwork adds to the image of tenderness and femininity.
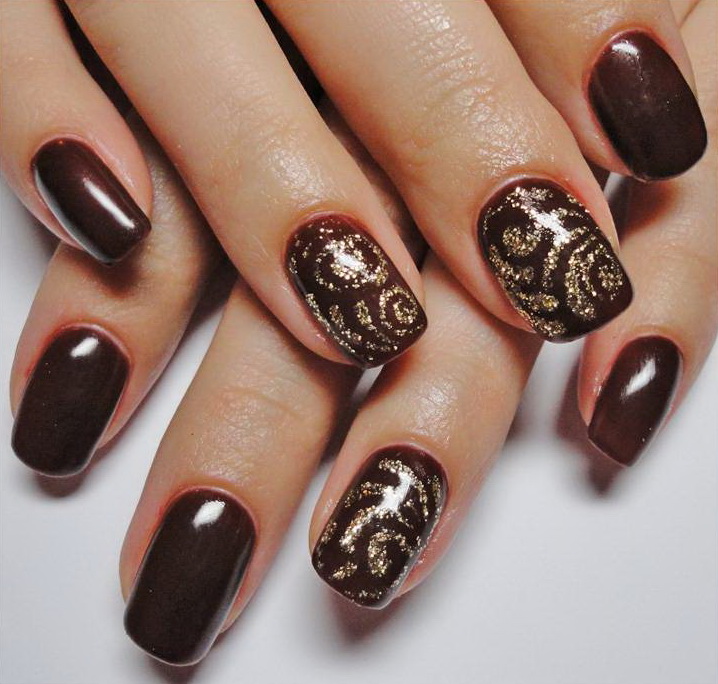
Monograms are spectacular and fit any style. They always attract the eyes to themselves, and made in gold will add chic.

Chinese painting is amazing. This hard work can only be done by real masters, but such a design is worth it.

Summer patterns are optimistic, bright. With their warm colors, they cheer up.

Autumn landscape drawings are no less beautiful, striking brightness of colors. No blues are scary.
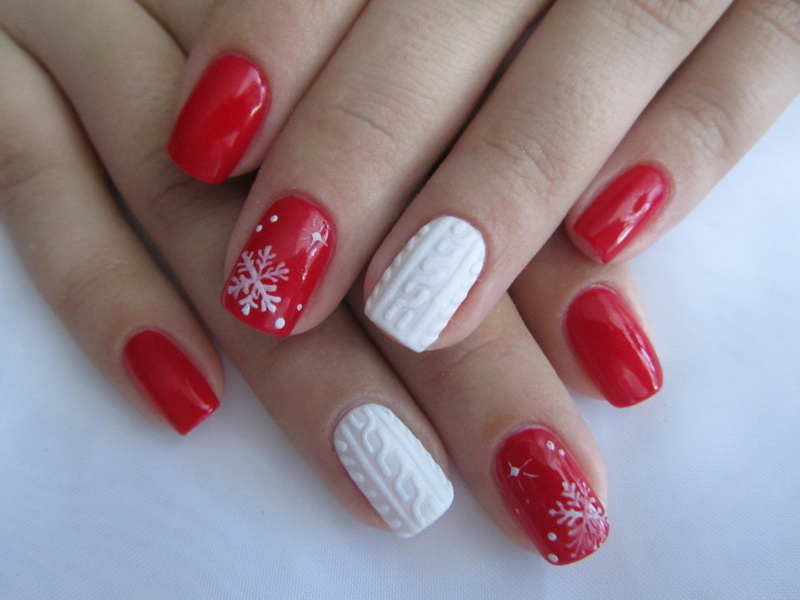
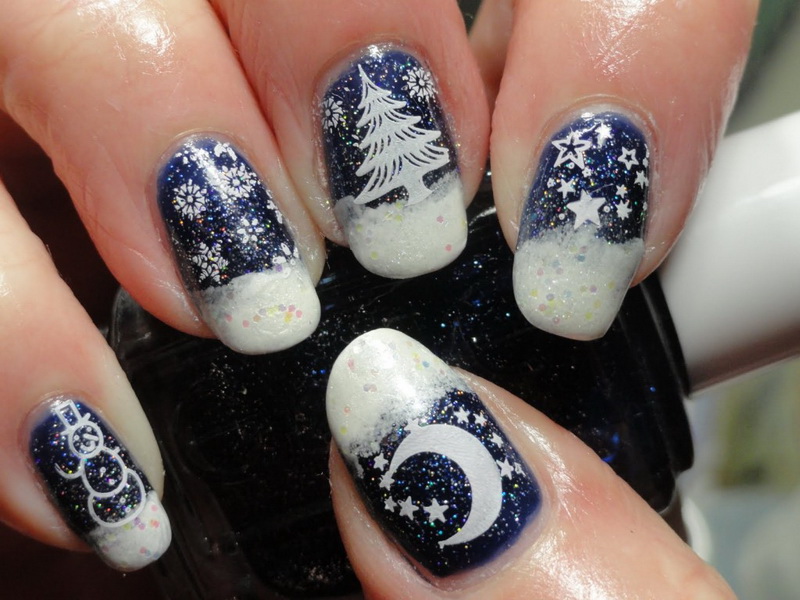
Winter manicure is surprisingly snowy, shimmering and softly soft, or warm, “knitted” and cozy.
How to draw flowers gel varnish, see the following video.


