In search of the best ideas for manicure, more and more modern women began to resort to alternative methods of painting nails - stickers. And if the stickers seem to be something difficult for the unenlightened representatives of the fair sex, those who have already met them successfully use this material to effectively complete different sets. About the features of stickers for manicure, their advantages and disadvantages, as well as how to work with them will tell the material of this article.
Features
Stickers for gel polish are translated prints of various shapes and sizes, which are transferred from the existing substrate to the surface of the prepared and painted nail. Depending on the type of material has its own nuances of use. In this case, a distinctive feature of this decor is the fact that it is located under the sealing coating.
Therefore, the sticker is reliably protected from external factors and is not destroyed in the process of manicure wearing.
Household chemicals do not harm it, ultraviolet rays, cold, and random mechanical touches are not terrible.
A picture can be sealed with one or several layers of special materials of the hybrid type. Depending on this, stickers can be used in a variety of manicure techniques. For example, the layering of the sealant allows you to create an aquarium design in which even simple stickers look volumetric.
In general, the use of various stickers allows you to significantly diversify any manicure technique ranging from classic and French and ending with a combined design using three techniques. The stickers themselves are a thin film with a certain pattern. Depending on the shape and size of their glue on the part of the nail, and sometimes fill the entire area of the nail plate. In the second case, the film itself is a kind of nail strengthener.
Advantages and disadvantages
Stickers on the nails under the gel polish have a lot of advantages. Almost all varieties are easy to use, which can not but rejoice those who perform manicures on their own at home. In this case, the products have a fairly affordable price, and therefore each of us can buy them. The images themselves are characterized by sharp lines and bright colors. This is also true for manicure, because clear lines give the design accuracy.
Given the richest thematic and color range, choosing the right options will not be difficult. Today, the list of prints of all kinds of nail stickers is so diverse that even the most demanding woman can find suitable, for example, to her purse, neckerchief, jewelry or shoes. In addition, the desired print can have several color shades. Due to this, you can choose a product as in a related accessory range, and in tone.
Stickers are good and the fact that they save the total time of manicure. However, some varieties can be disguised as an art painting, thereby enhancing the status of a manicure. This technique is used by nail service professionals when their clients are late, but they are asked to make artistic design on accent nails. Moreover, some stickers can be combined with each other, creating interesting compositions.
It is impossible not to note the fact that working with stickers does not require special knowledge and hard-to-reach materials.
Today the nail sphere tries to simplify any work of the master, and therefore we have the opportunity to purchase auxiliary substances that allow to correct minor flaws in the process. For example, the same primer can dissolve the folds, and top protruding elements to close. The rest of the translation requires a minimum of tools.
As for the shortcomings, they can all be related to the nuances of the work and the quality of the stickers themselves. For example, it may be the quality of the film itself and its thickness. There are cases when it is simply broken in the process of straightening on the nails. It is impossible to say for sure that all budget options are bad, because the main part of the quality of work depends on the accuracy of the master. And a thin sticker can be glued well, without any impulses.
If we talk about the nuances, we rarely listen to the recommendations of experts. Therefore, in the case of detachment, we attribute a flaw to the defects of the material. It is important to understand that when working with stickers there are a number of rules, the observance of which is mandatory.
In this case, it is impossible to break the technology by insufficient drying or carelessness.
The second nuance leads to the formation of folds, which significantly spoil the visual perception of the design.
Kinds
Stickers on the nails under the gel polish are different as the material of manufacture, and in the form of release. In addition, they may differ in thickness, which is the cause of discontent of non-professionals, students to work with such a decor. However, if the master comes across an elastic film, there are no problems with the work. This sticker can be pulled to the desired area of the nail to close the selected part.
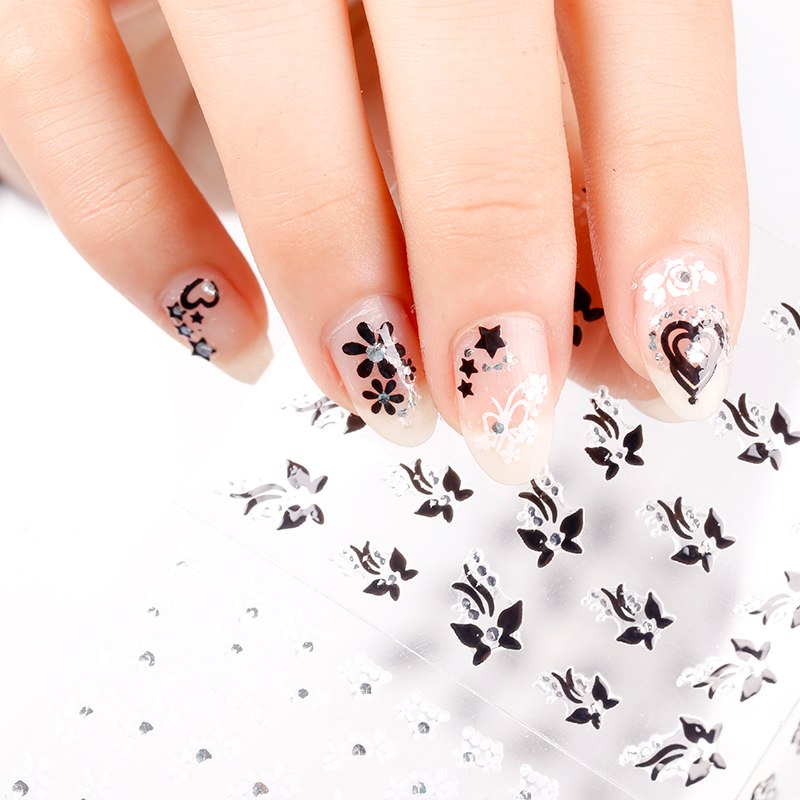
As for the general, the stickers can be monochrome, made in black or white, as well as color. In addition, in different rulers you can buy metallic options for gold, silver or even bronze, which today is considered to be quite a fashionable nail decoration. All in all, it is possible to conditionally distinguish several types of nail stickers that are used for gel polish.
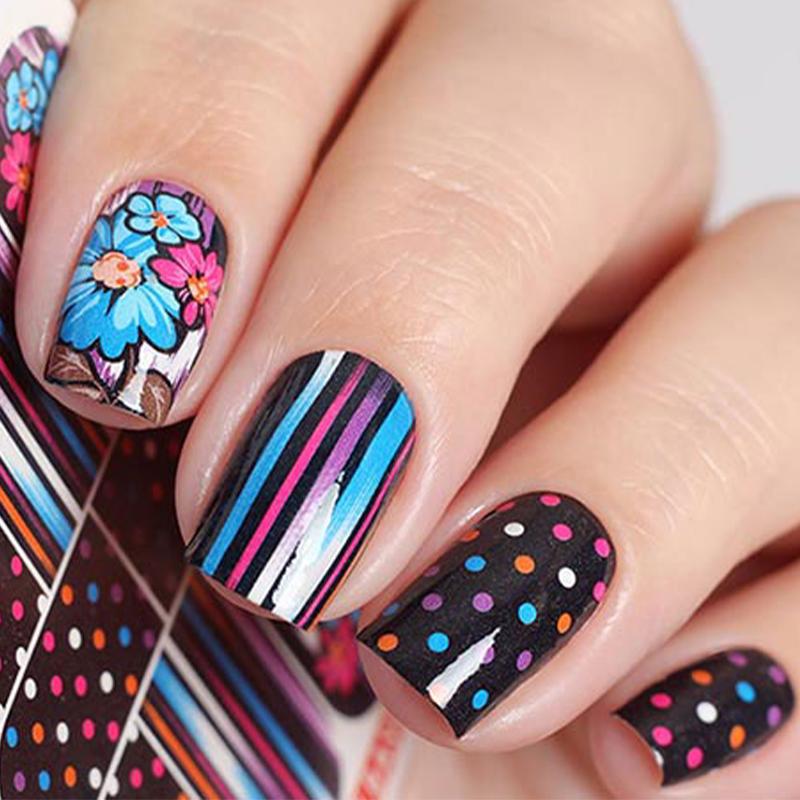
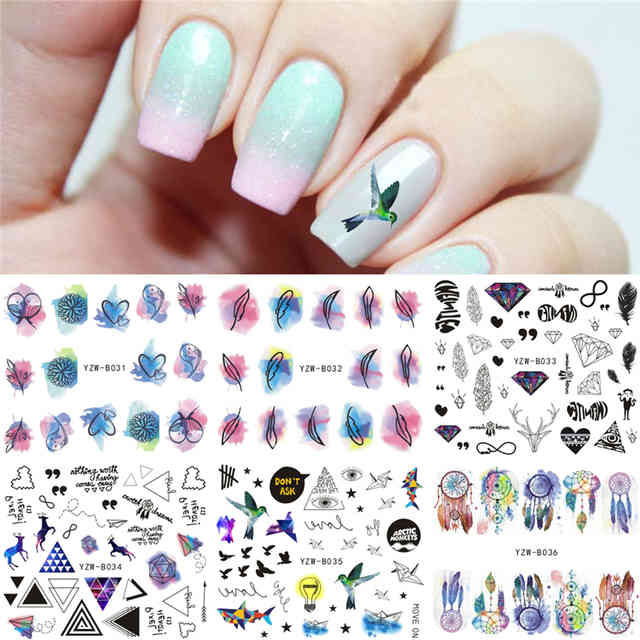
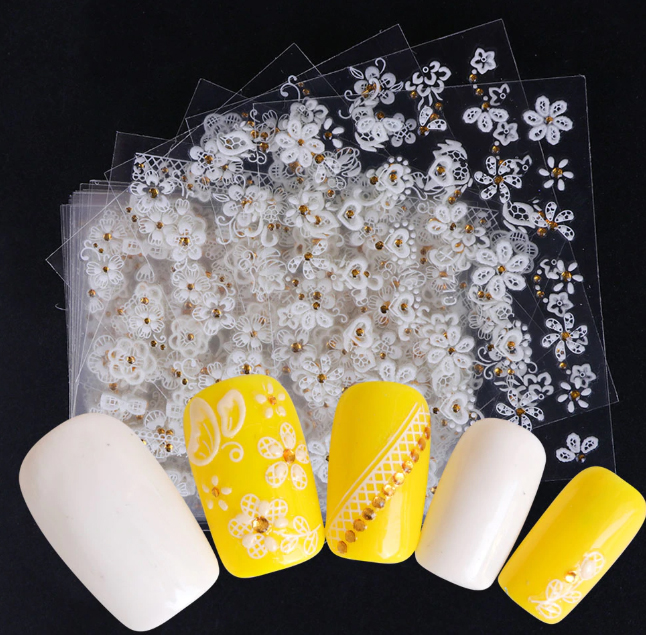
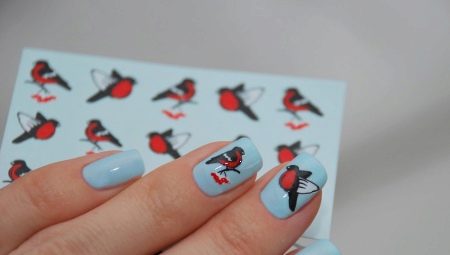
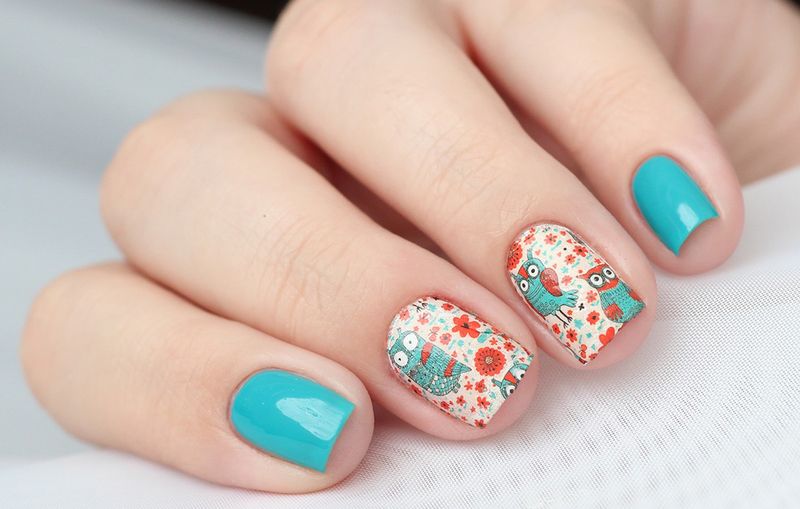
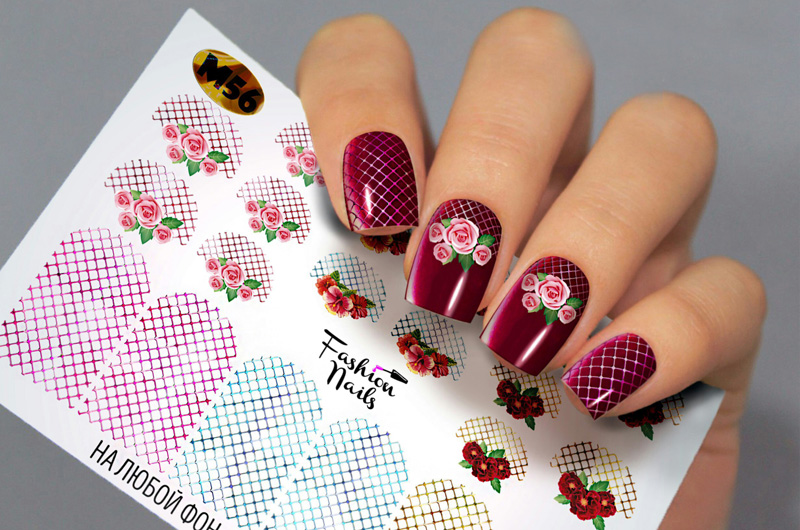
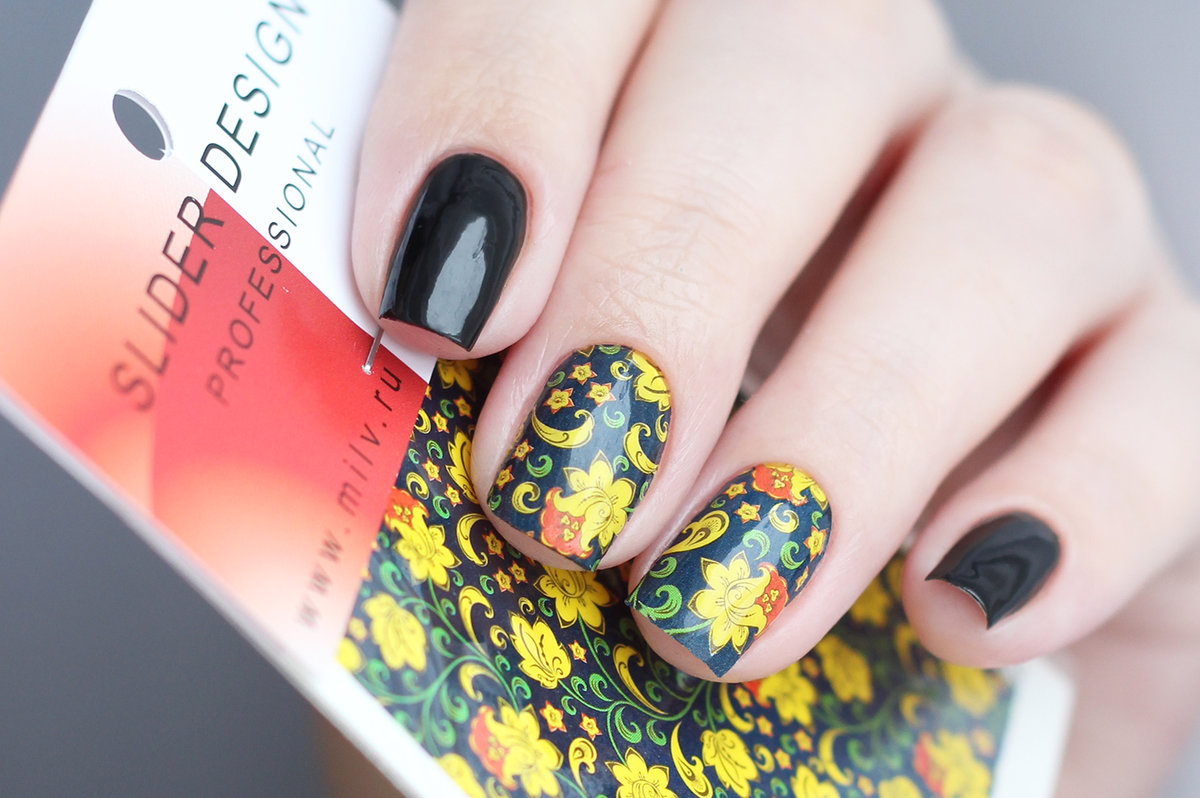
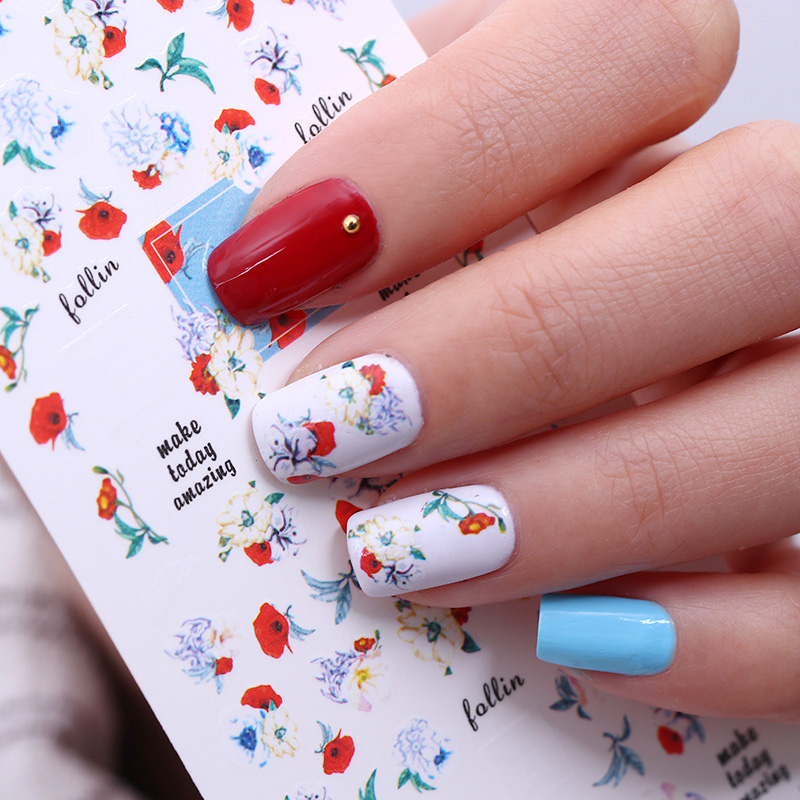
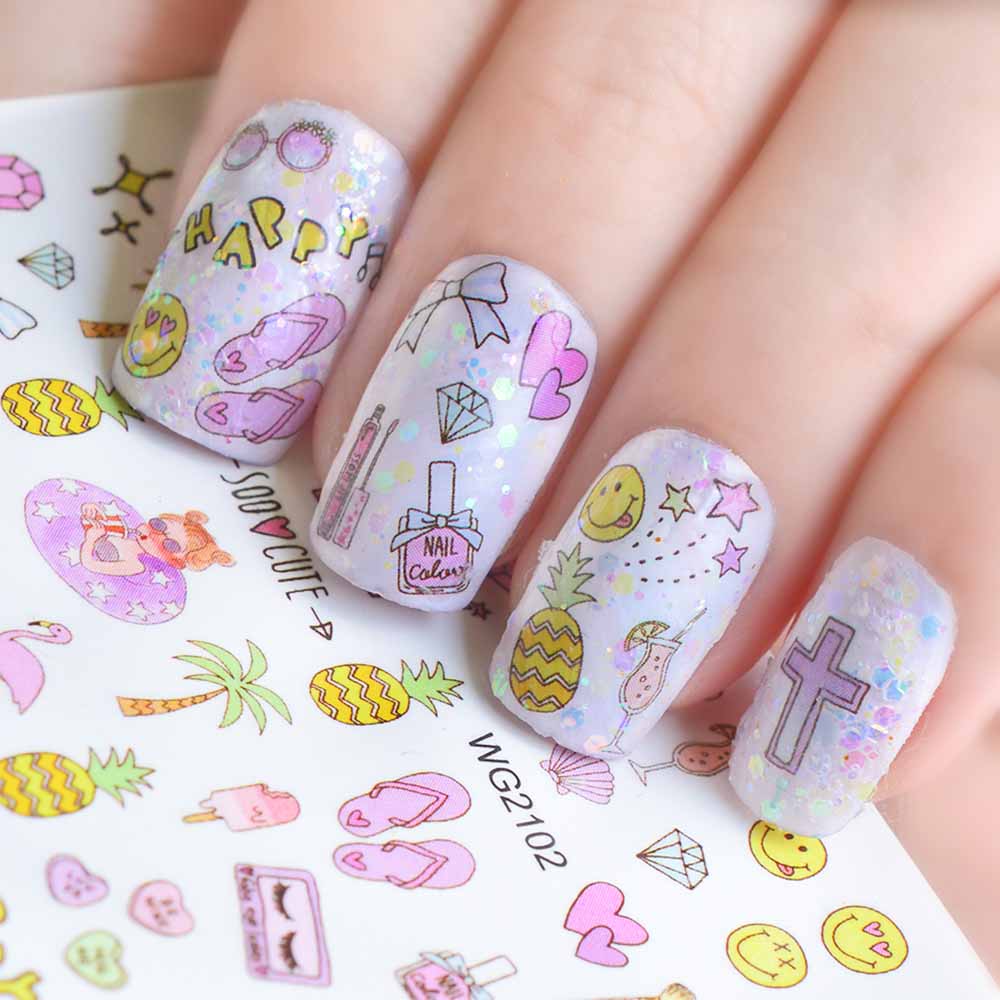
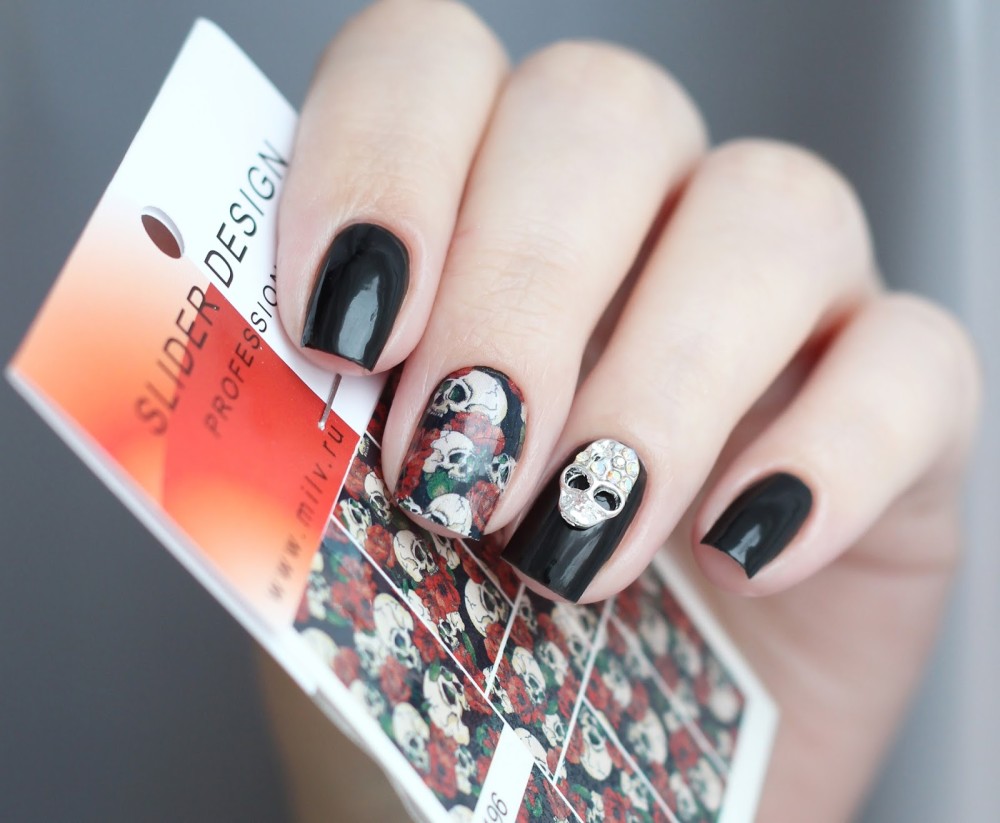
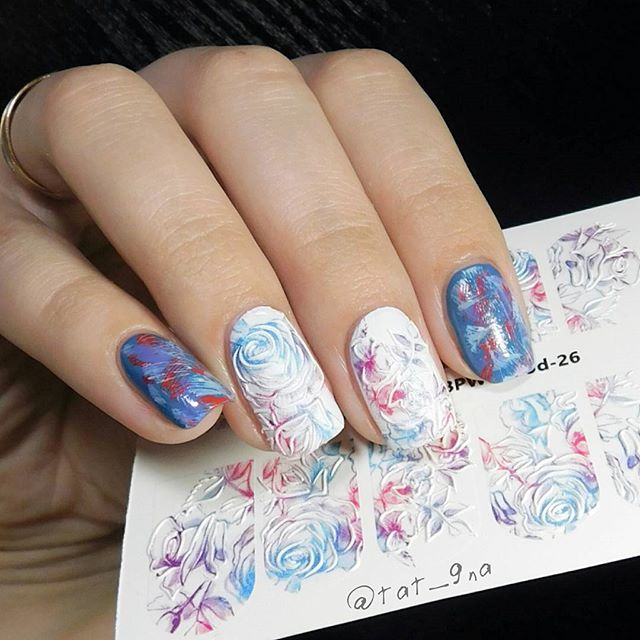
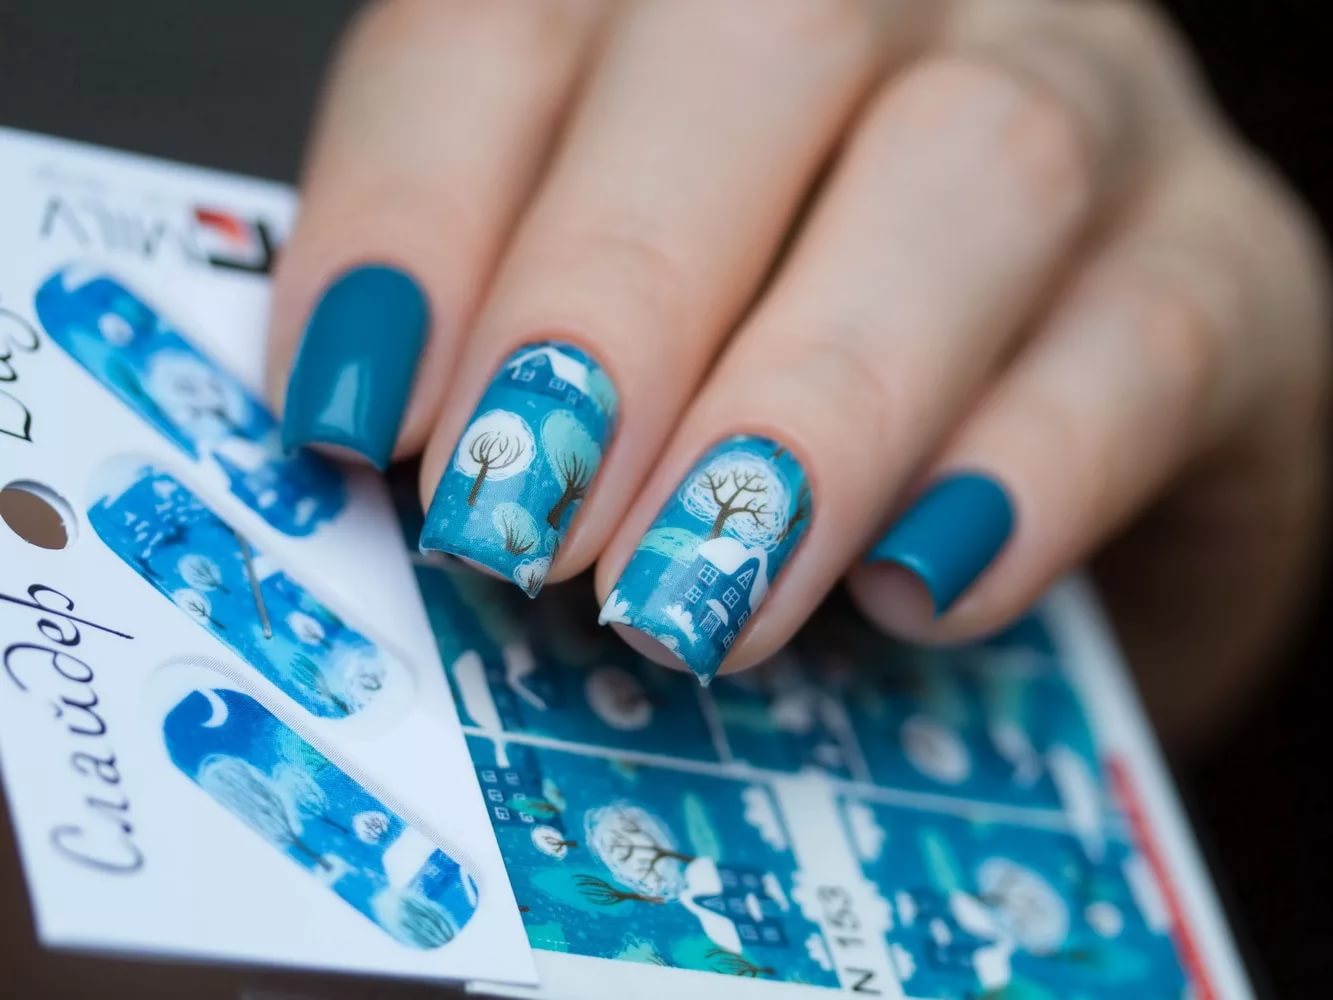
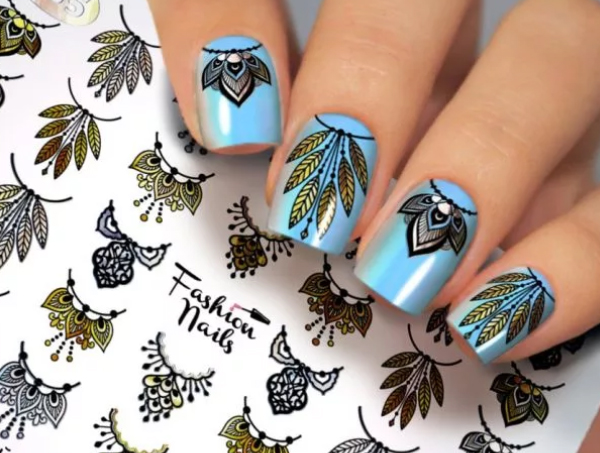
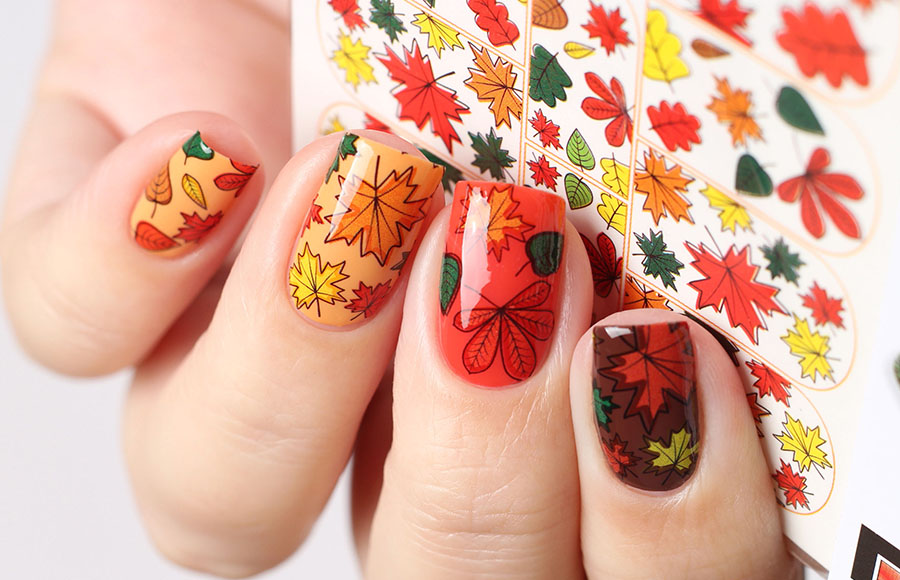
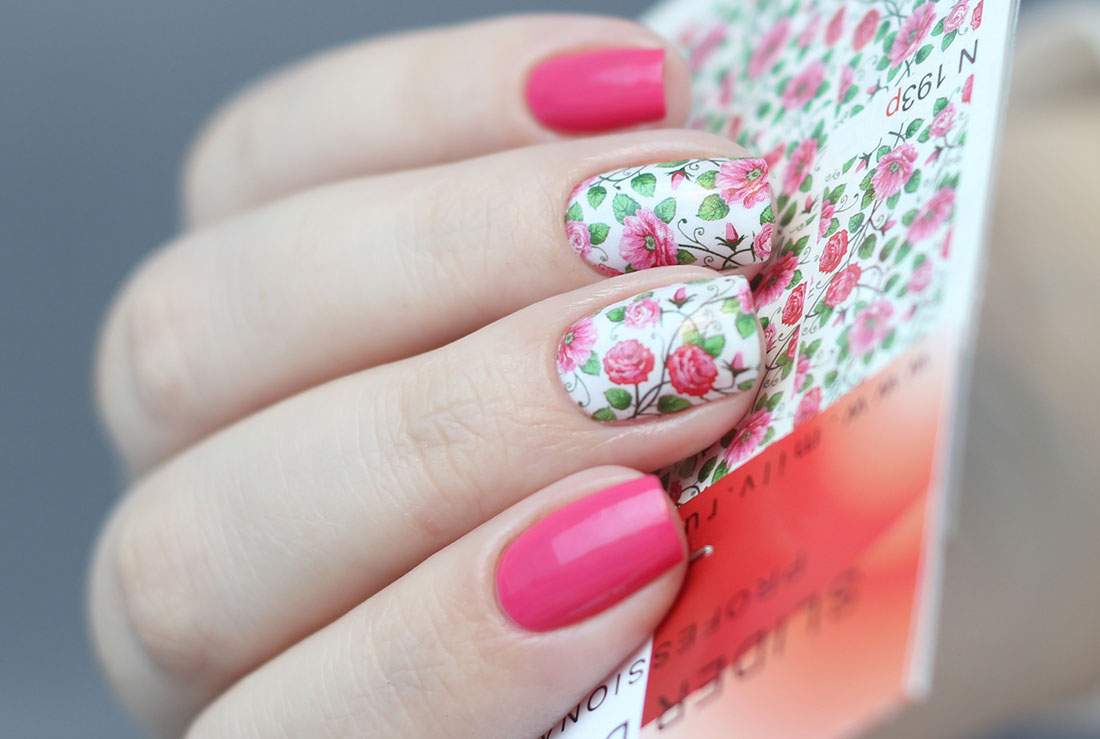
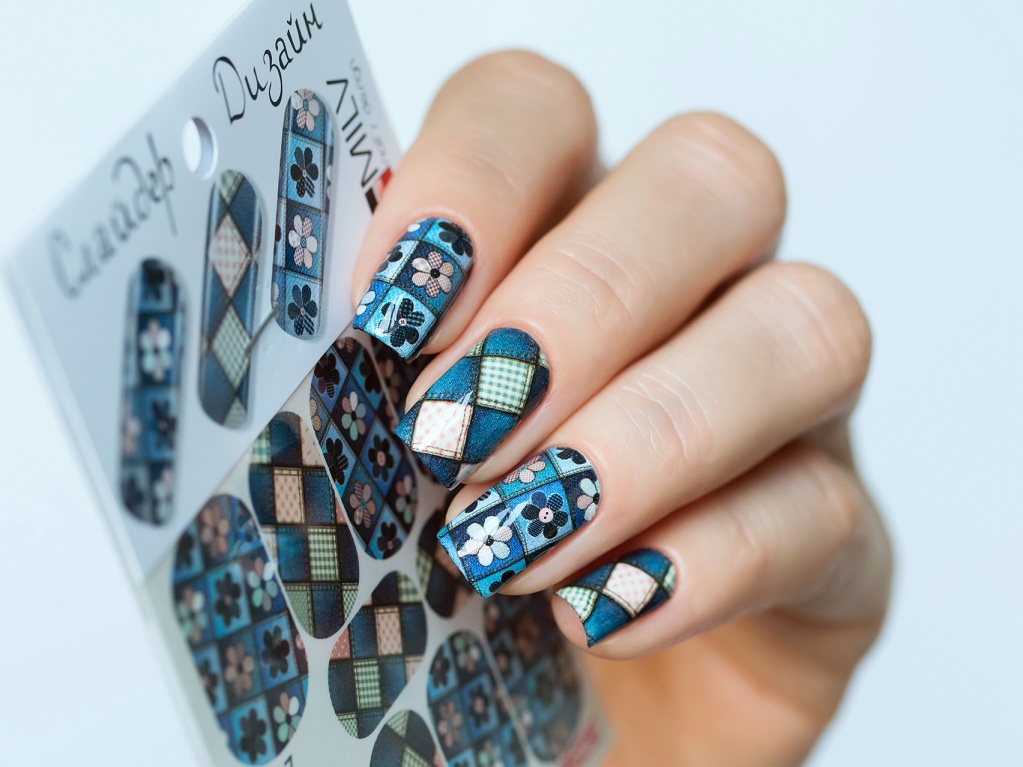
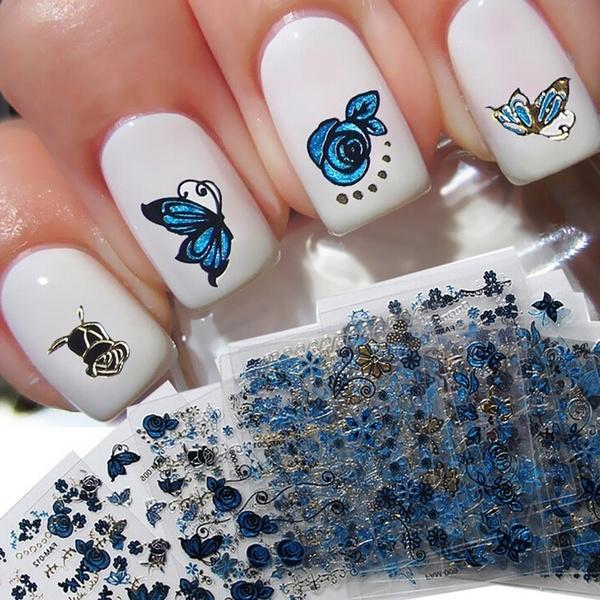
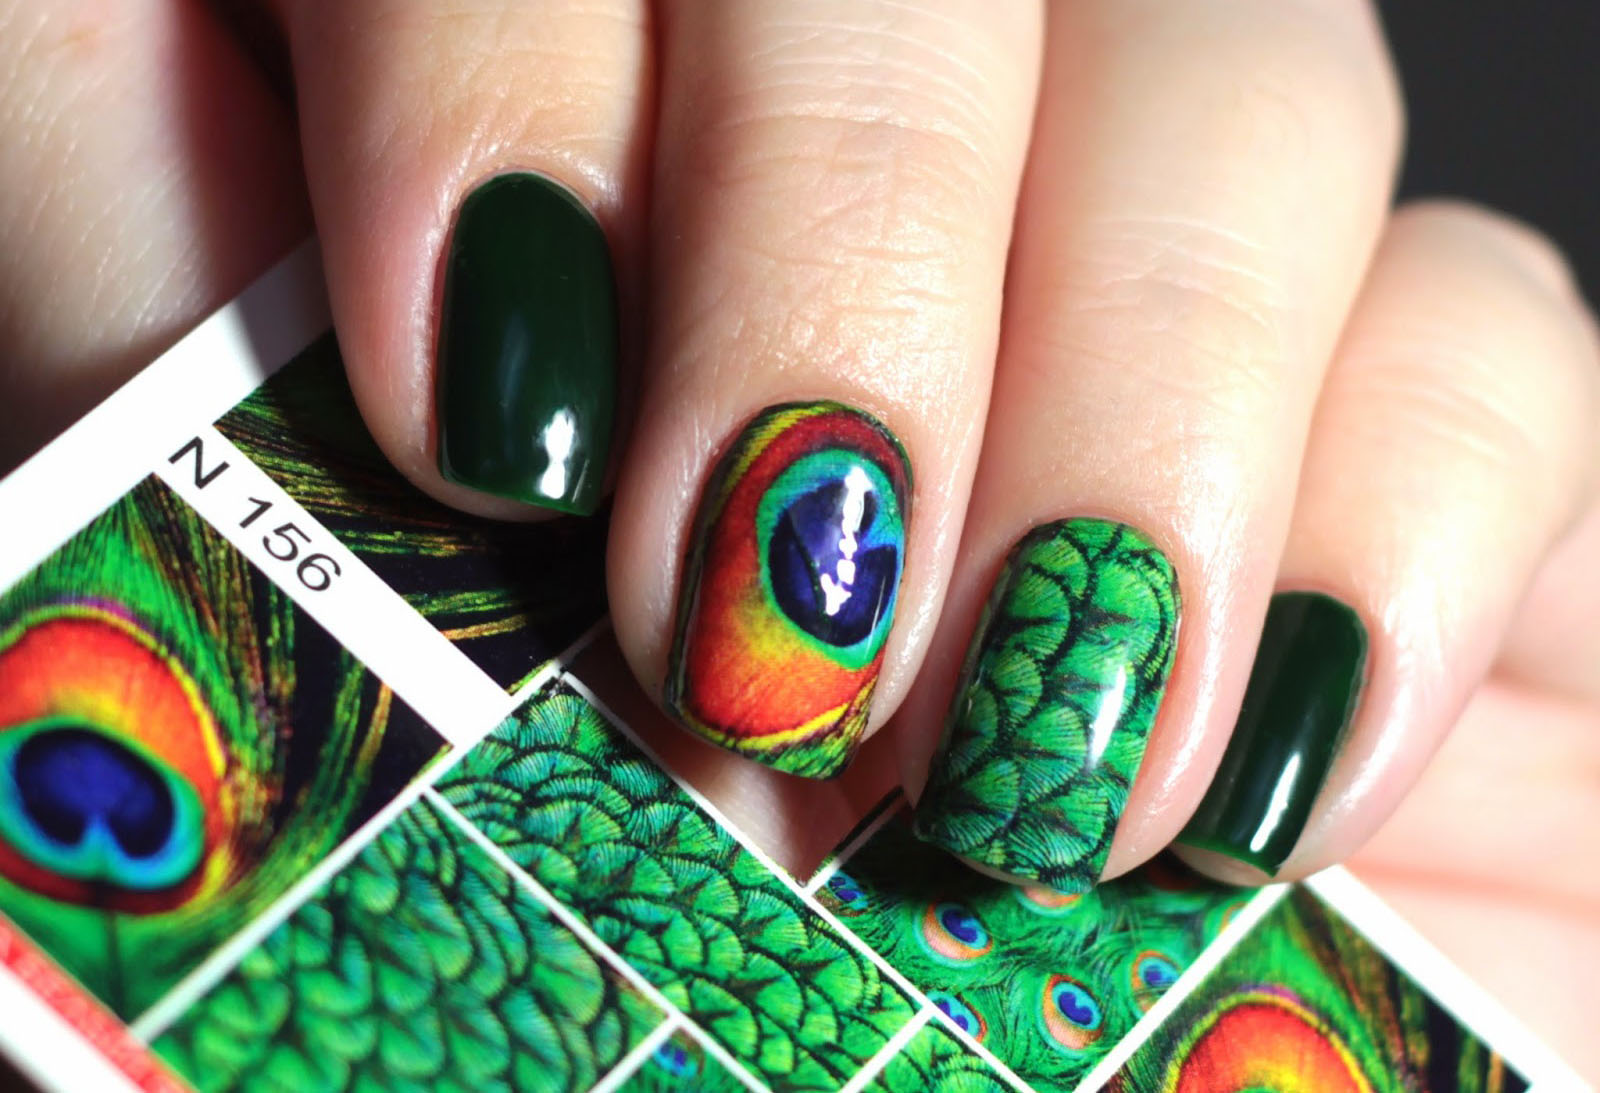
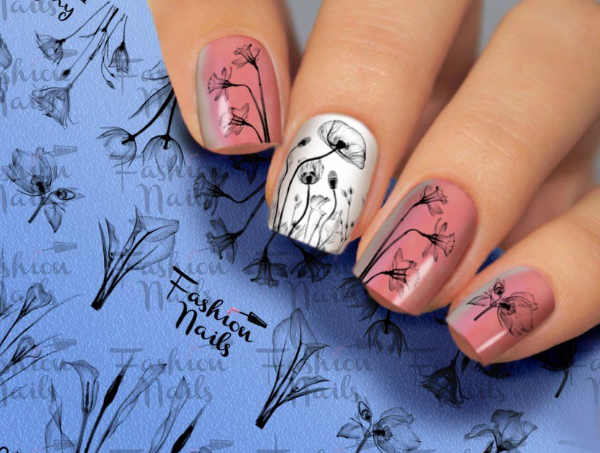
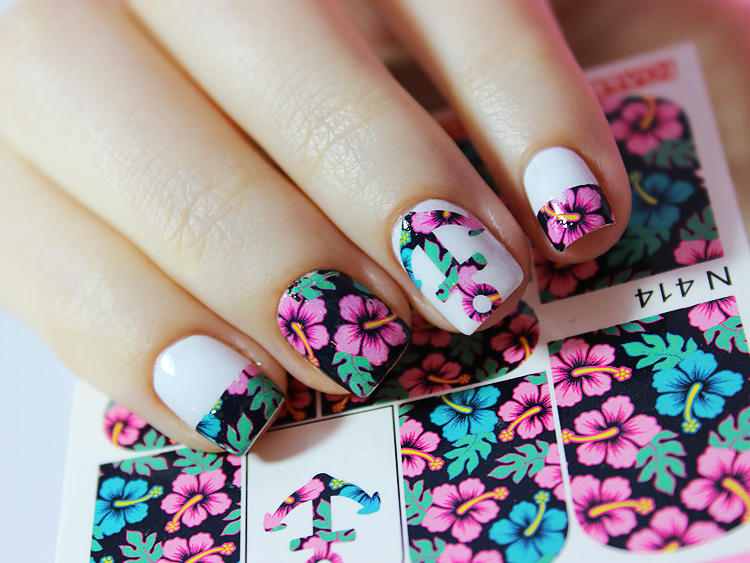
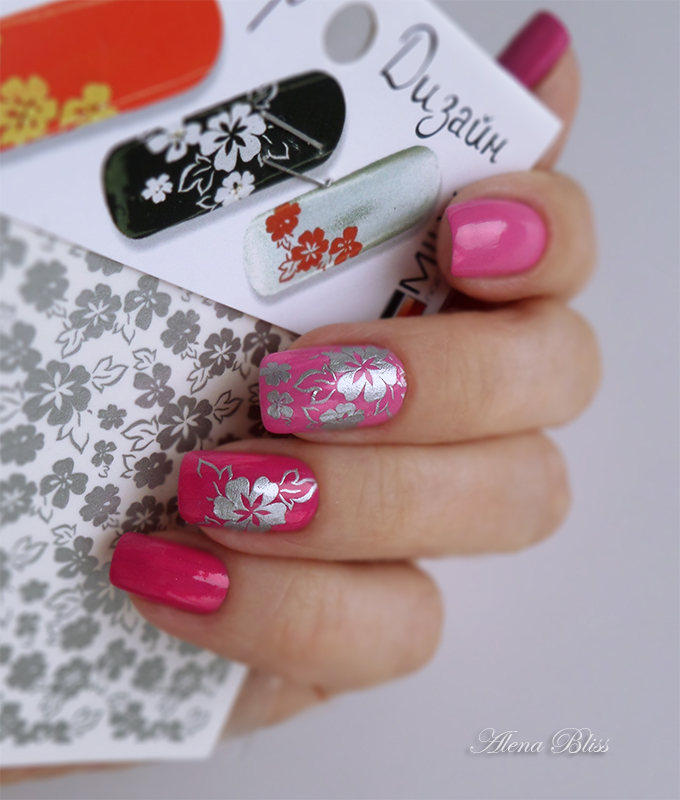
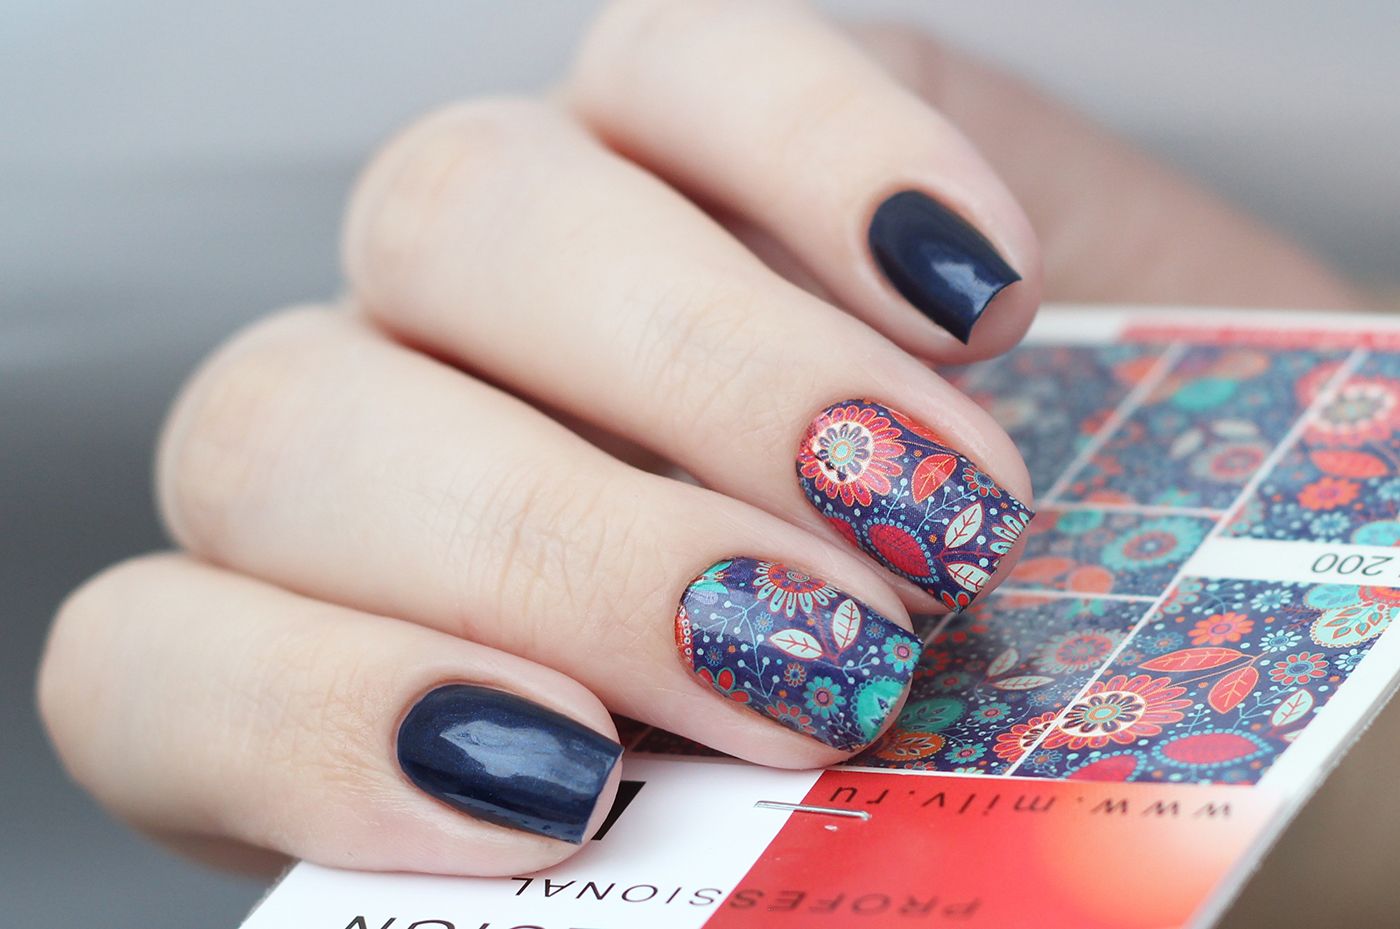
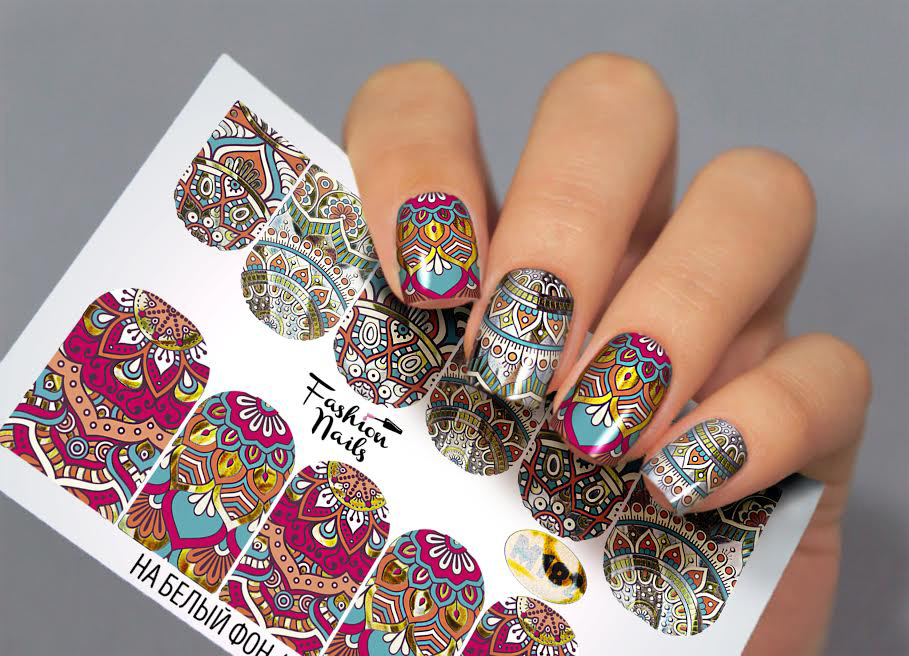
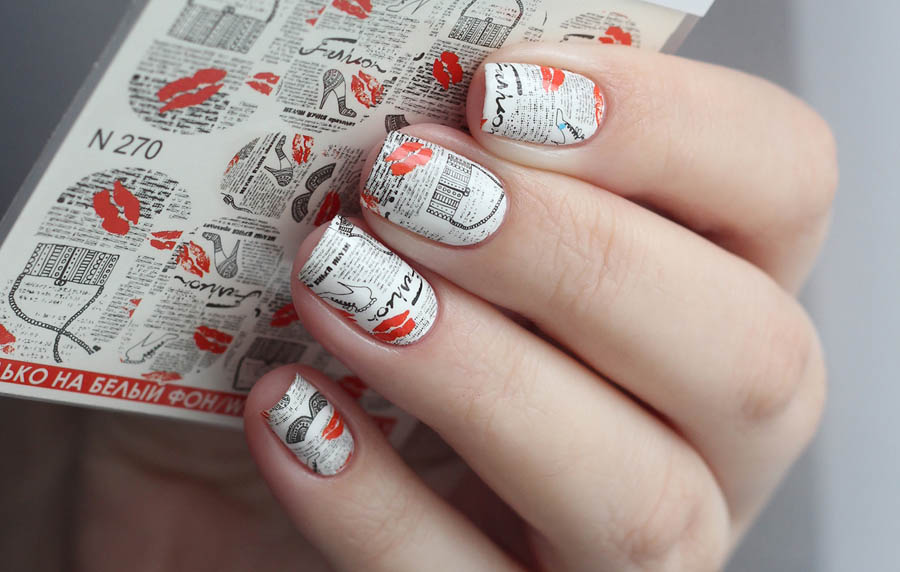
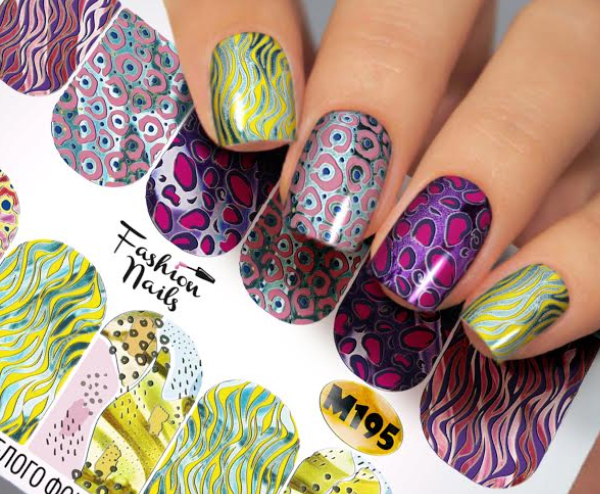
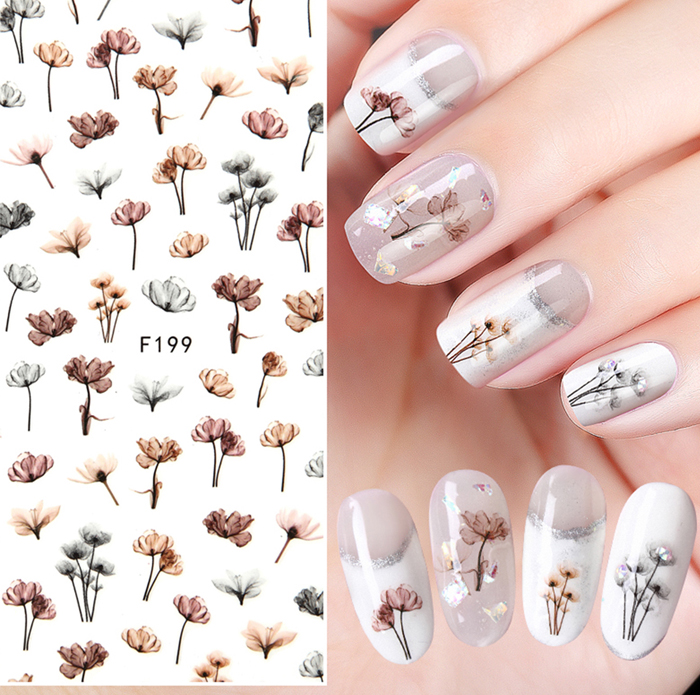
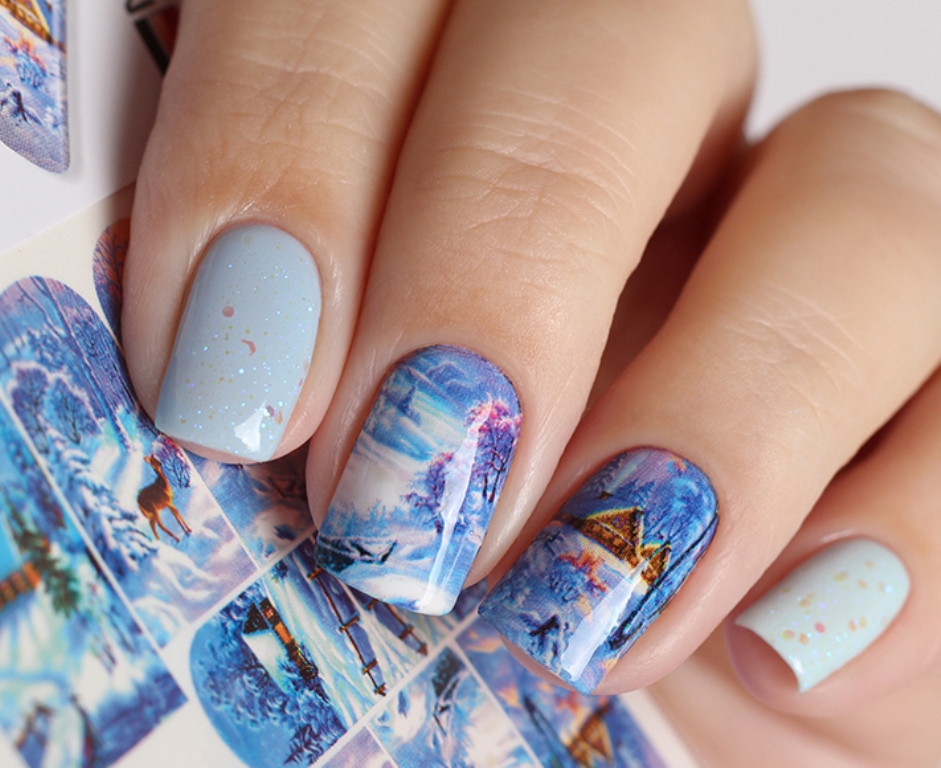
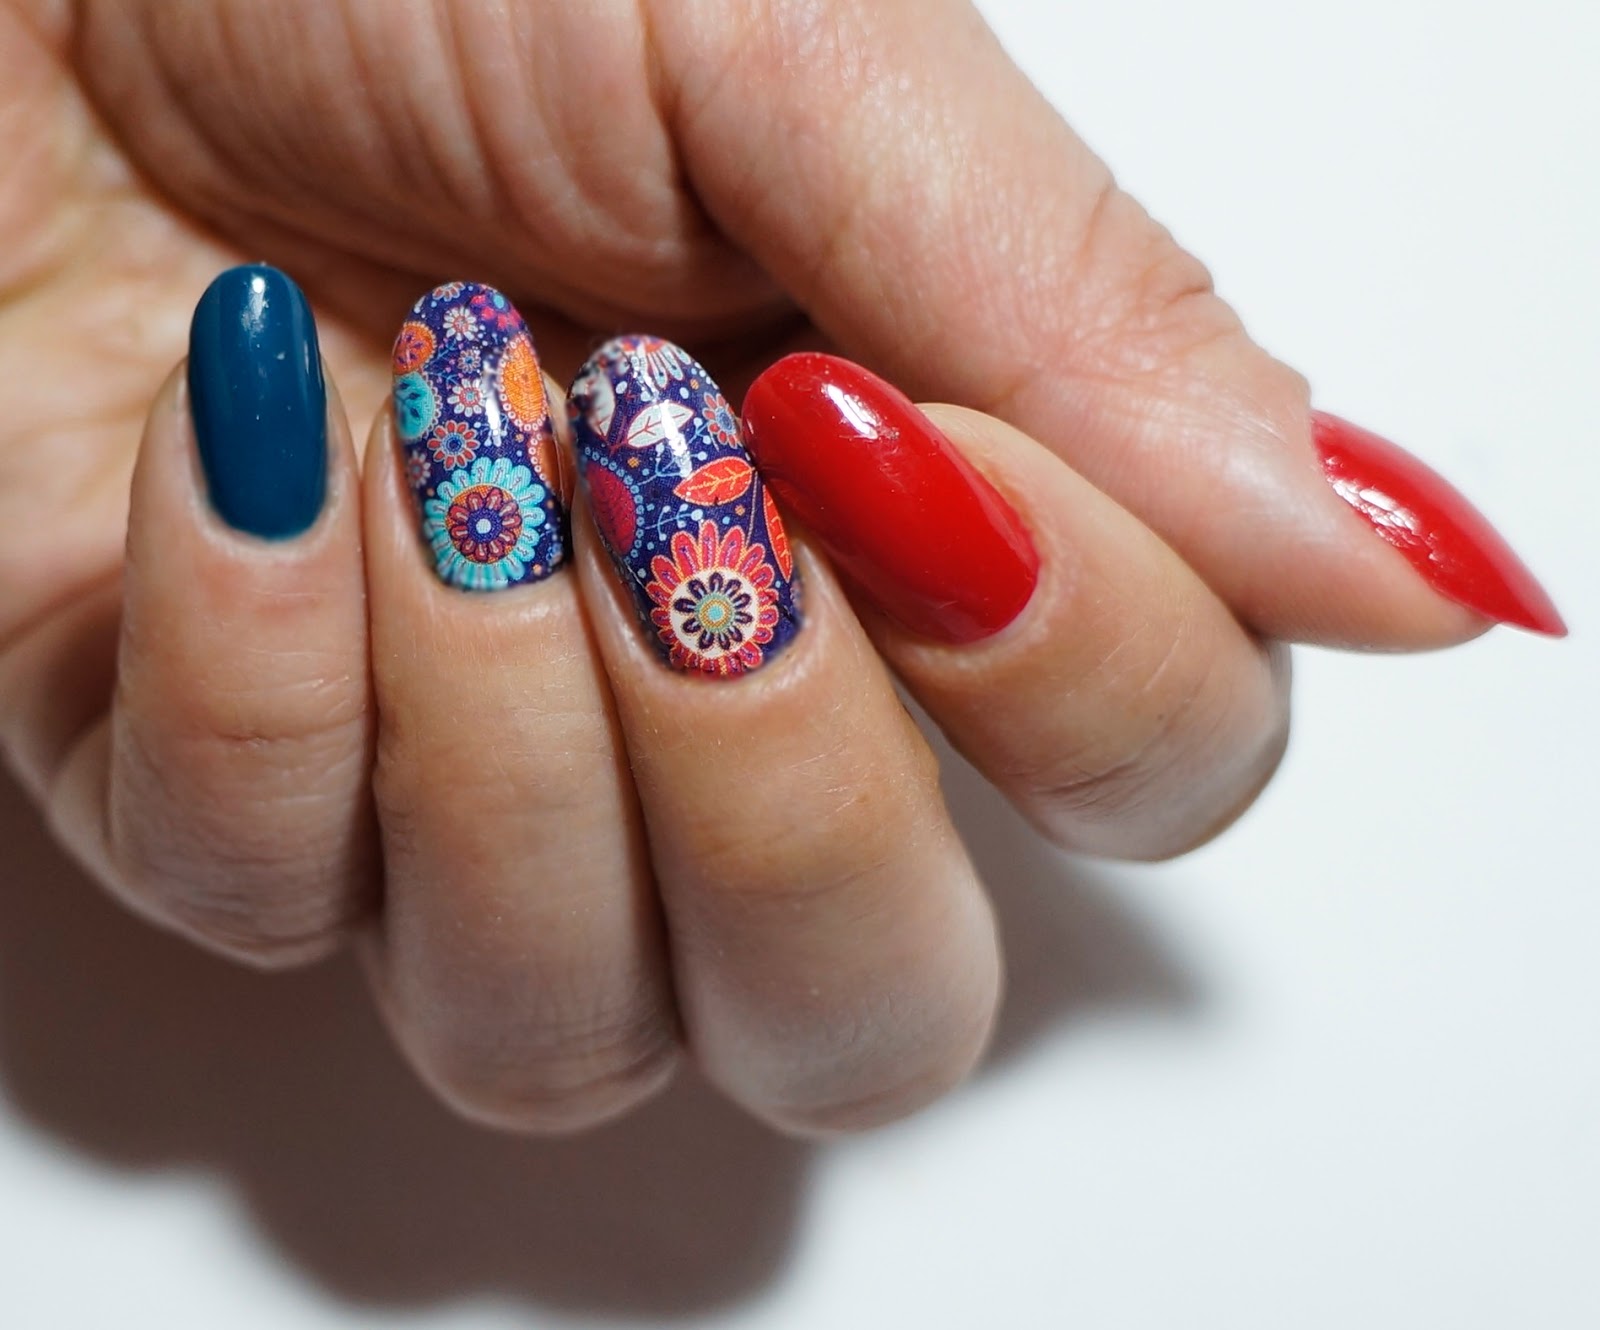
Slider design
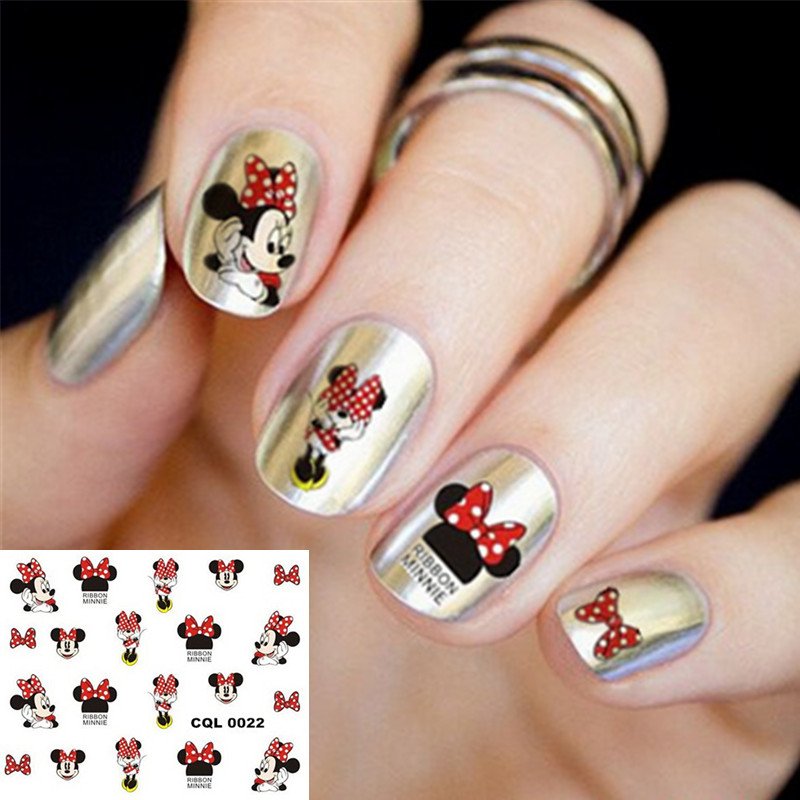
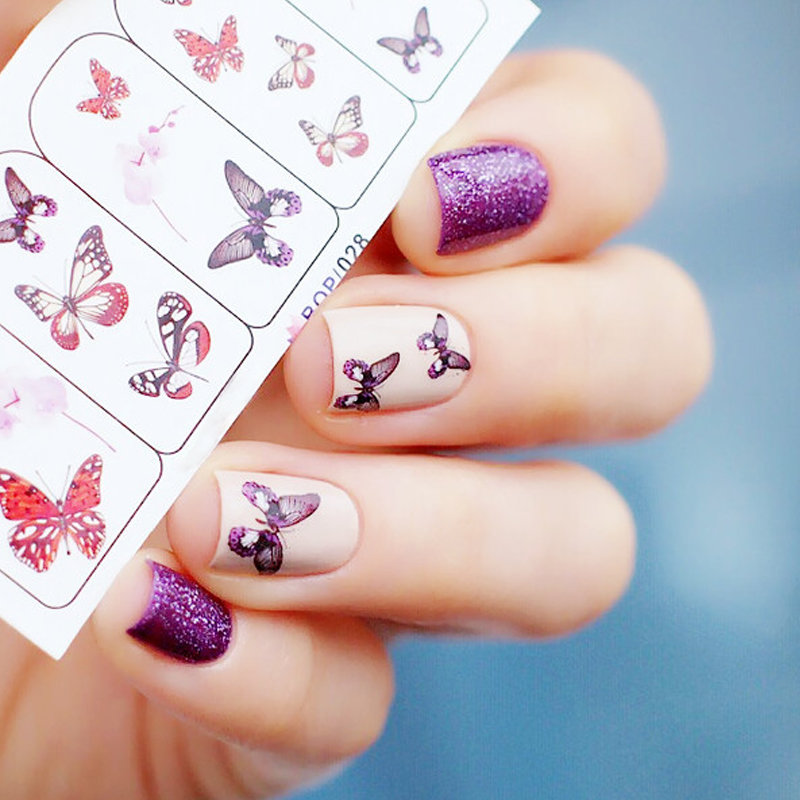
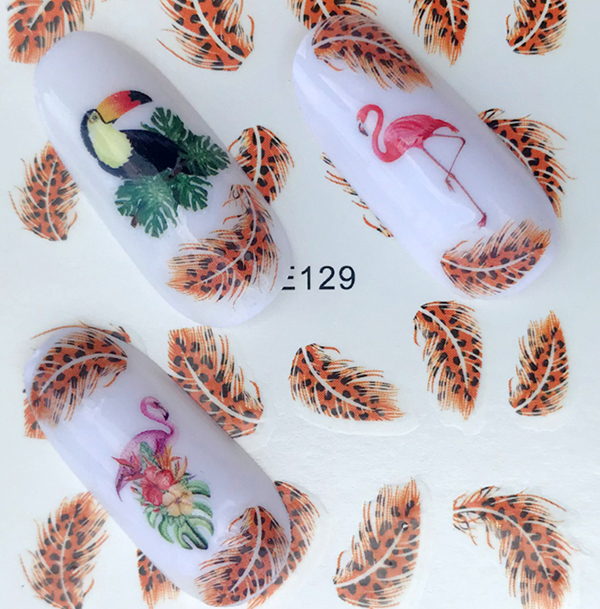
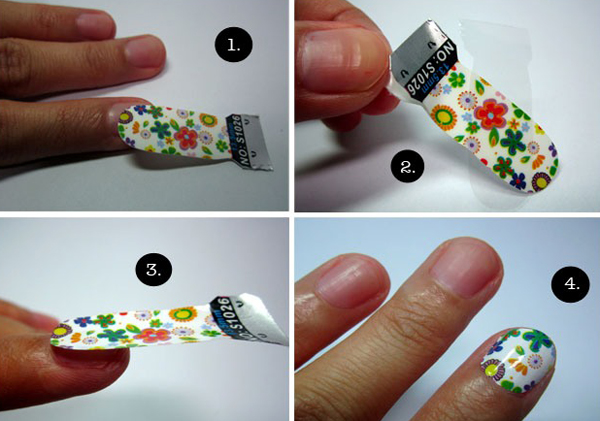
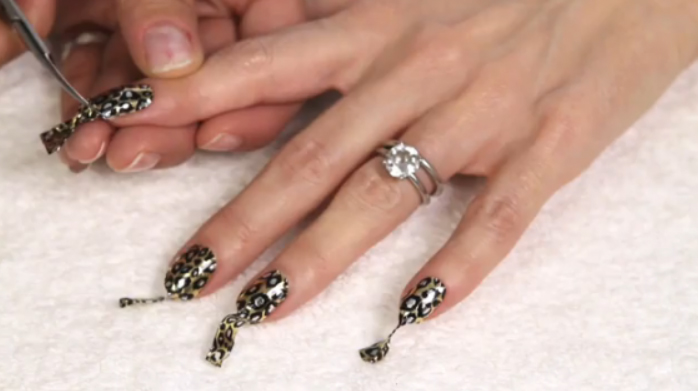
In fact, these stickers are analogous to the once popular water-type decals. This is a film on a paper backing that needs to be removed by maceration. There are these pictures of the island (on the part of the nail) or whole (occupying the entire area of the nail). As a rule, they sell sliders in sets in a specific color range with similar motifs.
Varieties of solid type for hands can include from 10 elements or more. Analogues for the legs consist of two stickers on the nails of the thumbs. Depending on the brand of the manufacturer, the pictures may have an approximate shape, according to which they are easier to cut. If they are rectangular, they will have to be more carefully adjusted to the dimensions of the specific nail plates to be decorated. In addition, the set may consist of many tiny pictures.
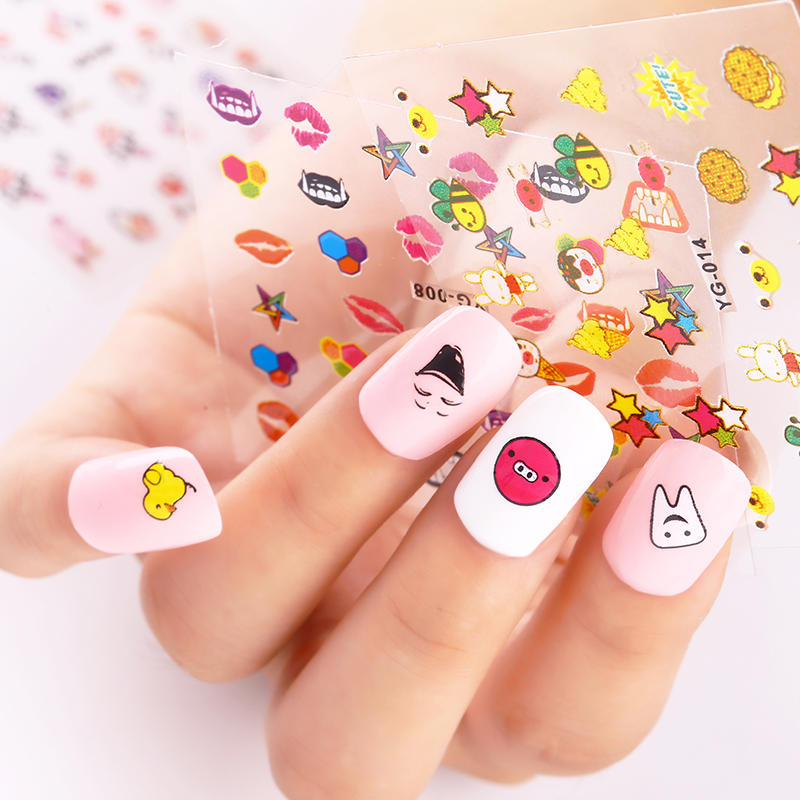
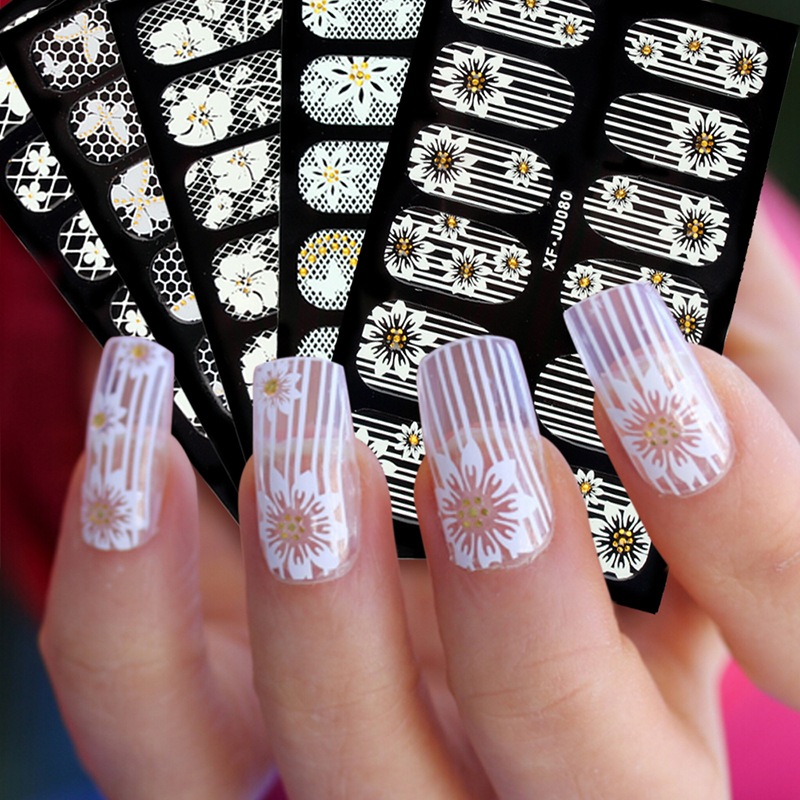
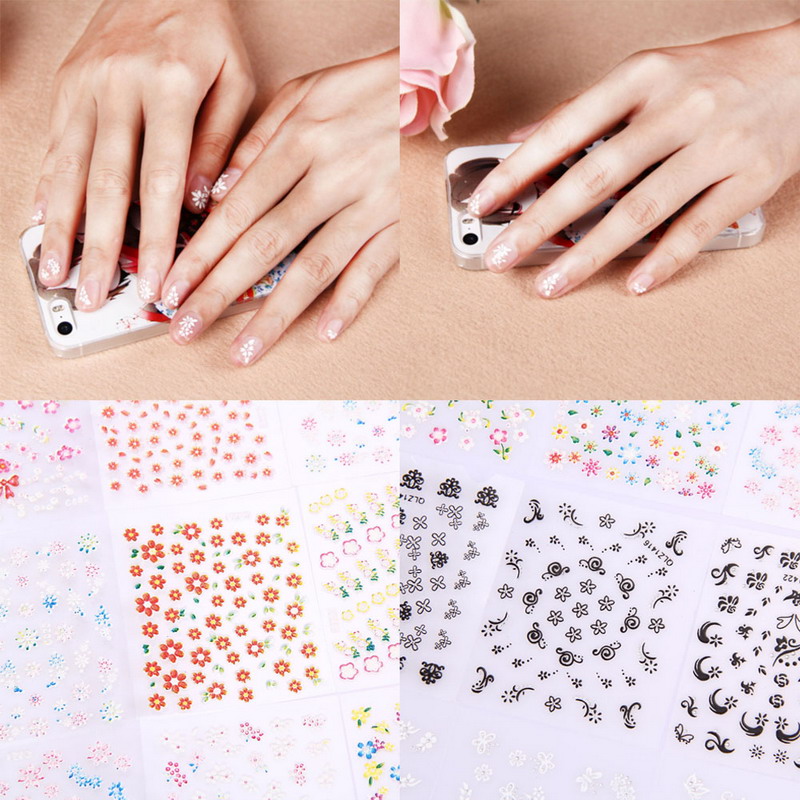
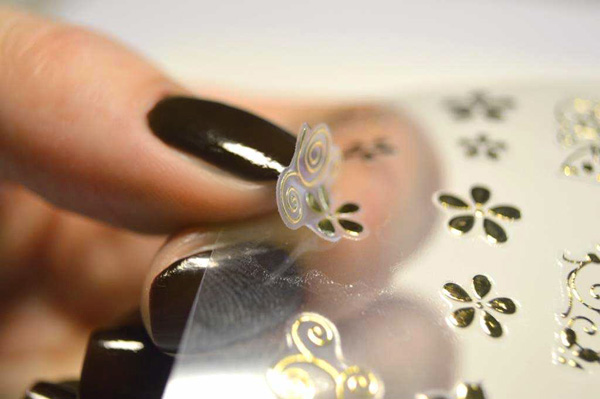
Self adhesive
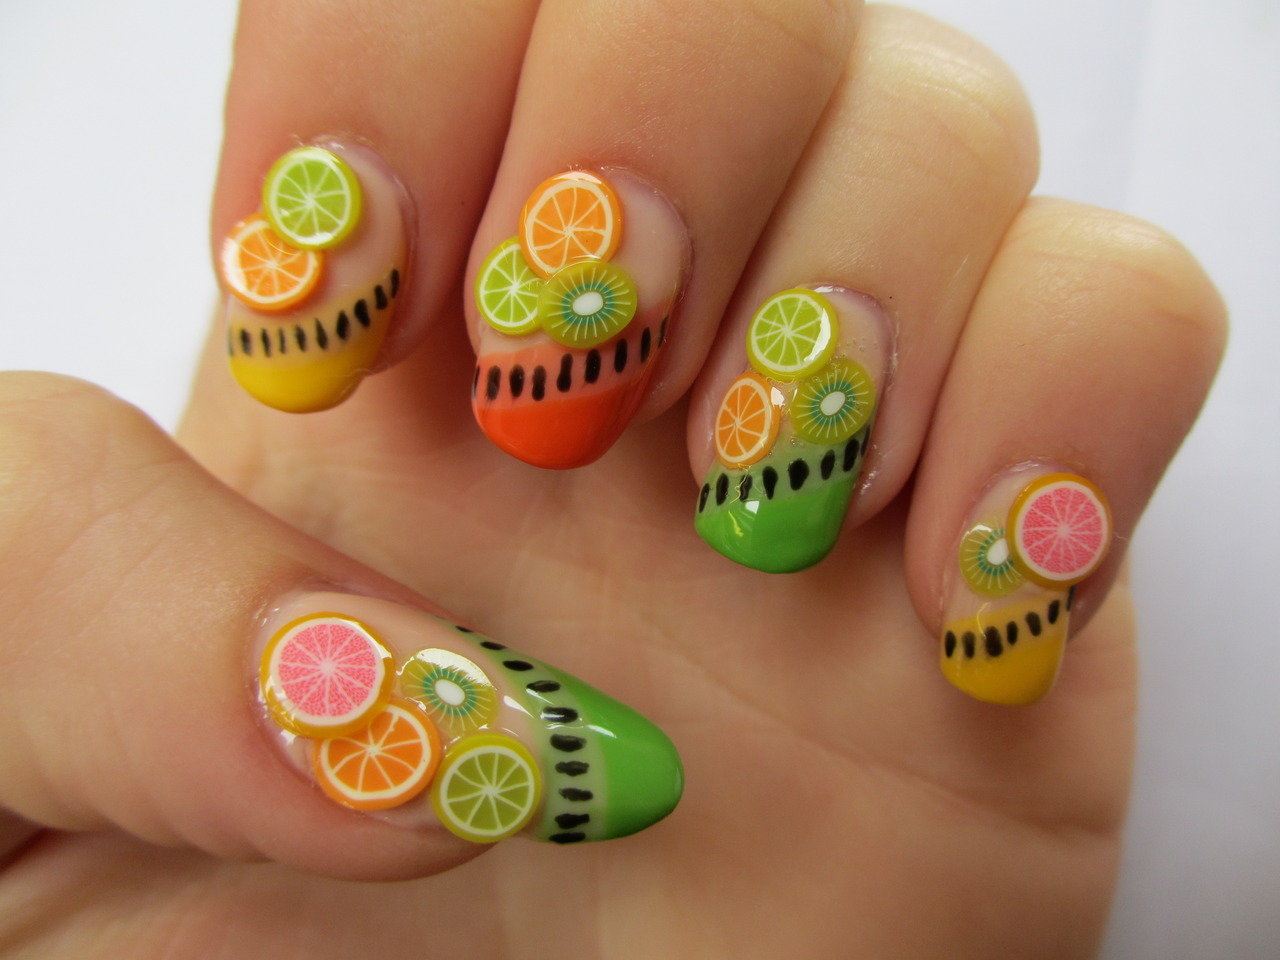
Such stickers today may have a different substrate. In addition to paper, it can be made of thick transparent film. The pictures of this type are often more voluminous, which can complicate their sealing. Some of them are three-dimensional, creating the illusion of volume. Other features include the appearance of the stickers themselves, it can be both application and presented in the form of a strip, which is cut to the size of the nail.
These products have a slightly sticky substrate, and therefore they are easily separated from the base and do not need to be soaked.
Someone such stickers seem difficult to work, although in this case the detachment can appear only in two cases: when applied to an undried gel polish and if the technology is not followed. At the same time, it is possible to stick quality not only a small picture, but also an option on the main part of the nail.
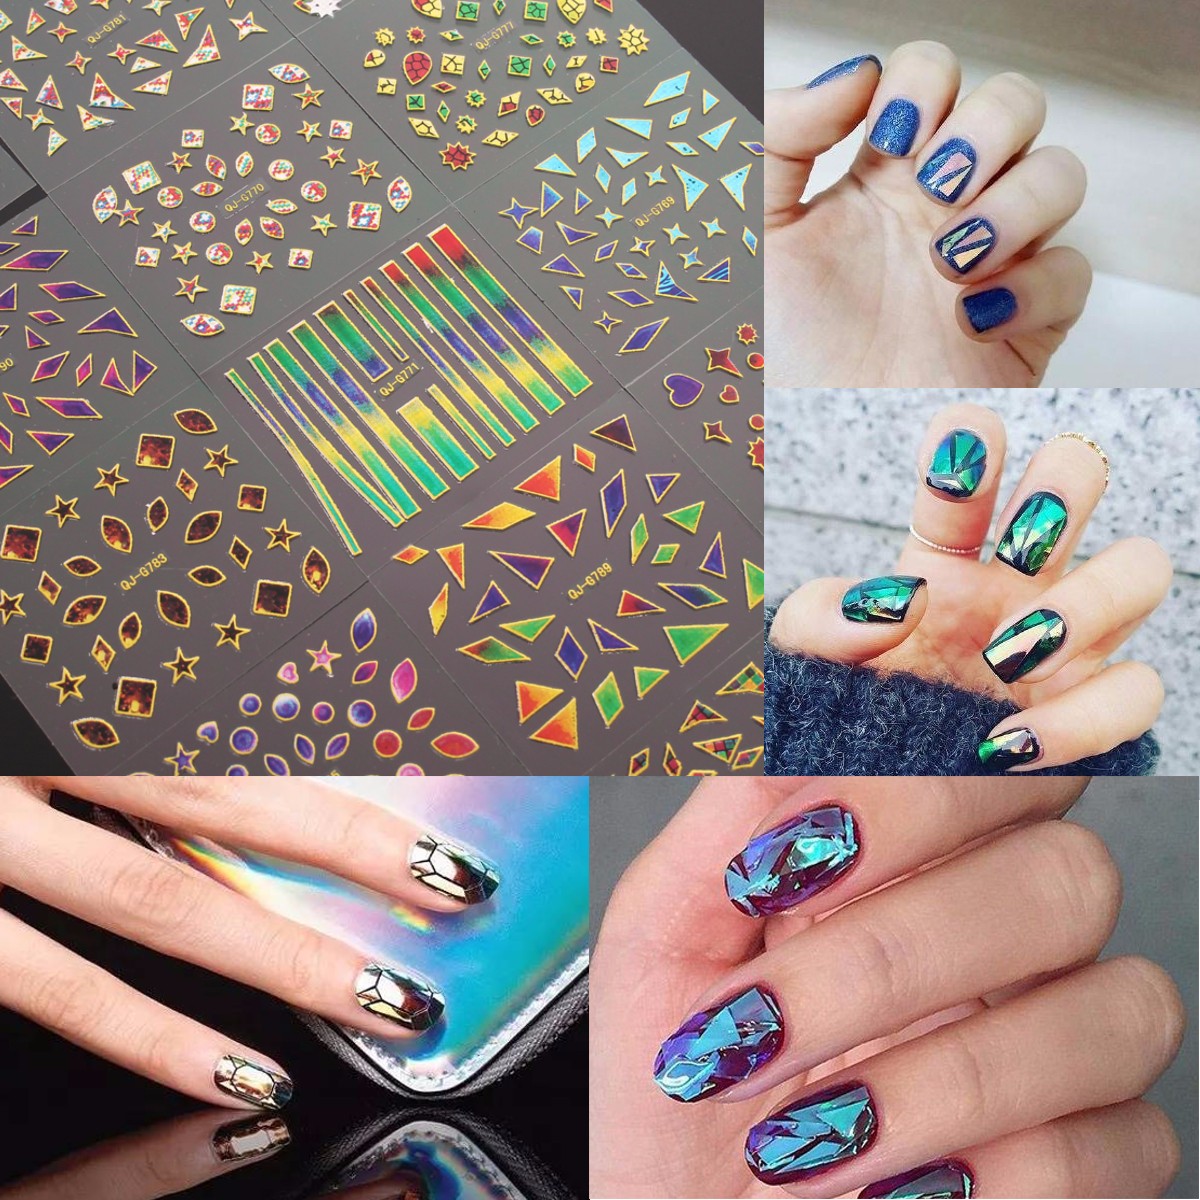
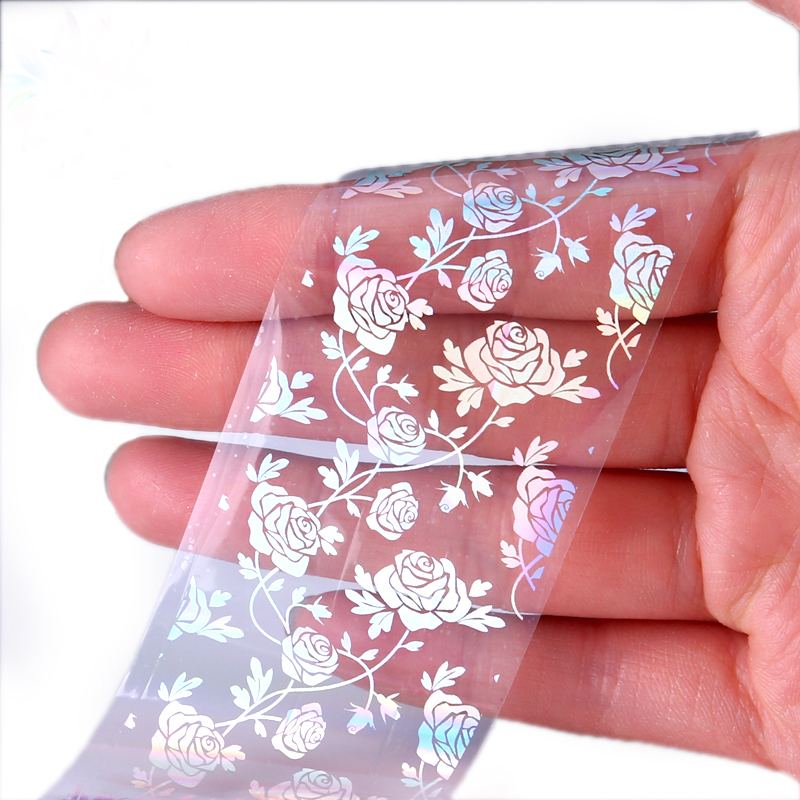
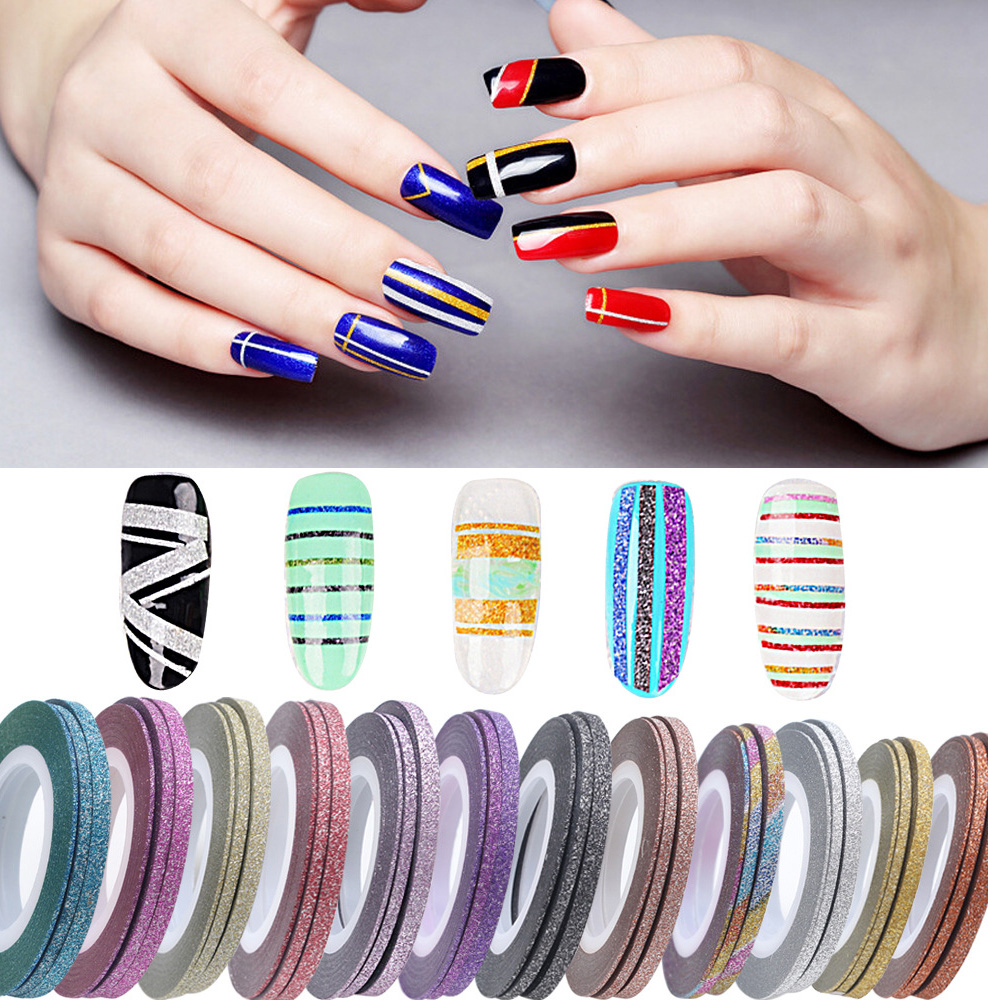
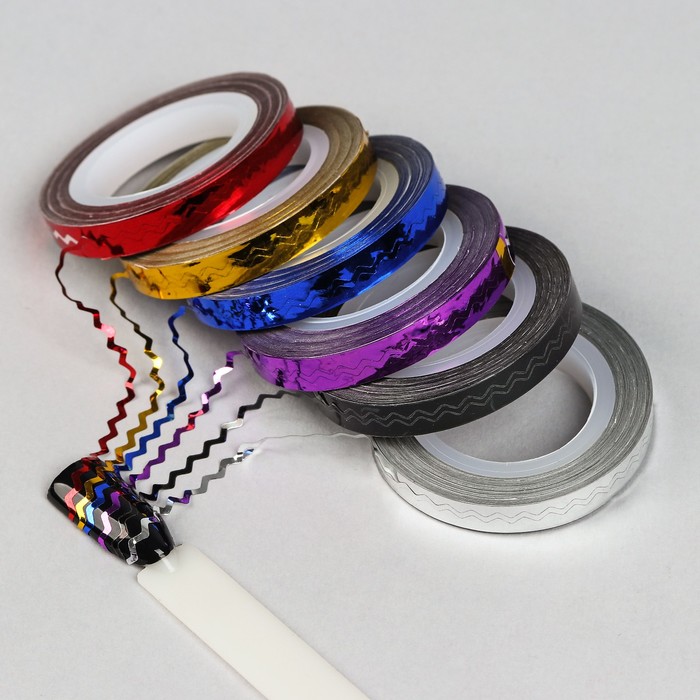
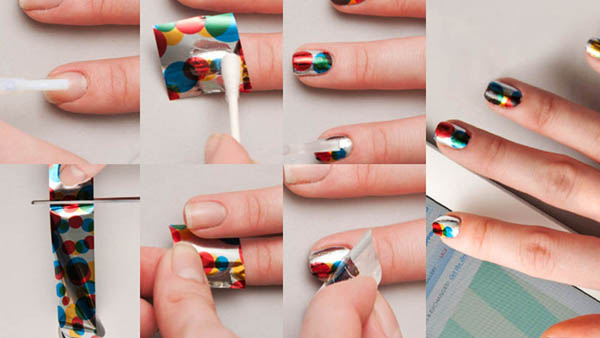
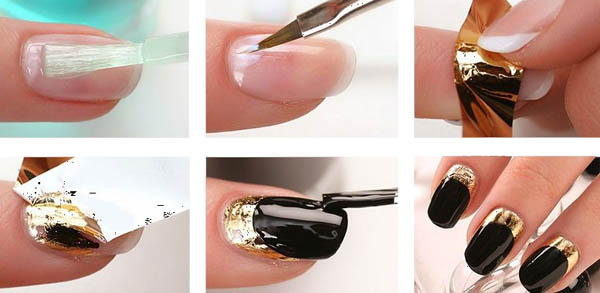
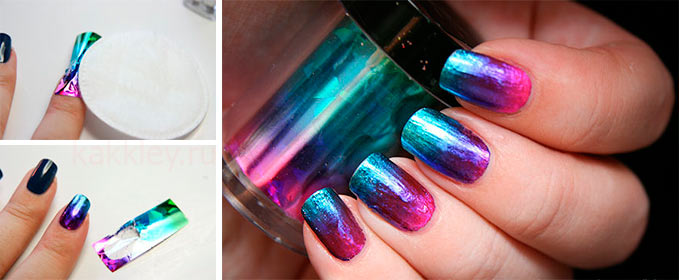
Tape
Such translated material appeared on the horizon of nail art not so long ago, but it had already managed to receive a high appreciation of the nail service masters. Depending on the variety, this may be a 4 cm wide foil, reaching a length of 1 meter. Sell it in cut or roll form, packing in plastic containers with unscrewing caps. In addition, the line includes types: sheet, embossed, compressed type, each of which has its own characteristics.
For example, the transfer material requires the use of special glue, the sheet variety is used in the form of a casting layer or small fragments in the form of some figures.
Compressed material resembles gold leaf, it is often used for aqua design. The embossed version is used for complex structured nail design. Foil strips are easy to use, they are used over gel polish on a dry basis.

Thermo stickers
These stickers need to be heated before applying to a painted base. In fact, these are metallized varieties that are somewhat similar to transferable water pictures, only the process of fixation requires heating. To do this, use a lamp in the work, without heating the decor will be characterized by divorce. The sticker gets its shape after activating the sticky base.
These stickers must be customized to the desired shape in advance, and try to choose the size as accurately as possible, since any inaccuracy will affect the result.
There can not be any bends, as well as air pockets. It is easy to glue such material, but some practice is desirable for a quality result. The texture of thermo-stickers can be matte and glossy, which significantly enriches the possibilities of design, allowing you to combine the decor with one or another texture of gel polish in the form of taking contrast.
How to glue?
Today, you can decorate your nails using different stickers at home. It is easy to do this step by step, but you need to apply different decorative materials correctly. This is possible with full compliance with the standard instructions, which are used by professionals. We note briefly the basic techniques of work.
Preparation of the base
The preliminary phase of work will be hygienic manicure, which can be edged or European (not edged). In the first case, the nails are soaked, cleaned the cuticle and pterygium, cut off the excess skin around the nail. European manicure is performed using a special gel to remove the cuticle. It does not use cutting tools at all, the cuticle is not cut, and pushed.
The second stage of work with the stickers under the gel polish is the preparation of nails. As a rule, before applying the first coating, they are buffered. This process is nothing but light grinding, which is performed by a soft grinder (buff). It does not polish, but removes gloss that interferes with strong adhesion of the varnish to the nail itself. Use a regular file for this is impossible, since it will raise the scales and create furrows on the surface of the nail plate.


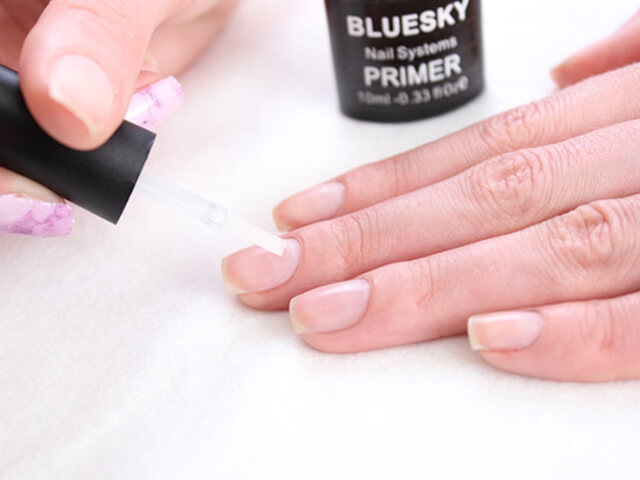
The third step is to create the desired substrate. Usually it starts with a primer layer, which can be used as a primer.
It will strengthen the nails and increase the level of adhesion of the nail with the subsequent applied layers.
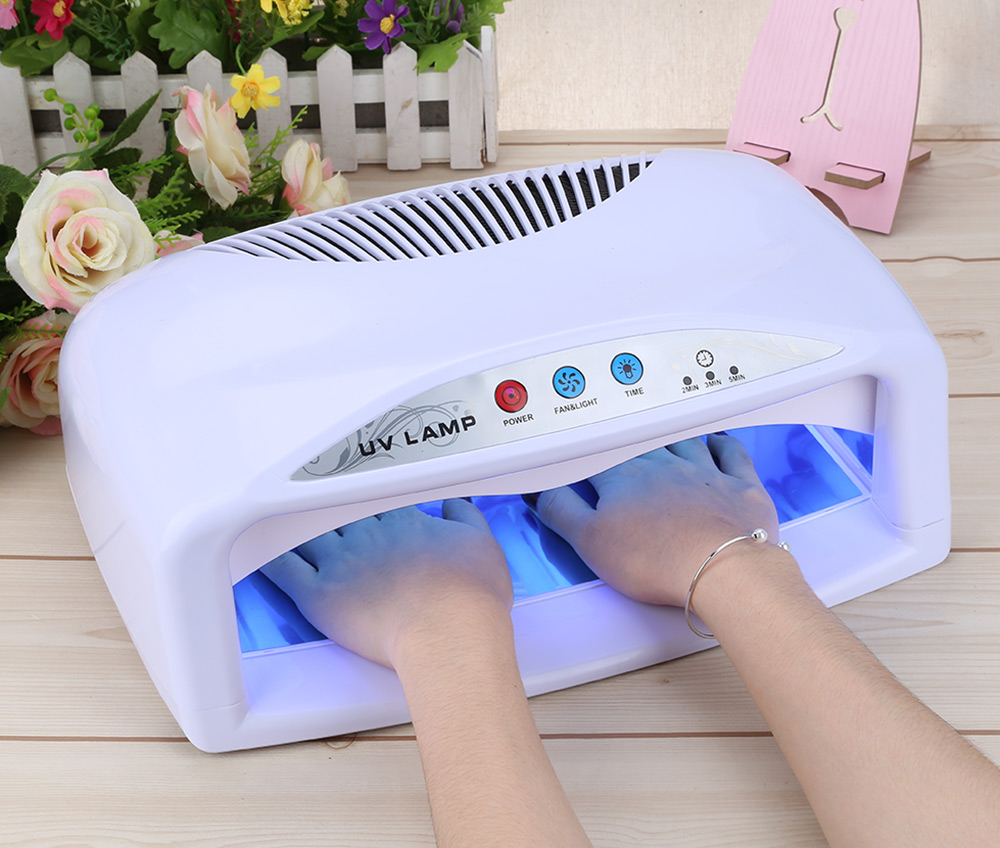
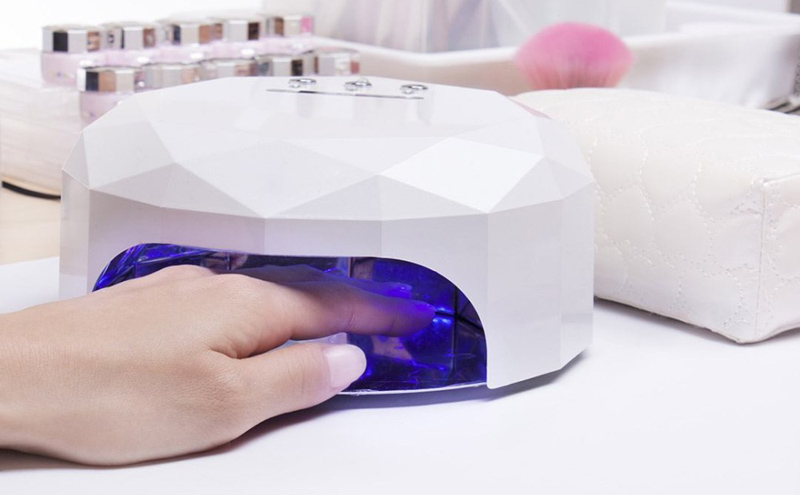
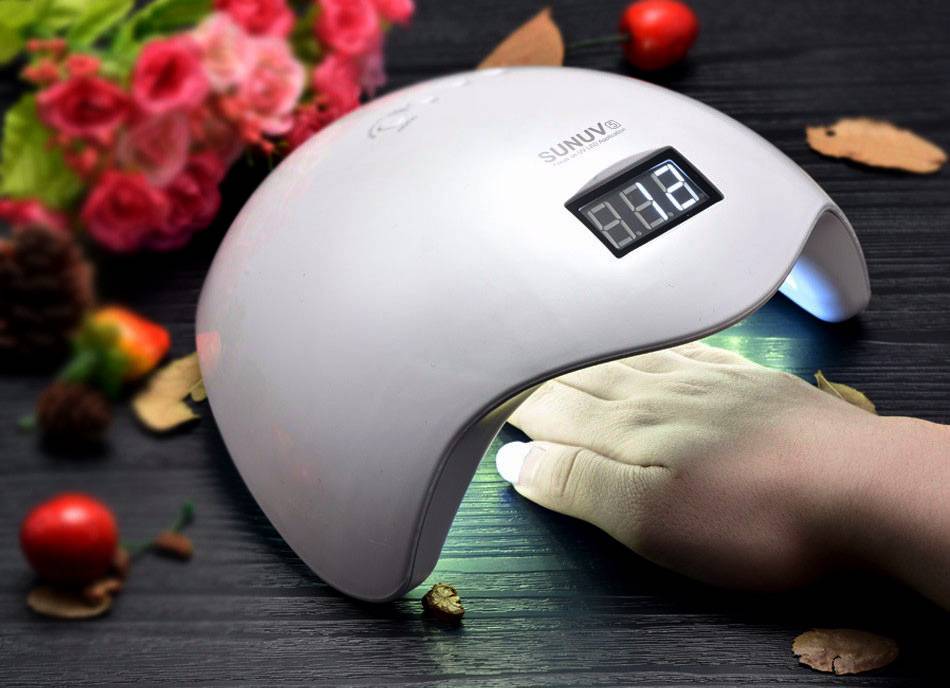
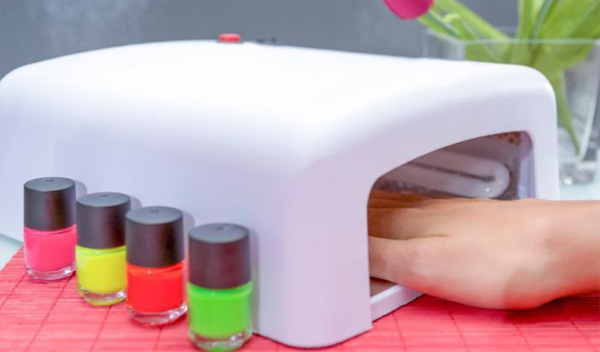
It is applied in a thin layer, then dried in a special lamp for the desired time (depends on the type of lamp and can be from half a minute to two minutes). Further, the process will depend on the type of decorative material used.
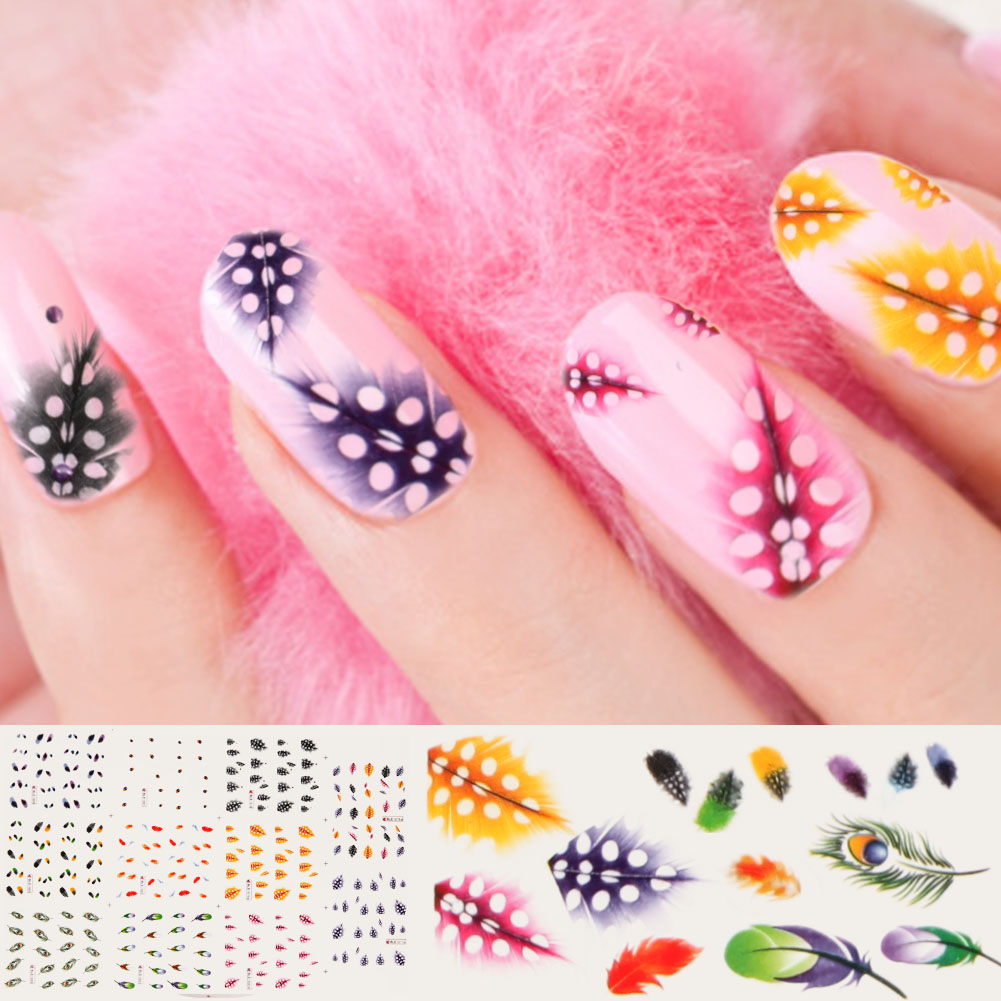
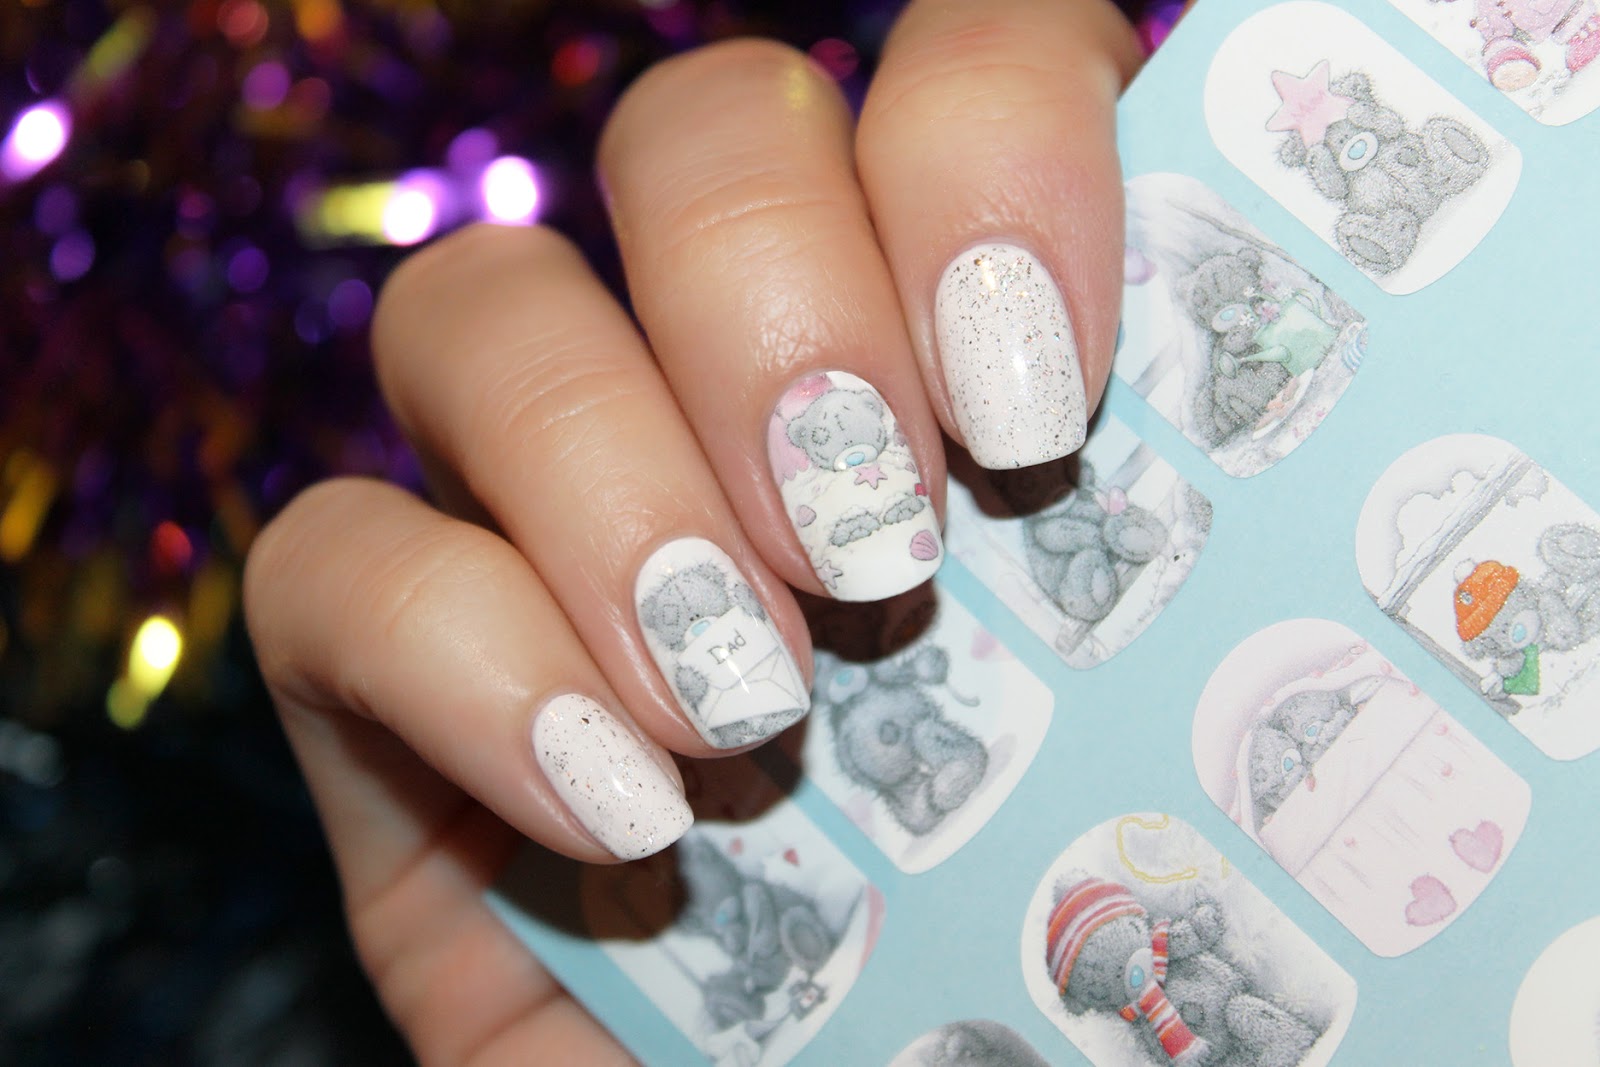
Water stickers
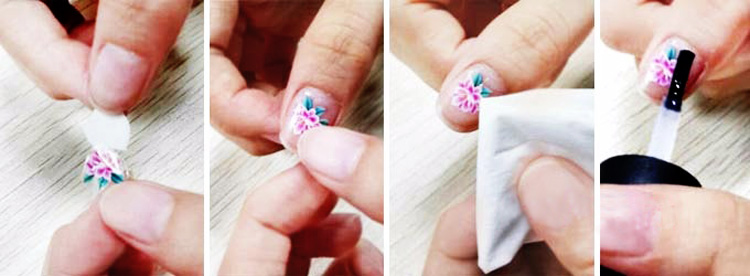
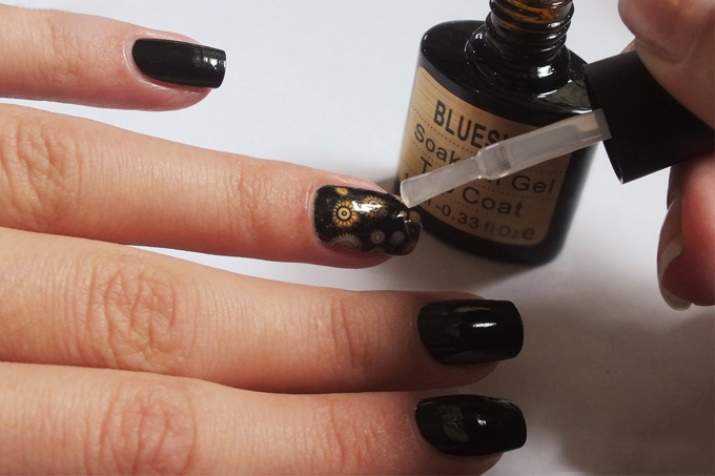
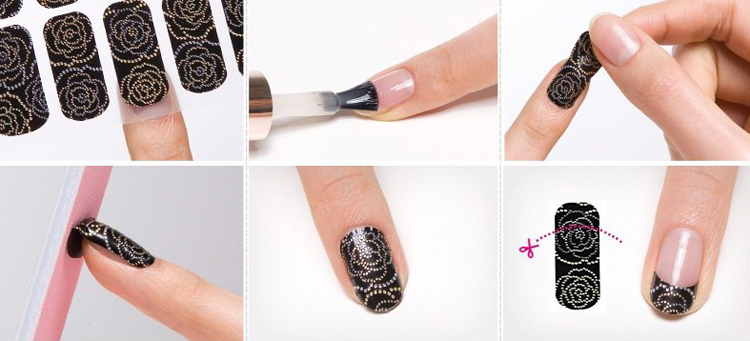
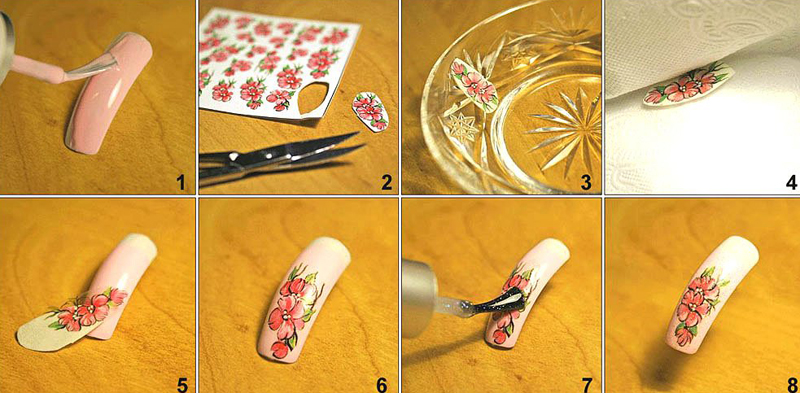
To glue such decor, are determined with its kind. If this is a picture with a transparent background, a color substrate is required. A base coat is applied to the dried primer and dried in a lamp. After that, the nail stained with the desired color, gel polish dried. In case of insufficient pigmentation of the varnish, the stage is repeated with the coloring of the nail and drying.Next, proceed to work with the sticker.
The picture is cut out according to the approximate shape of the nail, remove the protective film from above and put it face up on a napkinsoaked in cold water. The base is applied on the nail with a thin layer (top, ultrabond), not dried, the sticker is removed from the paper backing with tweezers and straightened on the nail. After that, the design is dried in the lamp, slightly increasing the time of polymerization. Cut the excess length, then seal the label with a layer of base and top. Each of them is dried after application.
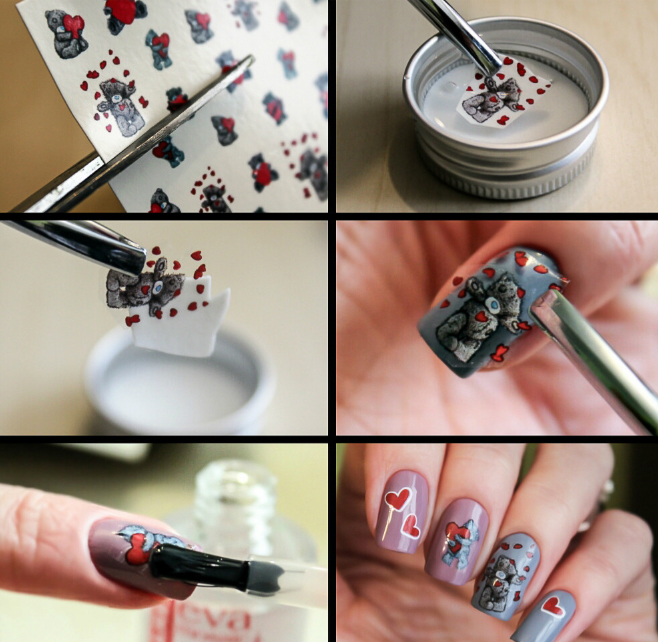
When the picture has enough thickness, you can not make a substrate under it. You can glue it directly onto the base applied over the dried primer. If in the process of work folds are obtained, they can be dissolved by lightly touching the brush with the primer. You can seal the design and one top.
On a sticky backing
Self-adhesive pictures are easy to glue, but you can not do without basic steps. First, the nail staining is performed, for which the base is applied and dried, then the pigment step is repeated in a similar pattern.
It is important to dry the nail in the lamp, because otherwise the sticky substrate will not be able to fix securely.
After the nail dries, take a pre-prepared sticker, cut to the desired size, and stick to the nail.
Now you need to give it at least two or three minutes to the material had time to take the rounded shape of the nail. If you do not wait for some time, the sticker will very quickly move away from the base, despite the sticky layer. After the time passes, you can fix the design with one or two layers of the finishing coating. Residual stickiness should be removed without fail.
Sticking foil
Regarding the fixation of foil material, everything will depend on the type of foil. If it is a transfer foil in the form of a tape, a special white-colored glue is applied on the pigmented nails. When dry, it becomes transparent. As soon as this happens, proceed to drawing the picture. To do this, prepare a piece of tape in advance, cutting it to about the desired size (preferably with a small margin).
Noticing that the glue has become transparent, the print is pressed to the nail quite tightly and pressed. In this case, you can walk on it with fingertips, but not with your nails, so as not to damage the coating.
Adjust the print does not work, and therefore need to work carefully right away.
According to this principle, glue tear-off foil. The strips are cut and glued onto the dried pigment, cutting off excess tweezers.
Thermo
Stickers that need warming are also impossible to fix on unprepared nails. To begin with perform high-quality hygienic manicure with the processing of the nail plates, aligning their length and giving the desired shape. After the nails are sawn, buffed, they are degreased, thereby increasing the percentage of nail adhesion with all applied lacquer materials. Next, proceed to the preparation of the labels themselves.
To do this, they are heated, sending under the light of an ultraviolet lamp, in which the gel-varnish is dried.
After that, each sticker spread on the nail and gently straighten as much as possible, avoiding the formation of folds. All the excess has to bend, so you need to adjust the size in advance. Next, the nail is dried in the lamp, carry out the correction of the form and seal the design with a layer of topcoat.
Design Ideas
Ideas for nails with stickers can be very diverse. As a rule, the design depends on the desire of the client and the professionalism of the master. For example, stickers do not paint all the nails, as this destroys even the high status of a manicure. Despite the fact that the client can independently choose certain pictures, they will be dosed so that they look impressive and expressive in the design.
The master is determined with the type of manicure and presumes how best to use the option chosen by the woman.
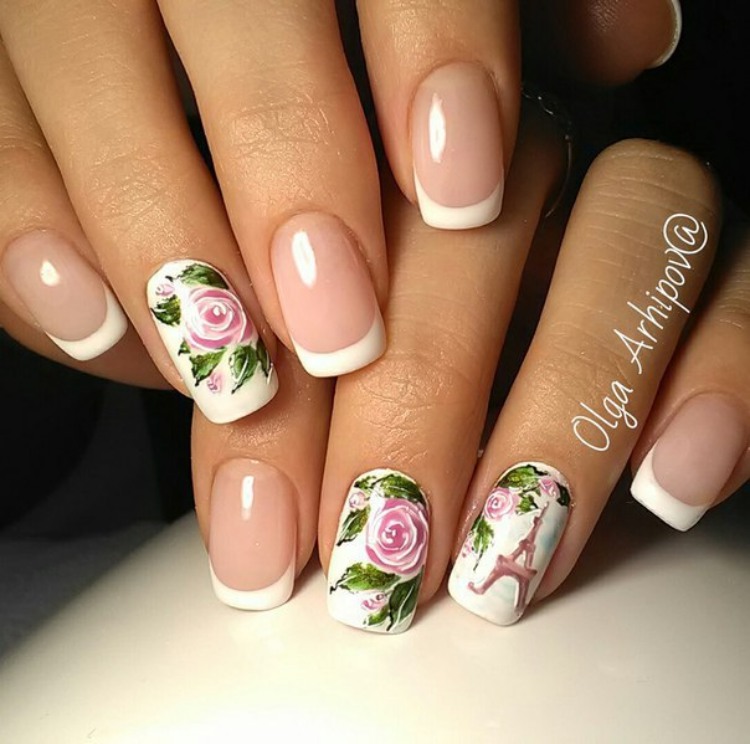
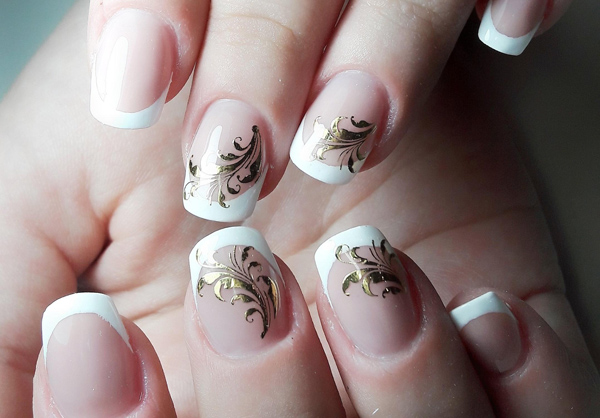
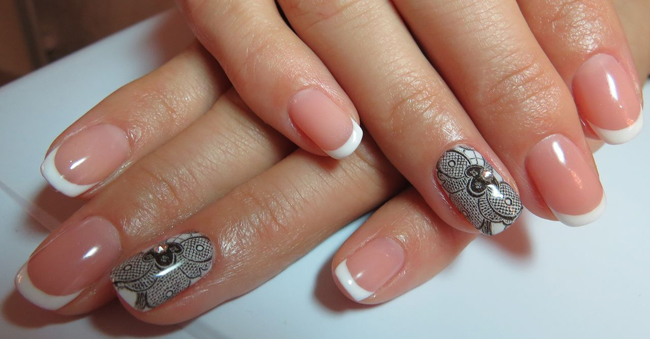
For example, if you think that you can put stickers on all of your French’s nails, then a French salon design may have no more than three or four such accents.
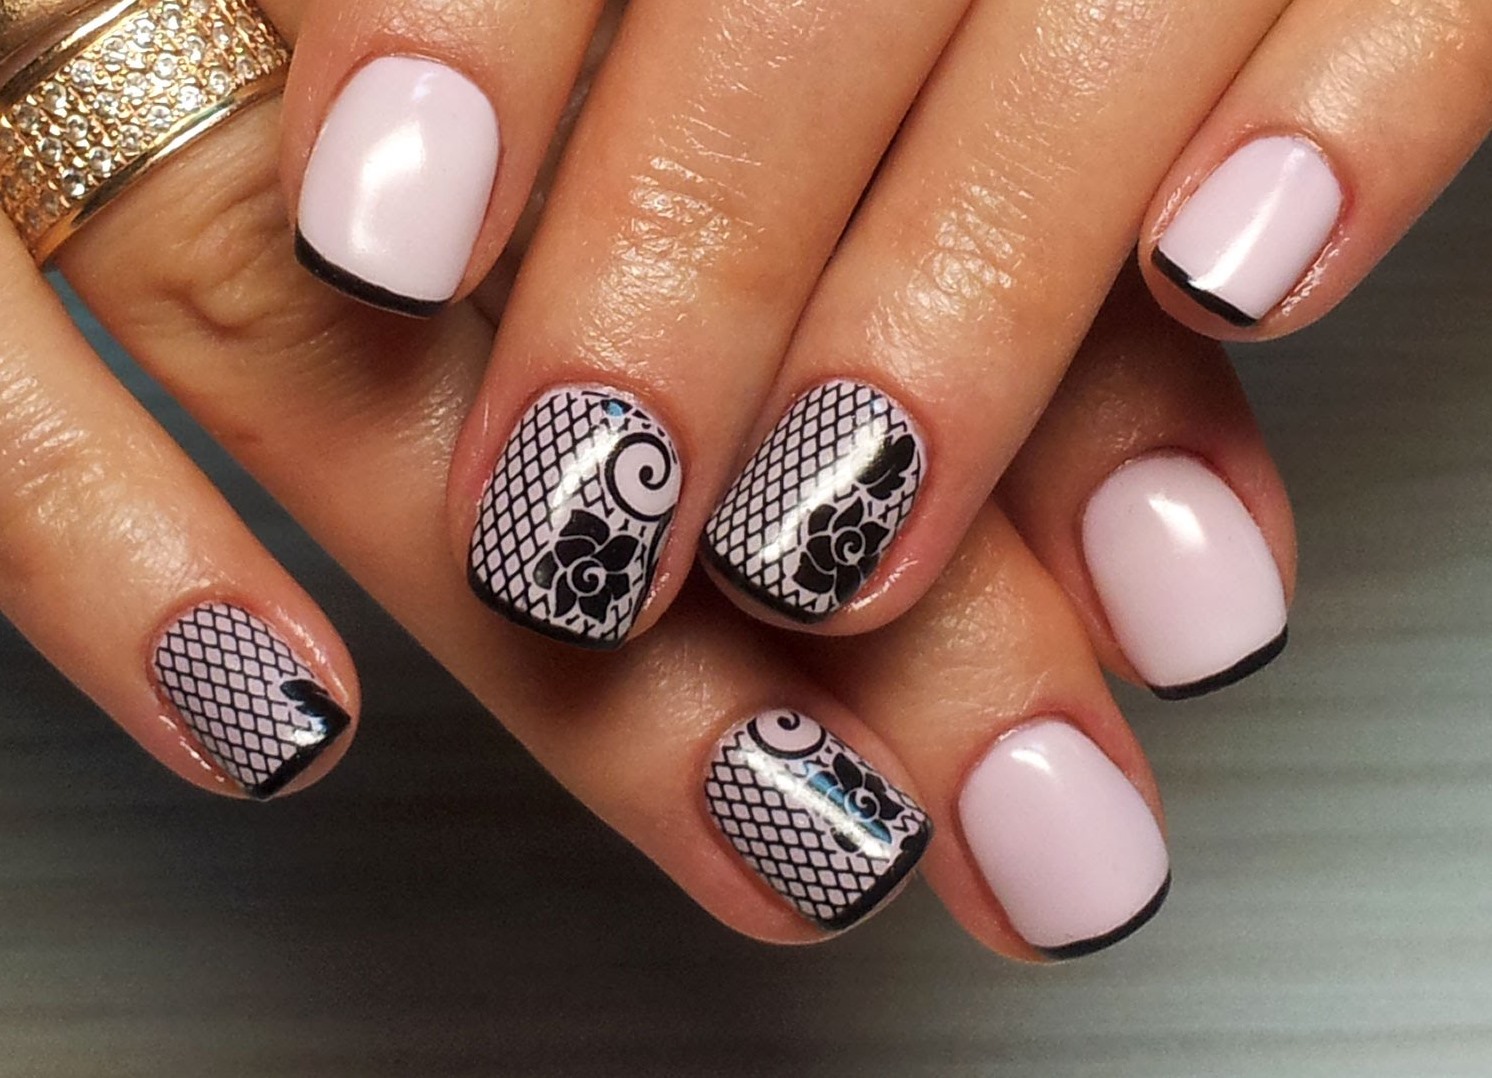
From stickers you can create a fantasy french pattern (for example, in the form of lace, monograms). And also with stickers you can create a design with holes: you can stick geometric shapes at the base.


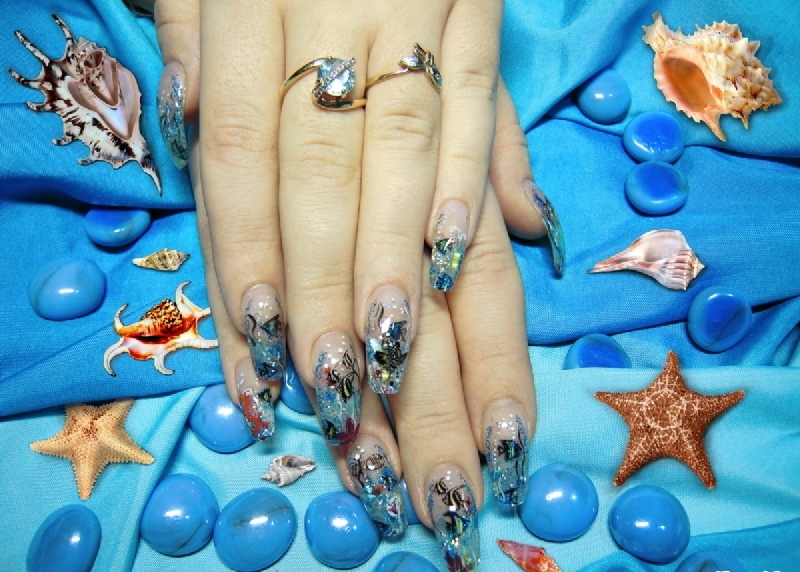
The design with the effect of 3D will look beautiful, while you can seal the sticker with a pattern not only with the modeling tool, but also with several layers of the top, creating a semblance of the aquarium effect. You can complement the design with sand, sparkles, multi-colored confetti, dried flowers. Especially beautiful will look like a similar design on long extended nails in the technique of french.
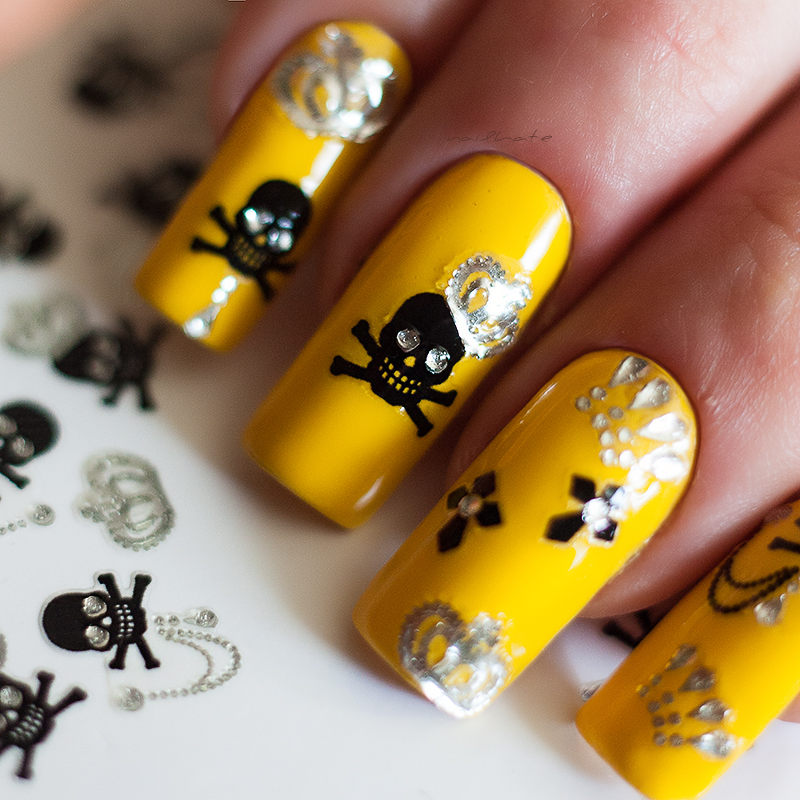
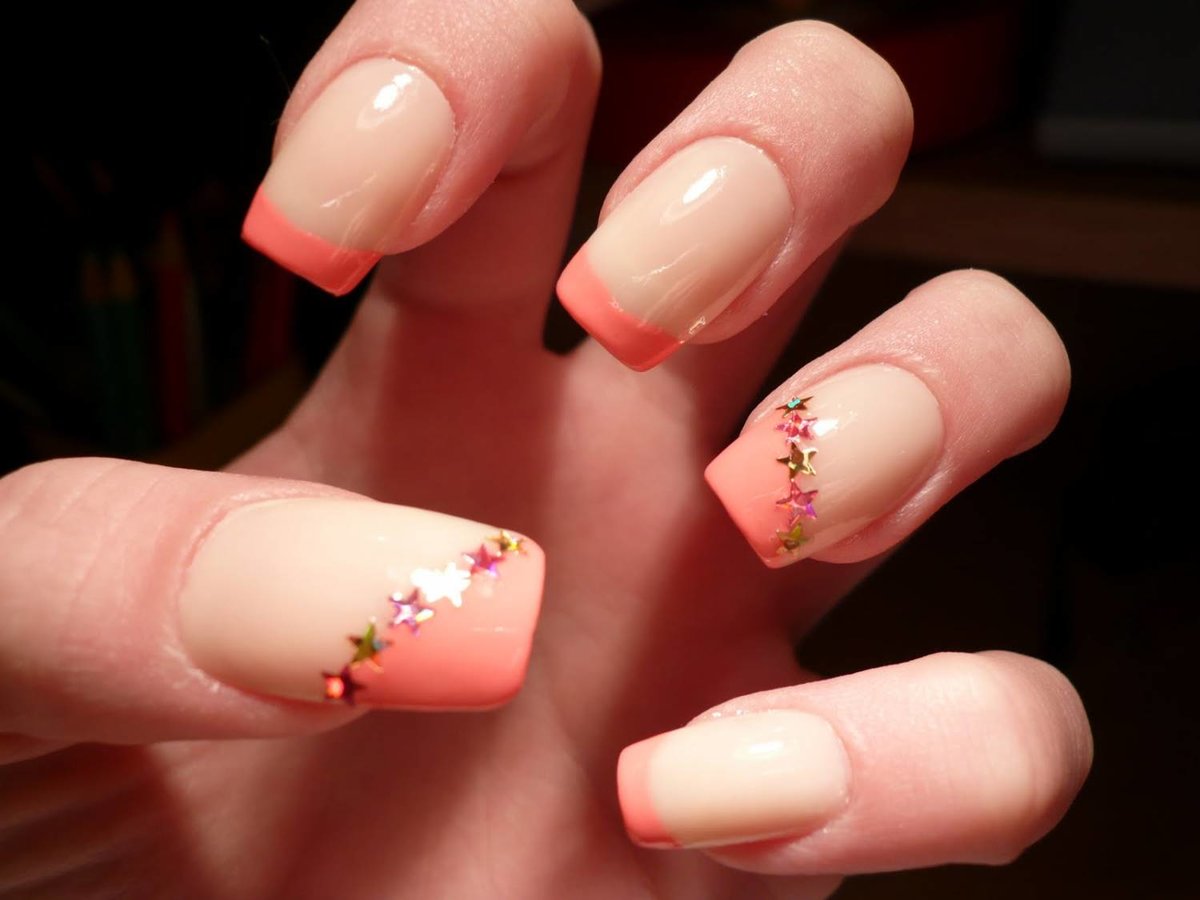
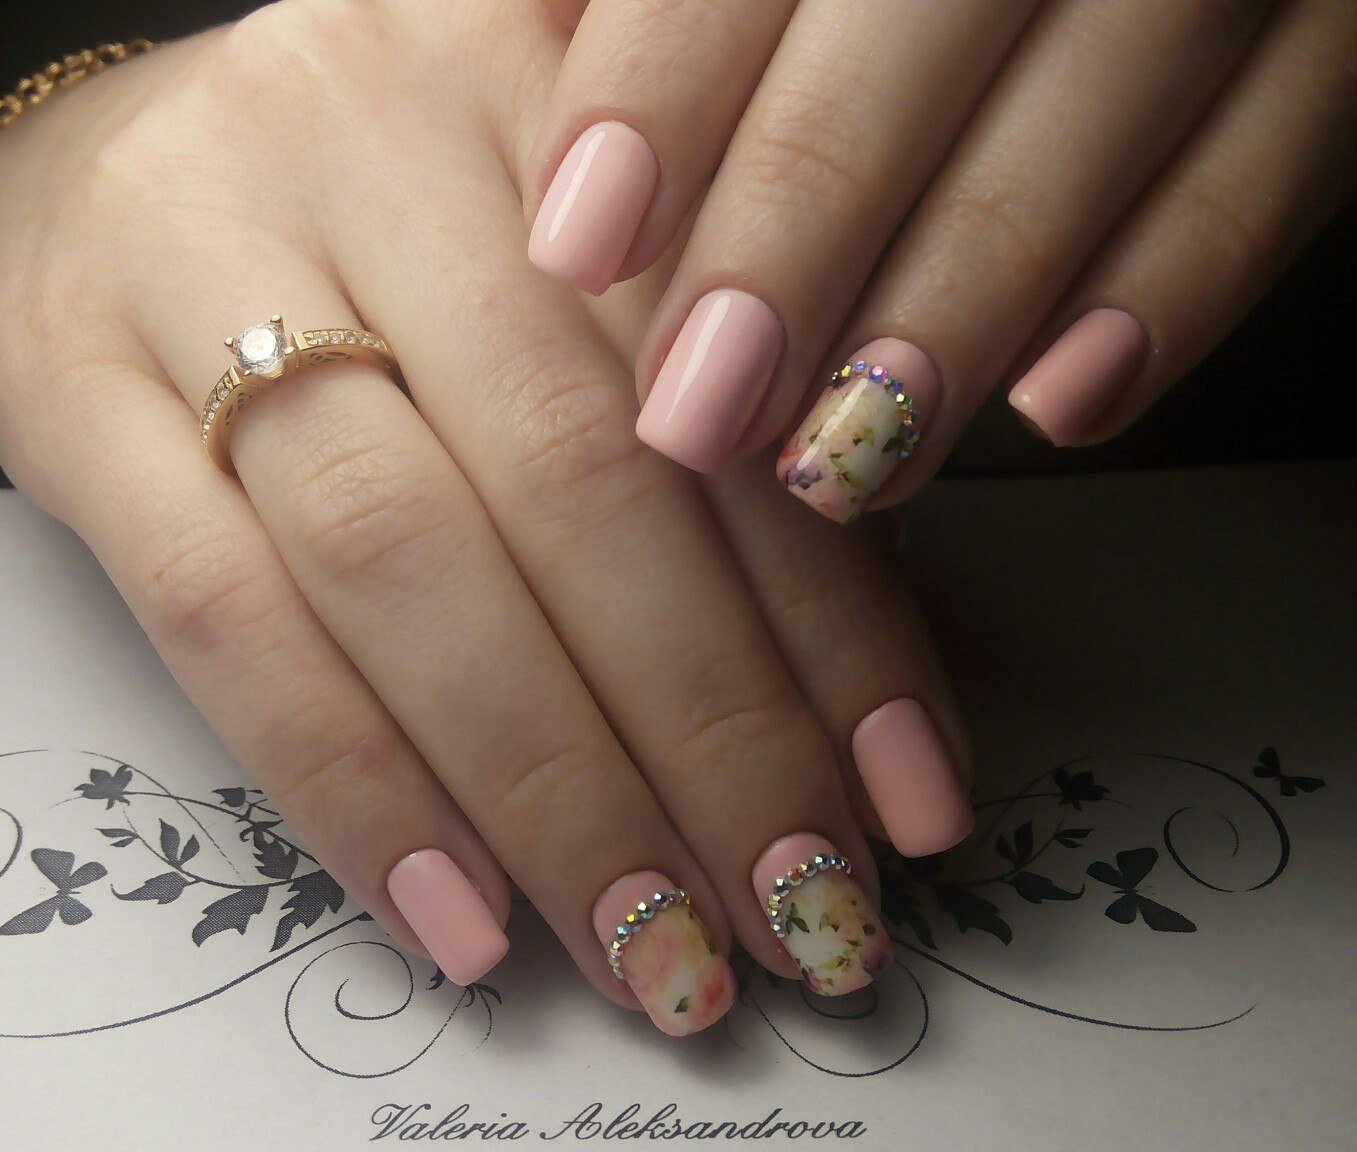
You can design on the entire area of the accent nail, and then decorate it with rhinestone or crystal.
However, for inlays it is better to select pictures that have places for the location of the sparkling decor.
For example, you can decorate the slider with small stones with a picture of a web, flower, branch. Rhinestones that imitate drops of dew on a piece of paper will look beautiful.
If you want to give the sticker a look of art painting, you should choose an image using watercolor technique. To create the desired illusion, it will be enough a few strokes, or even contours created with acrylic paints or gel directly over the slider. Take a thin brush and paint on it contours. By the way, you can add a watercolor slider glitter, creating the effect of silver or gold pollen.
In other cases, can be used for decoration bouillas. A design with an ear print can look beautiful if you add crystals instead of grains. Rhinestones can be used for pictures with a cat, decorating their eyes with an animal. By the way, sparkling decor can mask the flaws of work. For example, the same rhinestones can hide the resulting crease or tear on the film.
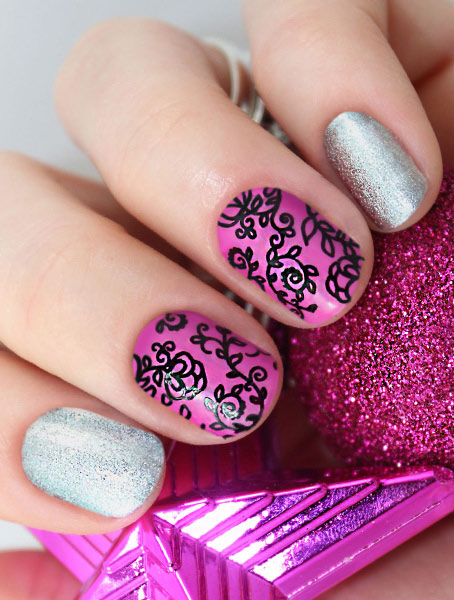
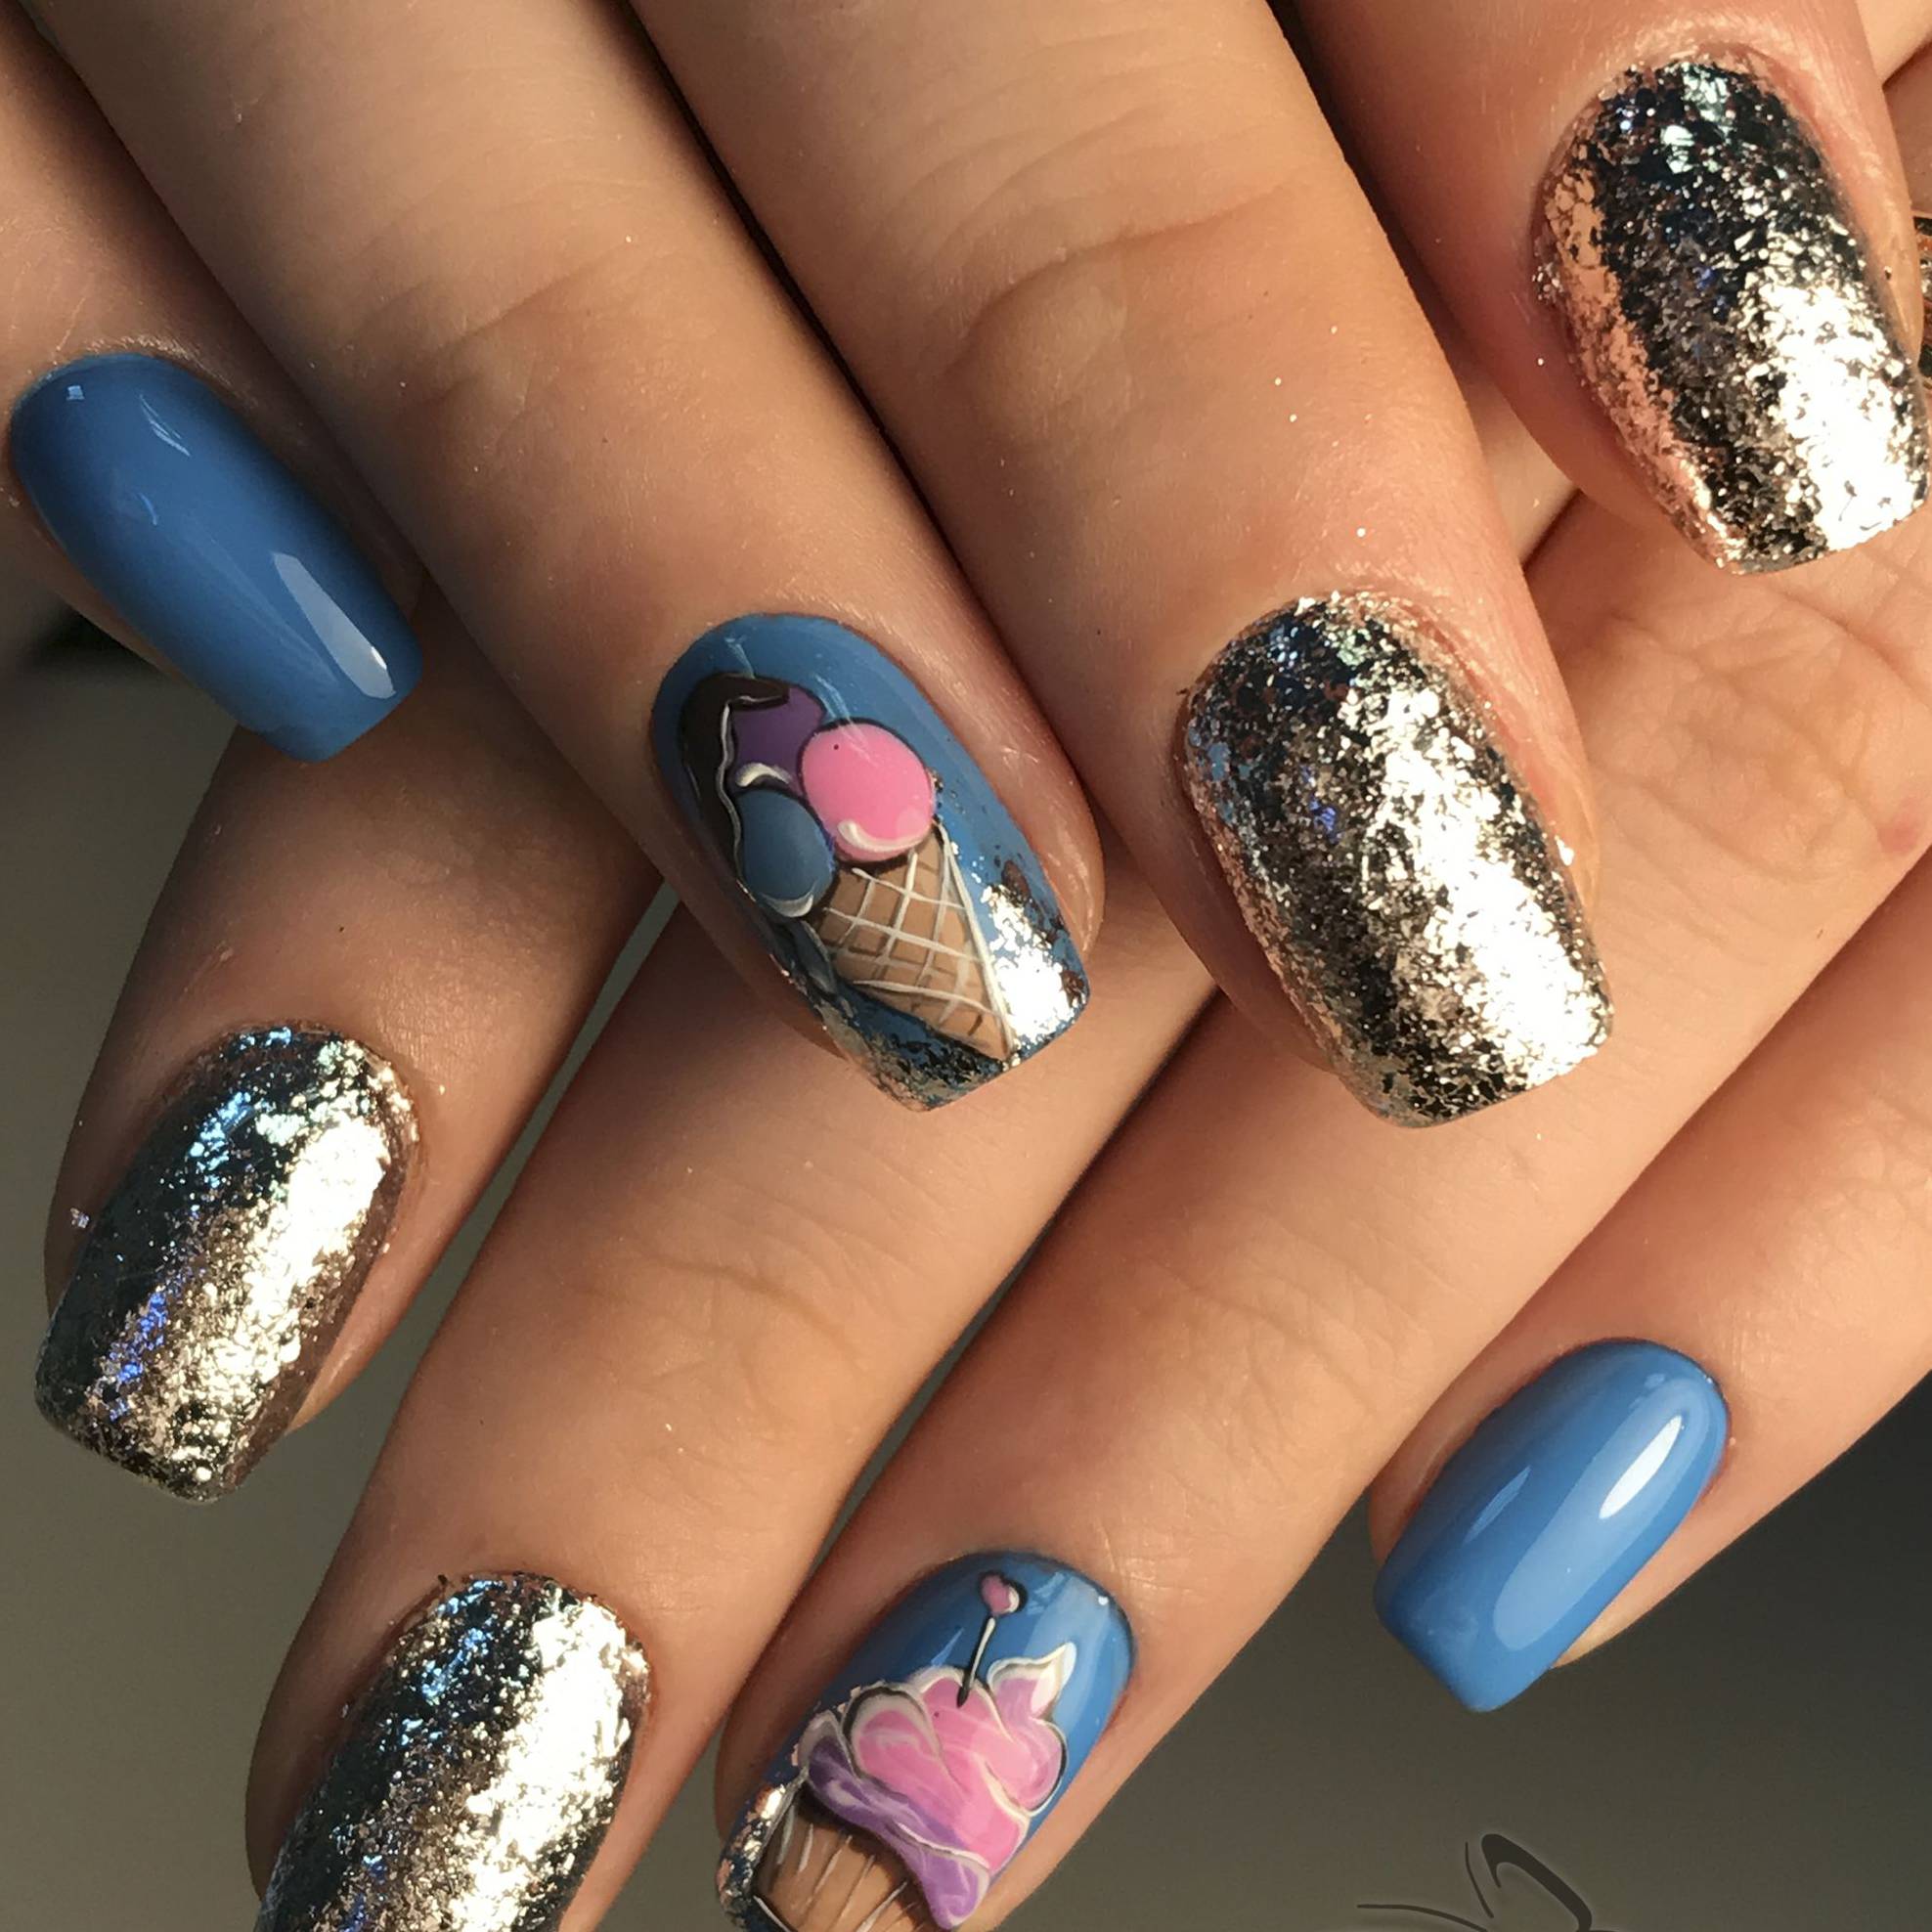
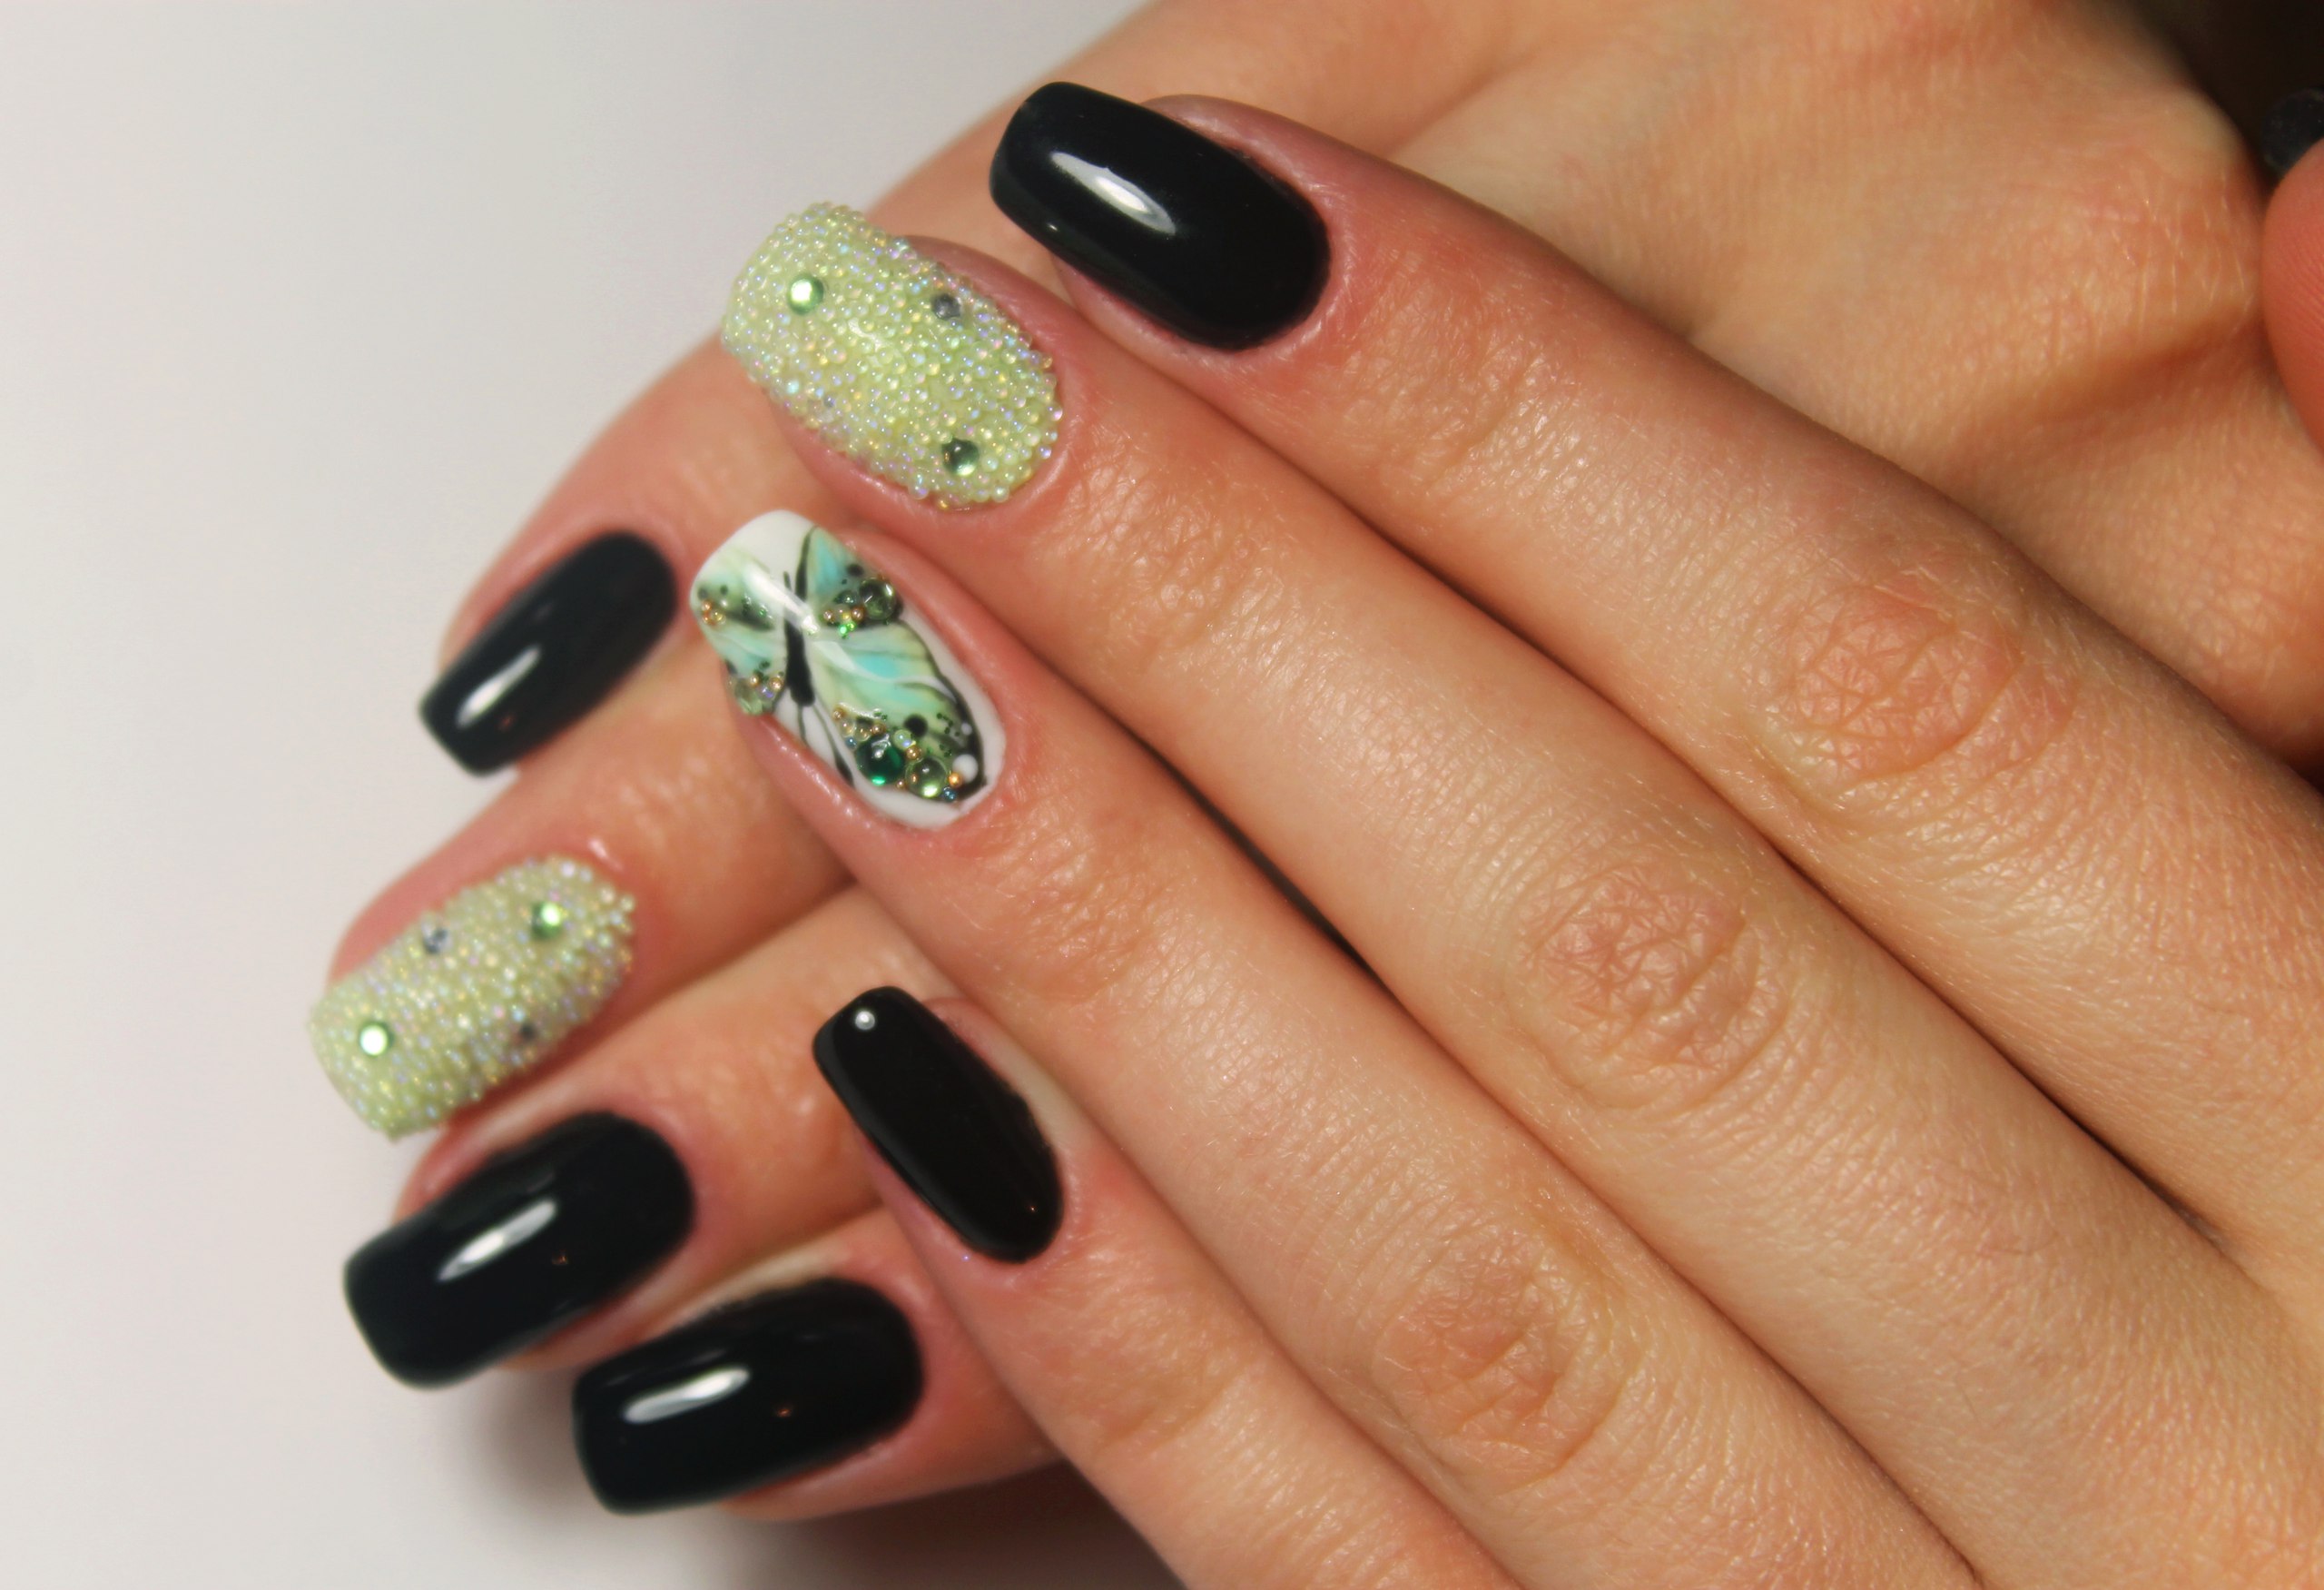
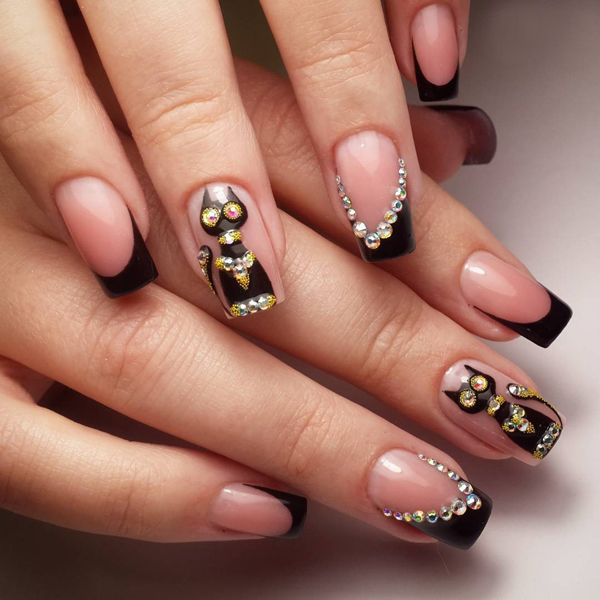
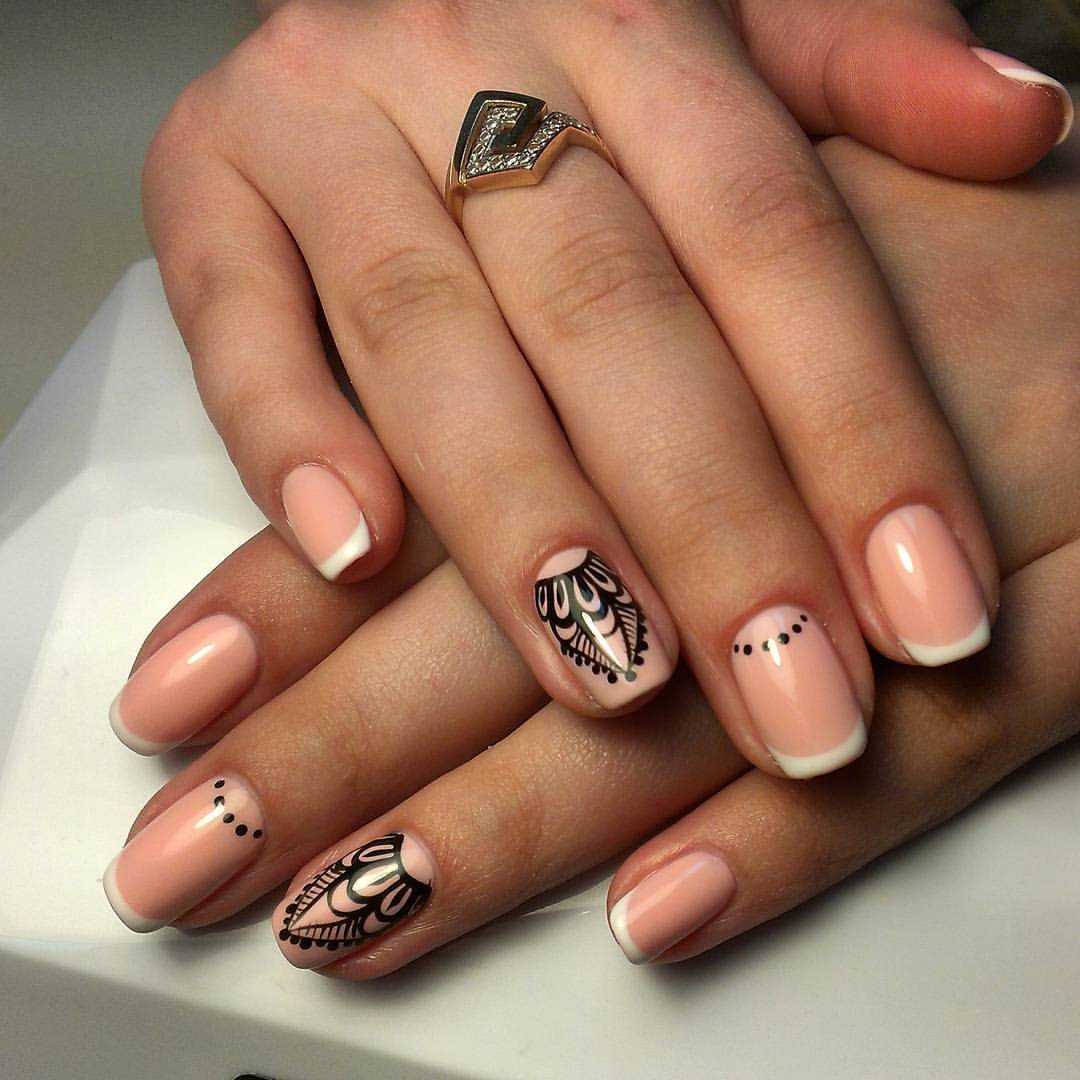
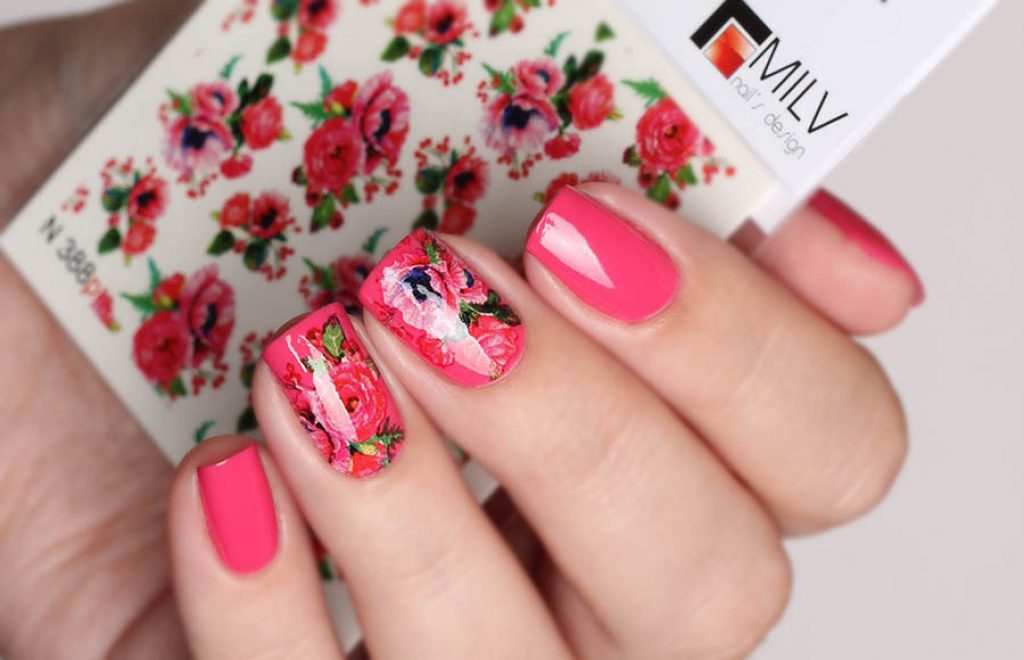
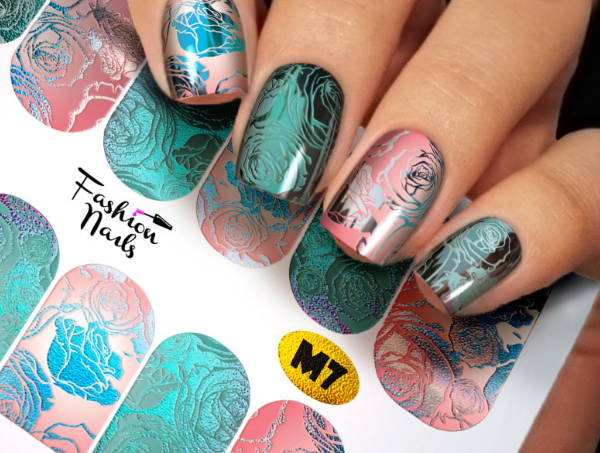
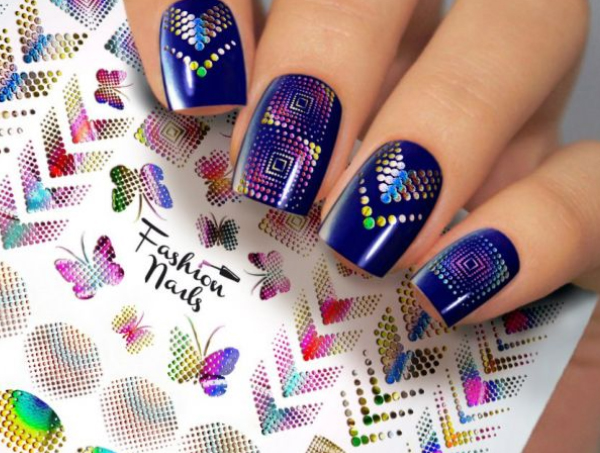
Beautiful examples
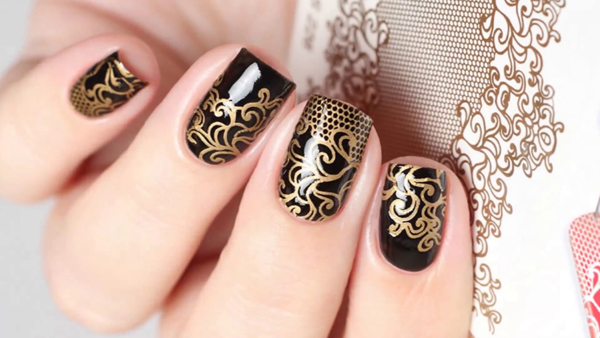
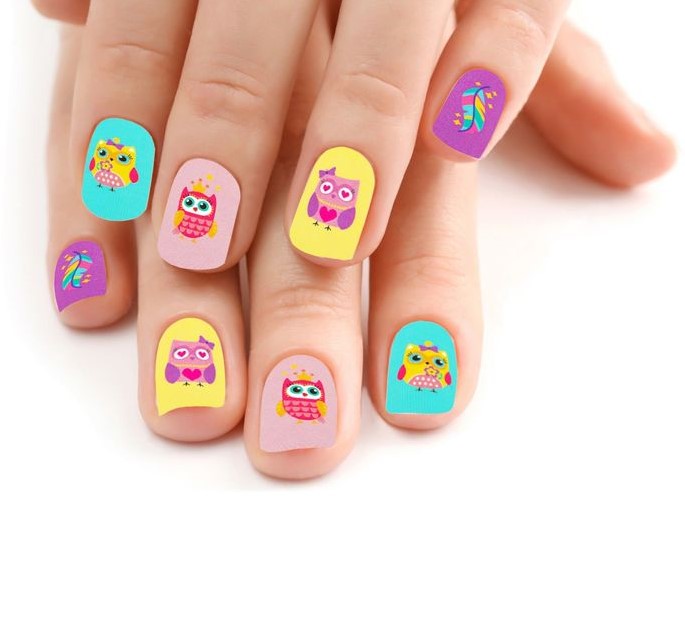
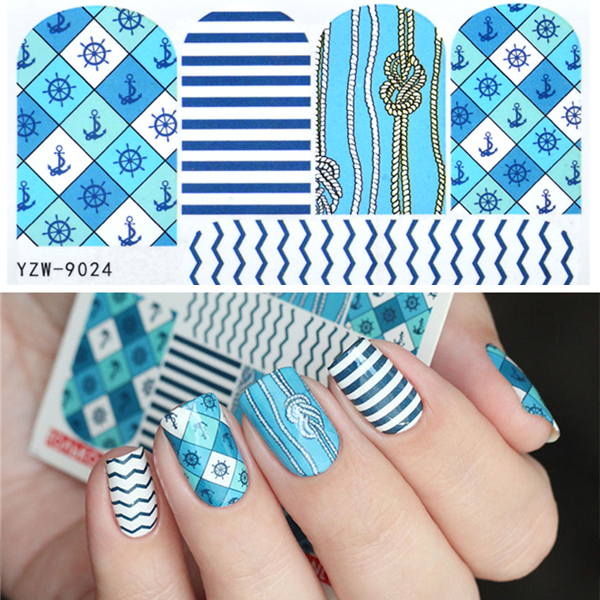
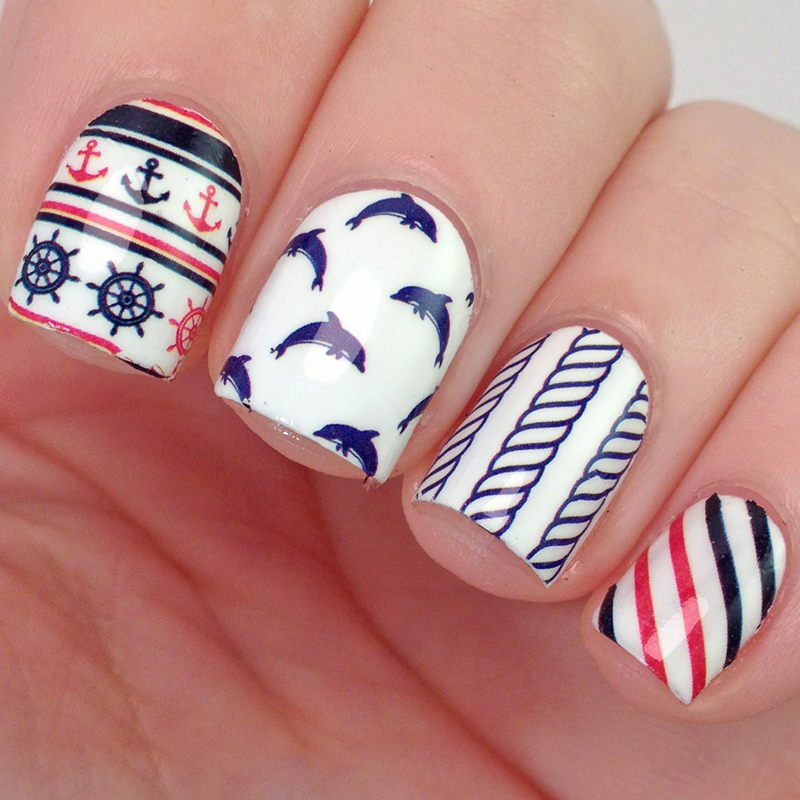
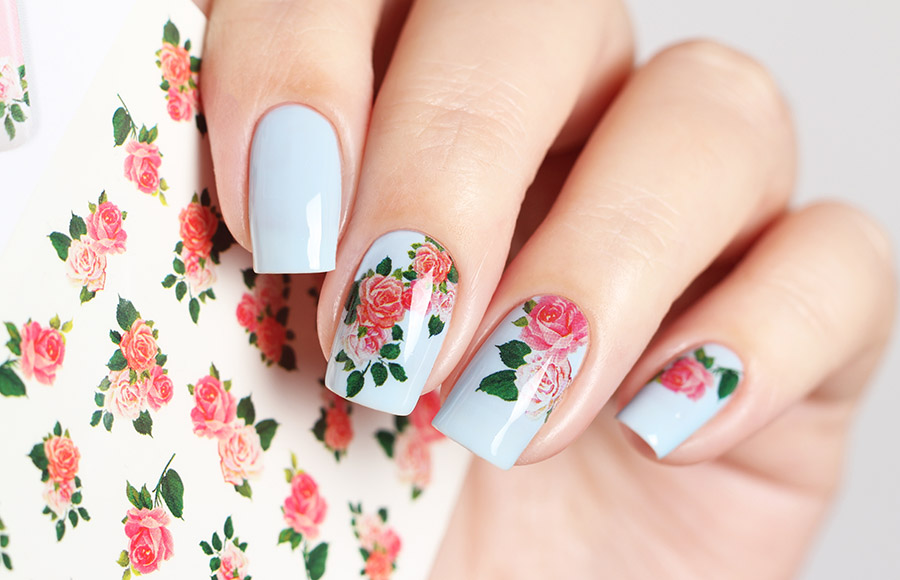
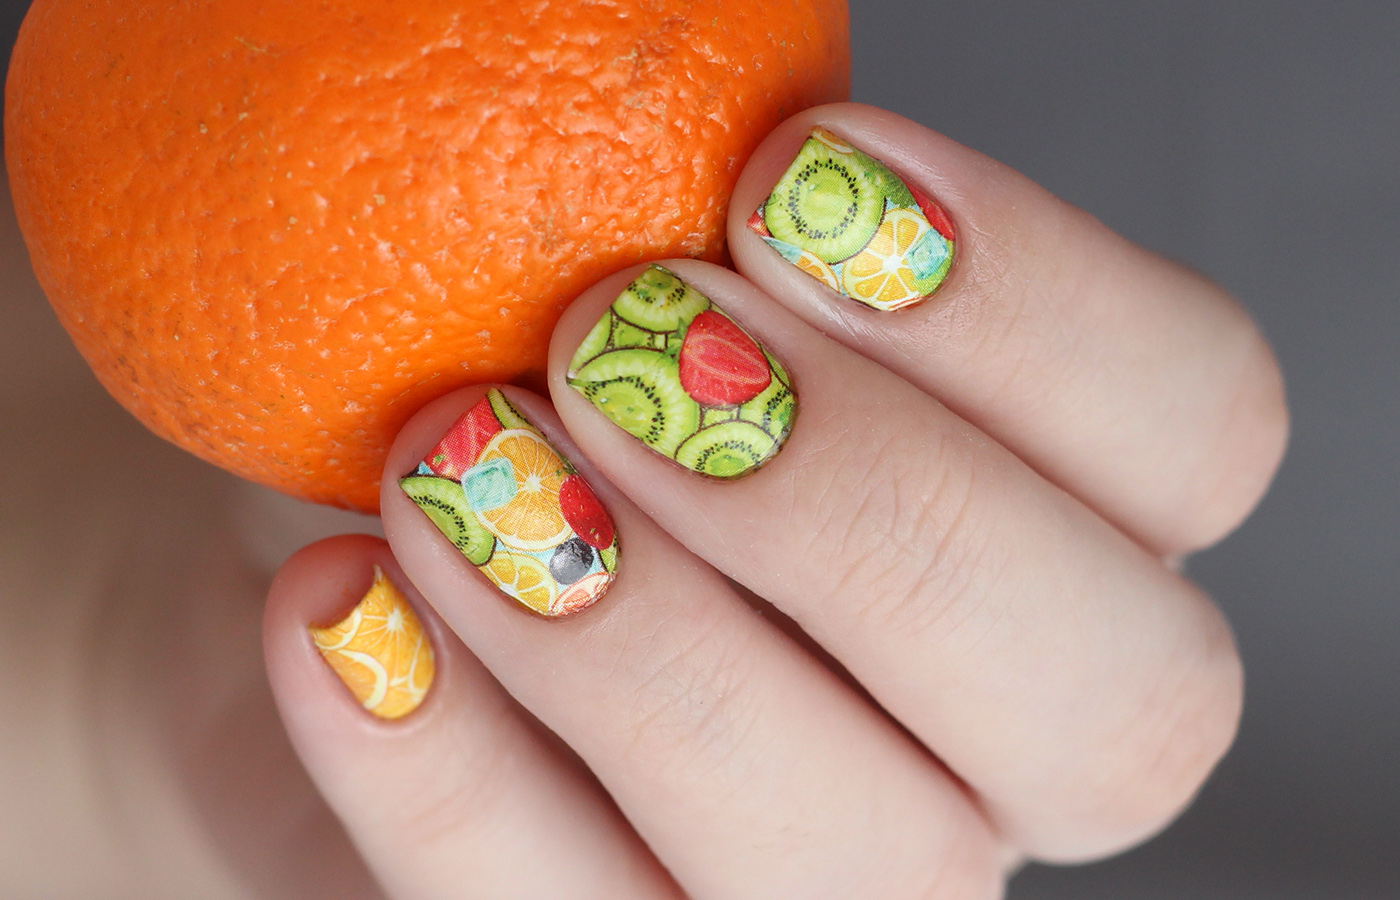
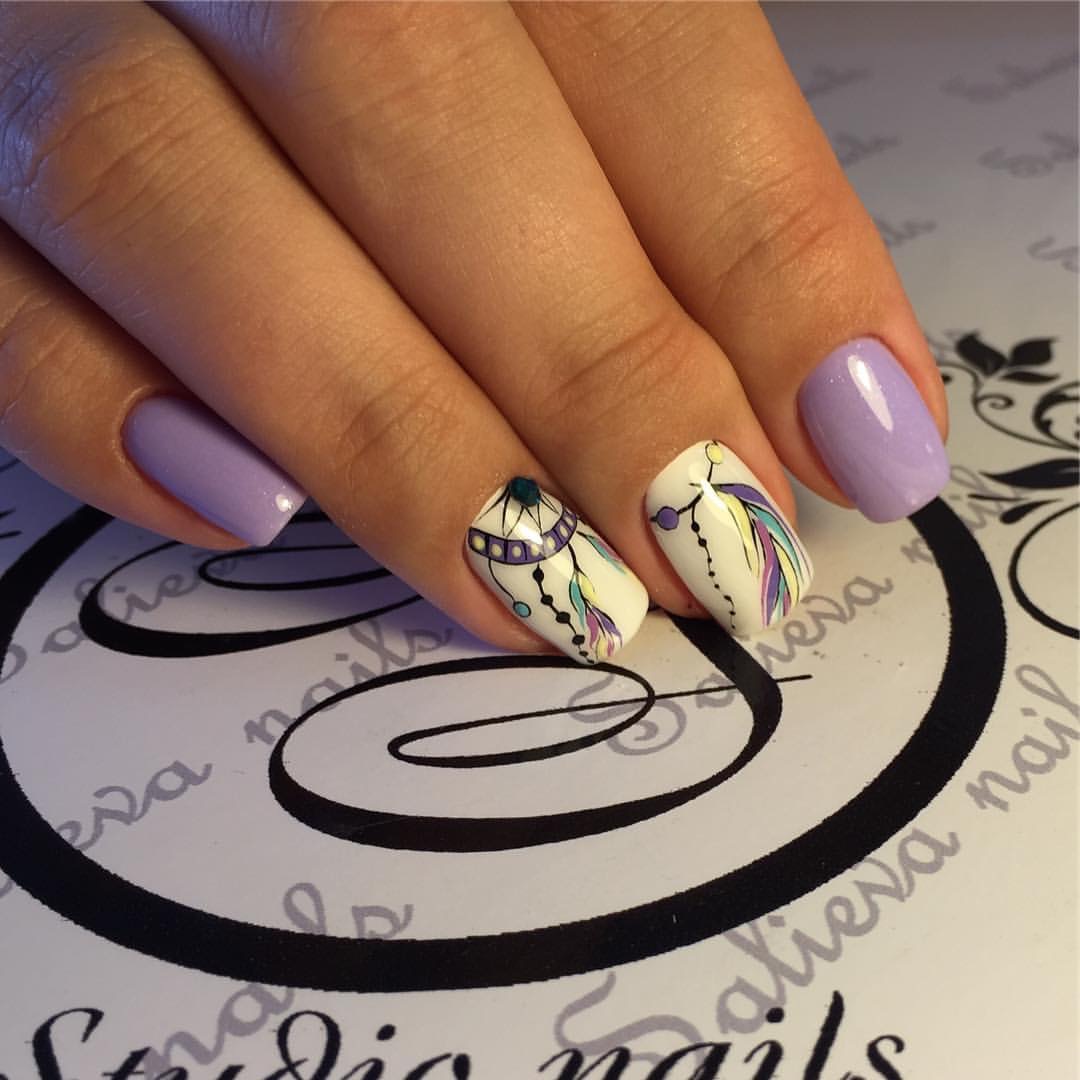
Evaluate the possibilities of decorating nail stickers stylish photo gallery examples will help:
- chic option to decorate an evening dress;
- stylish solution for bright personalities;
- an option for a vacation or a trip to the sea;
- gentle summer design for a romantic nature;
- original design for the completion of the summer bow;
- spectacular ethnic design;
- bright manicure with slider design;
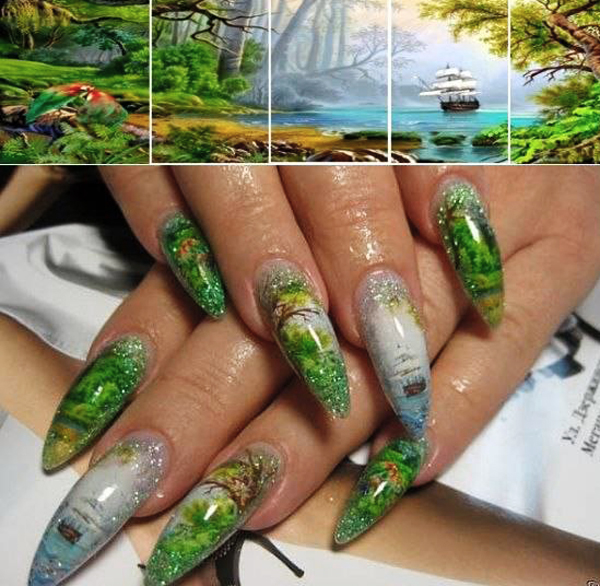
- use of seasonal themes in manicure design;
- beautiful nail decor using floral prints;
- option using lace lace on accent nails.
On how to make nail design with sliders under the gel polish, see the following video.


