Each new season brings with it many interesting trends in the field of nail design. Some of them are becoming especially popular. As a rule, this is influenced by a combination of spectacular appearance and ease of execution. So the design trend goes to the masses and flaunts on the fingers of thousands of the fair sex. The same thing happened with the technique of painting on wet gel varnish. She quickly gained universal love and acceptance. We offer to get acquainted with different patterns that are performed in this simple technique.
Design
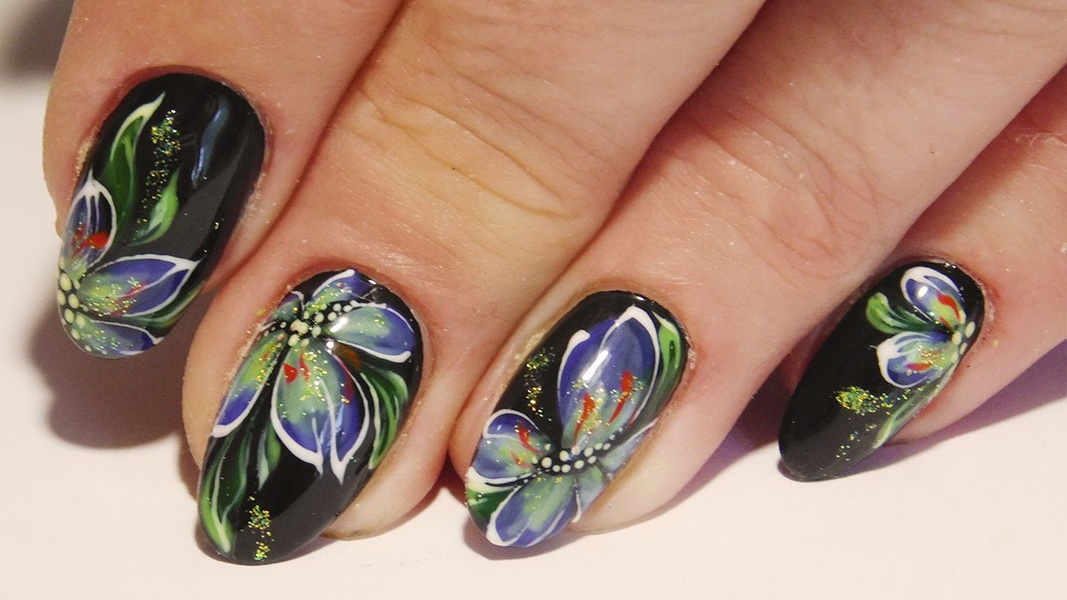
Initially, floral motifs were mostly present in the wet gel polish. The new season made its own adjustments and created many variants of the popular cover, so that each girl could create a unique masterpiece on her nails. Patterns in the form of multi-colored haze, abstractions, butterflies or the effect of a matte coating are now created on the basis of a resistant gel.
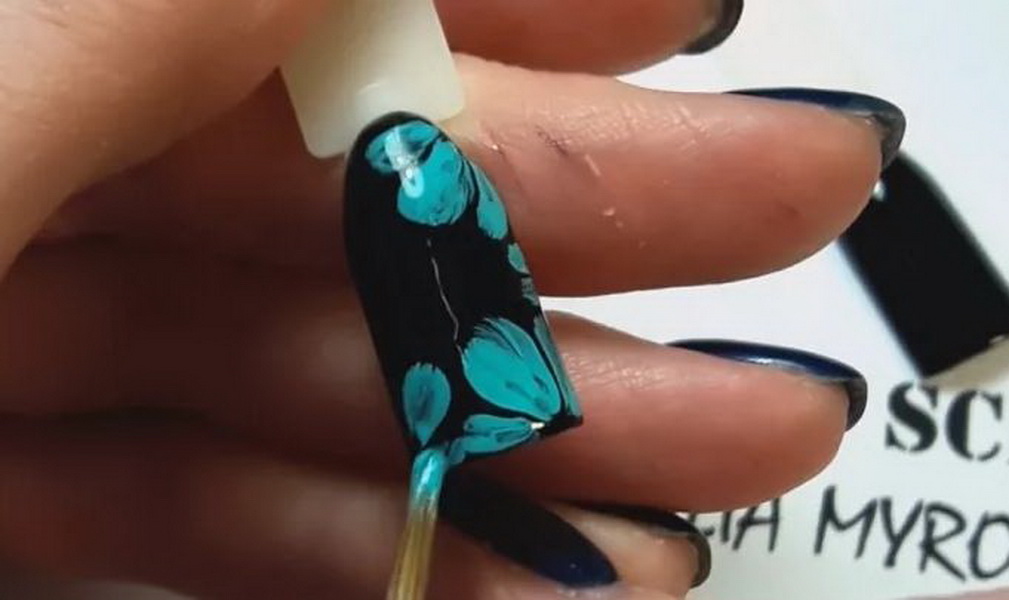
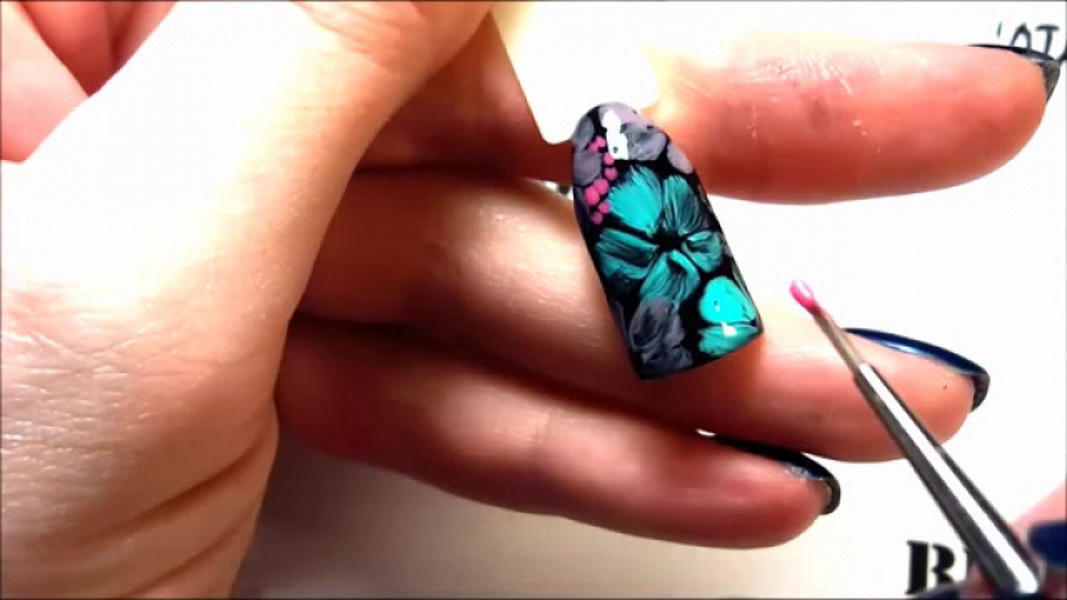
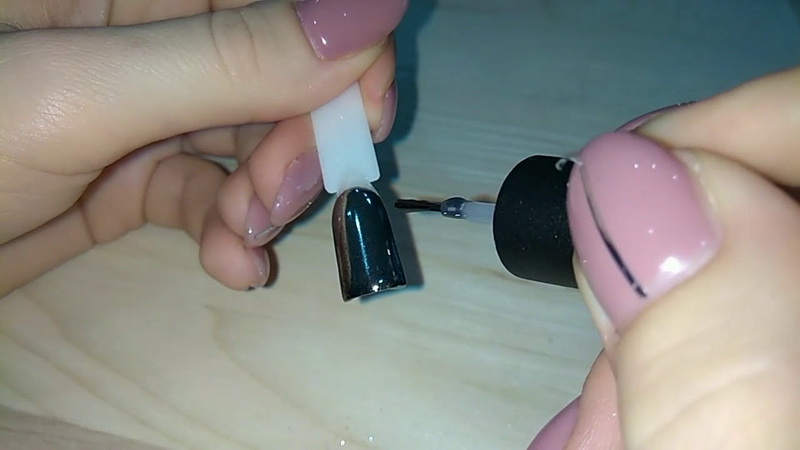
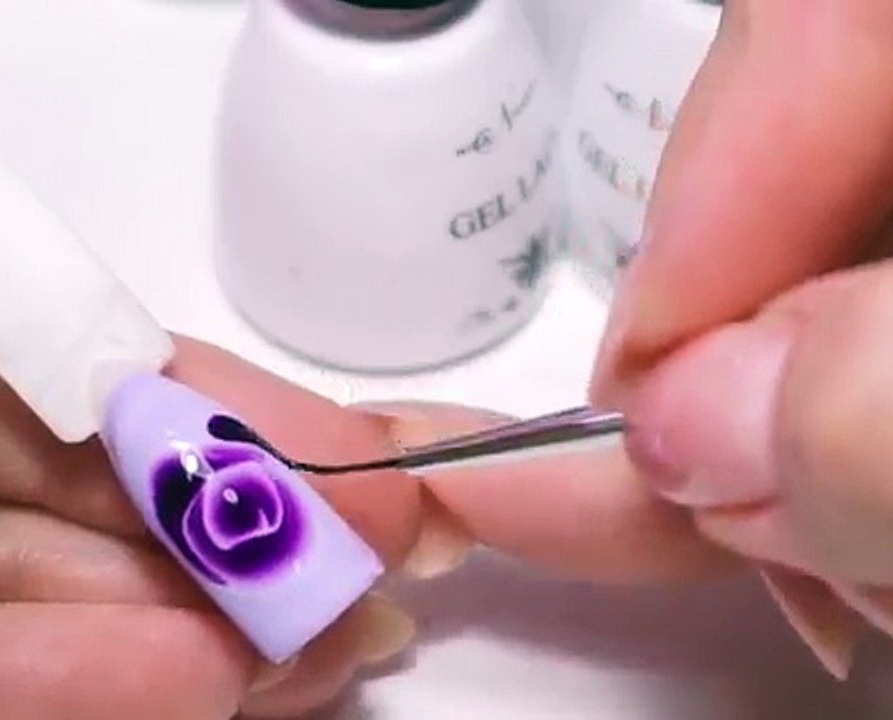
Combines all these new items one thing - a constant technique of execution. First, the first layer of colored lacquer is applied in the usual way and polymerized. Then the second thin layer is not dried, and a trendy pattern is immediately created on it. Only when the lines and contours on the surface of the nails begin to leak slightly, the manicure is sent for fixation under the lamp. Professionals advise you to choose a gel with a medium density texture in order to get a good spreading effect.

Flowers
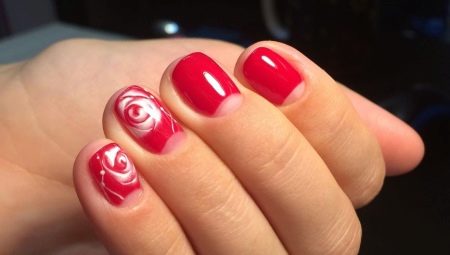
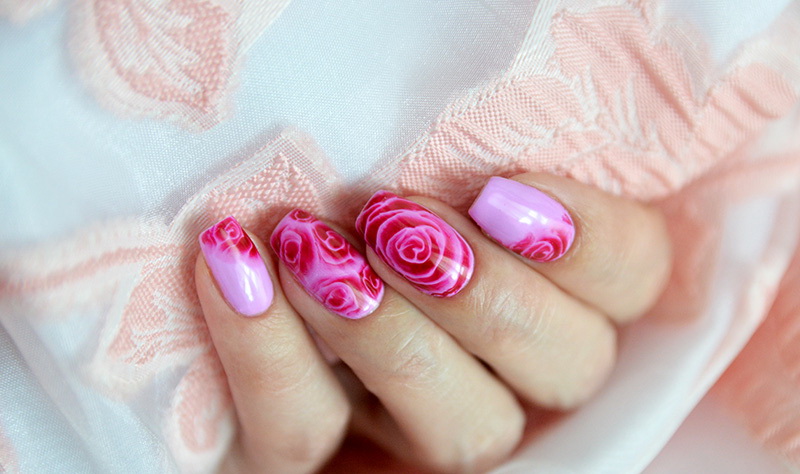
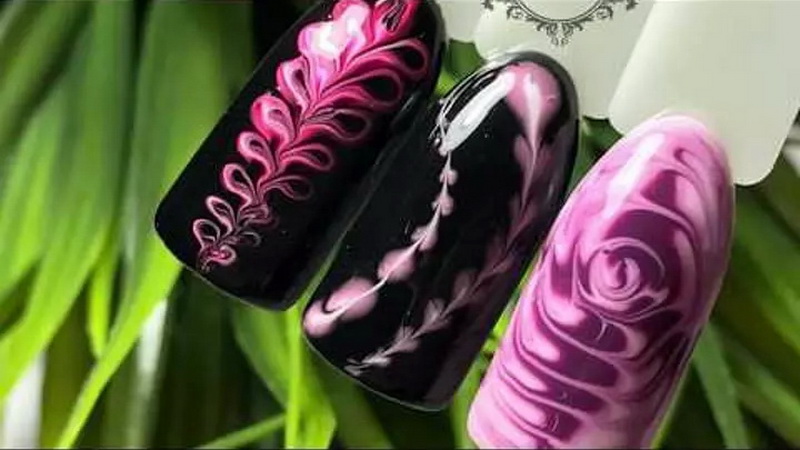
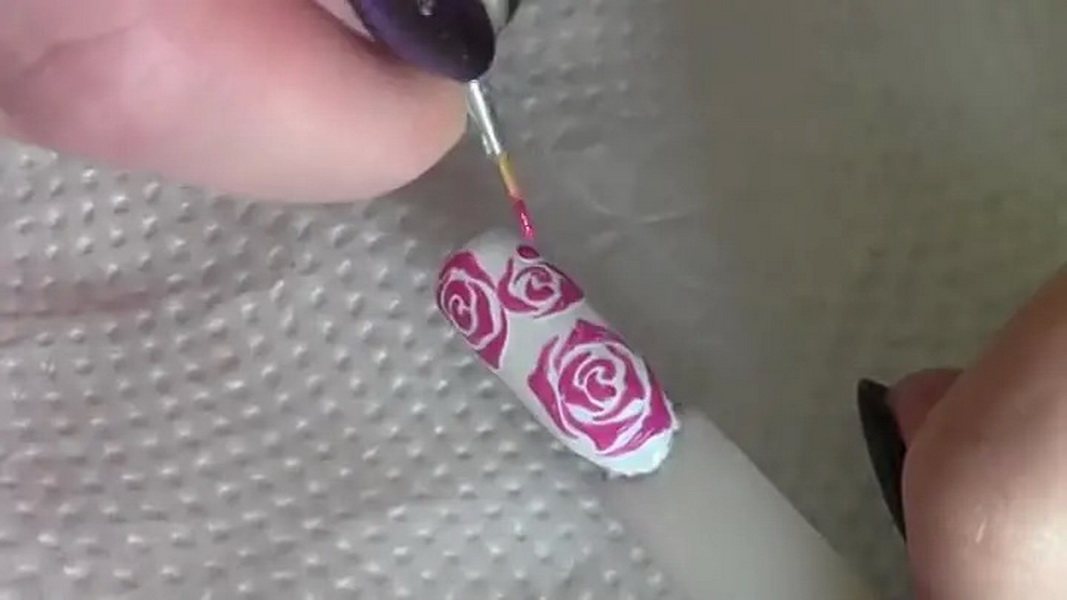
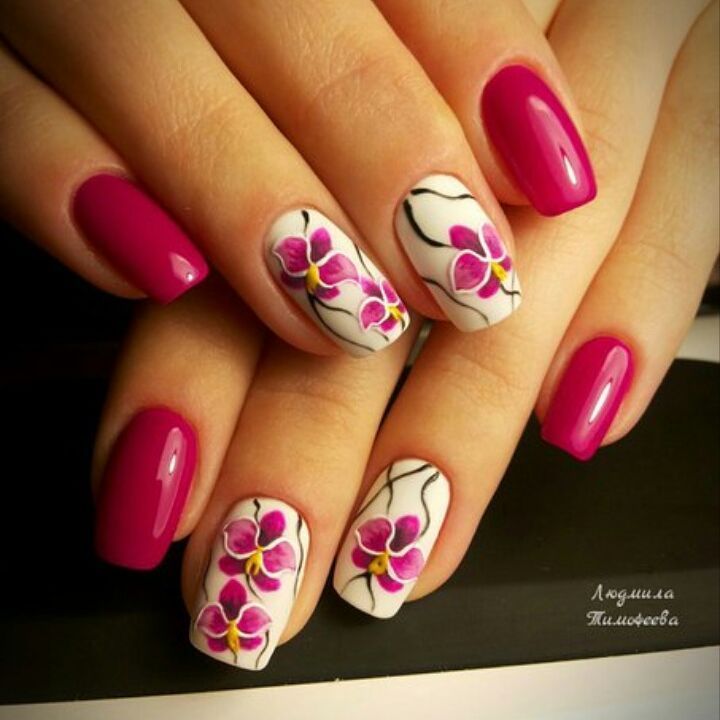
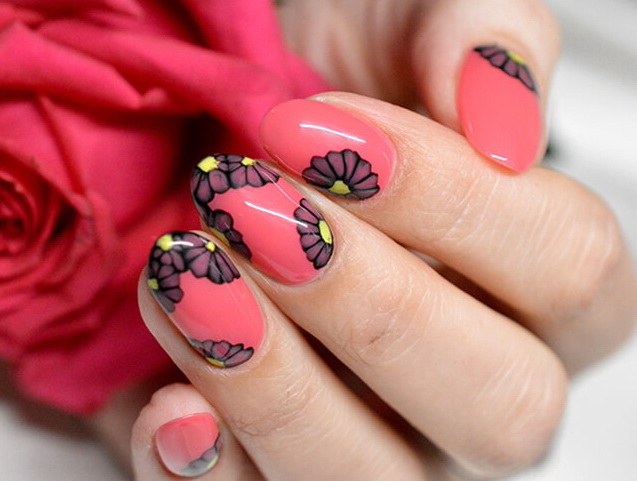
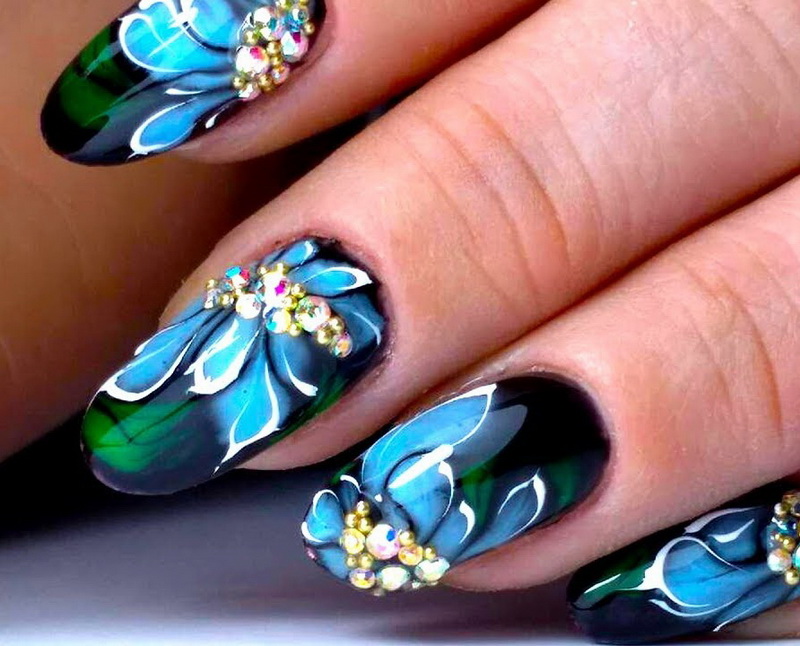
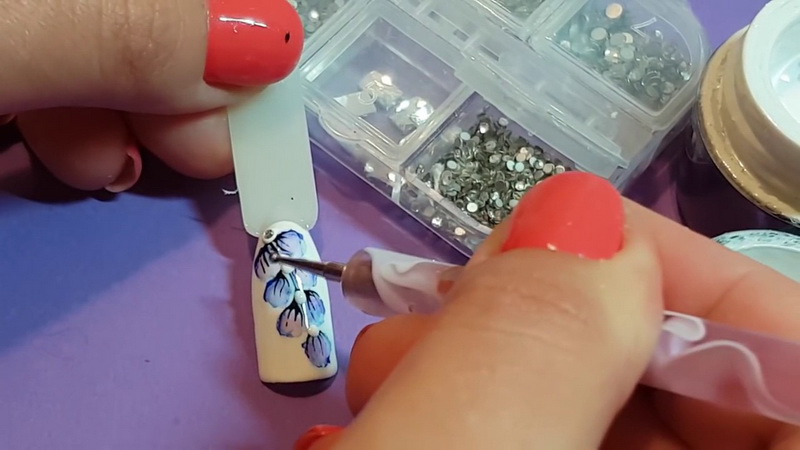
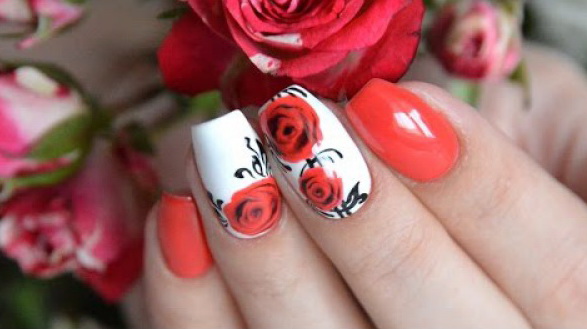
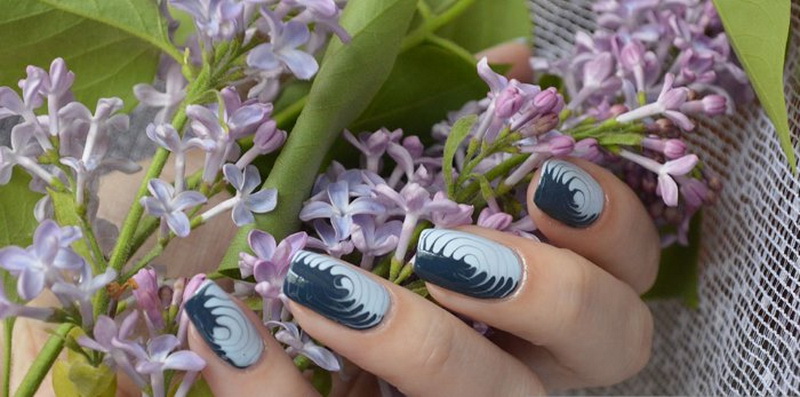
This is the most frequently embodied design on the nails. Floristic theme is always fashionable and in demand at any time of the year. The most often depicted on the nails rose. The type of this flower is most suitable for working in the technique of wet gel polish. Luxurious fuzzy petals seem to hover in the air. The picture is very interesting and voluminous.
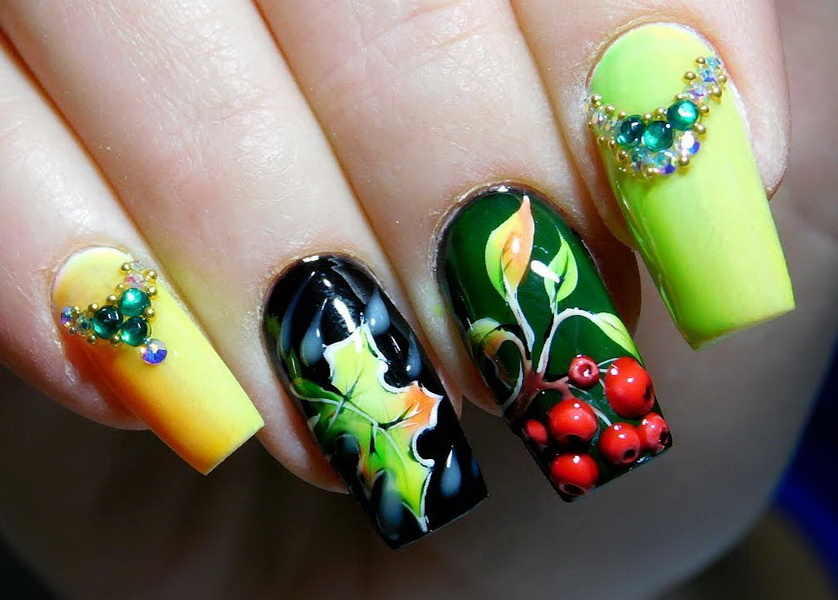
To obtain a bright result, it is important to choose the right color combination., then the manicure will look trendy and attractive. As a rule, such a design in itself looks quite catchy, so additional decoration in most cases is not required. Although you can use rhinestones. And add individual nails with a metallic rub in to obtain a contrasting combination of techniques in one manicure.
To create a winter version of manicure using luxurious velvet roses. Create them using the same technique. After drawing, only a pattern of leaves and petals is immediately coated with acrylic powder. The effect is amazing. Do not forget that in such a design, the top coating is not used, since it will destroy the charm of a voluminous fluffy pattern.
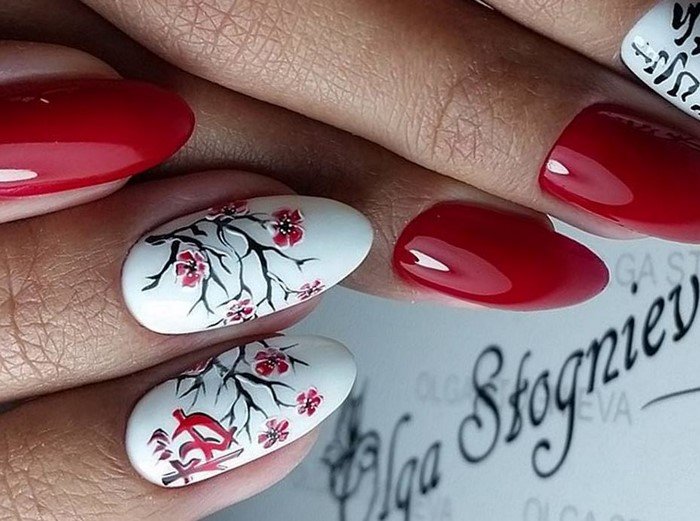
Not only roses are painted on a wet gel polish. Various leaves and blades of grass, twigs, cherry blossoms in a stylish blurry design are also popular. Perform in this technique and various tropical flowers fantasy. Patterns are obtained in the style of avant-garde - very fresh and fashionable.
Points and circles
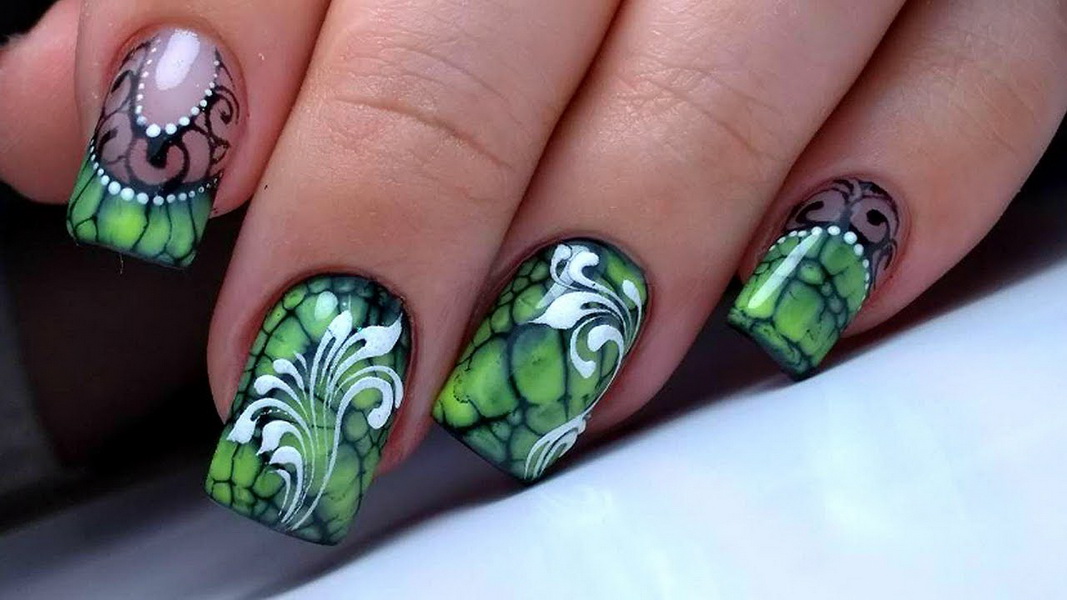
This is a very popular topic for beginners and those who want to refresh their image, but have not yet decided how. This does not mean that you can create only a simple design. Having mastered the technique, you can create on its basis a wide variety of complex patterns and shapes. It can be butterflies, fashionable design for a reptile, animal figures and fantastic birds, hearts - anything.
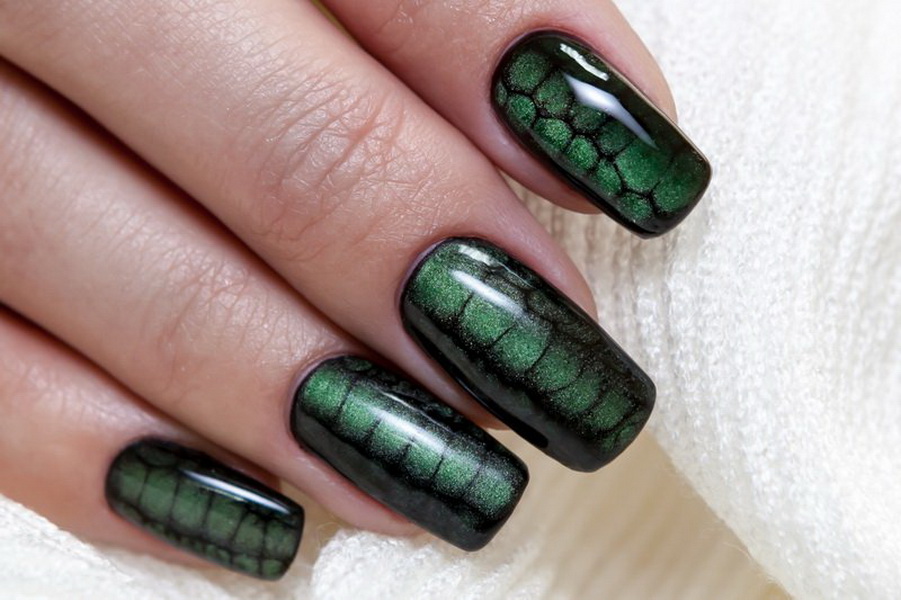
You can draw points randomly over the entire area of the nail or give them a clear direction. They are interconnected or superimposed on each other. In one manicure, you can use any number of colors. Popular visual effects from realism to the maximum (imitation of reptile skin) to free avant-garde in the spirit of impressionist paintings are popular. Often for such a pattern choose metallic gel varnish with the effect of "cat's eye".
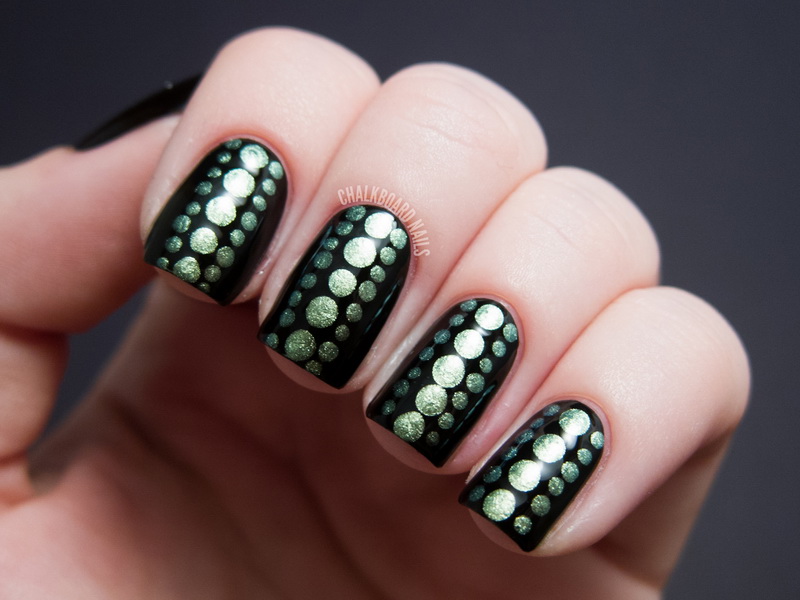
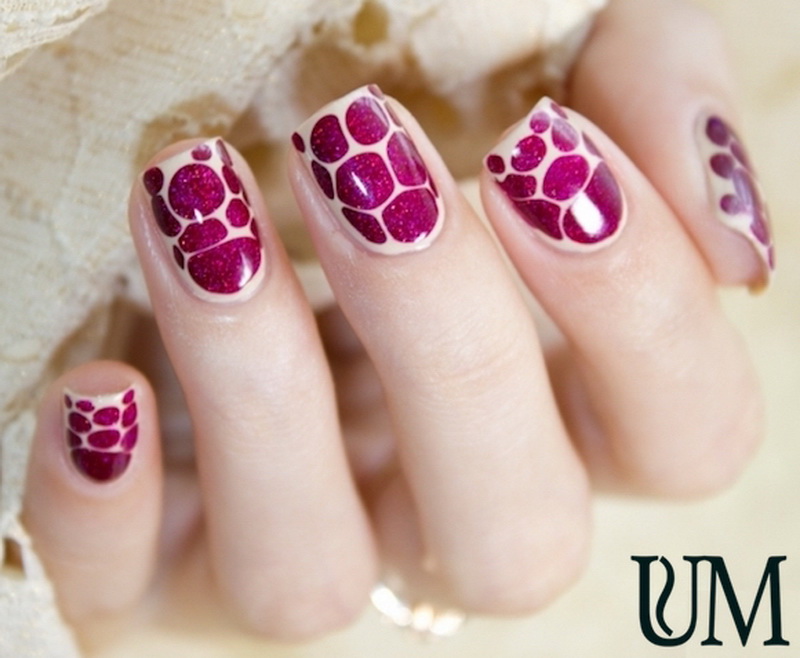
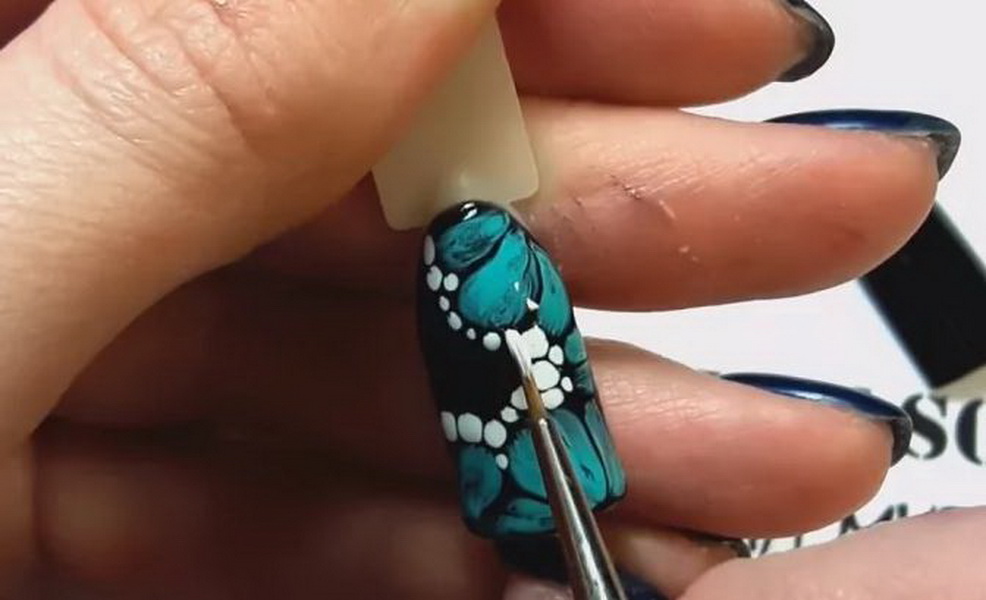
To create such a pattern is most convenient to use a special tool - dots. It resembles an ordinary pen with a round metal or plastic tip. The tool is very convenient, you can adjust the amount of paint taken and the thickness of the stroke depth of pressure. Beginners are advised to choose a versatile tool with balls at both ends: small and medium size. If it is not possible to buy a dots, you can use an empty writing pen or retro-pin for stabbing hair with rounded ends.
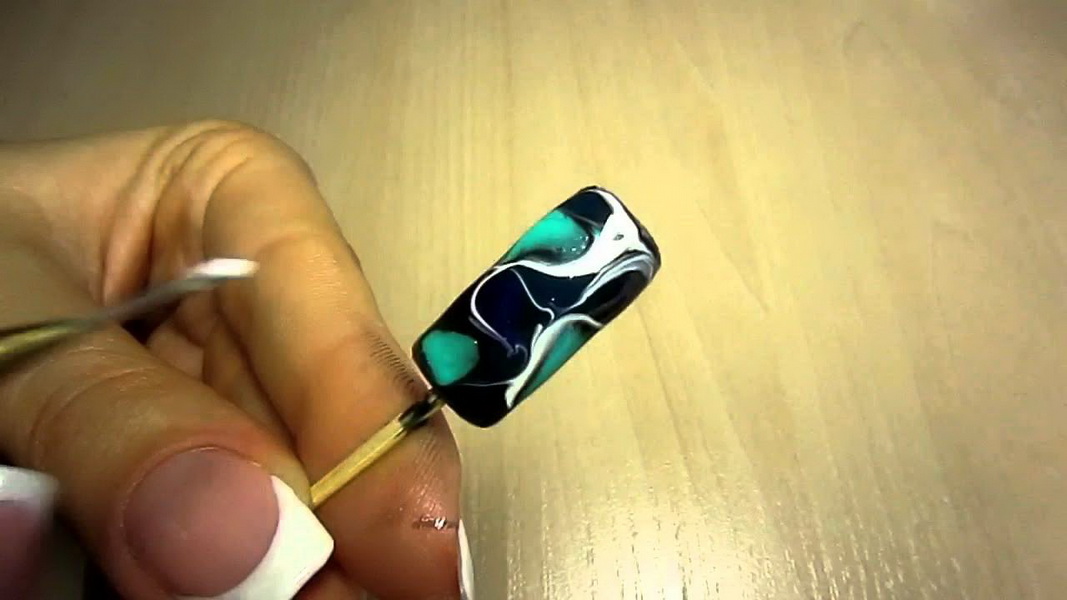
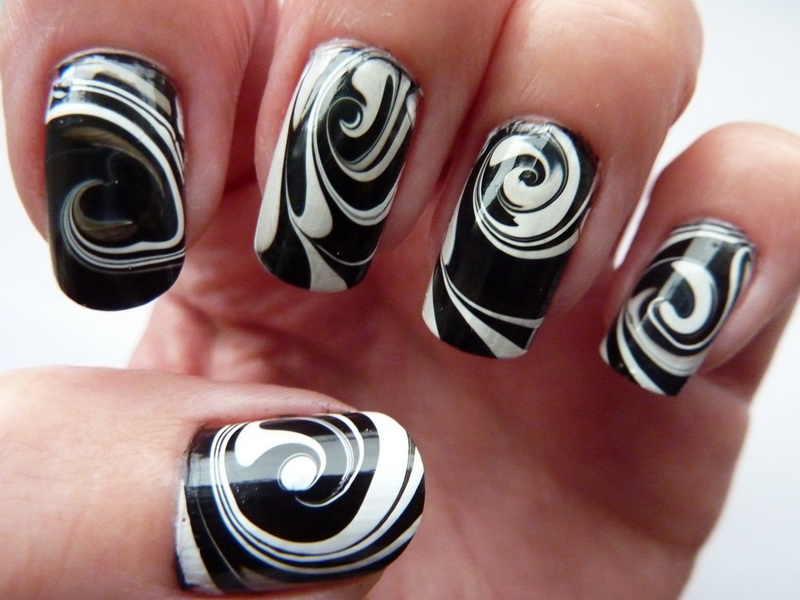
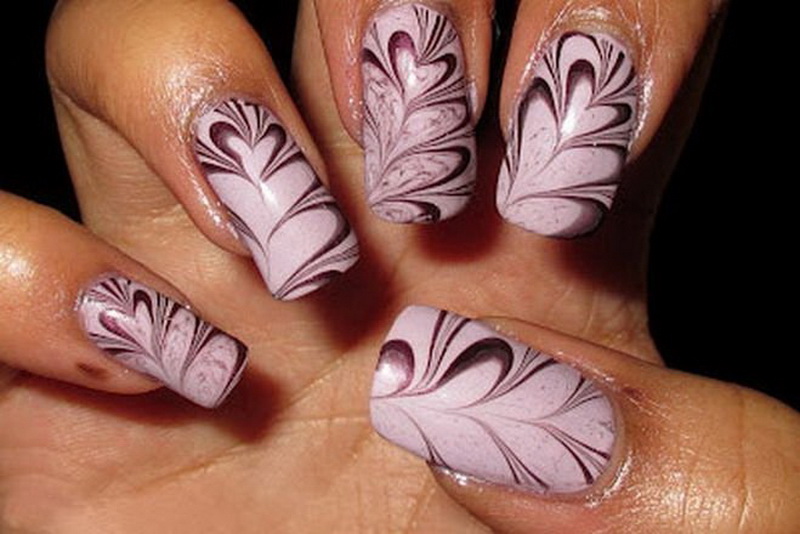
Marble manicure
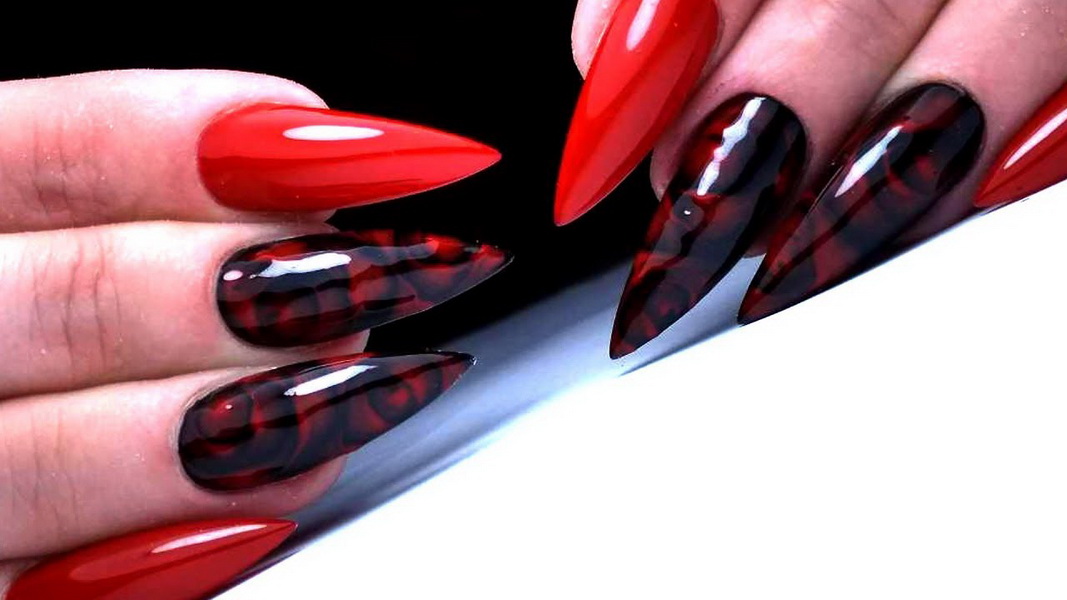
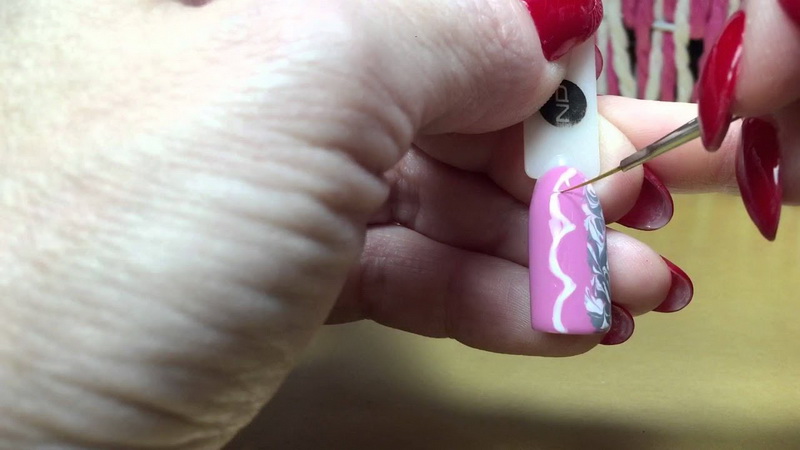
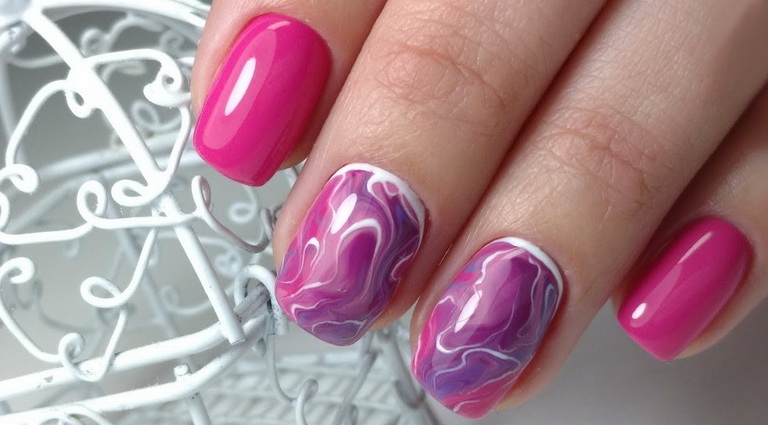
Extremely fashionable in the last season, the design looks amazing, and it is created very simply. Enough varnishes in two contrasting shades. Most often choose milk and black or malachite with gold. Thin streaks are created with a contrasting (usually darker) color using the thinnest brush. You can take any other available professional tool substitute: a needle, a toothpick, and so on.

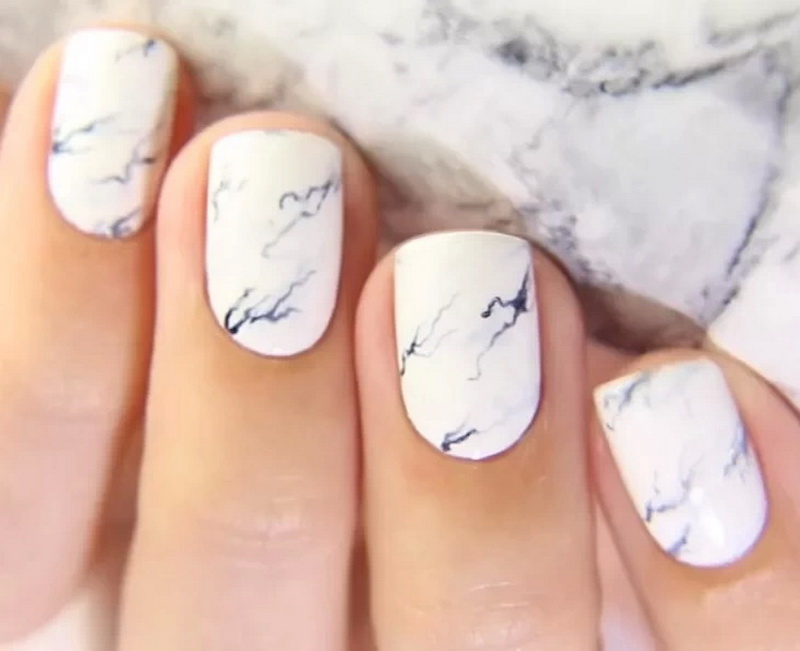

To obtain the most naturalistic effect, divorces are made as chaotic as possible, resembling a natural pattern on the saw cut of a marble block. It is necessary to alternate more distinct lines with thin branches - branches.
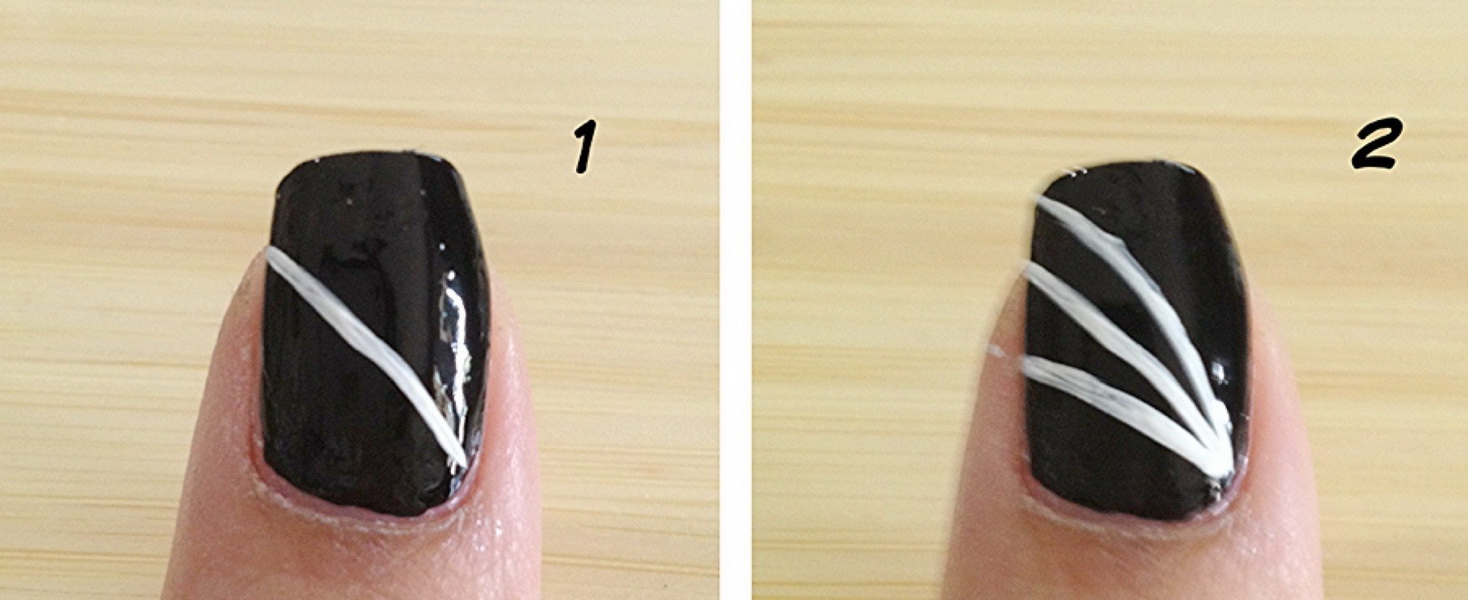
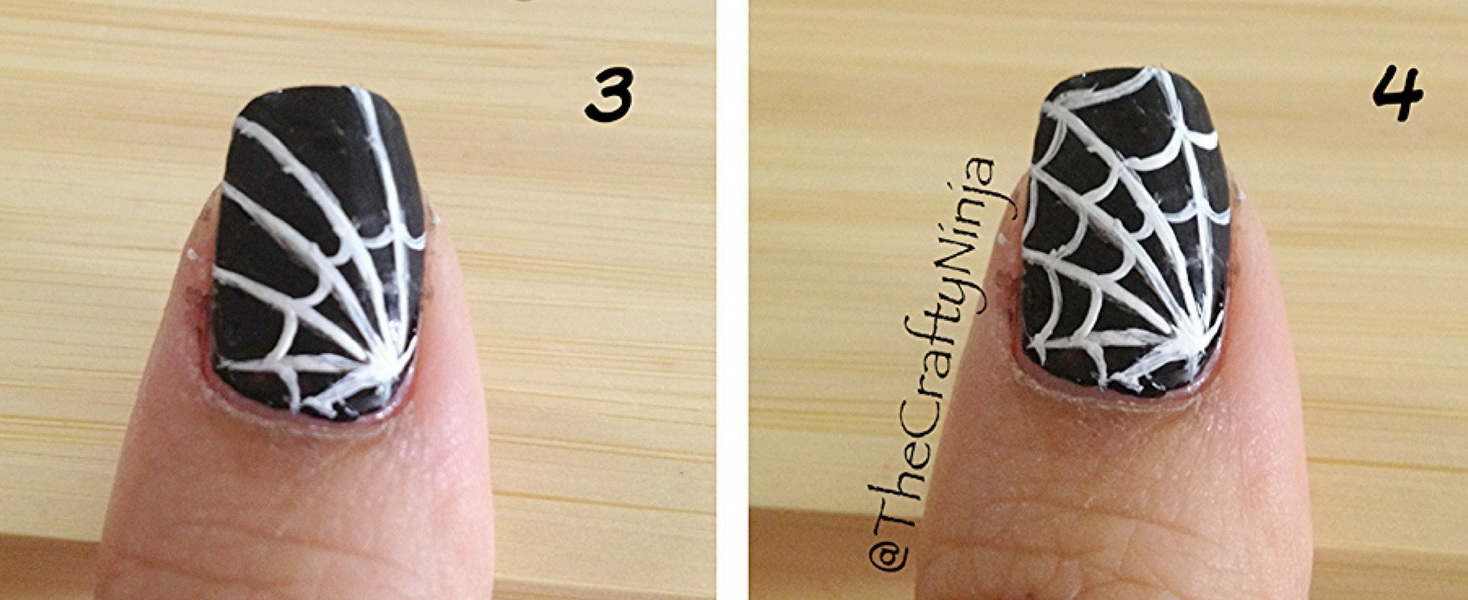
Web
This pattern will be appreciated by lovers of elegant solutions. If the usual lace design, mesh or veil is already tired, you should try a more modern version. At the same time we choose gel varnishes of the most contrasting shade and the thinnest tool for drawing a picture from yours. Traditionally, you can use two colors: the base and the “cobweb” or even several colors for drawing weaving threads.
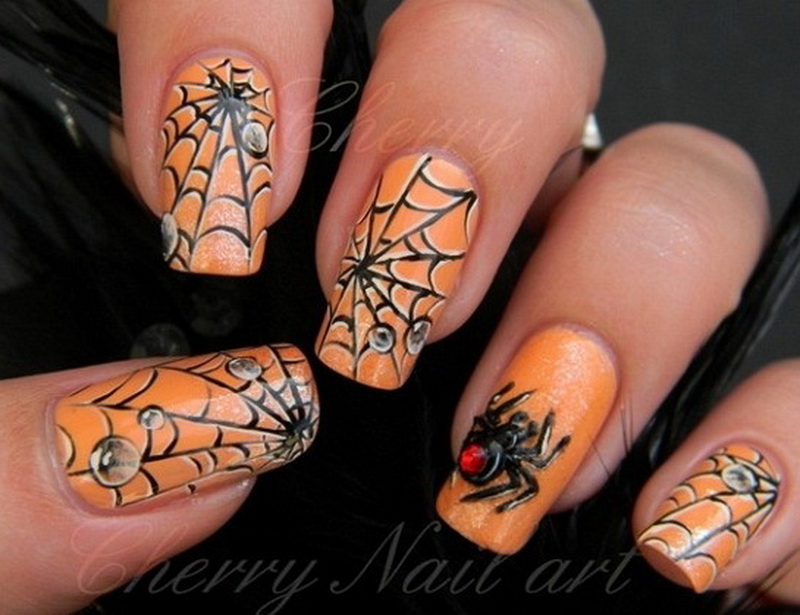
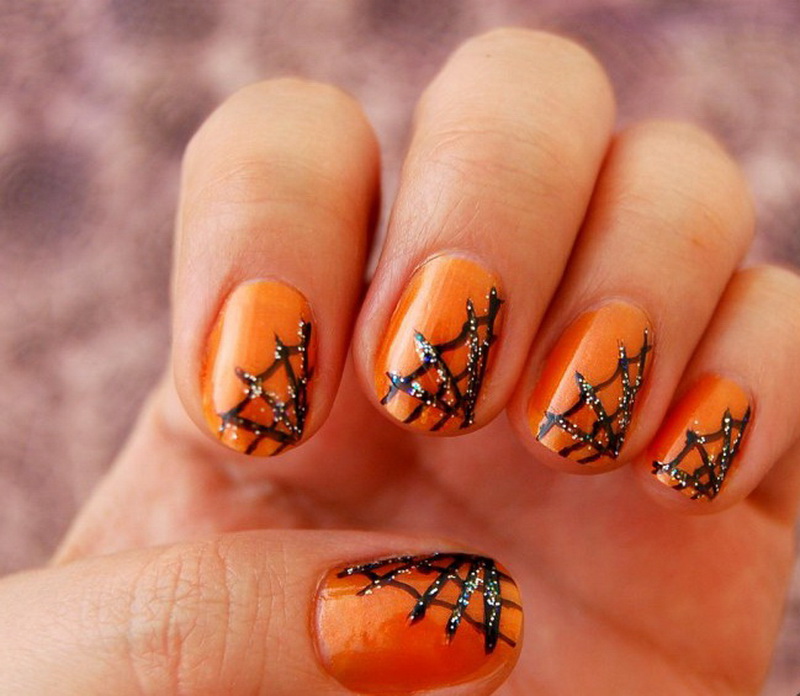
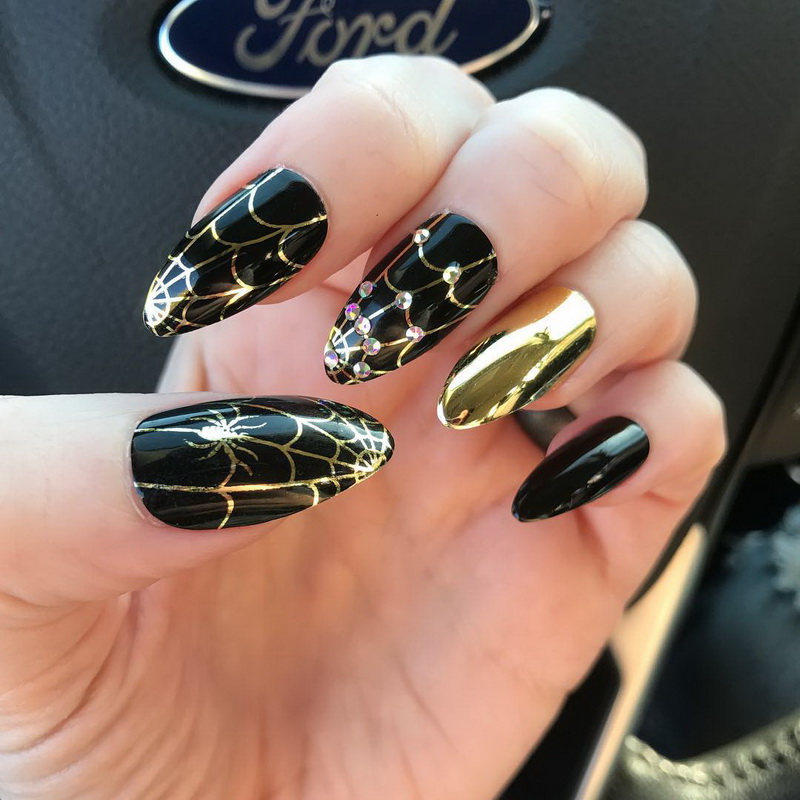
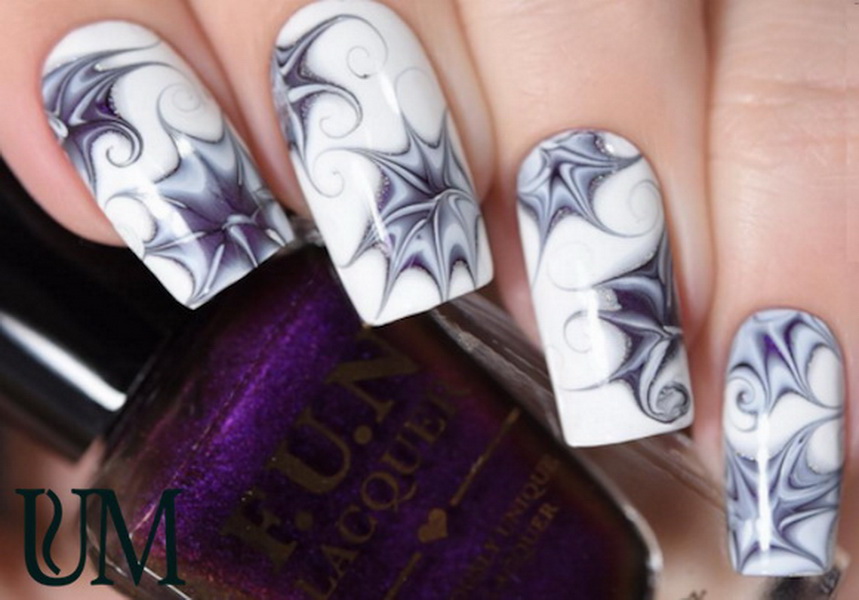
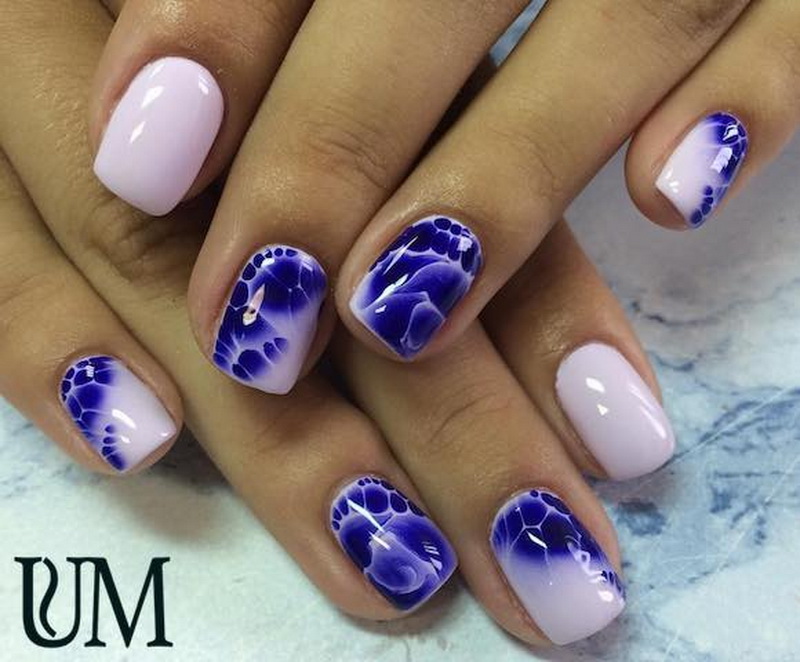
This also includes drawings based on different stains and spirals. In the right color scheme, they are beautiful in themselves. Also on their basis it is possible to create various fantasy drawings. The technology is pretty simple. Apply several parallel straight lines to the wet gel one after another, and a few more at an angle to them. For a less distinct stylized design, you can take a fan-shaped brush. It will take just a couple of movements in two directions. The black pattern on the nude tone and the golden threads of the cobweb on the deep black look very cool.
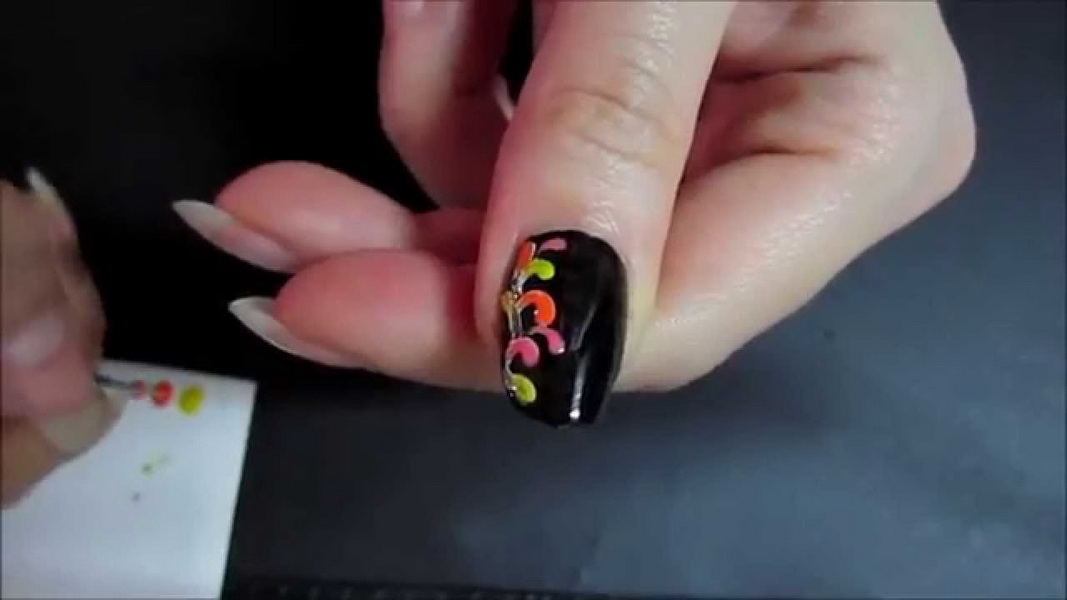
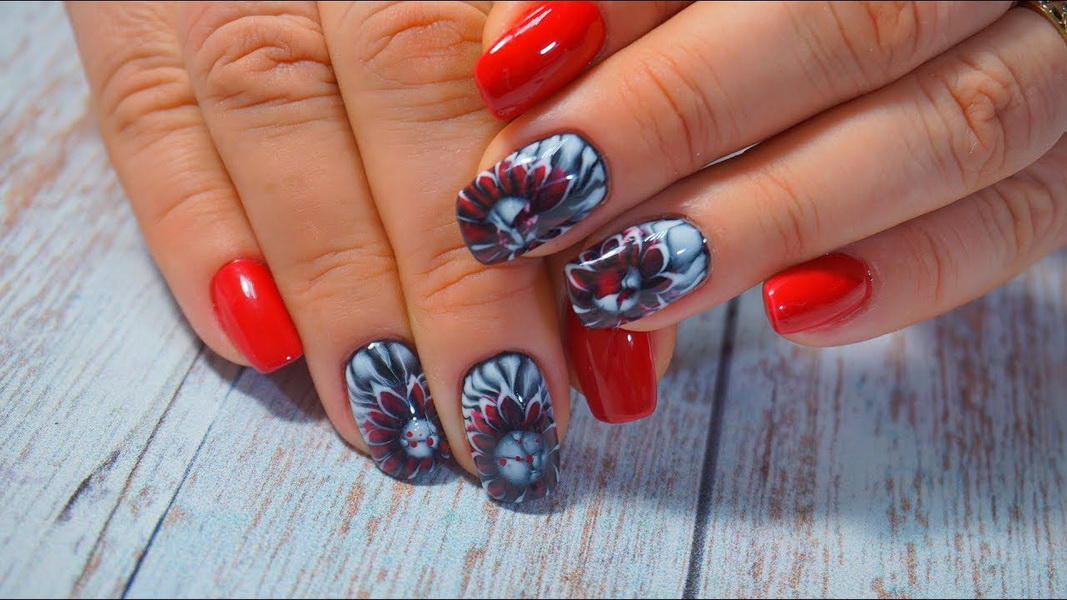
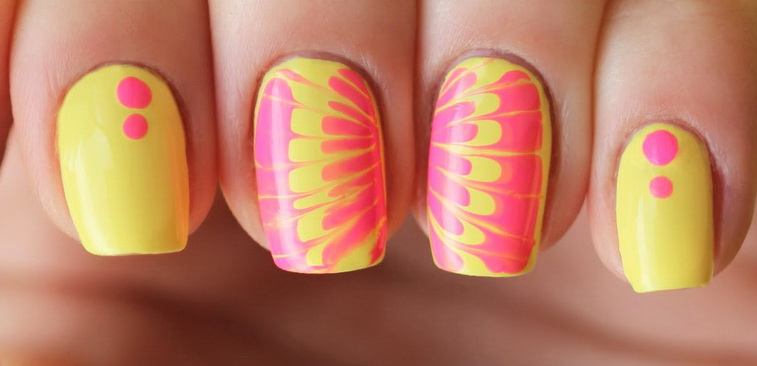
Abstraction
Here your imagination is not much limited. You can take a different number of colors and a variety of forms. Use popular geometric patterns, blotches in the style of children's astrakhan doodles or divorces using the Japanese Yuki flake technique. There are many options for creating a unique design. Blurred outlines look very gently, like the finest porcelain painting. For a different effect, you can add accents to the pattern from clear, volumetric outlines in white or black. At the same time, in order to obtain a stylish design, individual elements of the picture should not be strictly framed. It is better if the blurred edges go beyond the clear lines that repeat them.
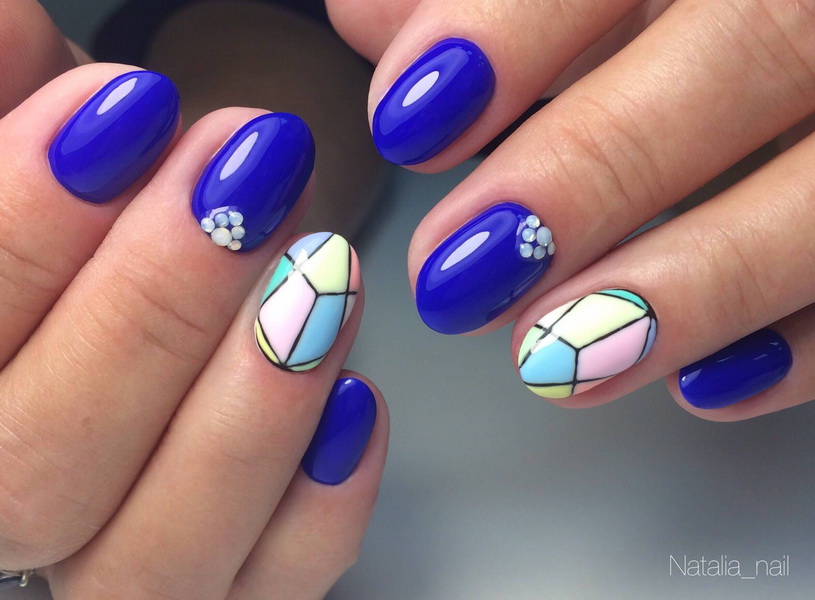
To create a picture, you can use a variety of tools and available tools. The more chaotic and ill-conceived the lines and elements, the more original the design can be. The plus of such a manicure is that it does not require special skills for its creation and is universal, as it fits different clothes and looks equally attractive on the nails of any shape and length.

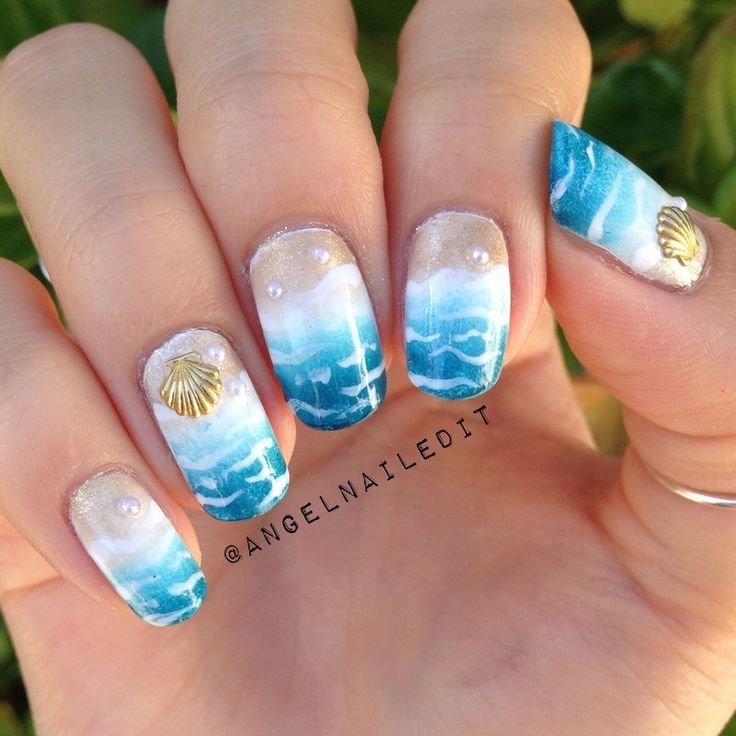
Seashells
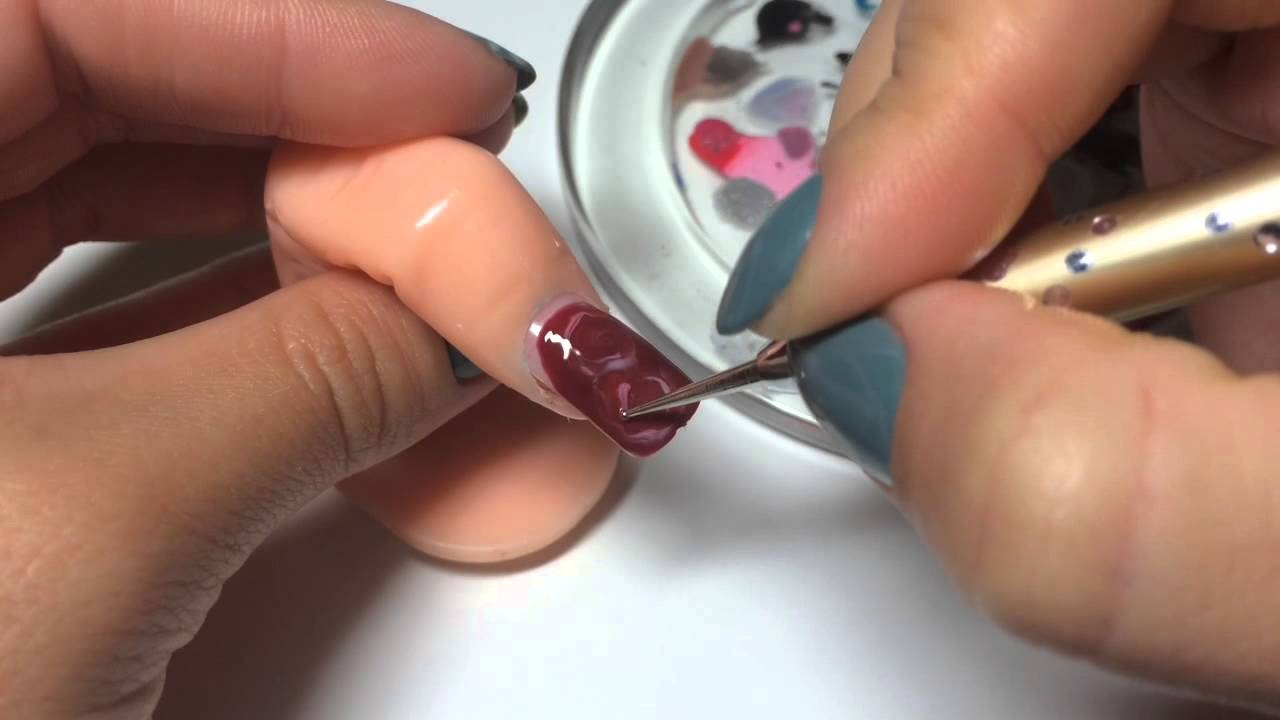
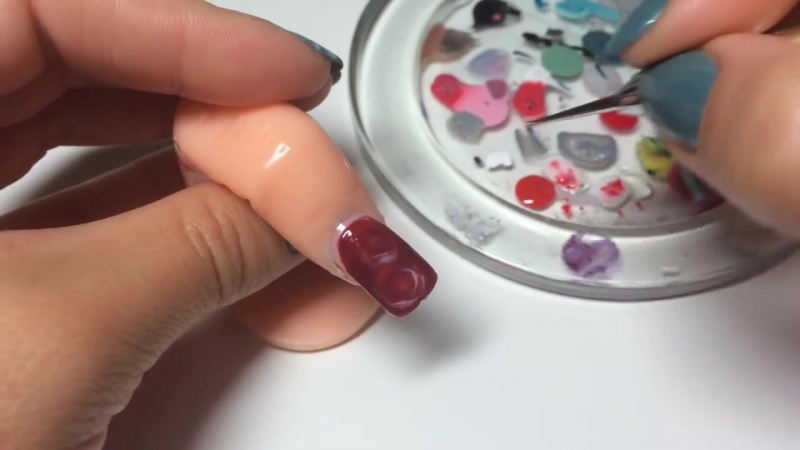
Imitation of seashells need not be performed in a color close to natural. Although blue-green tonality or noble mother of pearl in the painting is quite welcome. The drawing is based on the simplest elements - points. Dots will help you to cope with the task qualitatively. With it, on the surface of the nail plate put several points in the shape of a circle. The next oval of dots is made with a small indentation and a larger radius of area coverage. The points are connected together in a circular motion or in a spiral. To do this, you can use the same tool or brush.
Color spectrum
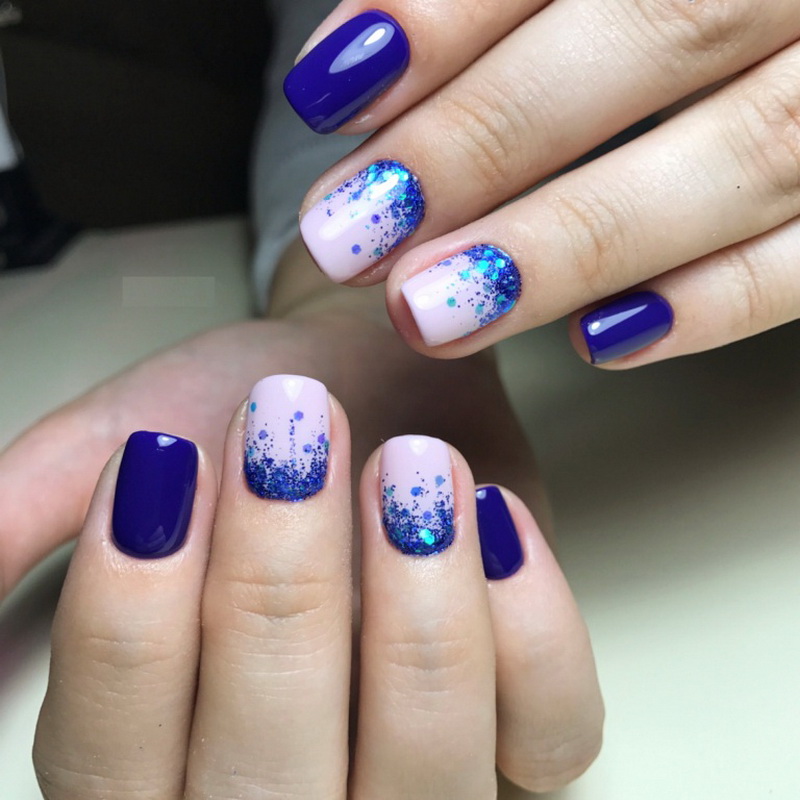
The popularity of certain shades changes every season. So, in the new use green emerald, chocolate shades, black, gold, all shades of burgundy, deep blue. Sometimes shortly forgotten combinations come back into fashion, for example, a chameleon and black. At the same time there is a color palette, which is considered a kind of classic, never going out of fashion. These colors form the basic basis for creating any kind of manicure: white and black, pink and milk, red and blue.
Less popular in manicure on wet gel polish nude delicate shades. So that they do not get lost, you should pick up a very bright contrasting pair for them. Choosing a traditional combination or metallic color, you definitely can not go wrong. The trend is also deep purple, lavender, screaming fuchsia and coral. Different shades of gray can be used to decorate the background.
Scheme
If you doubt your capabilities or have never created gel polish drawings, it is worthwhile to step through a simple technique of execution. The most popular among the fair sex are tender feminine floristic motifs. Rose is the queen of flowers and an exquisite attribute for decorating nails of any length and shape. You can draw a flower using the following instructions.
- We prepare nails under the primer. Remove the old coating so as not to leave a trace. We make a warm bath with hand salt with a temperature of about 40 degrees. Remove the cuticle as you usually do.
- Select the pattern and color of the future coverage. They should be harmoniously combined with the shape and length that you set your nails.
- Level the surface with buff and degrease. Cover with primer. Lay out the tools to create a pattern on the table.
- Be sure to cover all the nails with base gel and dry under the lamp for 1-2 minutes.
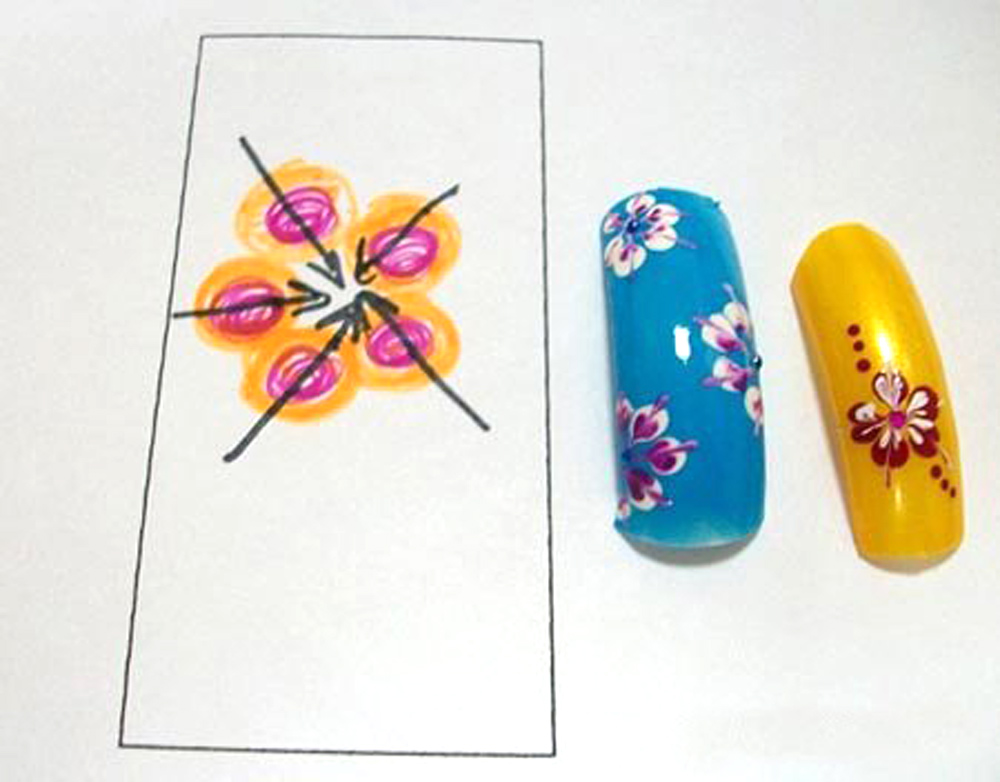

- We take color gel polish for the main background and apply a thin layer, then send the nails to the polymerization. Next, we work with each finger separately, with the fixing after each pattern on the nail plate.
- Cover the nails with a second coat of varnish. On it, without drying out, we place dots or a brush with dots, which we gently draw in flower petals or any other pattern with one easy movement.
- If necessary, add additional décor to the still wet layer.
- We give gel polish a little drip. In this case, the picture can mix with the main background a little, interesting color transitions are formed. This process takes about 10 seconds.
- Dry the resulting picture under the lamp for 3-4 minutes. Cover the top and remove the sticky layer. Do not forget to carefully cover the gel and finish the end side of the nail.

Possible errors when applying
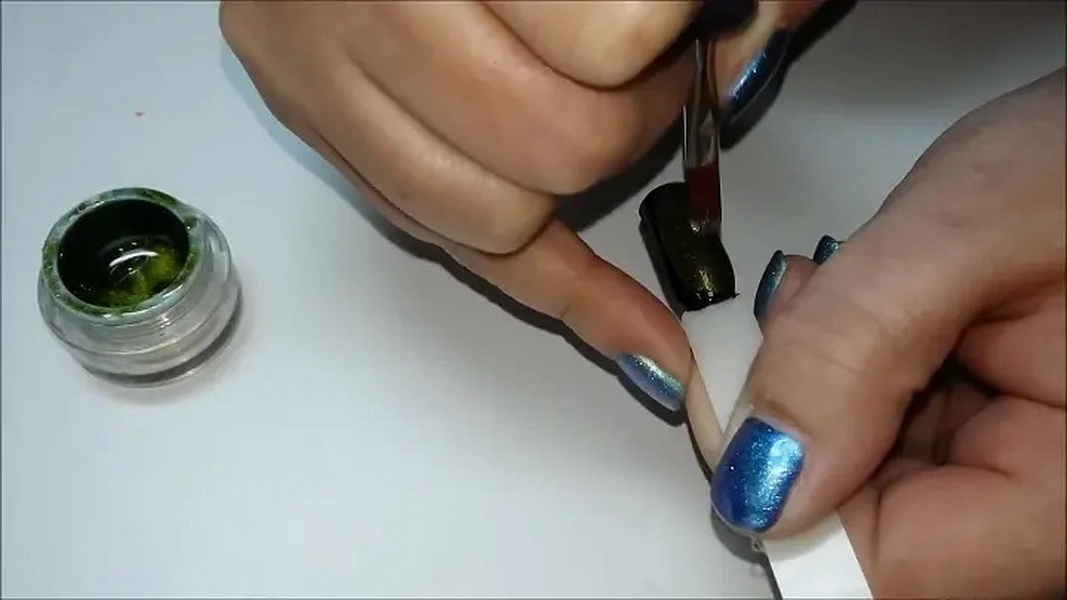
It is very rare that even beginners complain that they did not succeed or the design for a wet gel polish turned out unsuccessfully. Most errors occur at the initial stage of creating a coating or when choosing a tool to create a fashion manicure. Often, girls incorrectly choose the quality of gel polish. It should not be too watery, so as not to flow from the nail. However, thick varnish will be the wrong choice: it will not be able to create the desired spreading effect.

It is best to choose a coating of one manufacturer or special varnishes, designed to create the desired spreading effect. Then you can get good quality and predictable behavior gel Polish. Often, masters create an insufficiently high-quality, dense basic background. Apply at least two layers.At the same time, each is applied as accurately as possible, carefully drying and applying quite thinly.
When creating a drawing movement must be clear. Do not spread or hold several times in a single line. We immediately make free strokes from points in the form of straight, various zigzags or “commas”. Sometimes novice masters remove the sticky layer from one of the coatings before applying the wet layer. This should not be done. It provides the desired spreading and optimum adhesion of the gel-varnish layers to the nail plate or to each other.
Beautiful examples
Creating your own version of popular design, study the trends and follow the advice of experts when performing technology. Use contrasting colors of gel polishes. Do not be afraid to experiment with color nuances and shapes. Make your unique manicure with an impressive trendy pattern.
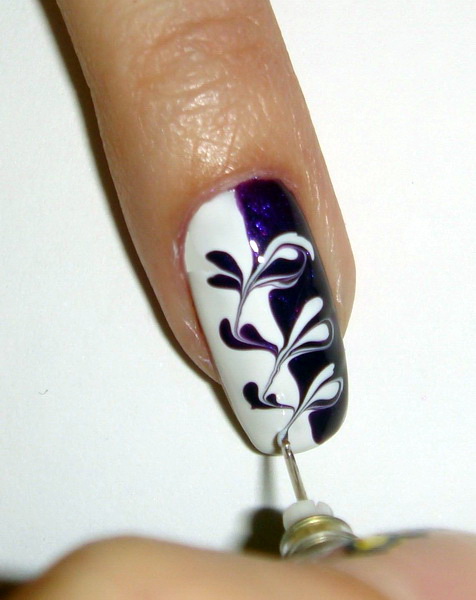
- Such an original design requires for its embodiment gel varnishes of two colors and a toothpick or a thin brush. Actual color sets the tone. Manicure is suitable for any style of clothing.
- Different lines and points serve as an excellent basis for drawing in different style and thematic areas. Here is such a summer positive manicure with grapefruit slices obtained on a wet gel polish.
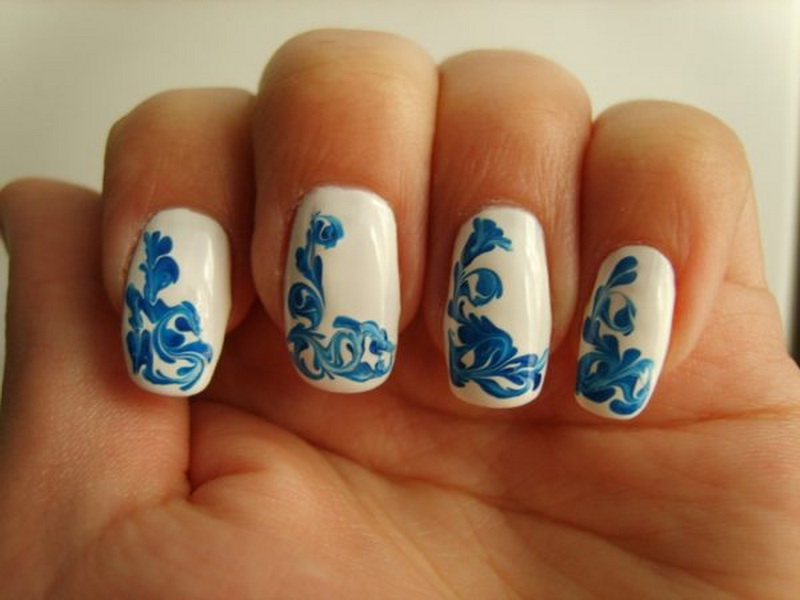
- Gentle monograms and curls created in the classic colors of milky-blue Gzhelevskoy painting. Manicure for real aesthetics.
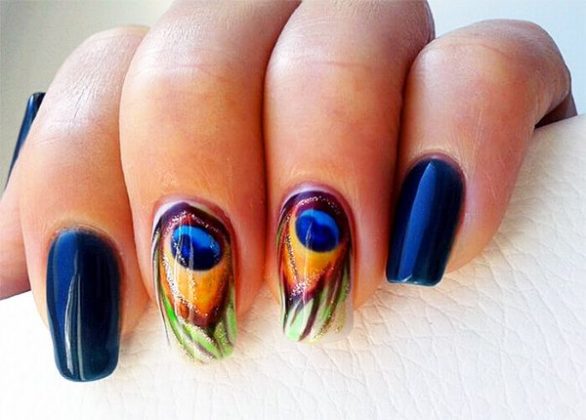
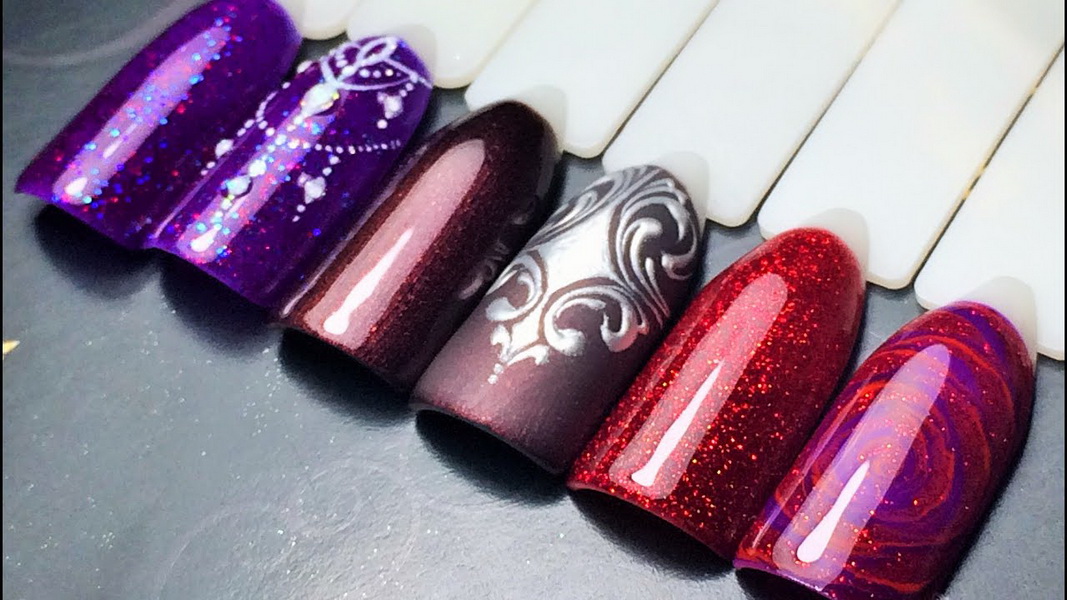
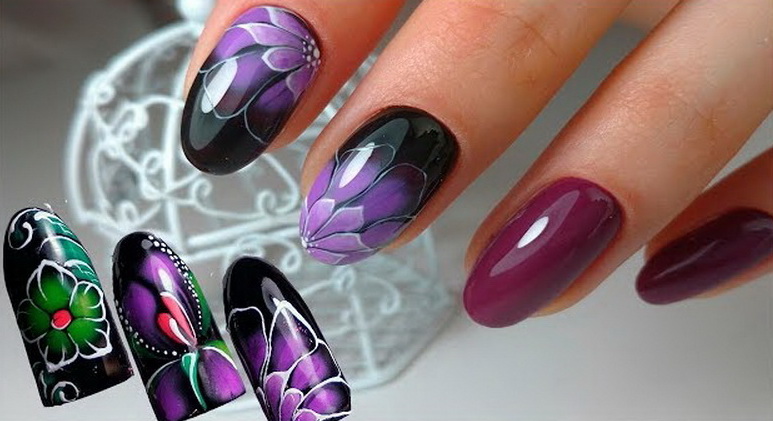
- You can perform in the technique of wet painting only a couple of accent nails. The darker and deeper the background, the more vividly the image appears.
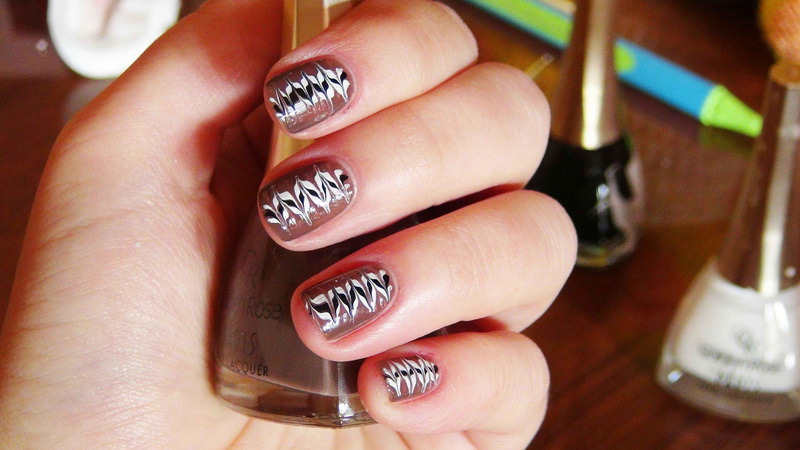
- Divorces in graphic style look good on short nails. The actual color of milk chocolate is suitable for a restrained manicure in the autumn-winter season.
- Tired of the usual pictures? Making a unique pattern. Polysemy is welcome. These are original flowers or stylized hearts - everyone sees what is closer to him in mood.

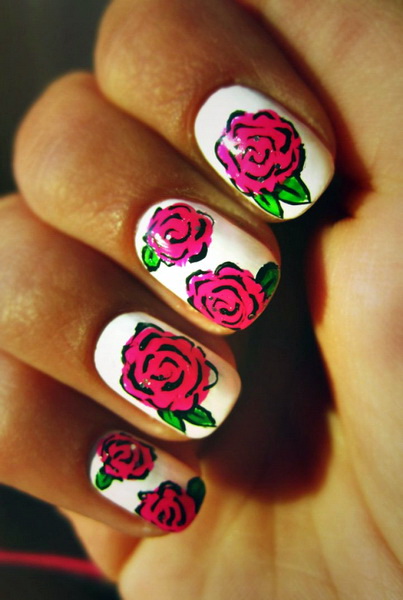
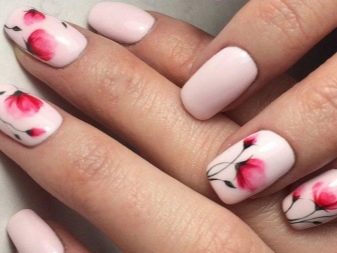
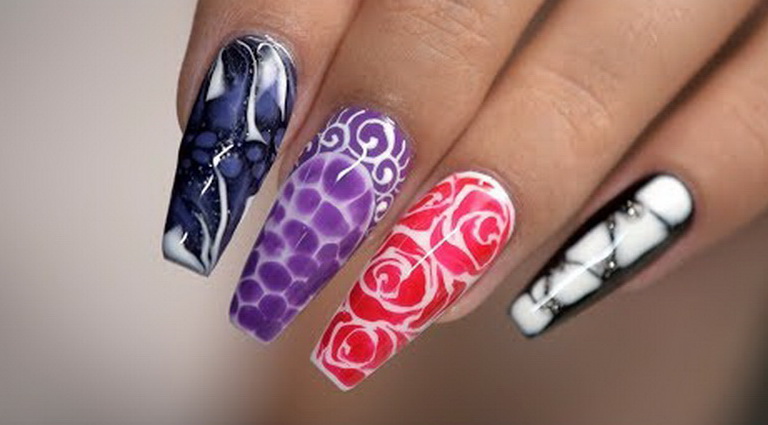
- Roses using the wet gel polish painting technique are just as alive. Actual colors do not go out of fashion - in favorites black, white and red. I want a little more luxury - add rich green and gold.
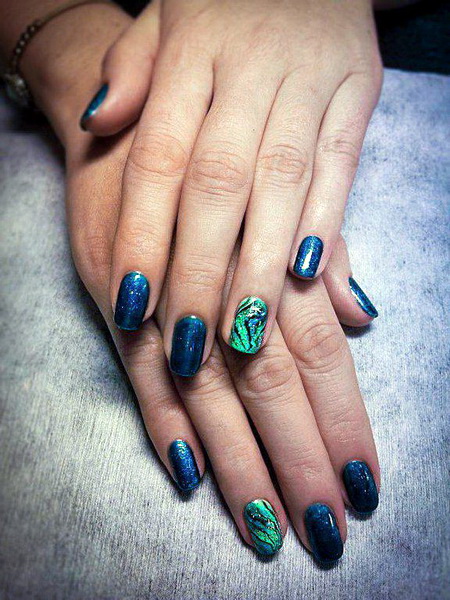
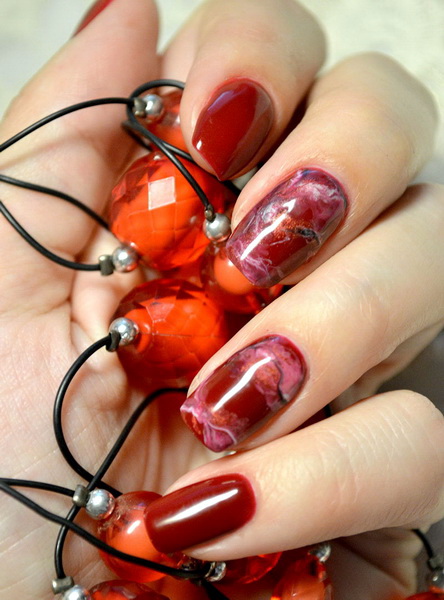
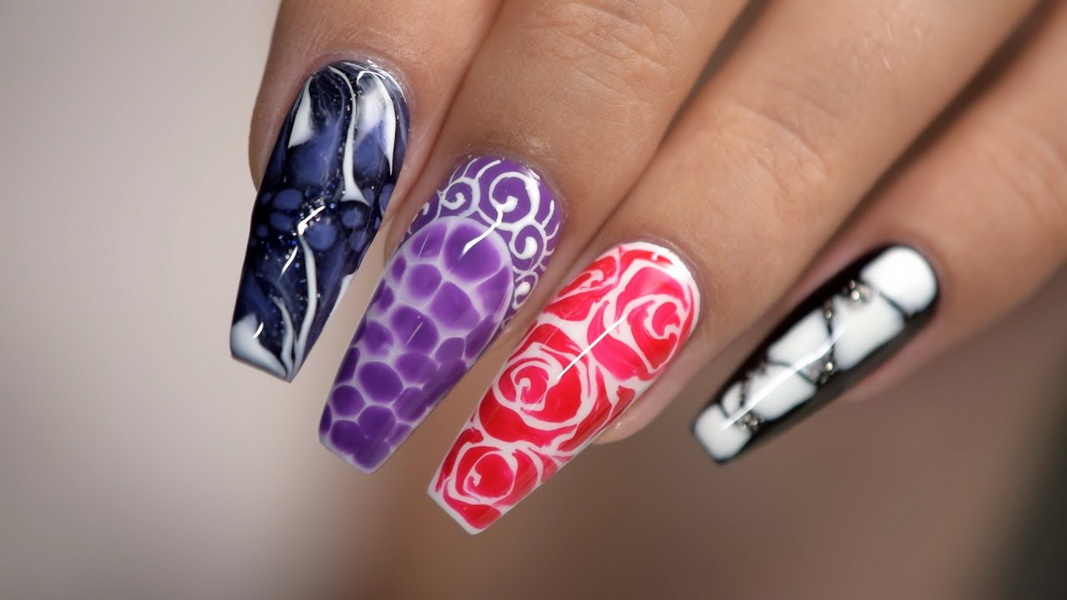
- Fashionable effect of natural stone or granite stains just like on a real mineral is easy to create. It is important to choose the right color combinations.
- The simplest pictures can carry several trend motifs at once. Fashionable geometry, a combination of classic contrast, popular Asian themes in the symbolism of yin and yang look unusual.
- Within one manicure, you can combine several different motifs for painting. Combines their unified technique of execution. The combination of colors of a peculiar tint range was also successfully chosen.
To learn how to properly design nail polish for a wet gel polish, see the following video.


