Aquarian build-up is quite a popular trend in nail design. Such marigolds always look festive, original and unbroken. What features of the manicure "aquarium", what are the positive and negative sides of such a design, let's consider.
Advantages and disadvantages
Aquarium building is a way to lengthen the nails, in which various decorative elements are laid into the layers of the gel. As a result of such a manicure on the nails formed a design, closed under a thickness of "glass".
There are a number of advantages to this type of finger design.
- Manicure "aquarium" pretty racks. It can be worn for three months. The only thing that needs to be done is to slightly correct the edge of the cuticle, file the regrown shape and finish drawing.
- All decorative elements are located in the thickness of the design, so they do not rub themselves in the process of socks, and also do not cling to clothes.
- The presence of such a manicure does not require additional decorations on the fingers, the nails themselves will focus on your hands.
- Suitable for both long and short nails.
- This method of extension allows the master to create a unique design with three-dimensional images.
But there is a slight drawback in the aquarium building.
- The technique of this manicure is quite complicated, so it is better to trust the professionals.
- "Aquarium" is always quite bright, so it is not suitable for business style. It will be necessary to block it with calm monochromatic varnishes.
- Such nail art is quite expensive in contrast to surface design.
- The nails in some cases turn out to be thick.


Application Method
If you have already mastered the technique of nail gel, you can try to create on the nails "aquarium" yourself.
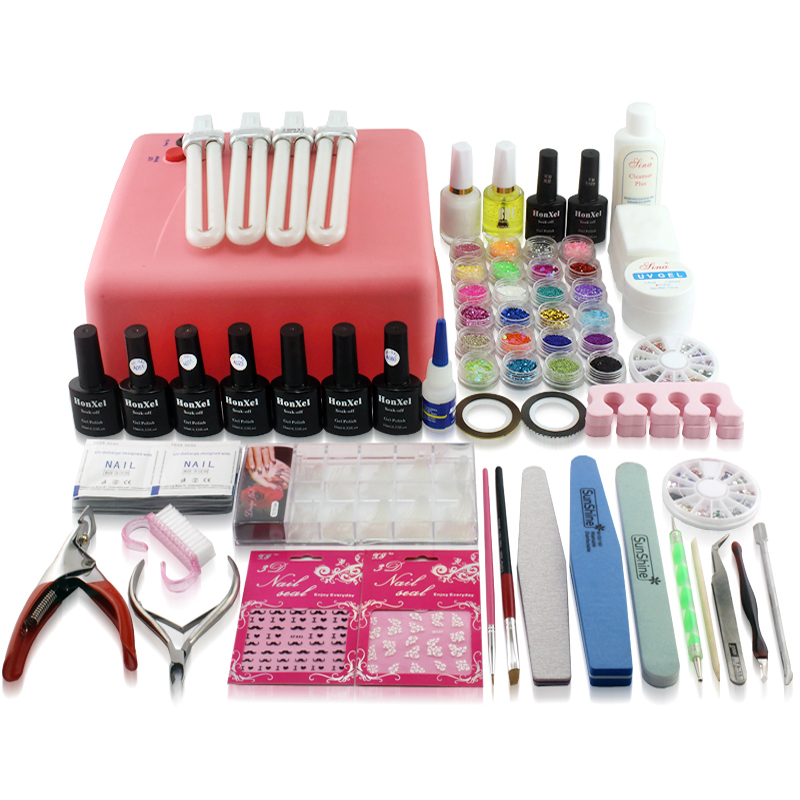
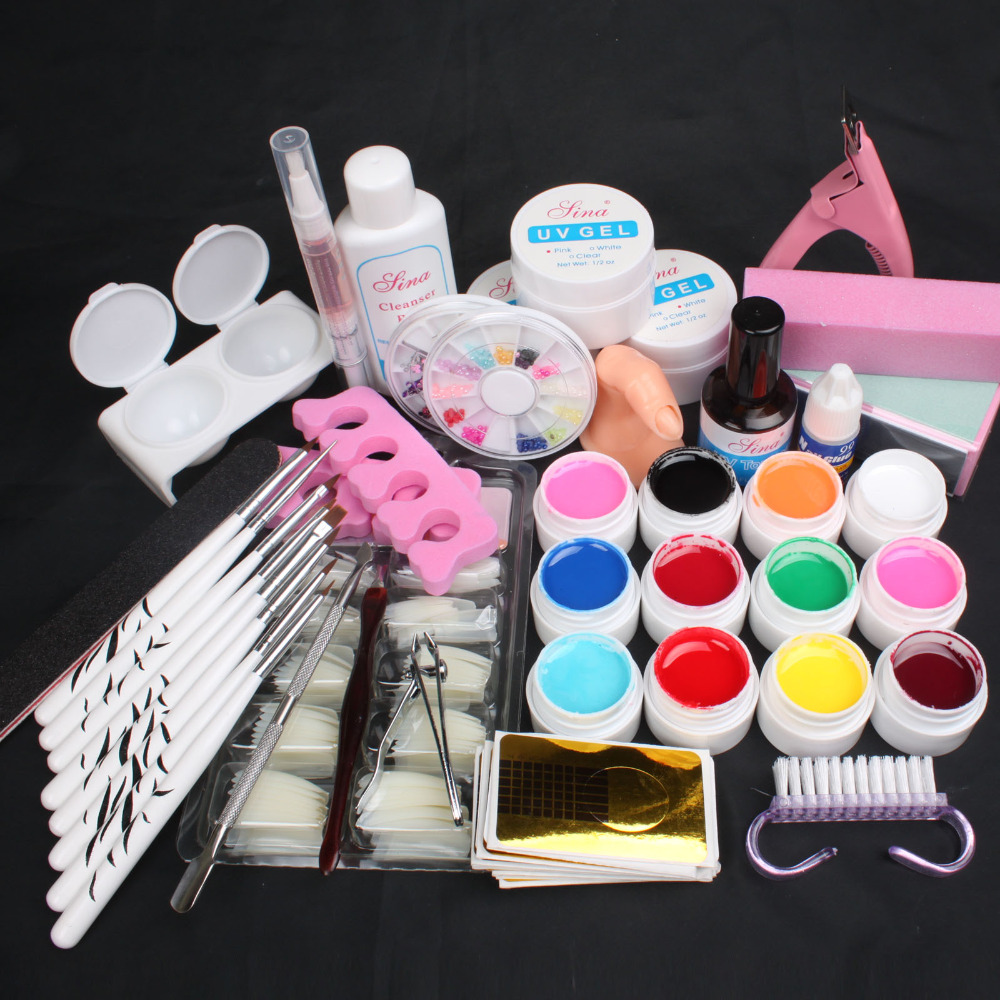
To do this, you will need the following materials and tools:
- files with abrasiveness 180 and 250 grit;
- pusher and orange sticks;
- flat brush with synthetic hair;
- degreaser;
- primer;
- gels - transparent, camouflage and color, if your design implies them;
- decorative elements - everything that you want to put in the thickness of the nail, for example, it can be rhinestones, sparkles, dried flowers, acrylic pastes and much more.
Finish coat
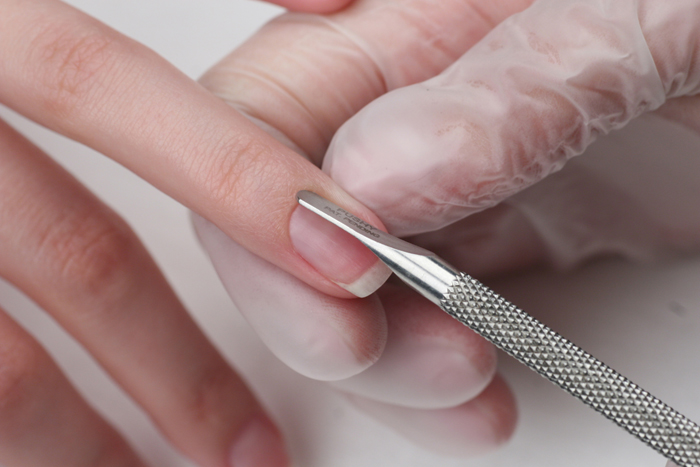
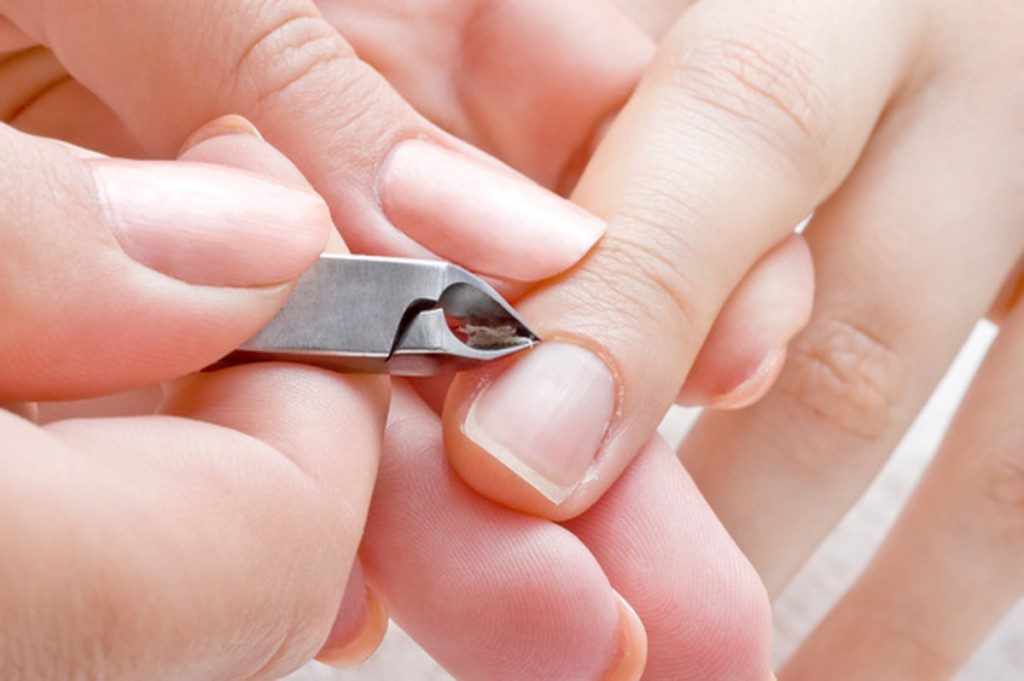
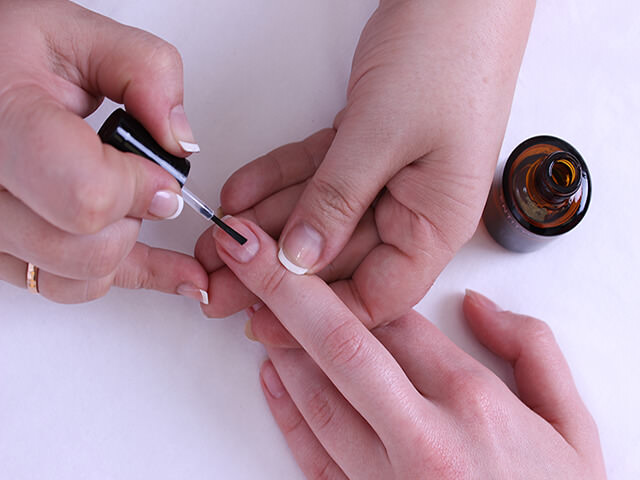
Having collected everything you need, you first need to prepare your nails to build. To do this, push the cuticle with the pusher, clean the pterygium well, cut off the excess skin and cut it over the plate, removing the upper layer.
Next, we sweep away the dust from the nails with a dry brush, treat them with a degreaser. Here you need to use a special tool. But if it is absent, you can replace the degreaser with alcohol or vinegar.
In the next step, a primer is applied. This composition does not require drying in the lamp, it is intended to make the surface of the nail plate rough for a stronger grip of the gel and the nail.
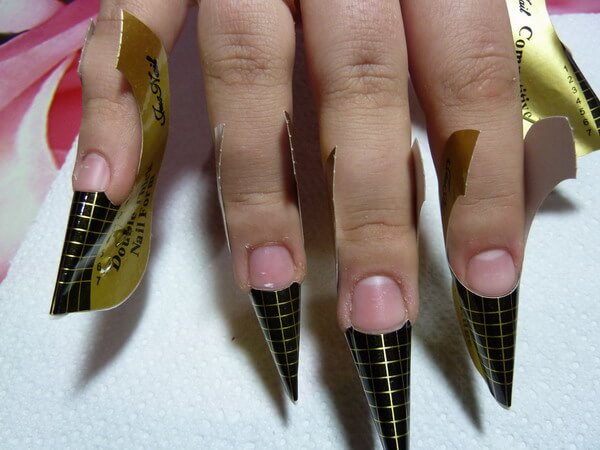
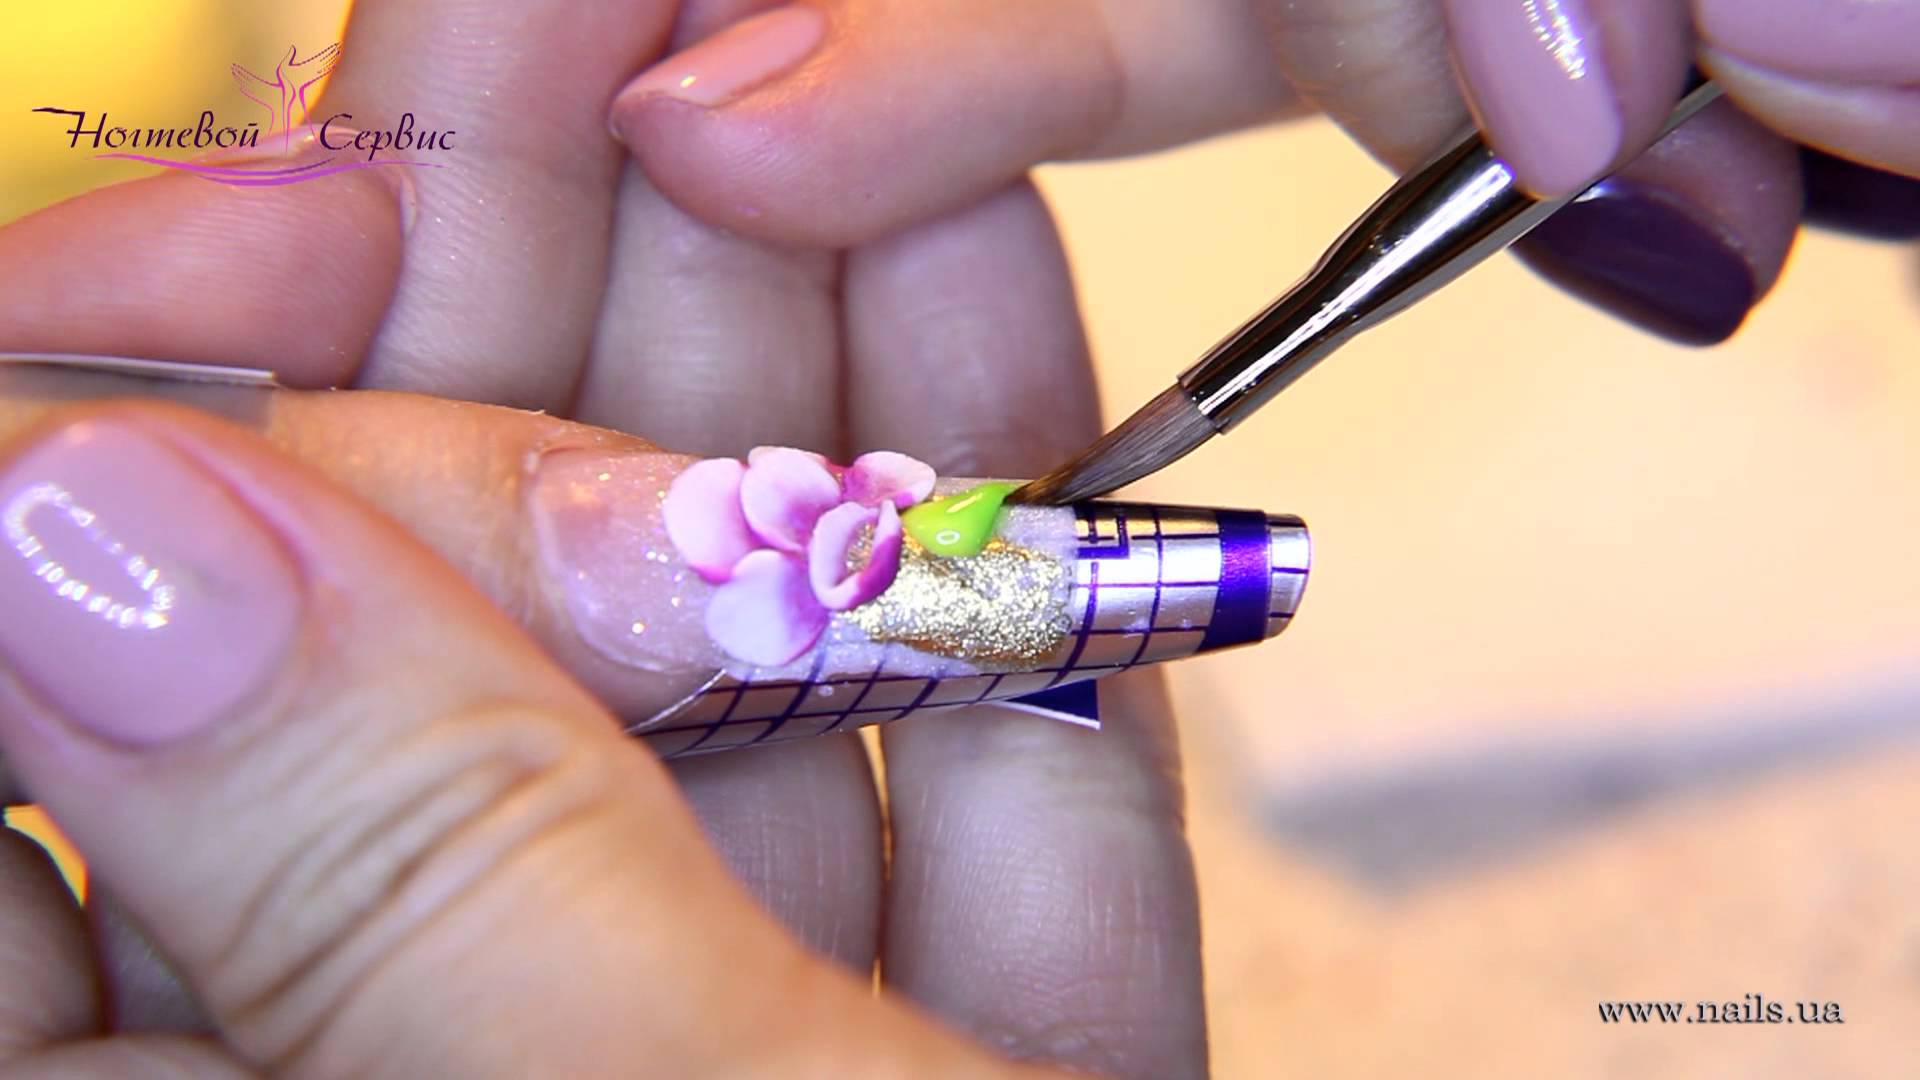
Now you need to set the form to build. To do this, under the edge of the nail plate we start the conical part, gently fasten it. We check if the form has exactly sat down, if there are no gaps between it and the nail plate, if necessary, slightly trim the workpiece with scissors.
Apply a thin layer of transparent gel on the surface of the nail, moving to the form. We form the desired length. Letting the line up a few seconds. Dried in the lamp.
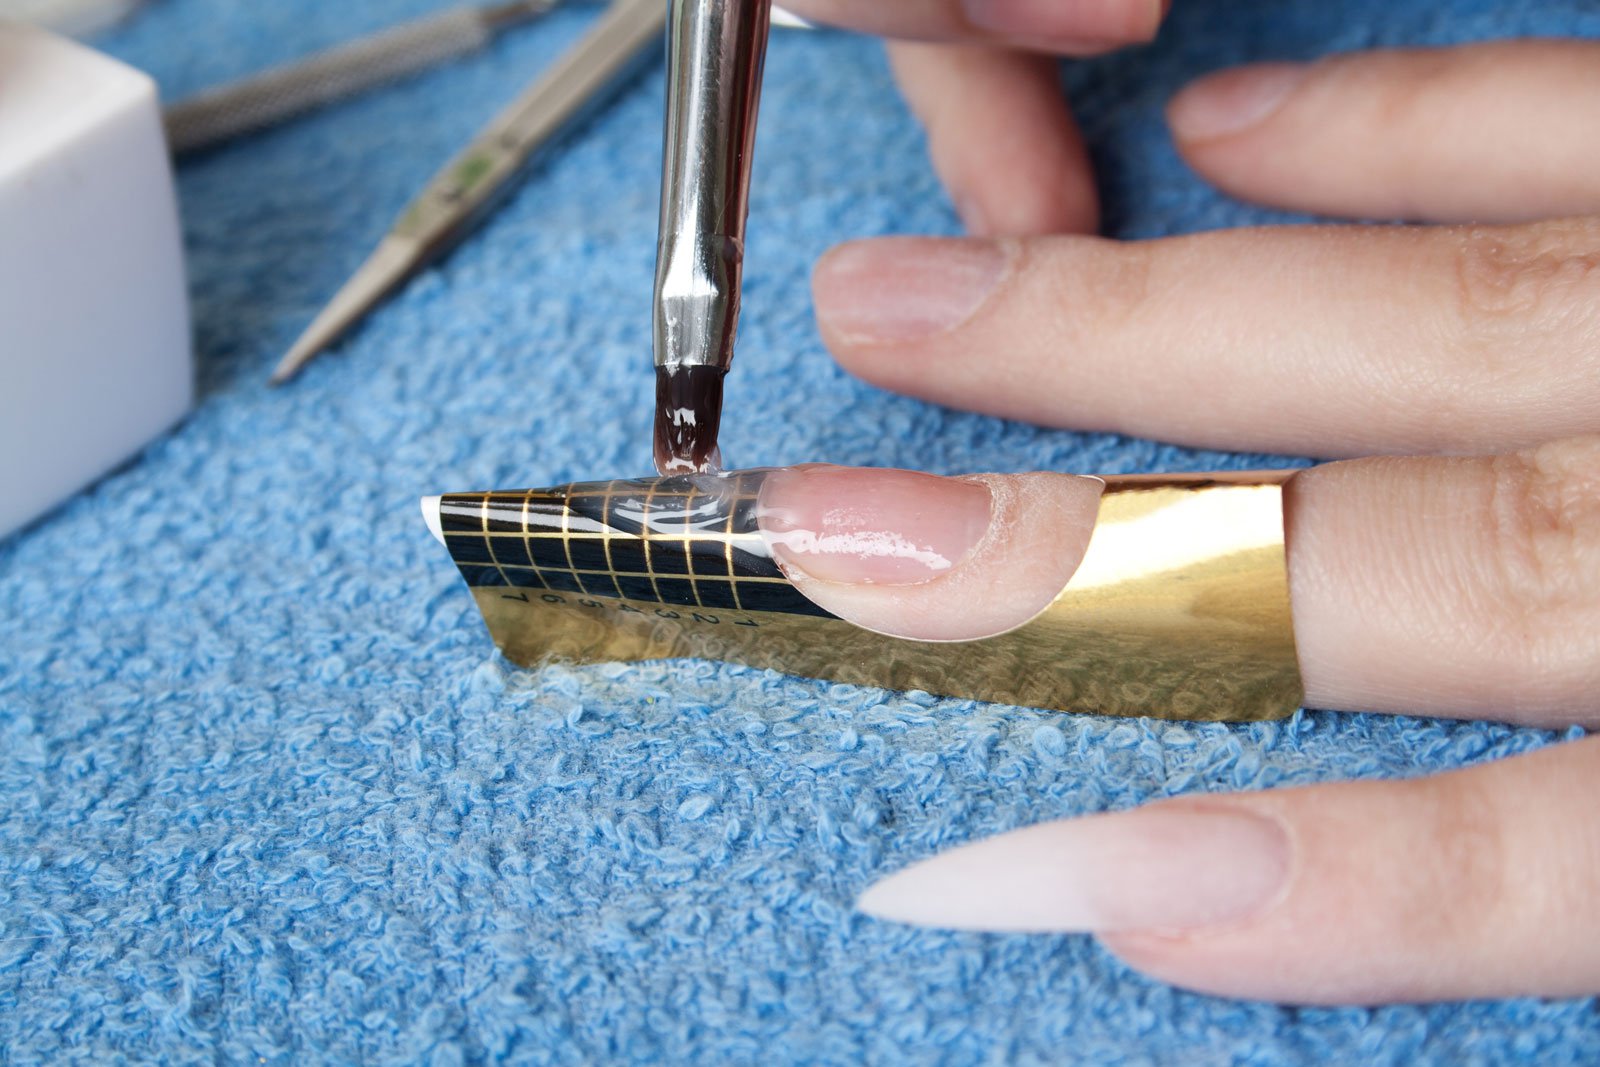
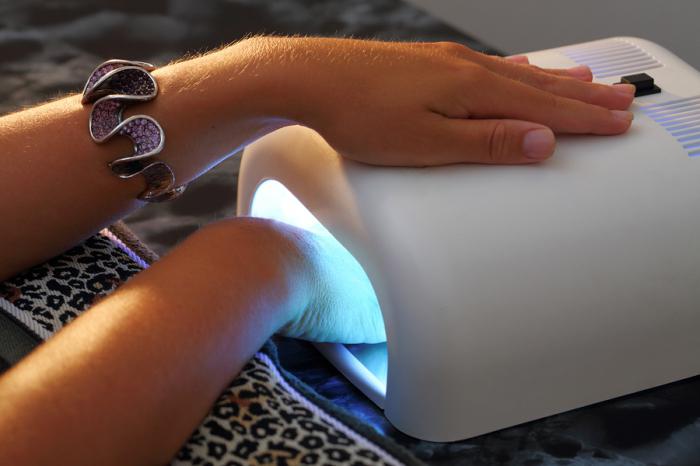
Take camouflage gel. Put a drop on the nail plate, arrange the gel so as to simulate the skin under the nail.The gel layer should fade to the cuticle and lateral rollers, then the transition will be hardly noticeable when the nail plate grows. Again dry in the lamp.
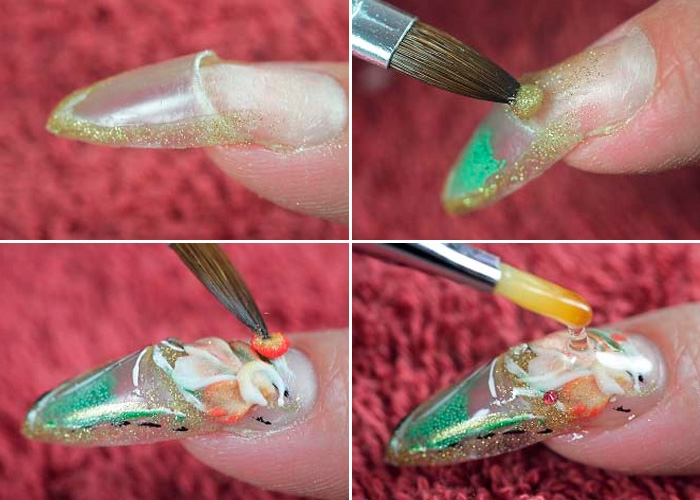
On the free edge we put the first layer of the design and overlap with a transparent gel. At this stage, volumetric elements are usually used, since the layer here will be the thickest one, and also tone is laid. We dry. Now you can remove the form.
We lay the next layer of design. Here you can use glitter, sequins and other not very voluminous elements. Overlap again with a layer of clear gel and dry in the lamp.
There may be several such layers, the main thing is that the result is a not too thick nail, otherwise the work will look inaccurate.
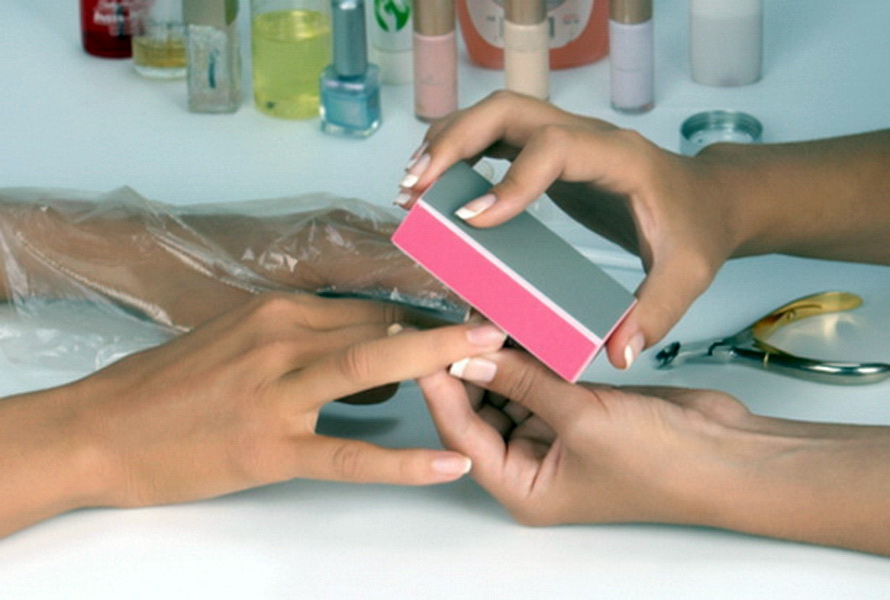
We produce sawdust work. We remove the top layer of the gel from the plate itself, and also give it the necessary shape.
We cover the nails with a finishing layer of liquid UV gel, not forgetting to walk along the edge of the nail. If your extended nails turned out to be quite long, then it is recommended to cover them with such a gel from the inside. This layer will not only protect your manicure and give shine to the coating, but also reduce the harmful effects of UV rays on the nails.
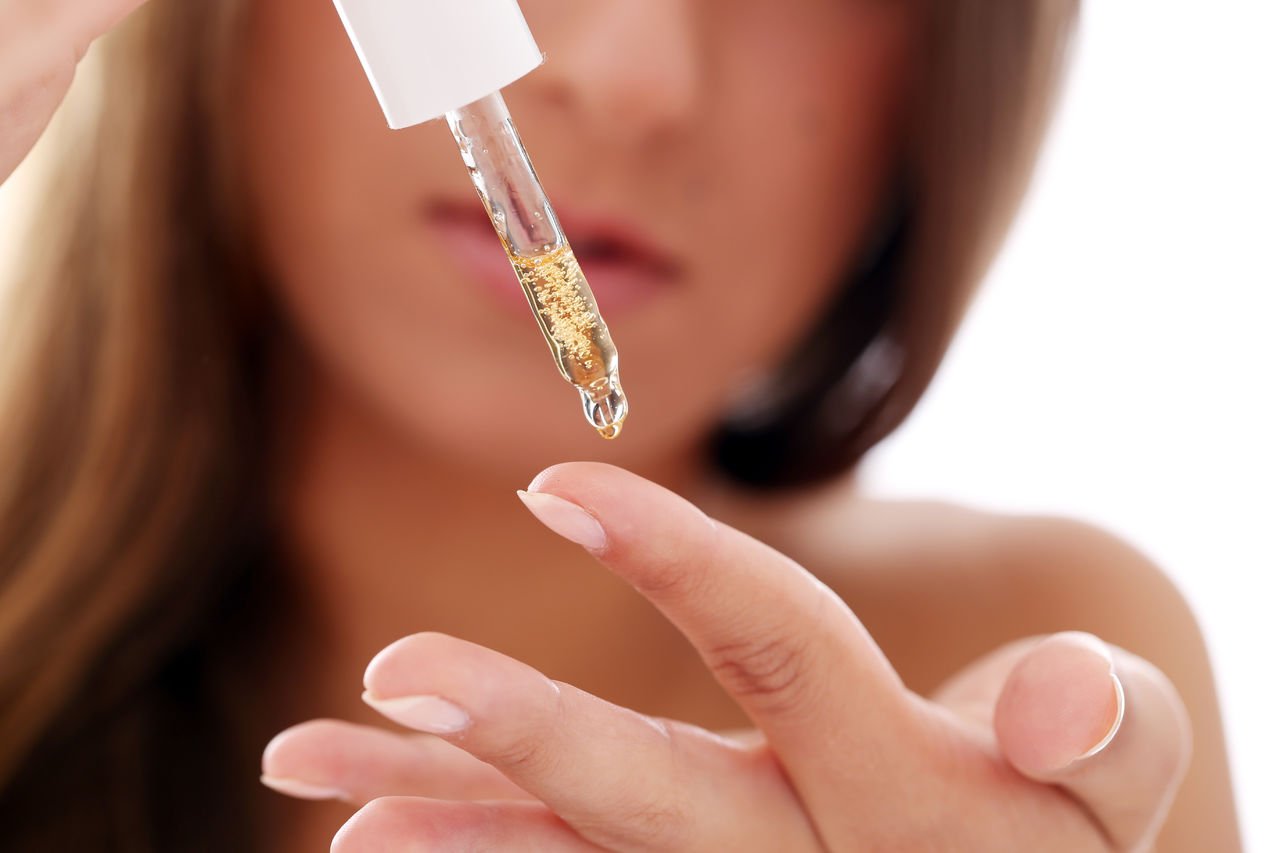
At the last stage, we will treat the cuticle with special oil, since, when it is dried in the lamp, it has lost a lot of moisture, and it can crack.
Beautiful examples
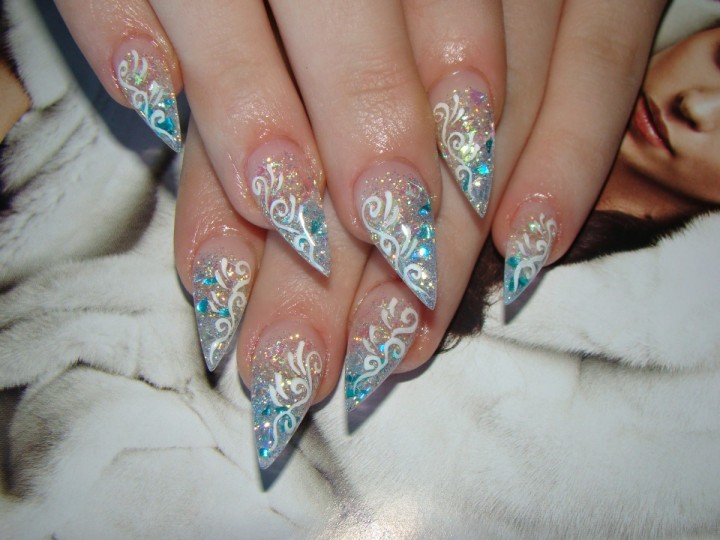
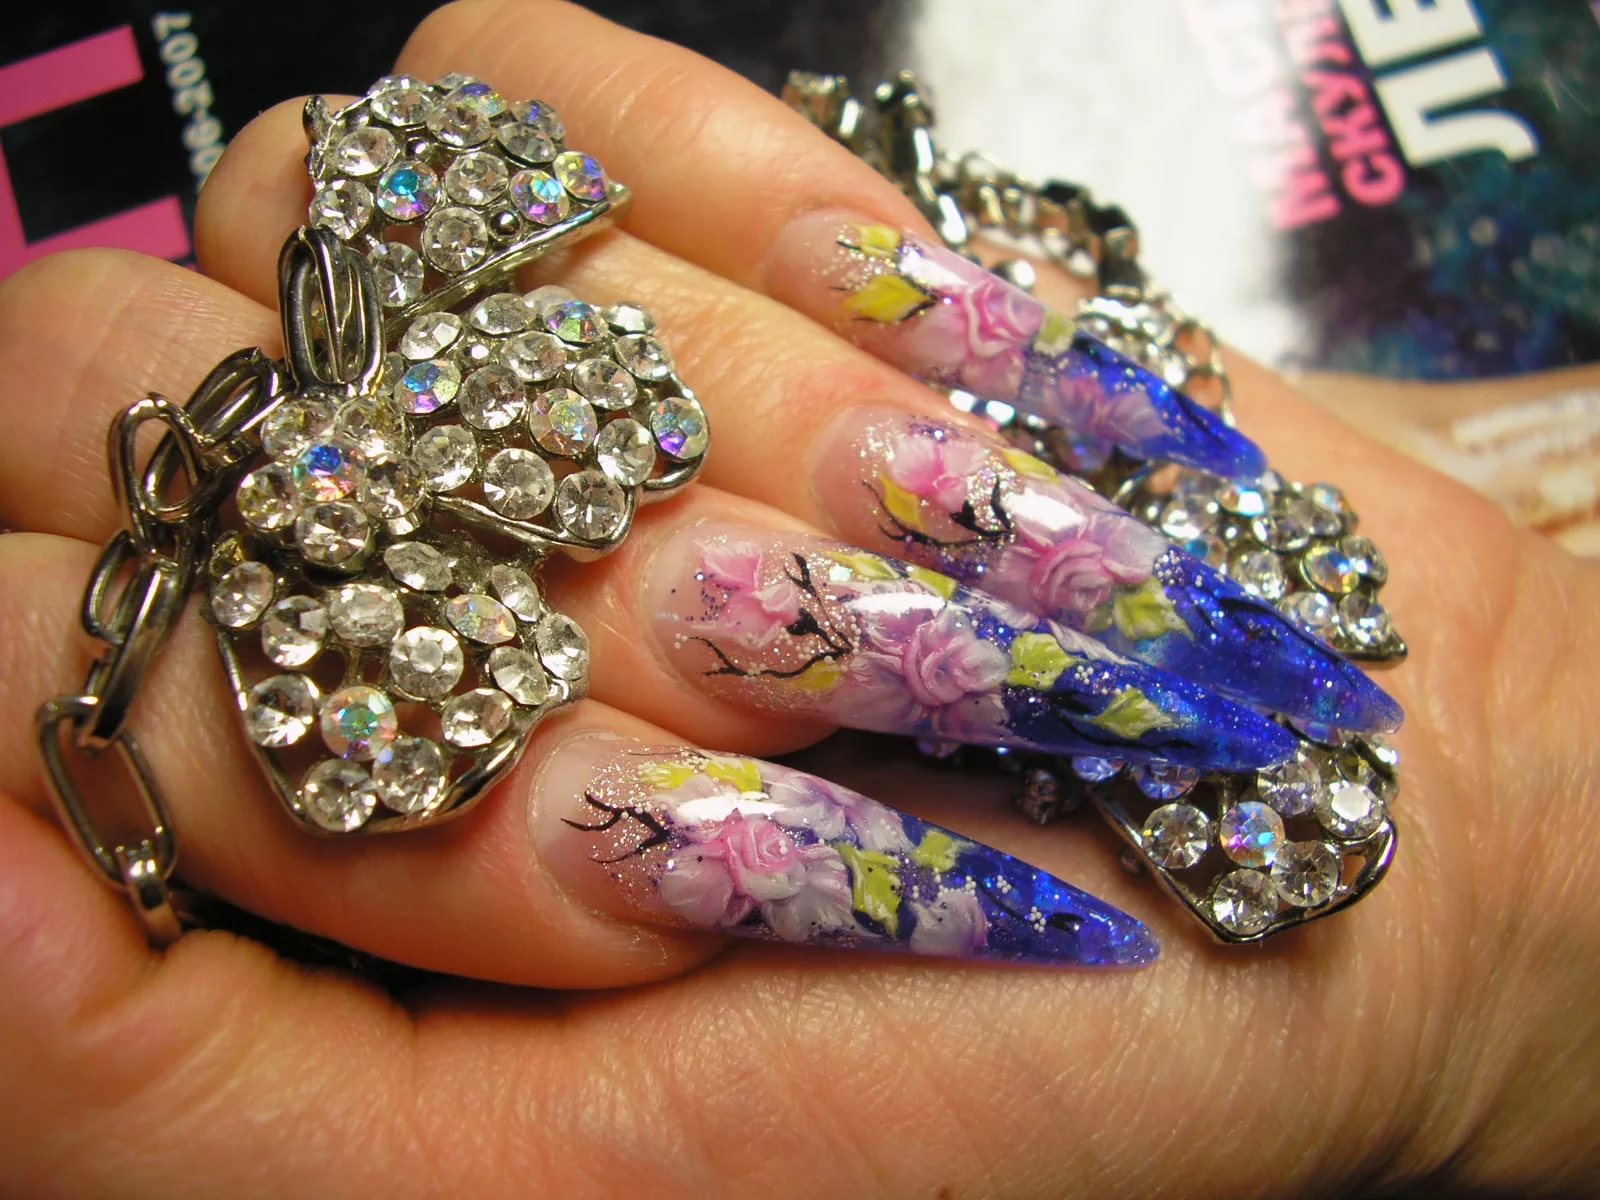
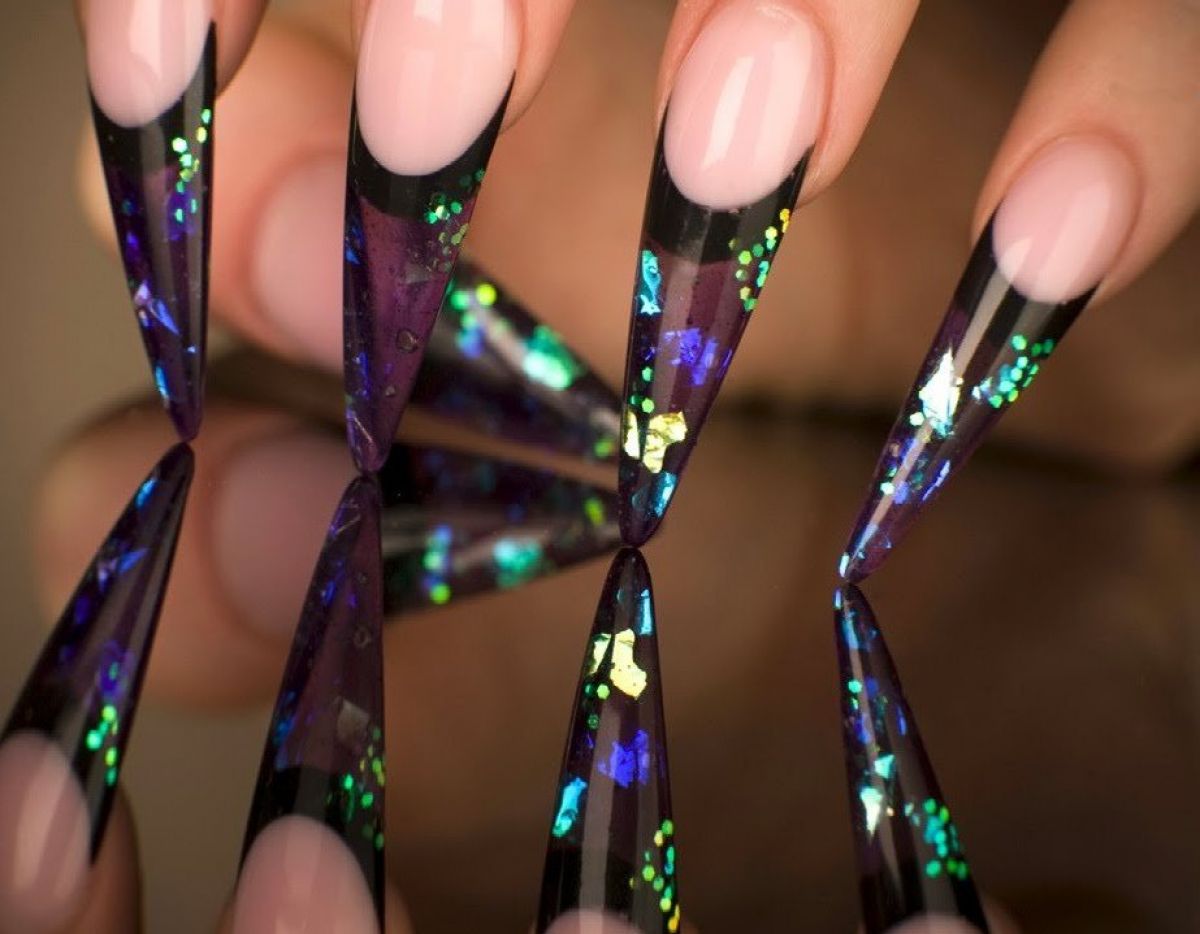
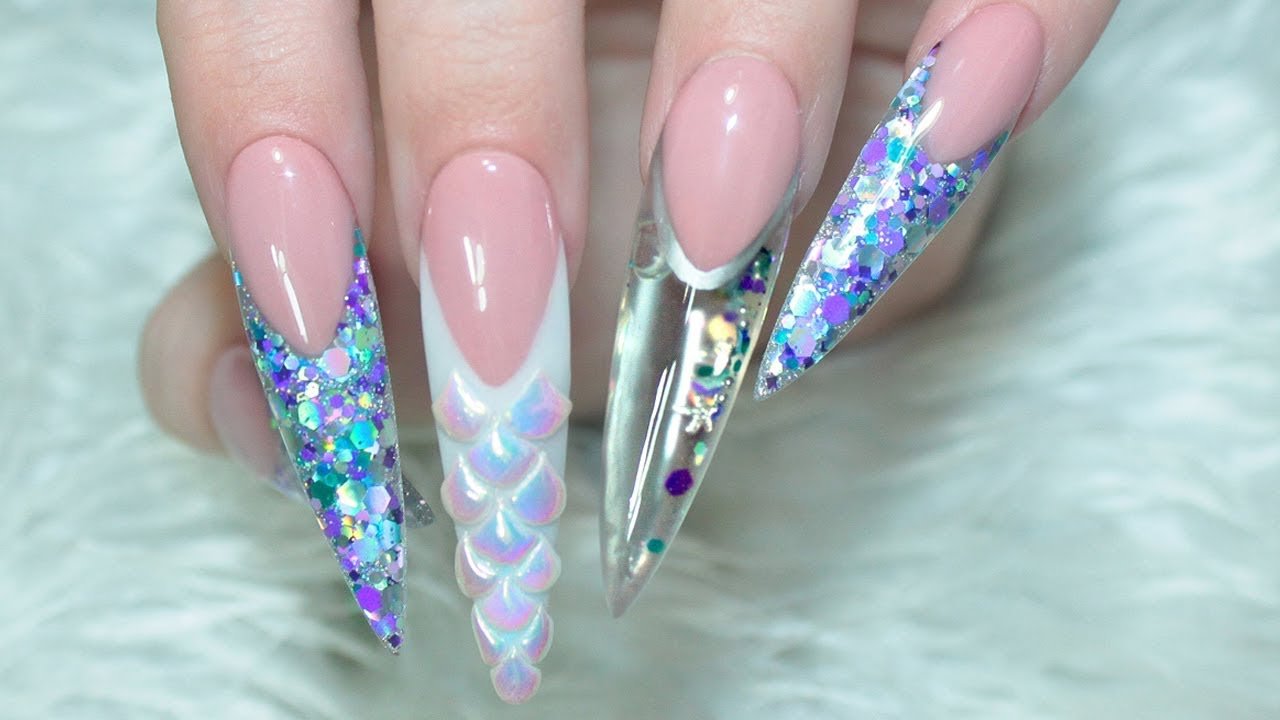
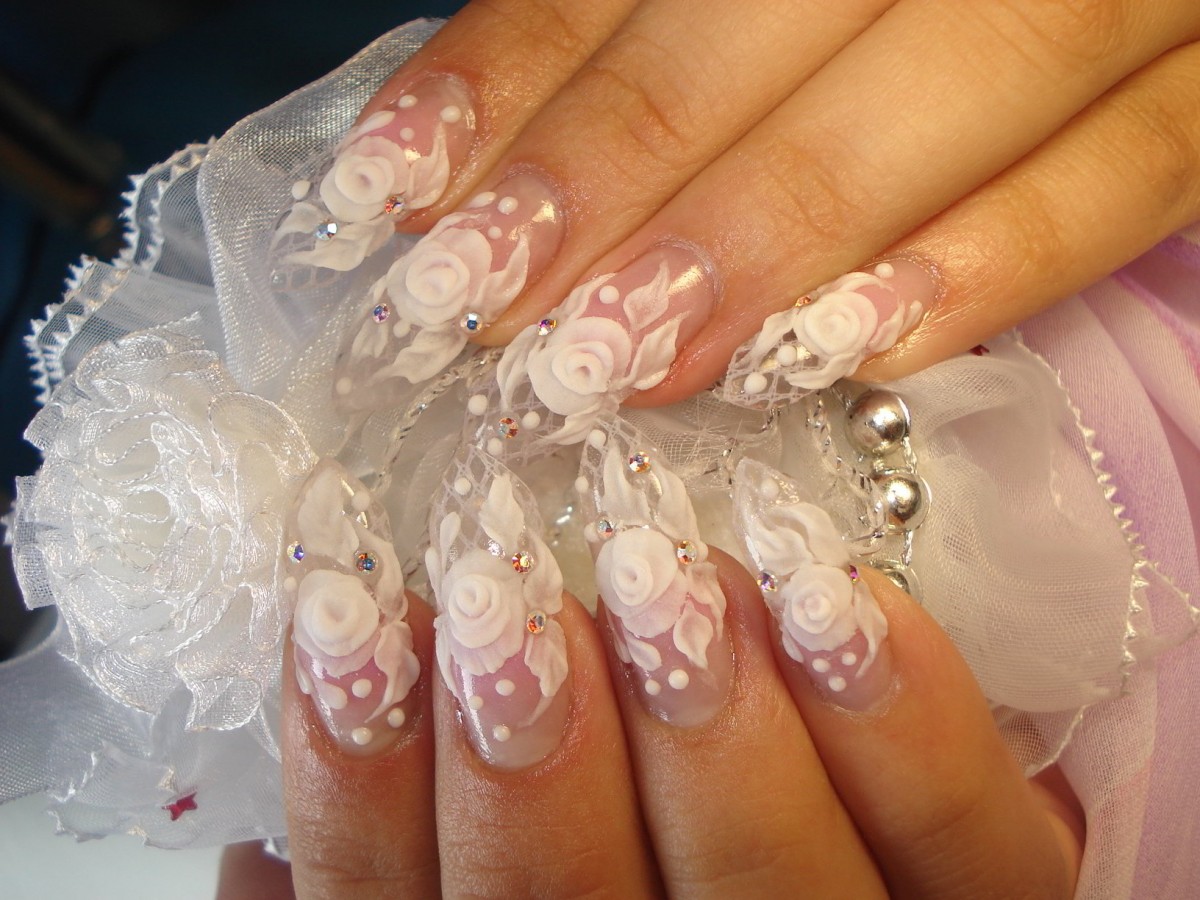
Aquarian nail extension always looks elegant and elegant. Performing this nail design, the master can embody any imagination. The highest level of skill here is the use of elements of acrylic modeling. Of course, such elements give an increased thickness of the finished nail, but your manicure will surely attract attention.
Here are some pretty interesting examples of how you can draw marigolds using the extension in the aquarium technique.
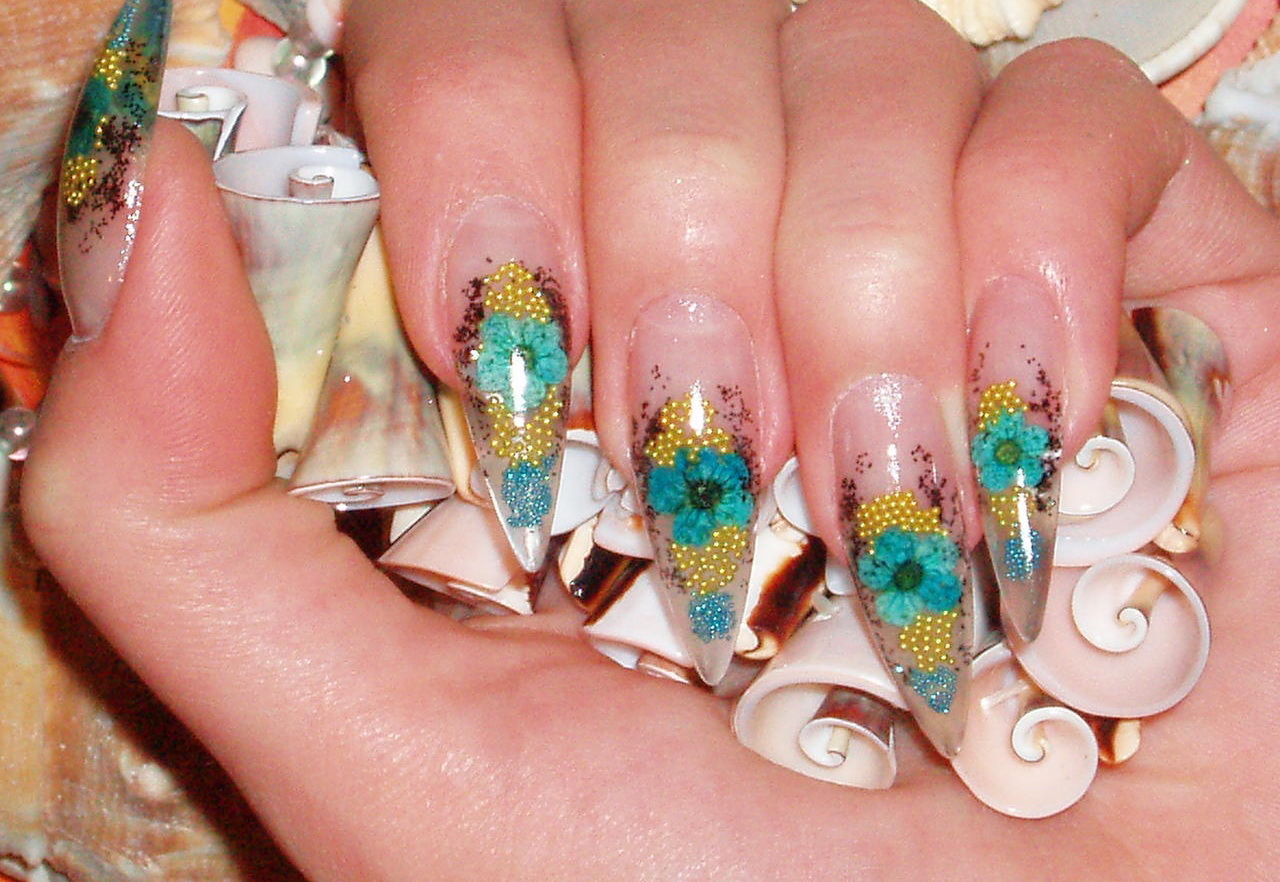
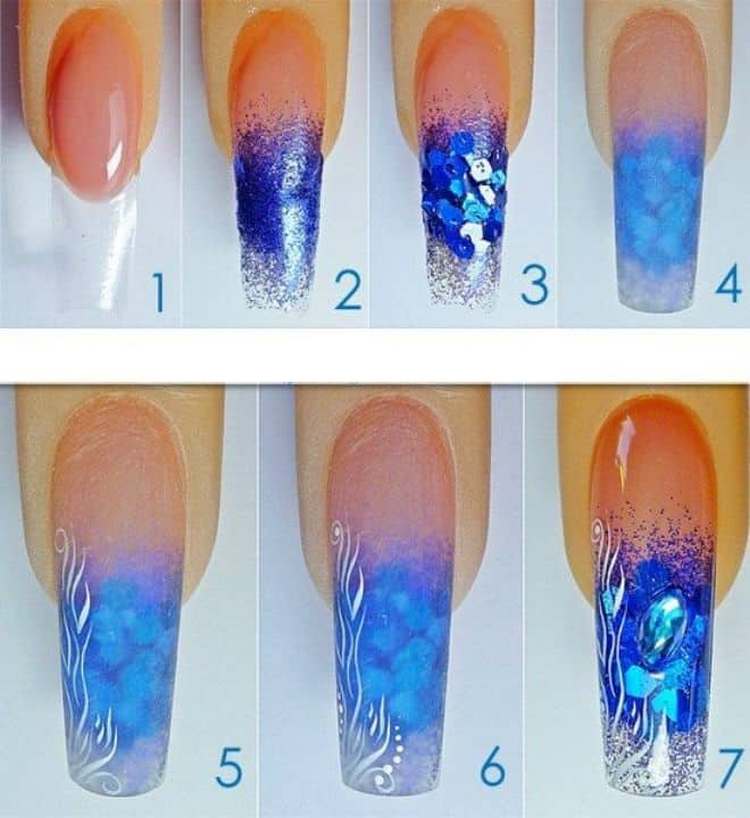
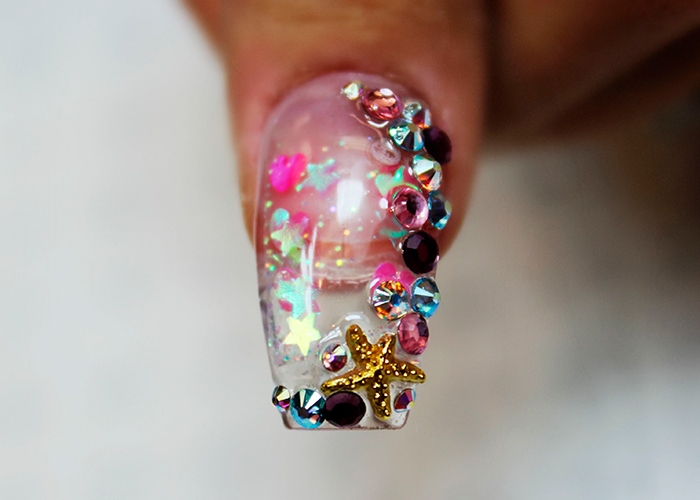
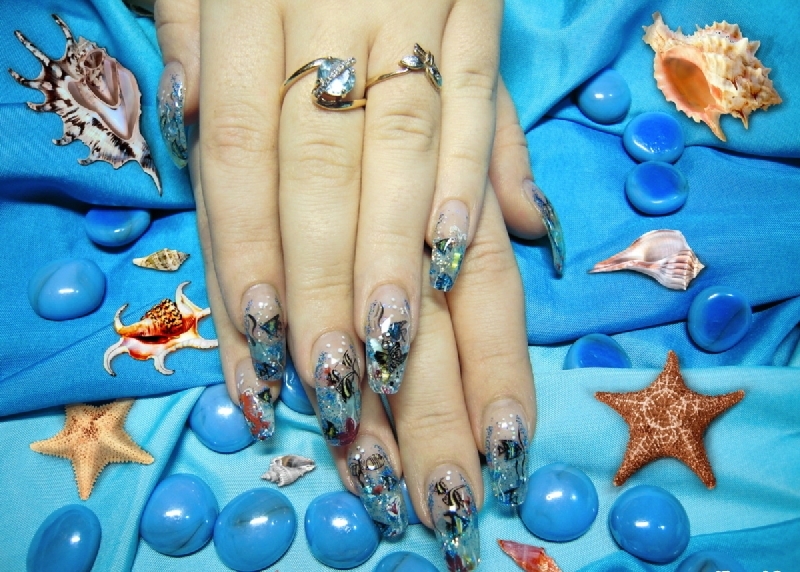
Sea
The bottom of the ocean with its various inhabitants, brilliant sand in pastel blue tone looks expensive, but in no way coarse.
Maritime themes can be framed with kamifubuki. And in order to make it clear at a glance that this is the sea, you should add a small starfish to the “water column”.
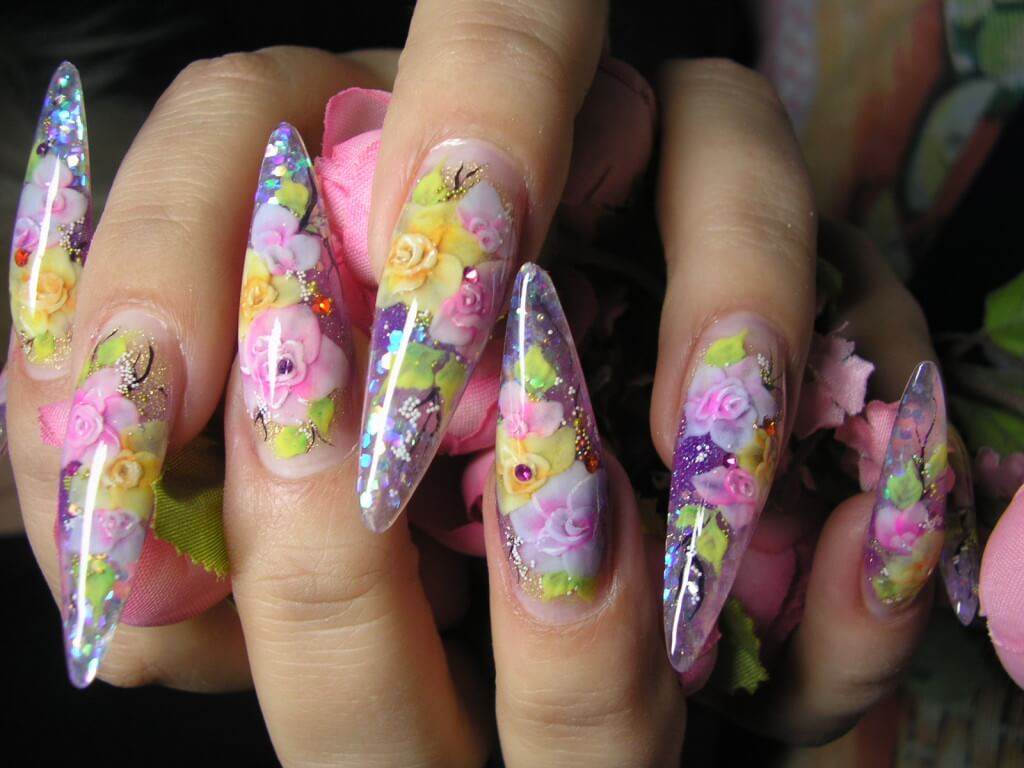
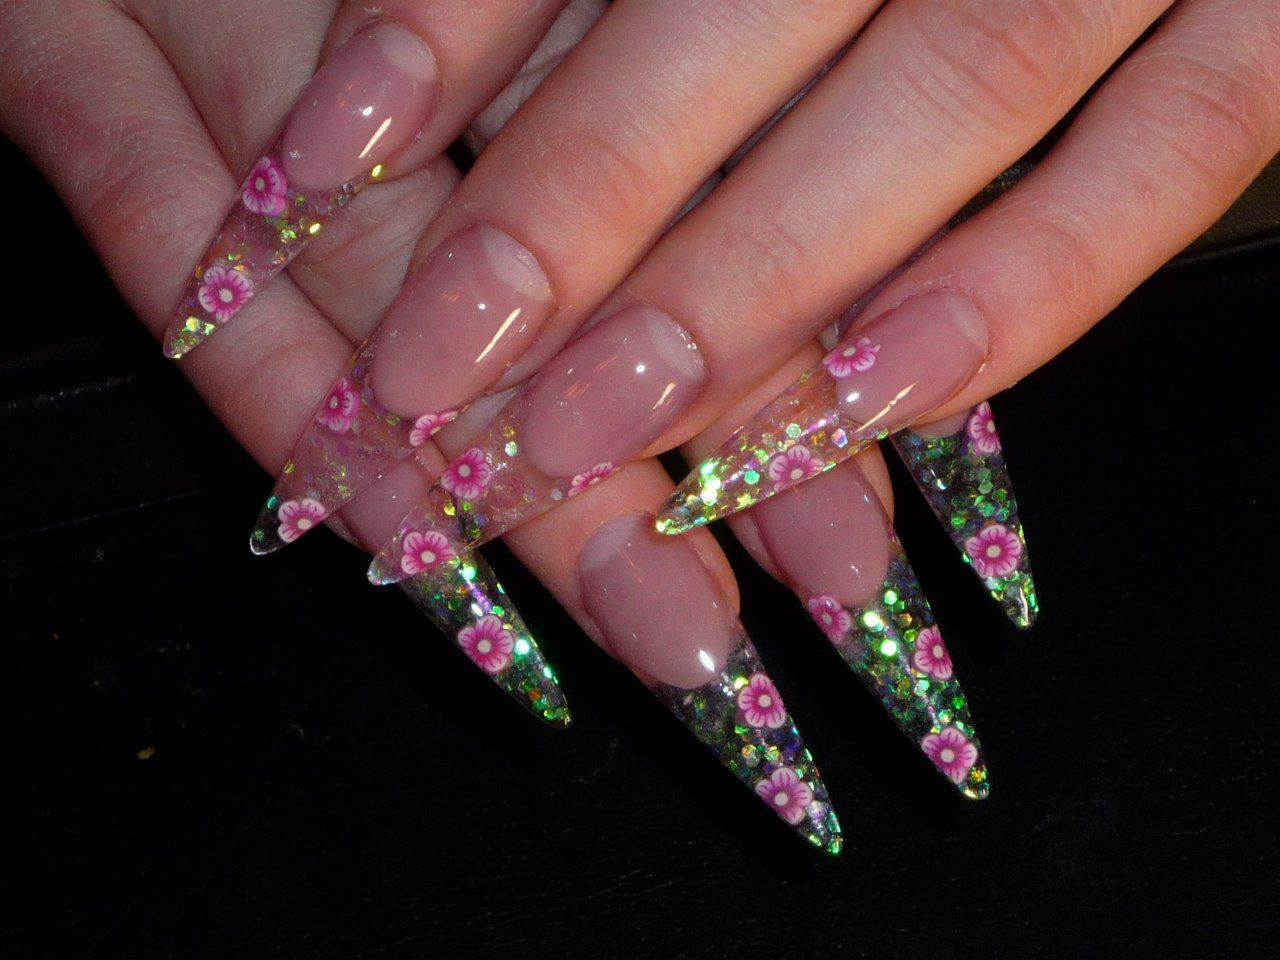
Flowers
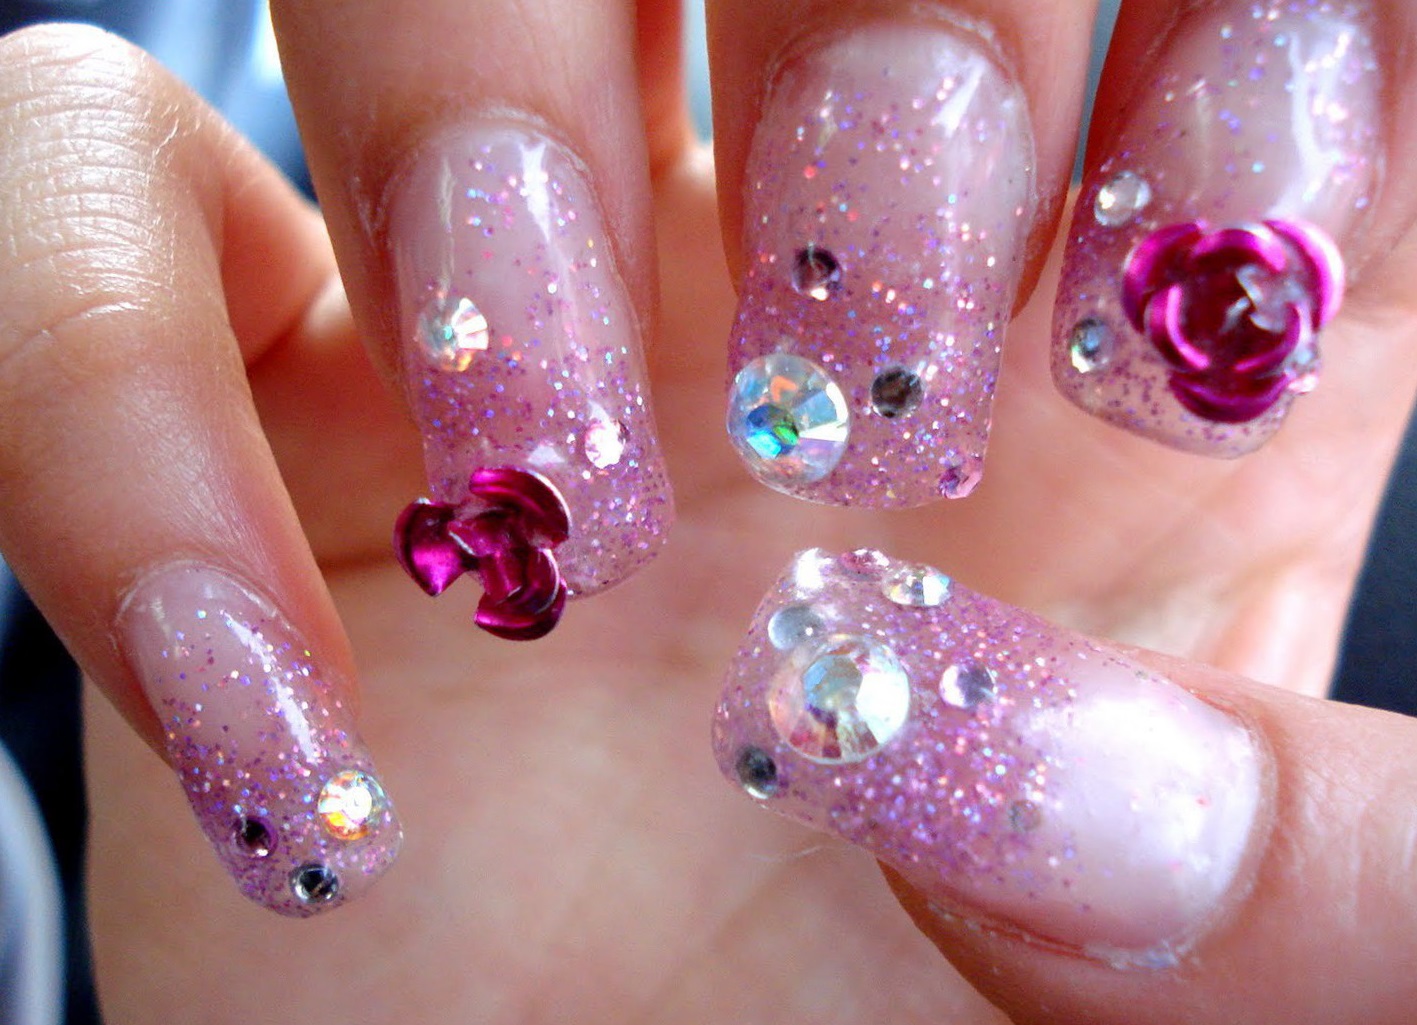
Floral design always gives a feminine touch to the image, especially if the decor elements are made in pastel colors.
Aquarium manicure is a great solution for wedding design.

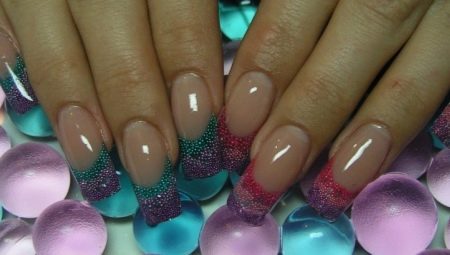
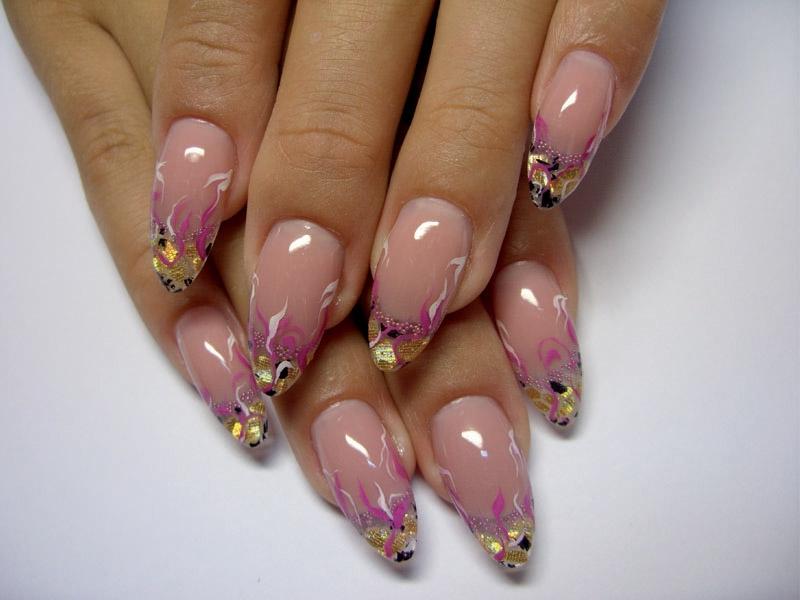
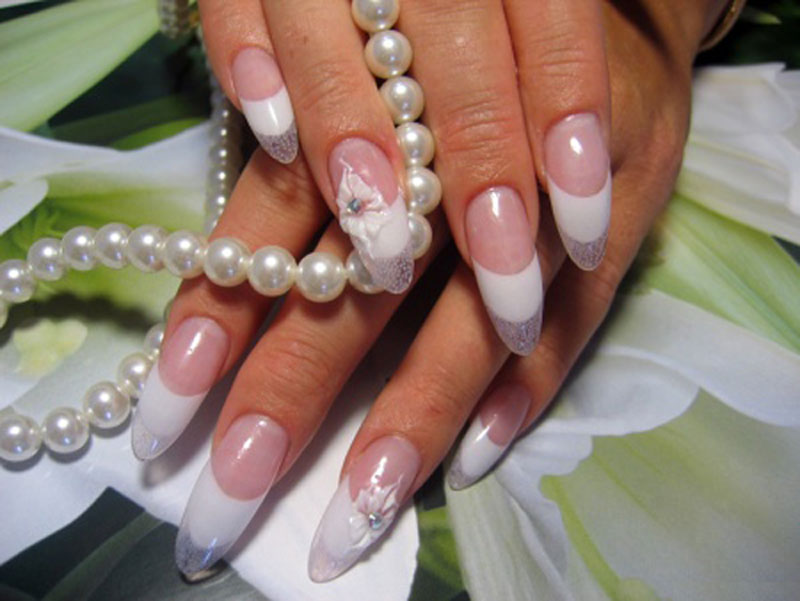
French
French manicure in classic colors can also be decorated with an aquarium technique.
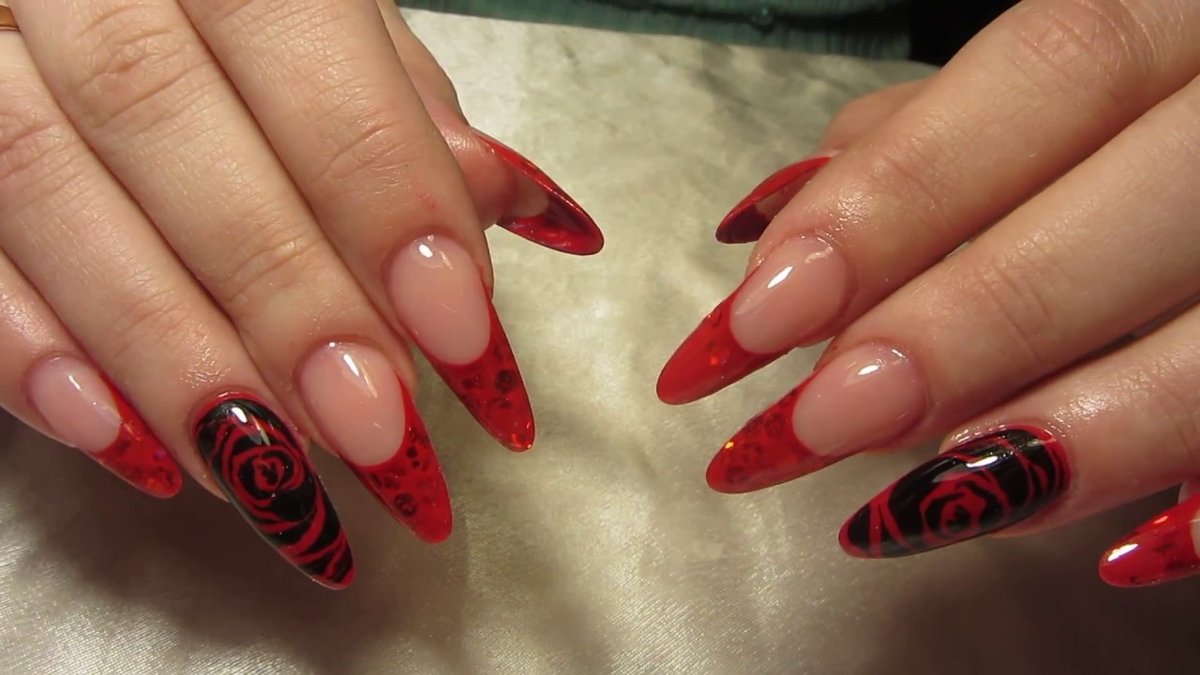
And also the jacket can be bright and brilliant for a spring mood or passionate in black and red for Lady Vamp.
Other decor
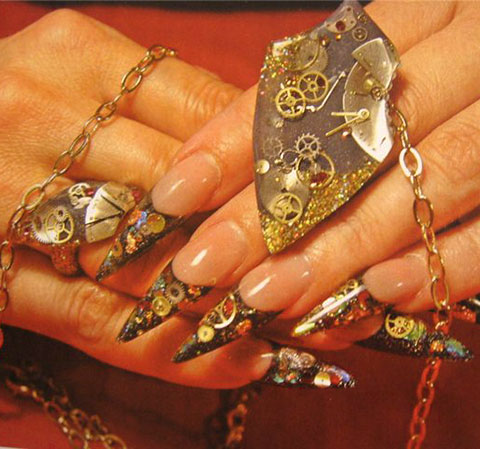
Decorate the "aquarium" and you can clockwork. Such marigolds will attract the attention of even the stronger sex.
Aquarium manicure can be decorated not only in the thickness of the gelbut also decorated with elements outside. The main thing is not to overdo it. Usually no more than two fingers adorn this way.
The manicure itself is quite simple and does not contain a large amount of decorative elements, while the ring fingers are decorated with rather voluminous rhinestones on top of the extension.
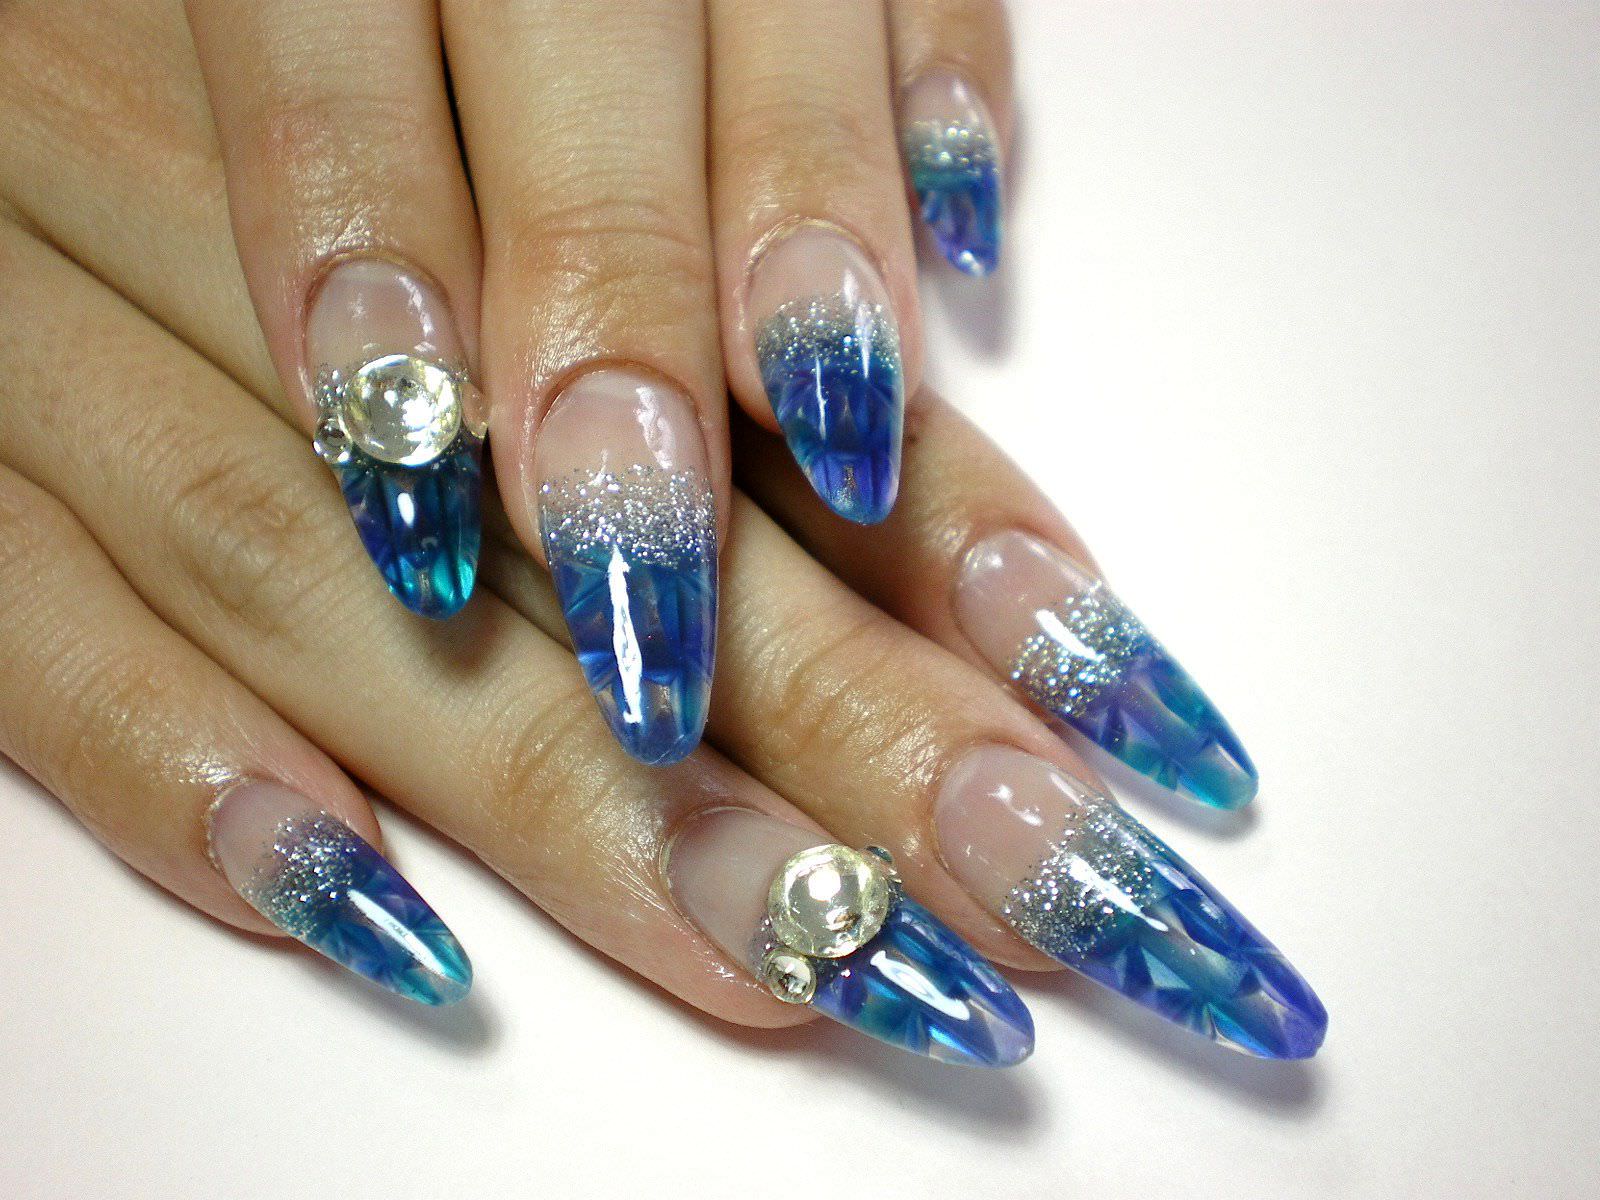
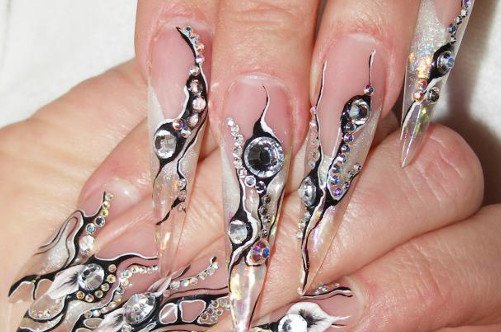
Outdoor rhinestones can be on all fingers, then the design inside the "aquarium" should not contain sparkles at all, and the colors in manicure should be used, for example, in black and white.
How to increase the aquarium service jacket, see the following video.


