Looking at glossy magazines, sometimes there is a feeling of regret that a dress you like from a fashion show or from the red carpet, if you can try on in a boutique, you can wear a party only in your dreams. Unfortunately, this dress will remain an impossible dream if you do not arm yourself with a pattern-base and do not model the exact same model.
It is about the principles of modeling will be discussed further.
Stages and rules of modeling
The design process begins with a technical pattern and modification of the top or bottom of the main pattern:
- the selected model is divided into correctly constructed parts according to the most precisely taken measurements;
- body features are taken into account;
- additions are made to the seams or free fit depending on the chosen style and material.
Ends modeling, cutting and sewing.

Modeling bodice by transferring darts
The first step towards the modification of the dress - the transfer of the upper chest dart. There are many ways of transferring, for example, in the cut of the armhole, in the waist or neck, in the middle of the front or in the drape.
To do this, you need to chart its new position so that it is aimed at the highest point of the chest. Further along the lines of the pattern is cut and closed the old groove, opening a new one.
The following are common options for transferring a chest dart.

To translate the notch in the shoulder seam into two soft folds, draw two lines on the pattern (in the example indicated by a dotted line) at a distance of 2 cm. Connect the top of the notch with the lines drawn. Close the dart, cutting the pattern along the lines.
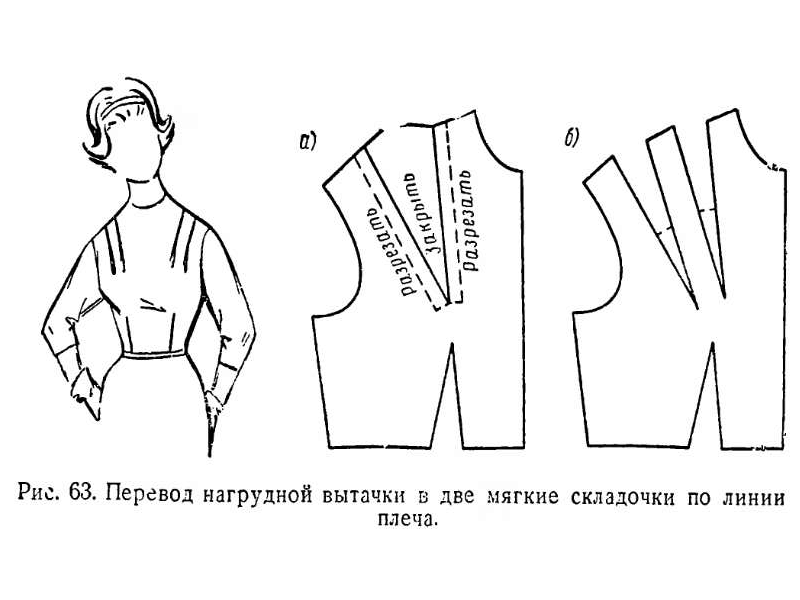
Here is an example of a dress with a neckline on the shoulders, where the groove is carried in the neck. Then the sleeve is drawn and the skirt is extended.
Drapery making
A little harder with moving tuck to drapery. This is done like this:
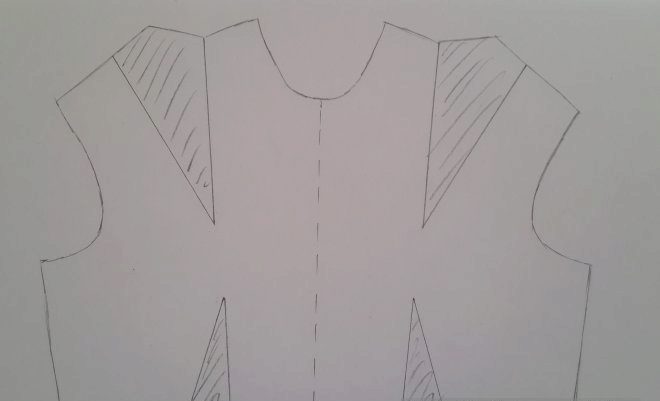
- On a wallpaper or a sheet of paper in pencil, circle the outline of the expanded pattern of the front bodice.
- From the tops of the two lower and upper right darts, draw lines to the left shoulder. Close the darts, leaving not closed only the left chest.
- Spreading out the tucks, circle the new contour of the bodice, smoothly connecting the upper points of the left shoulder.
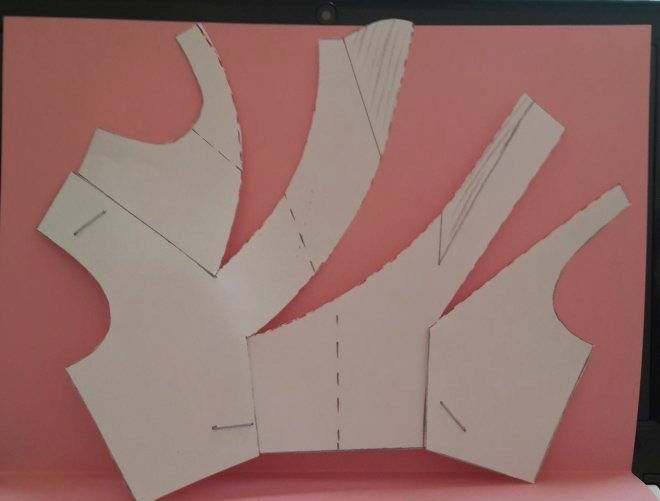
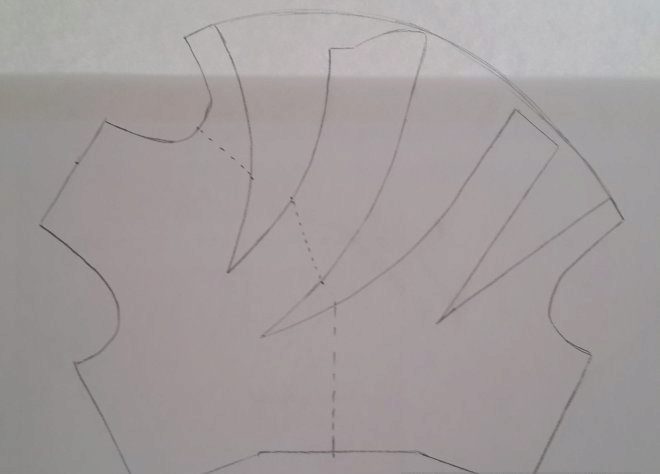
You can translate both tuck at once:
- On the expanded front bodice, put shaped fat lines and drapery direction lines.
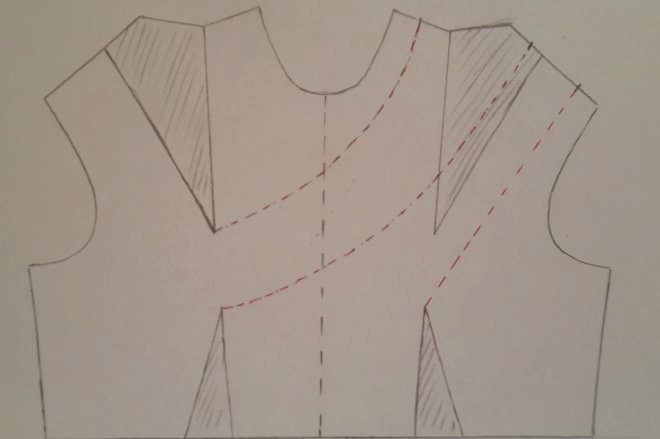
- On the left half of the top of the darts, move to the upper end of the shaped line (t. F) and circle their new position.
- On the right half of the top of the second taliyev tuck lift to the top of the chest.
- First cut the pattern along the contour, then cut it along the lines drawn.
Shaded places on the pattern - fabric allowances for cutting, which are needed to create draperies.

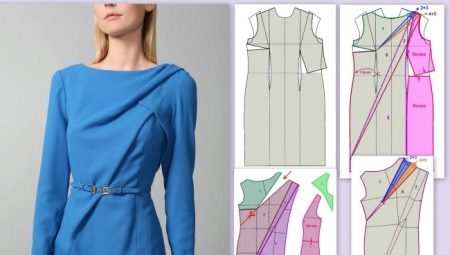
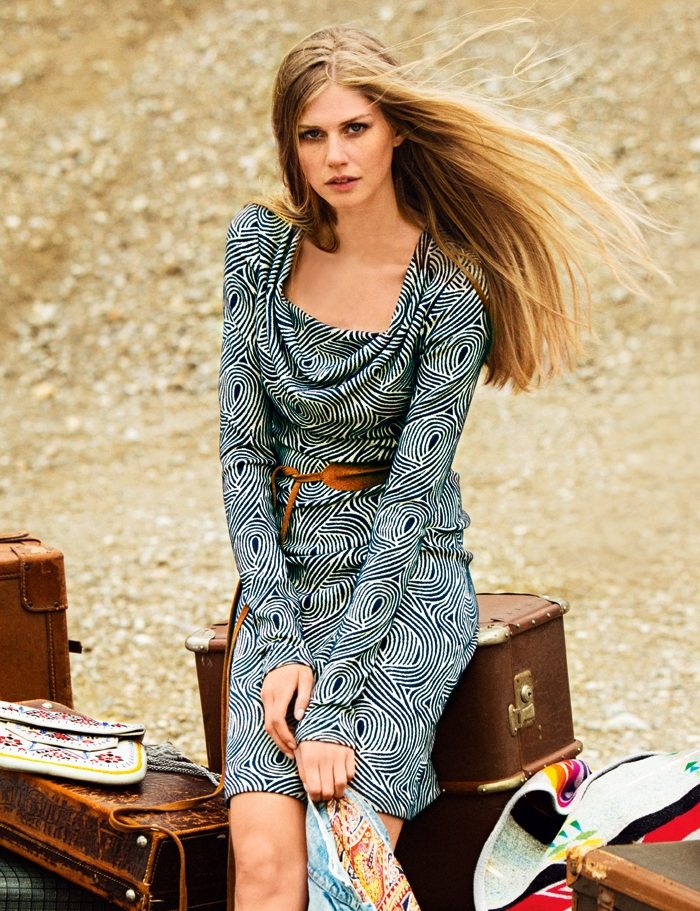
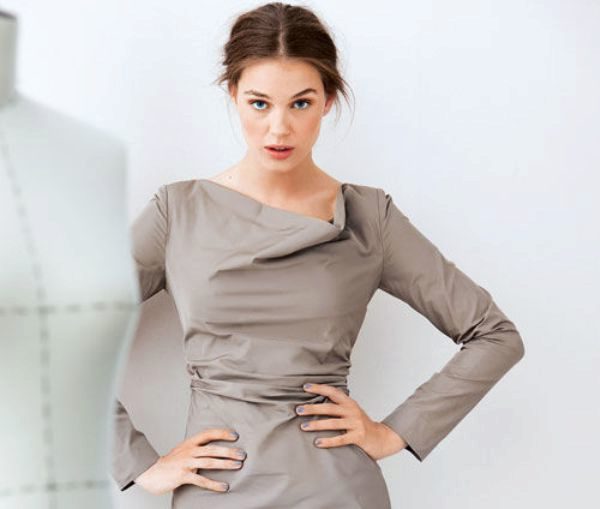
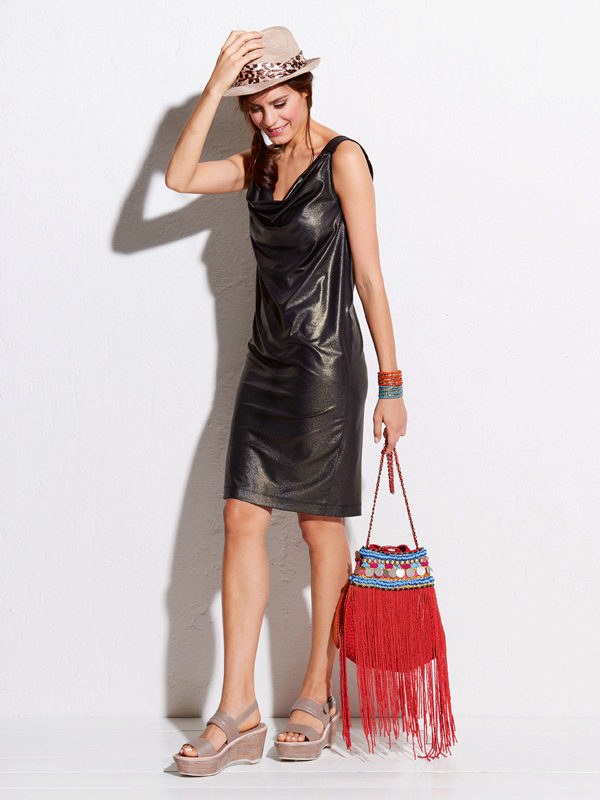
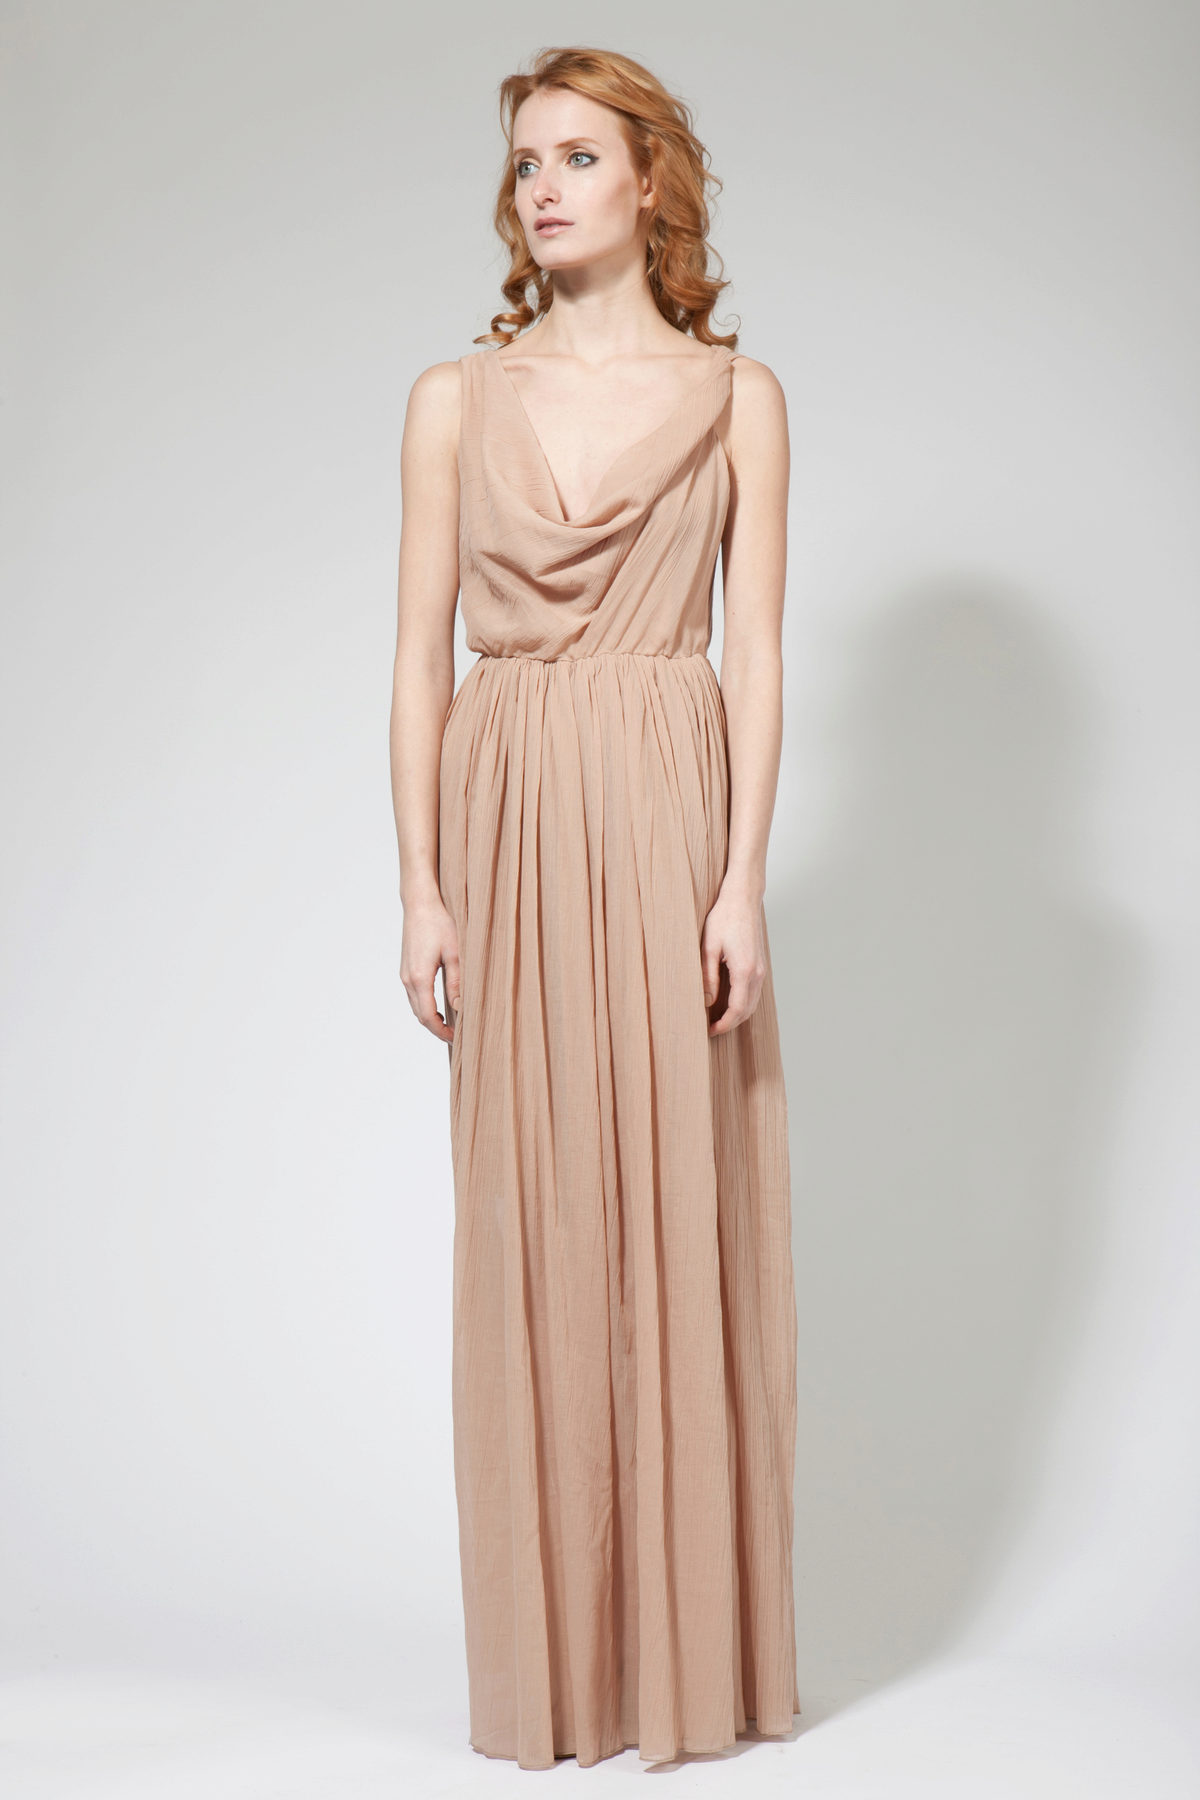
Swing collar
Beautiful drapery on the neckline can be created in different ways, but they begin with the tuck closure.
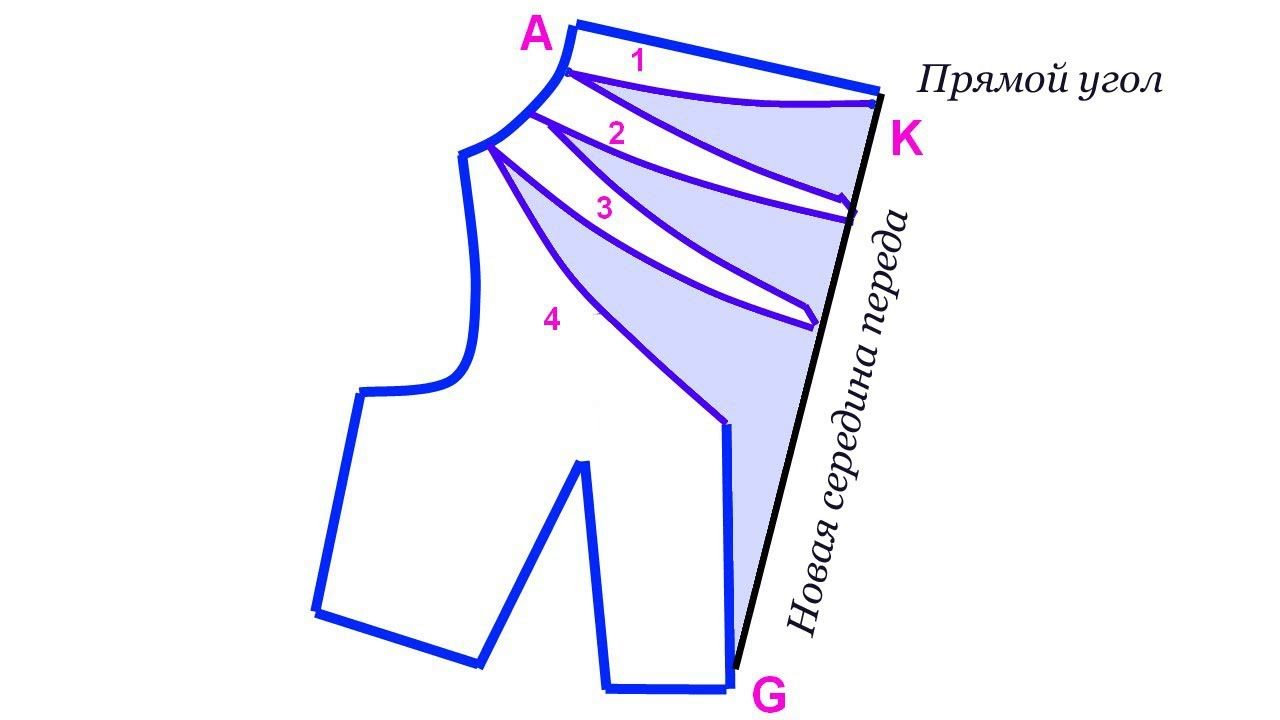
- Measure the length of the shoulder seam, then apply the shaped lines. Cut them, leaving 1 cm undercut along the shoulder line.
- Expand the resulting parts, draw a horizontal line from the highest point of the shoulder line.
- Make a one-piece cuff.
A few more examples of modeling the collar "swing."

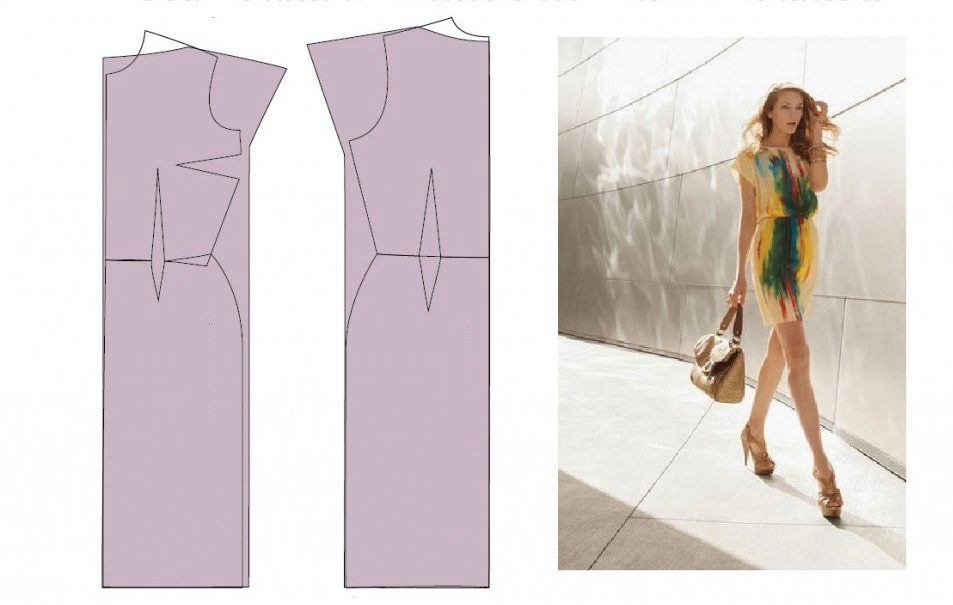
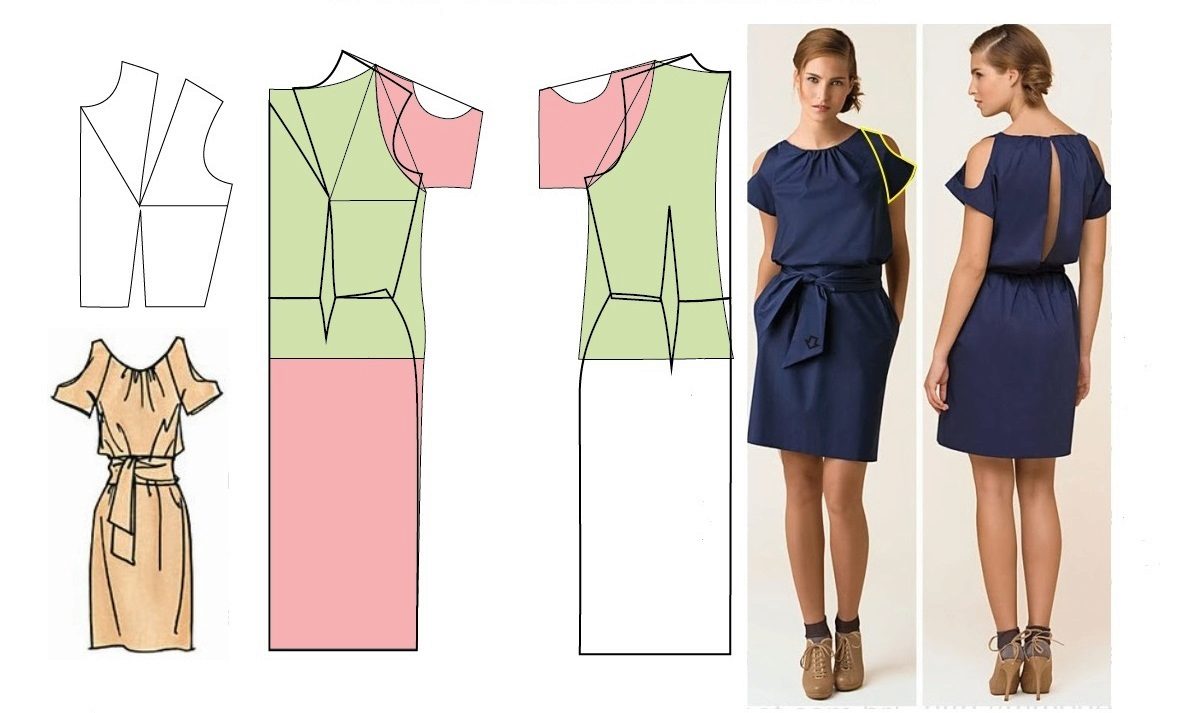
Modeling a gorgeous dress
A short dress with a voluminous skirt and an asymmetrical neckline on the bodice will allow you to be a queen at any celebration.
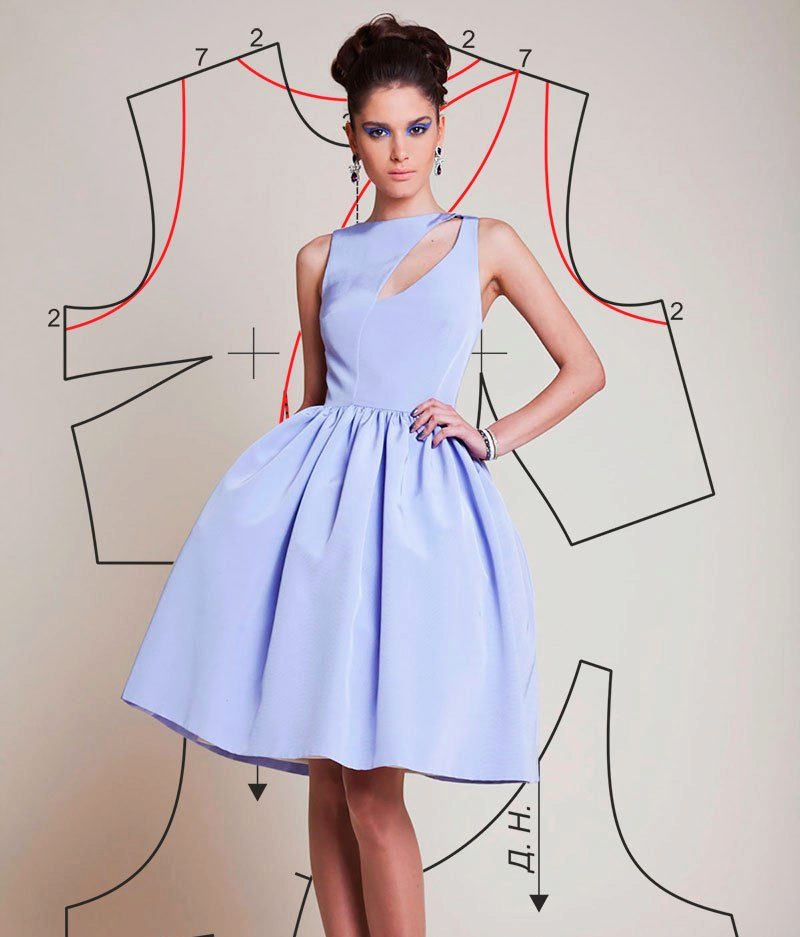
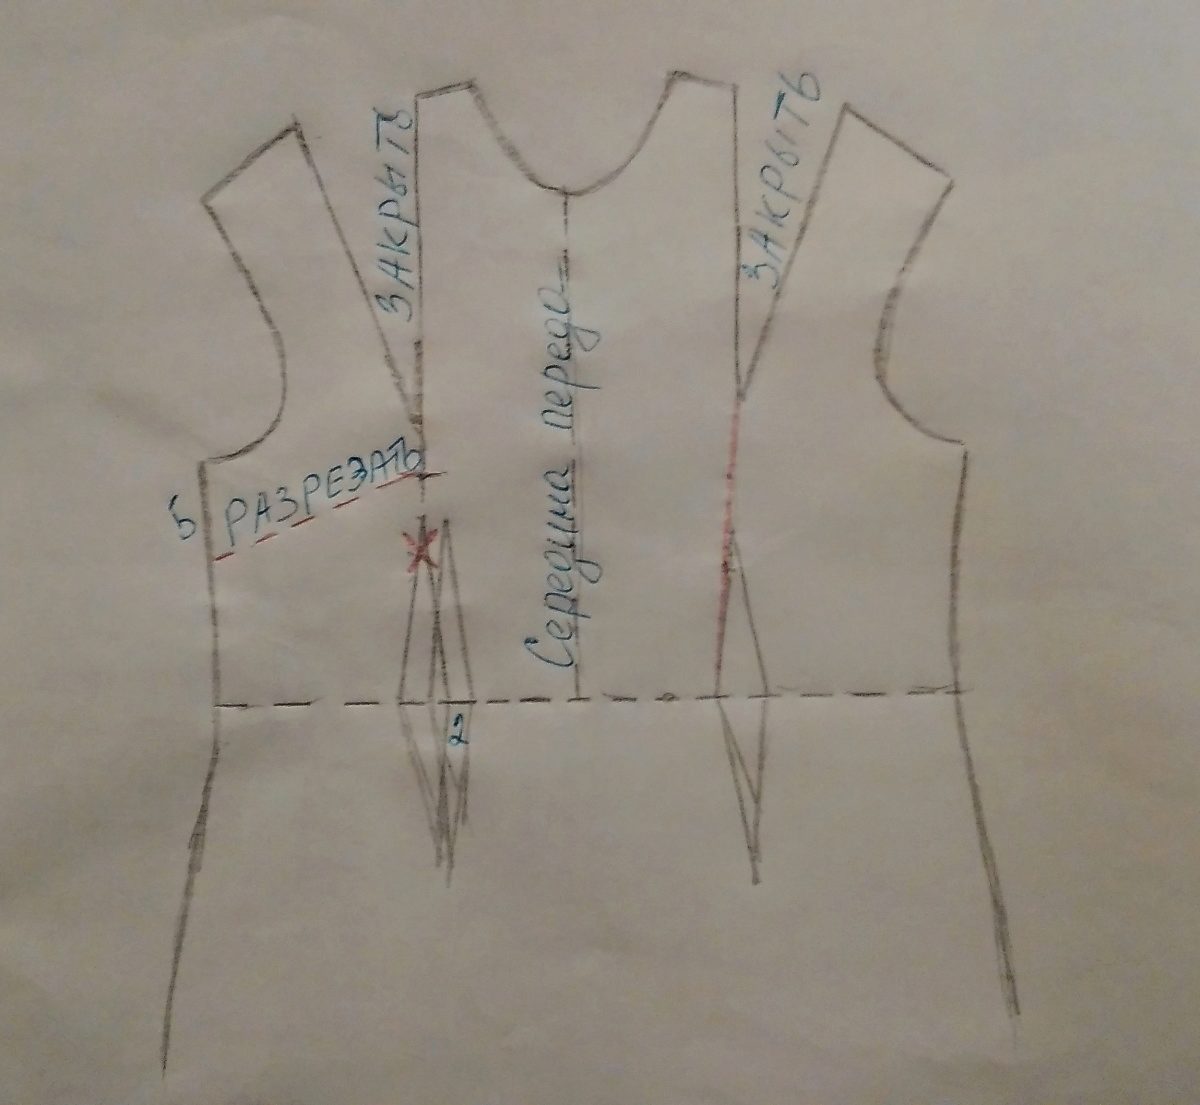
- On the bodice in front of the left chest tuck transfer to the side seam, and the right - to the waist line.
- Move the left tuck at the waist 2 cm to the center.
- To 7 cm, reduce the length of the shoulder, and make the neckline taller.
- Arms make deeper by 2 cm.
- Draw a petal cutout and cut the pattern along the modeled lines.
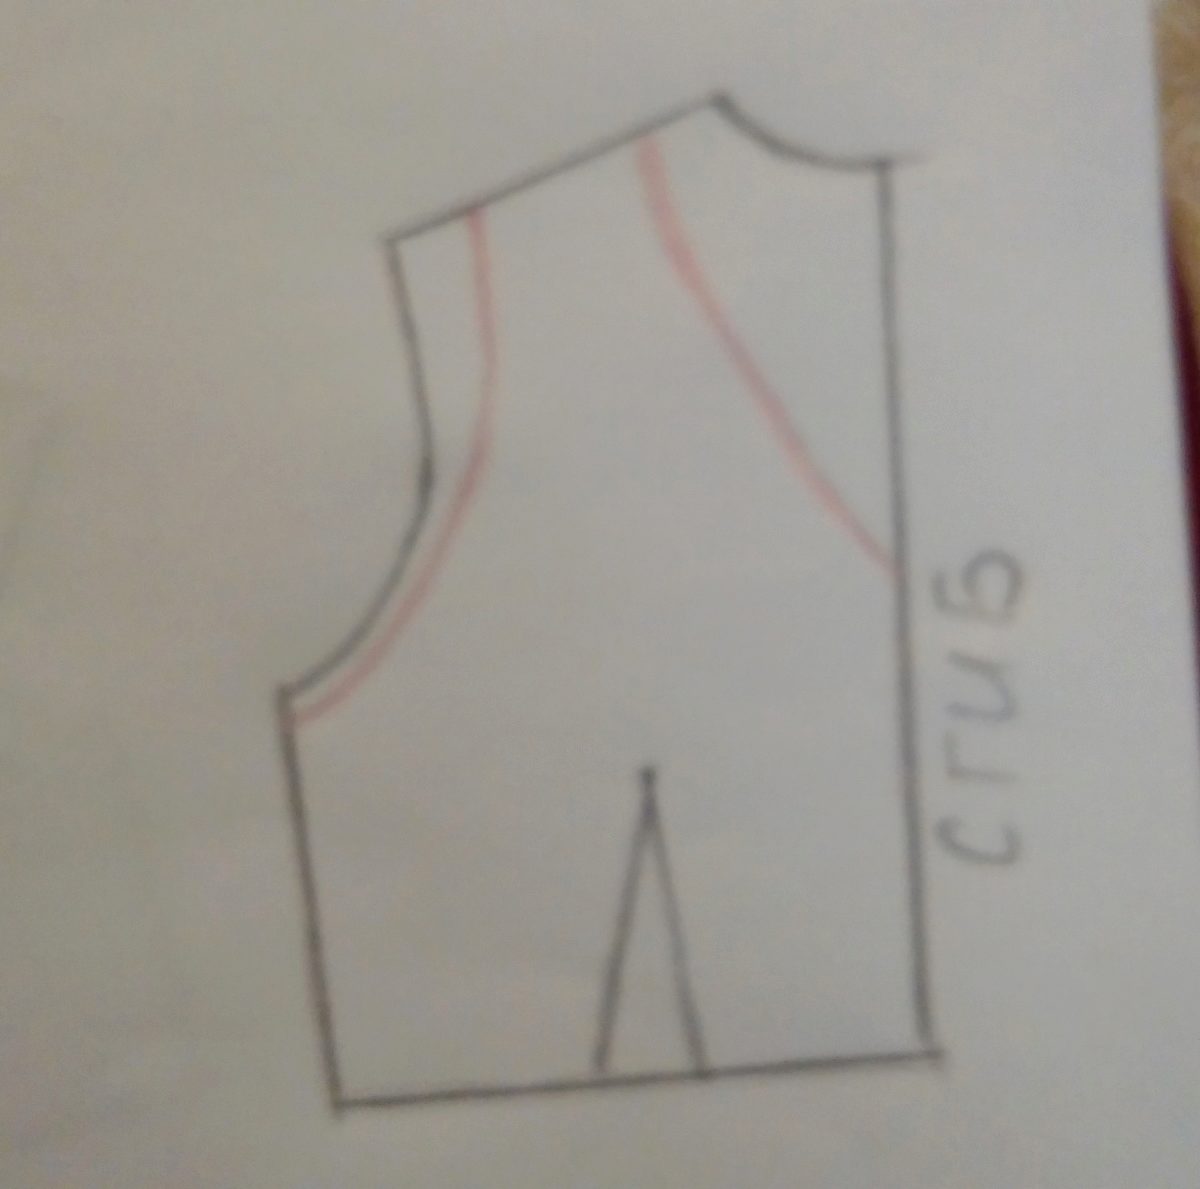
- On the back, as on the front, shorten the shoulder and deepen the armhole.
- Draw a triangular cutout, putting 23 cm in the middle line.


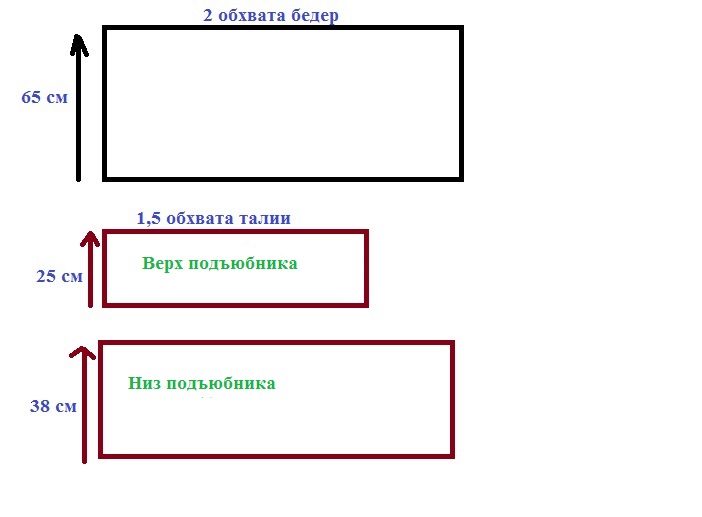
For the skirt, draw the desired length of the rectangle, which is equal to the width of the two hips. If the width of the fabric is not enough, cut out the skirt from two pieces.
Petticoat consists of two parts:
- 1st — top, 25 cm long and one and a half wide around the waist;
- 2nd - bottom, the width is equal to two hips.
The entire length of the petticoat is 2 cm shorter than the skirt.
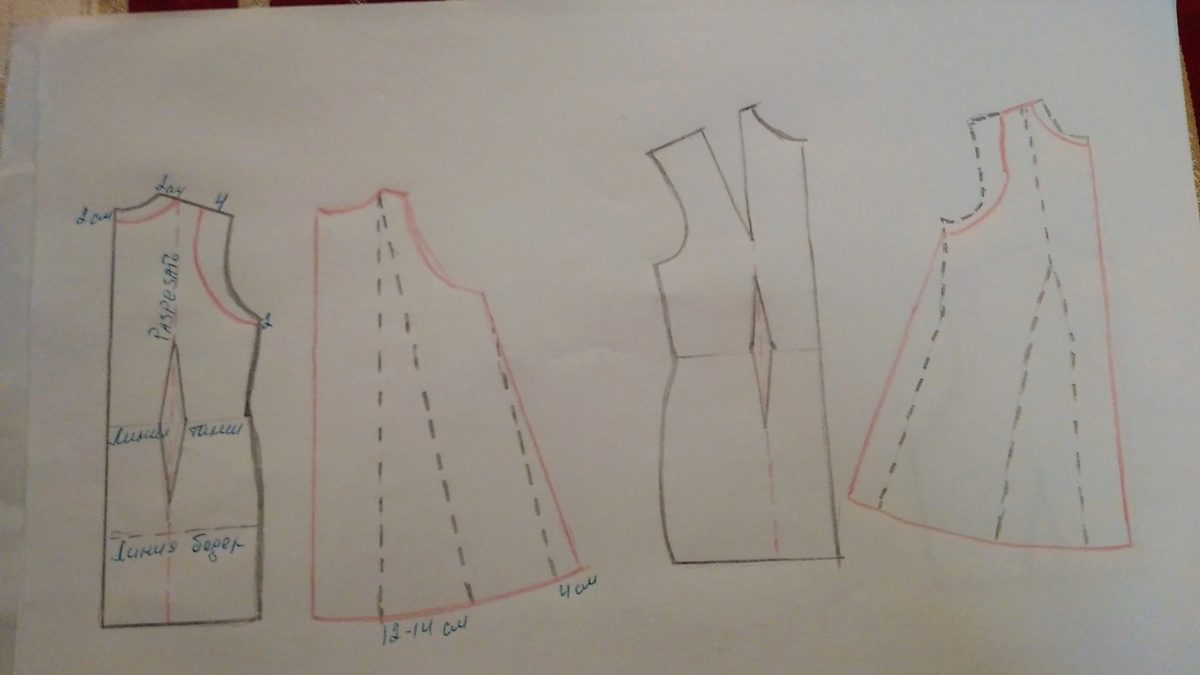
Drawing free dress patterns
A dress of a free cut is an option that is created in haste, because the newcomer is able to sew. It does not require a zipper, just on the back left not stitched area for sewing buttons.

- Mark the back of the dotted line and move it to 12-14 cm. It is from the angle of inclination that the curvature of the folds will depend.
- Round the bottom line, and make a deeper armhole and neckline.
- On the front of the dress, carry the chest tuck onto the waist. The front should be a little more flared, so 4 cm is added to the lower line of the back and front.
- The side lines of the two parts - straight segments.
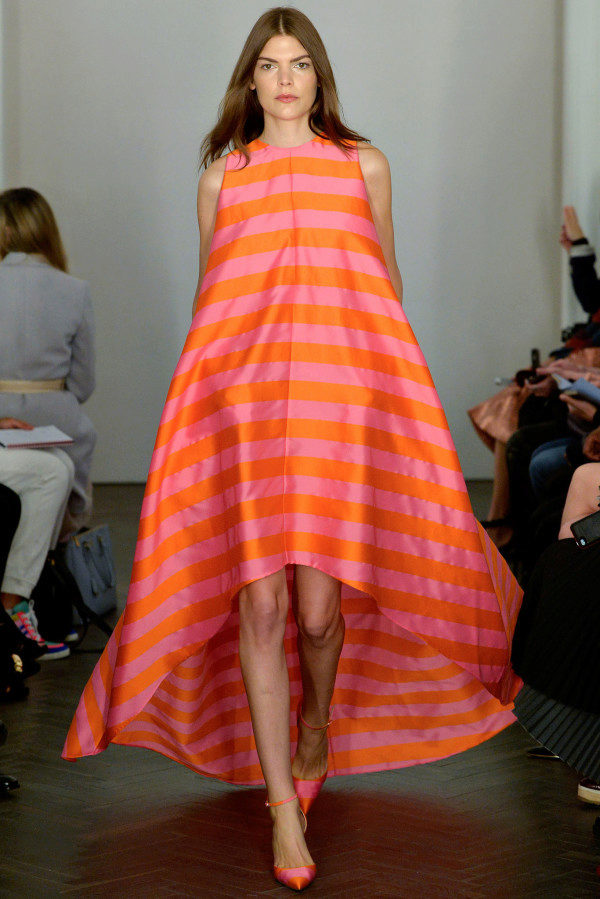
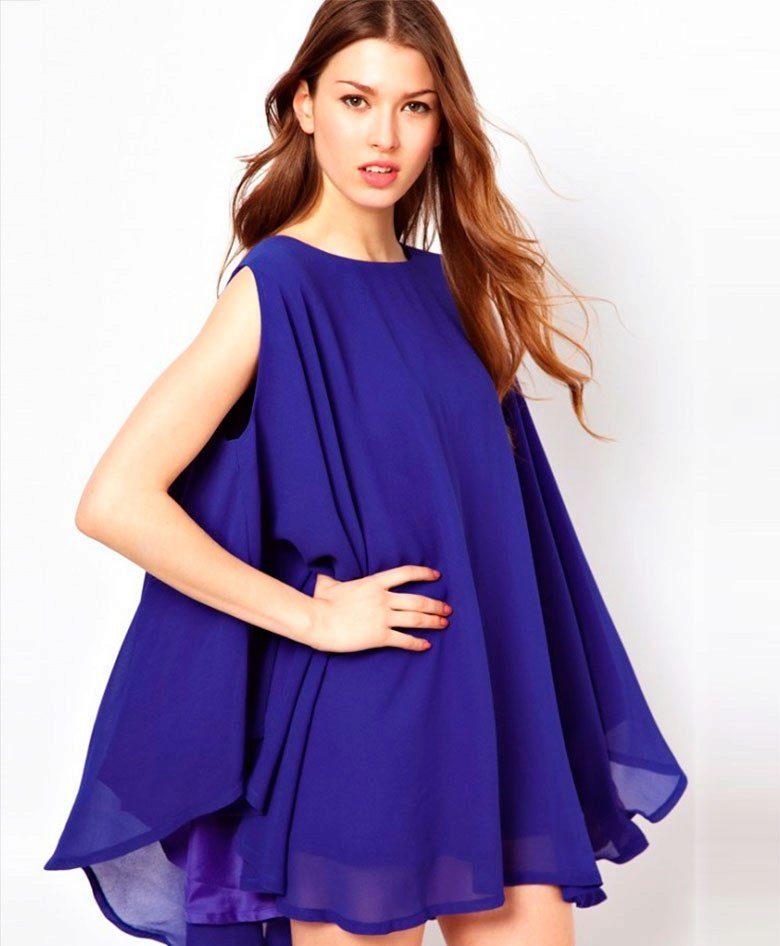
If you want a short short front dress in the back, on the back pattern created above, measure the desired length in the middle of the fold and draw the rounded lines to the side seams.
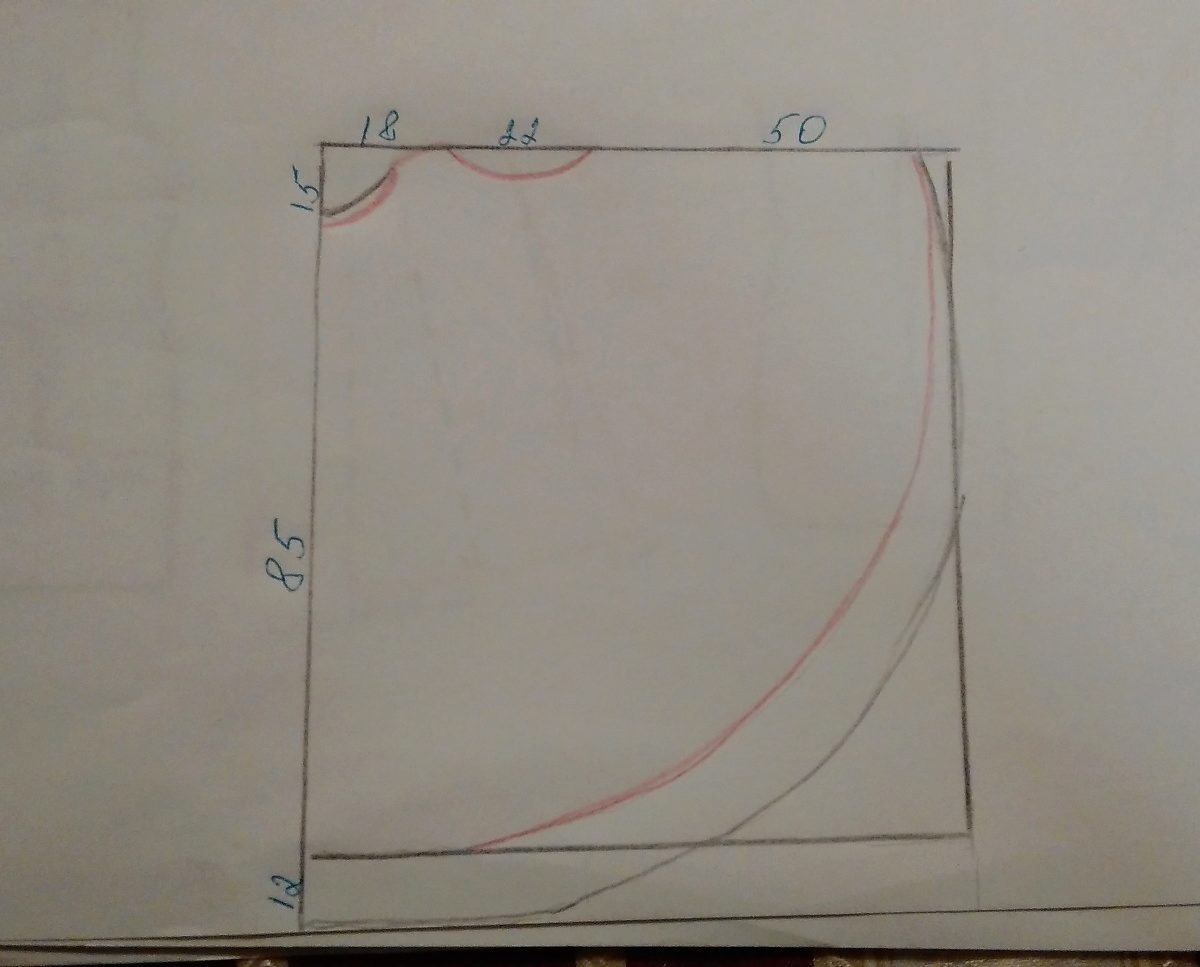
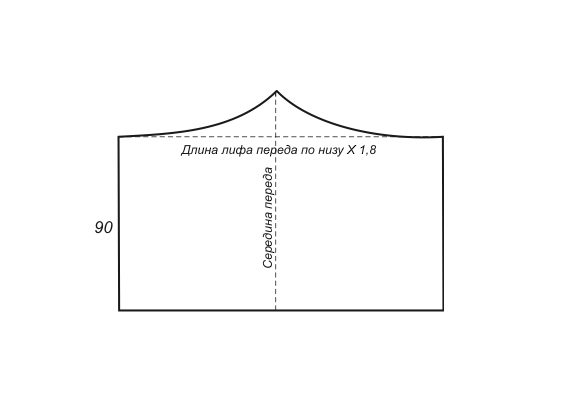
Modeling a short dress - the sun is similar to a real flower because it allows you to create a volume with a lot of folds.
Having drawn a rectangle, build a pattern of the front and back with a shoulder length of about 5 cm. Cut out the details with a fold.
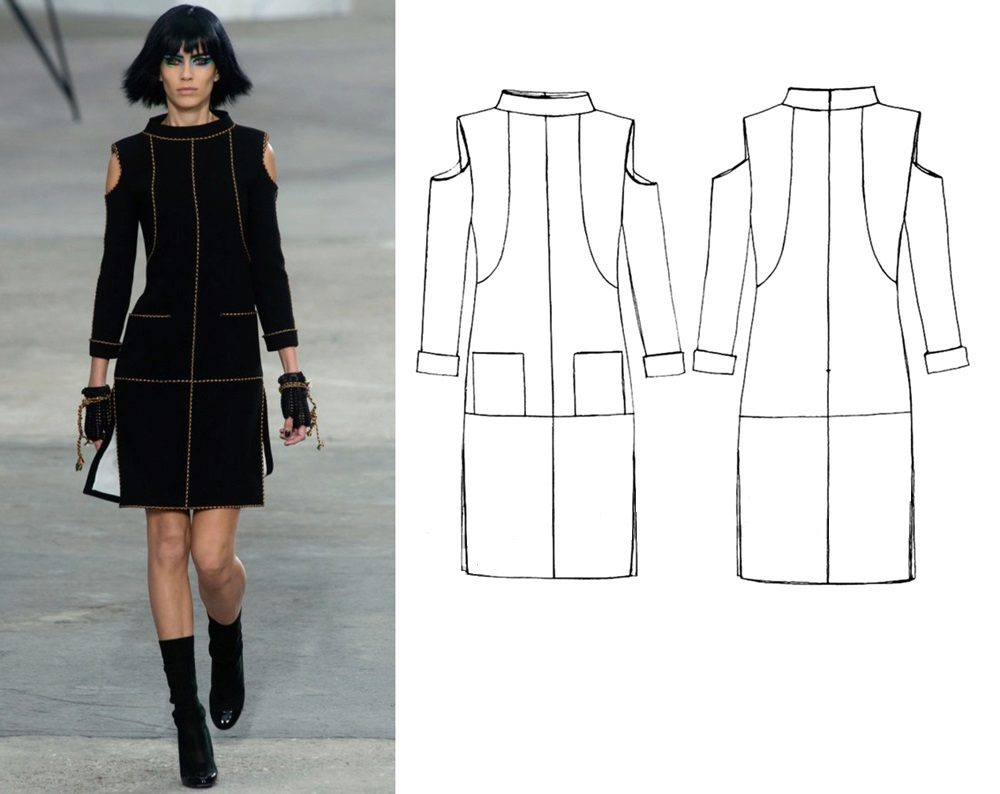
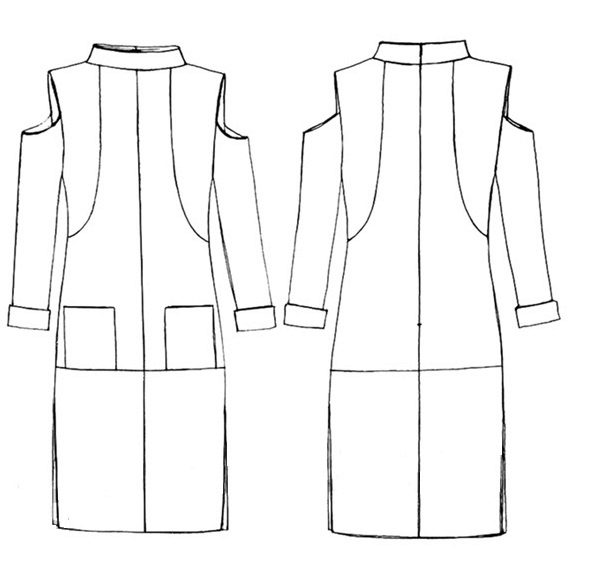
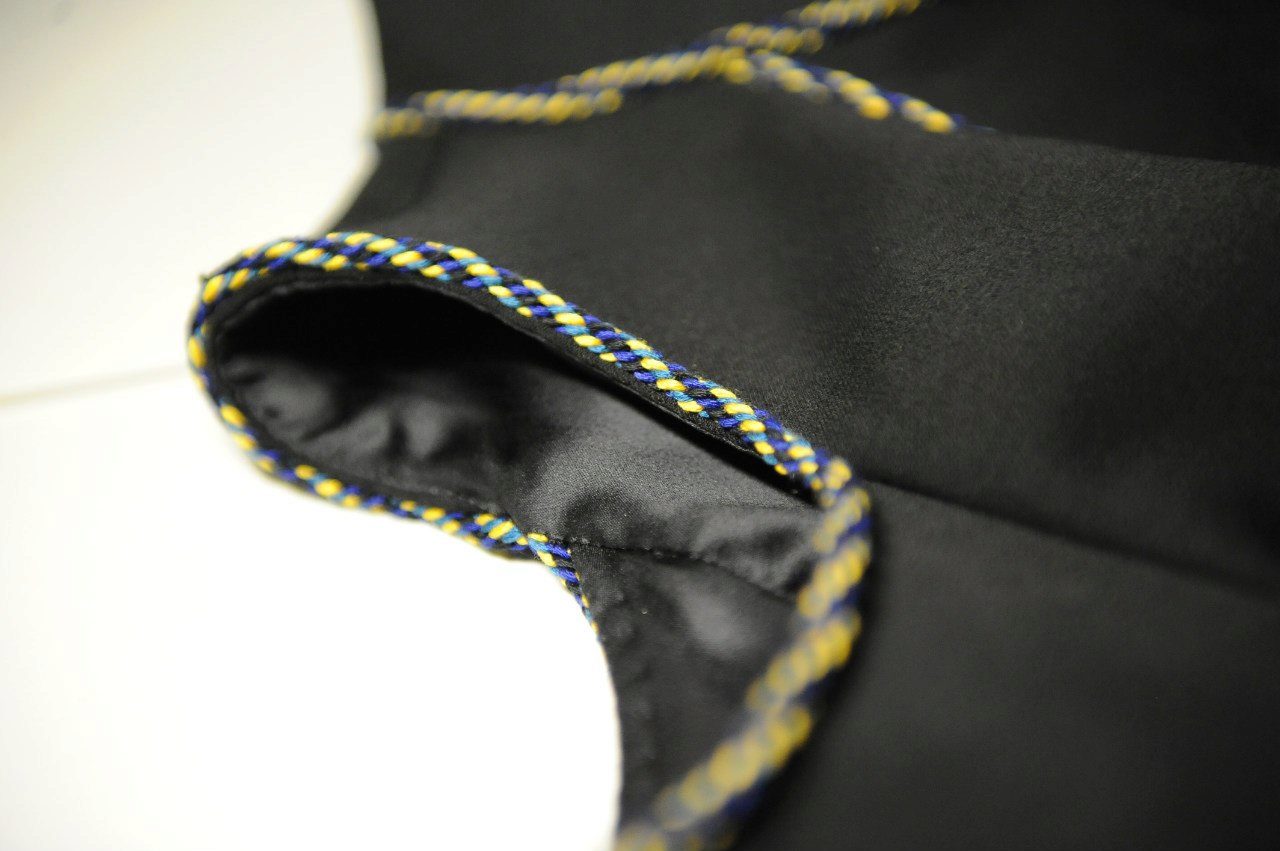
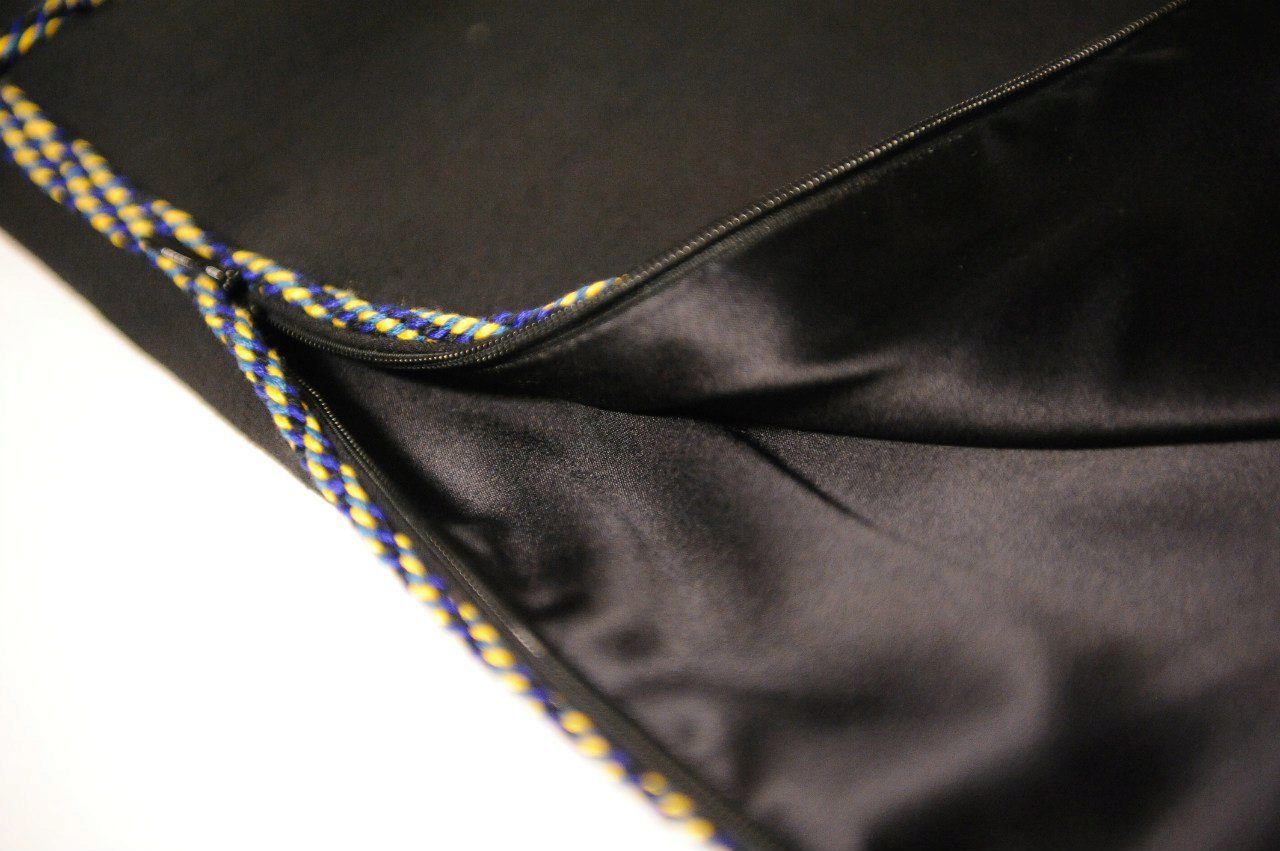
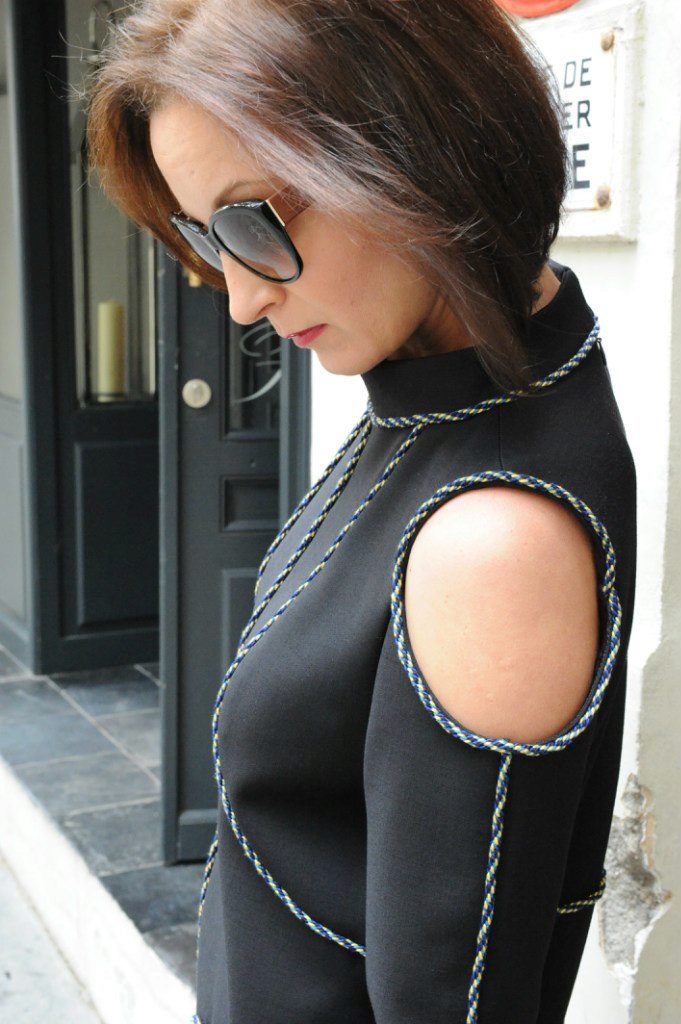
Dress from Dior
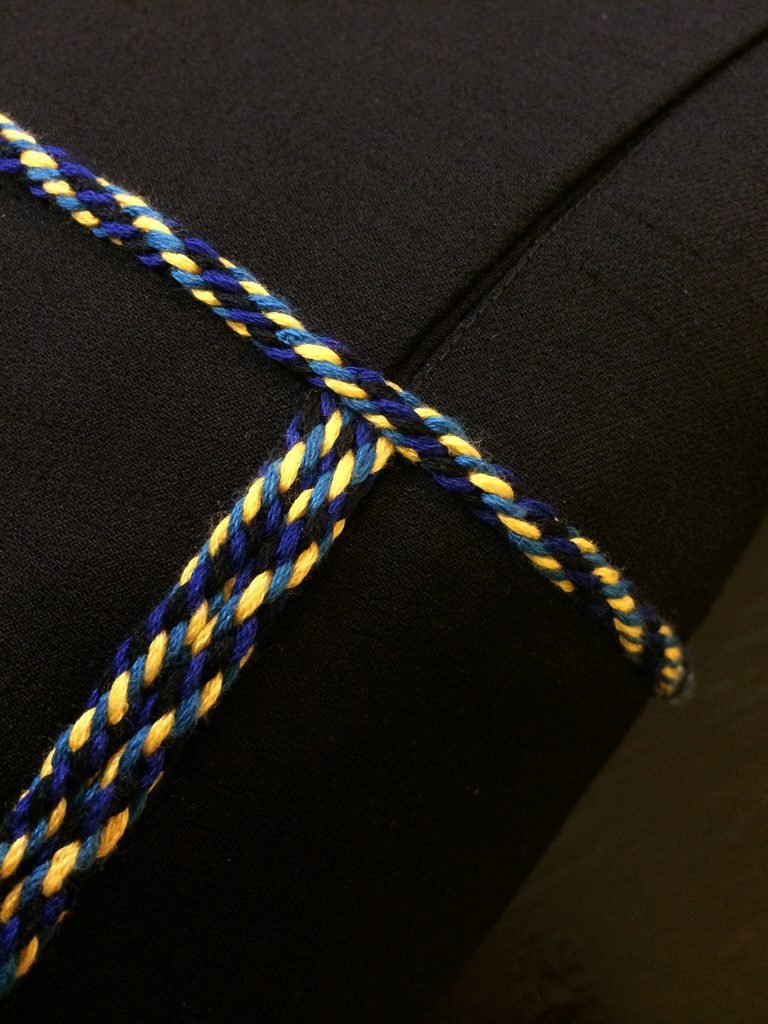
An unusual fitted dress from the catwalk, decorated with a cord and with two pockets, will appeal to many.
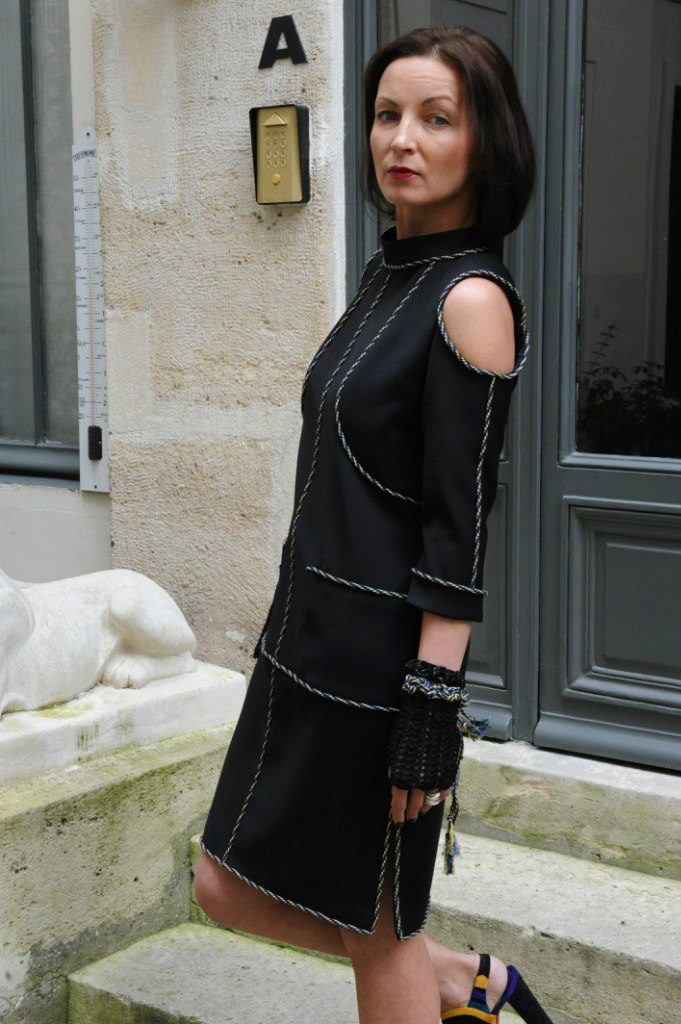
When modeling this dress you need to take into account some of the nuances:
- Relief from the neck smoothly goes back through the side seam.
- In the side sections inserted zipper.
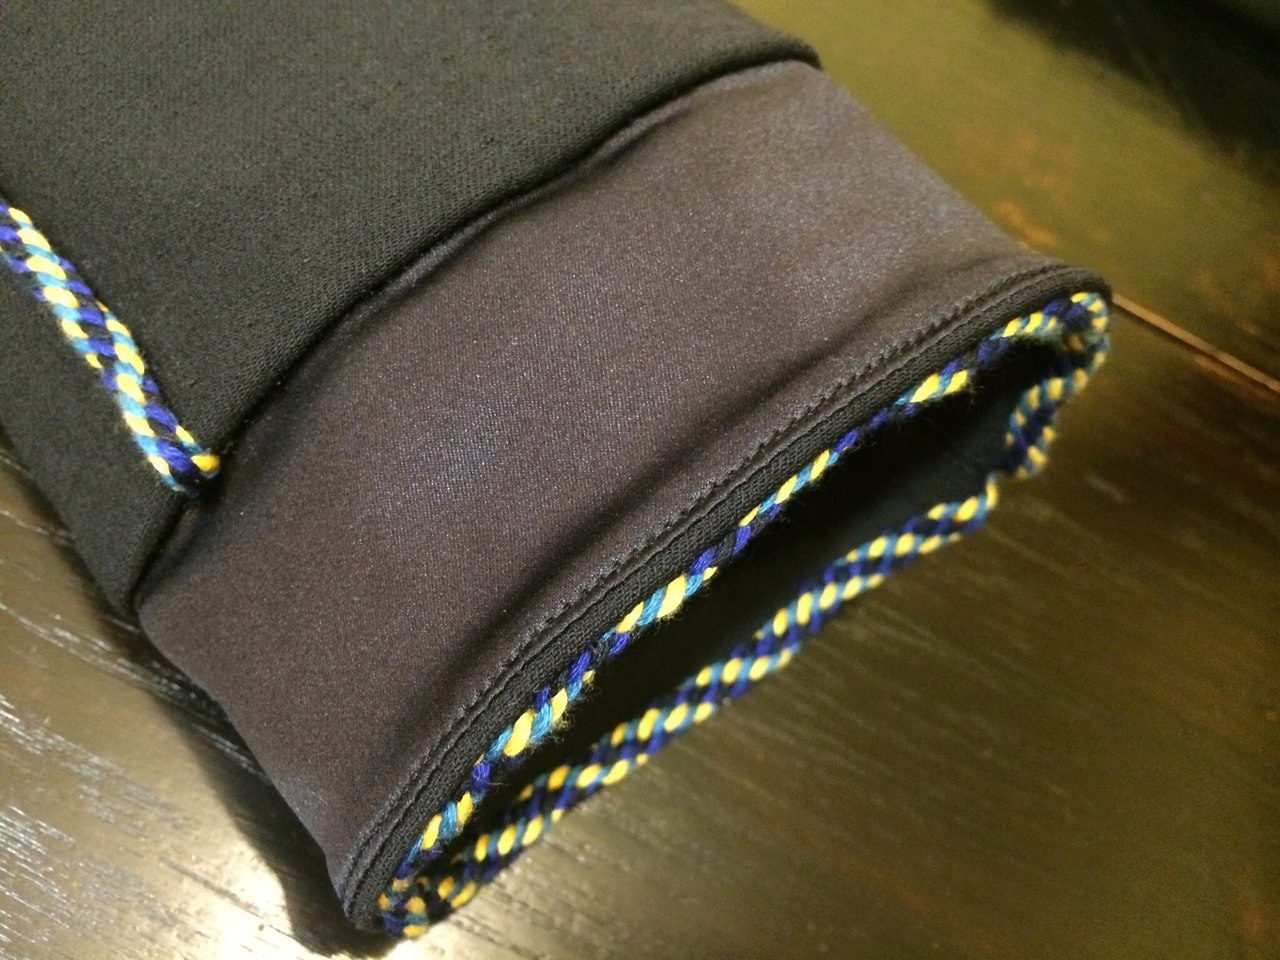
- The sleeve is double-seam, one of them will hide the cord.
- Sleeve cuffs stitched. If the fabric is very dense, the inside of the sleeve can be made of lining fabric.
- Overhead pockets.
- If the fabric is frayed, process the cuts immediately, for example with an overlock.
- The cord is sewn with hands, hidden stitches, on both sides.
Suitable fabric - thick wool with a small amount of elastane. Also need lining.


Sundress from Chloe
Summer cotton dress on wide straps with a flying skirt and romantic frill on the bodice will give coolness in the hottest time.
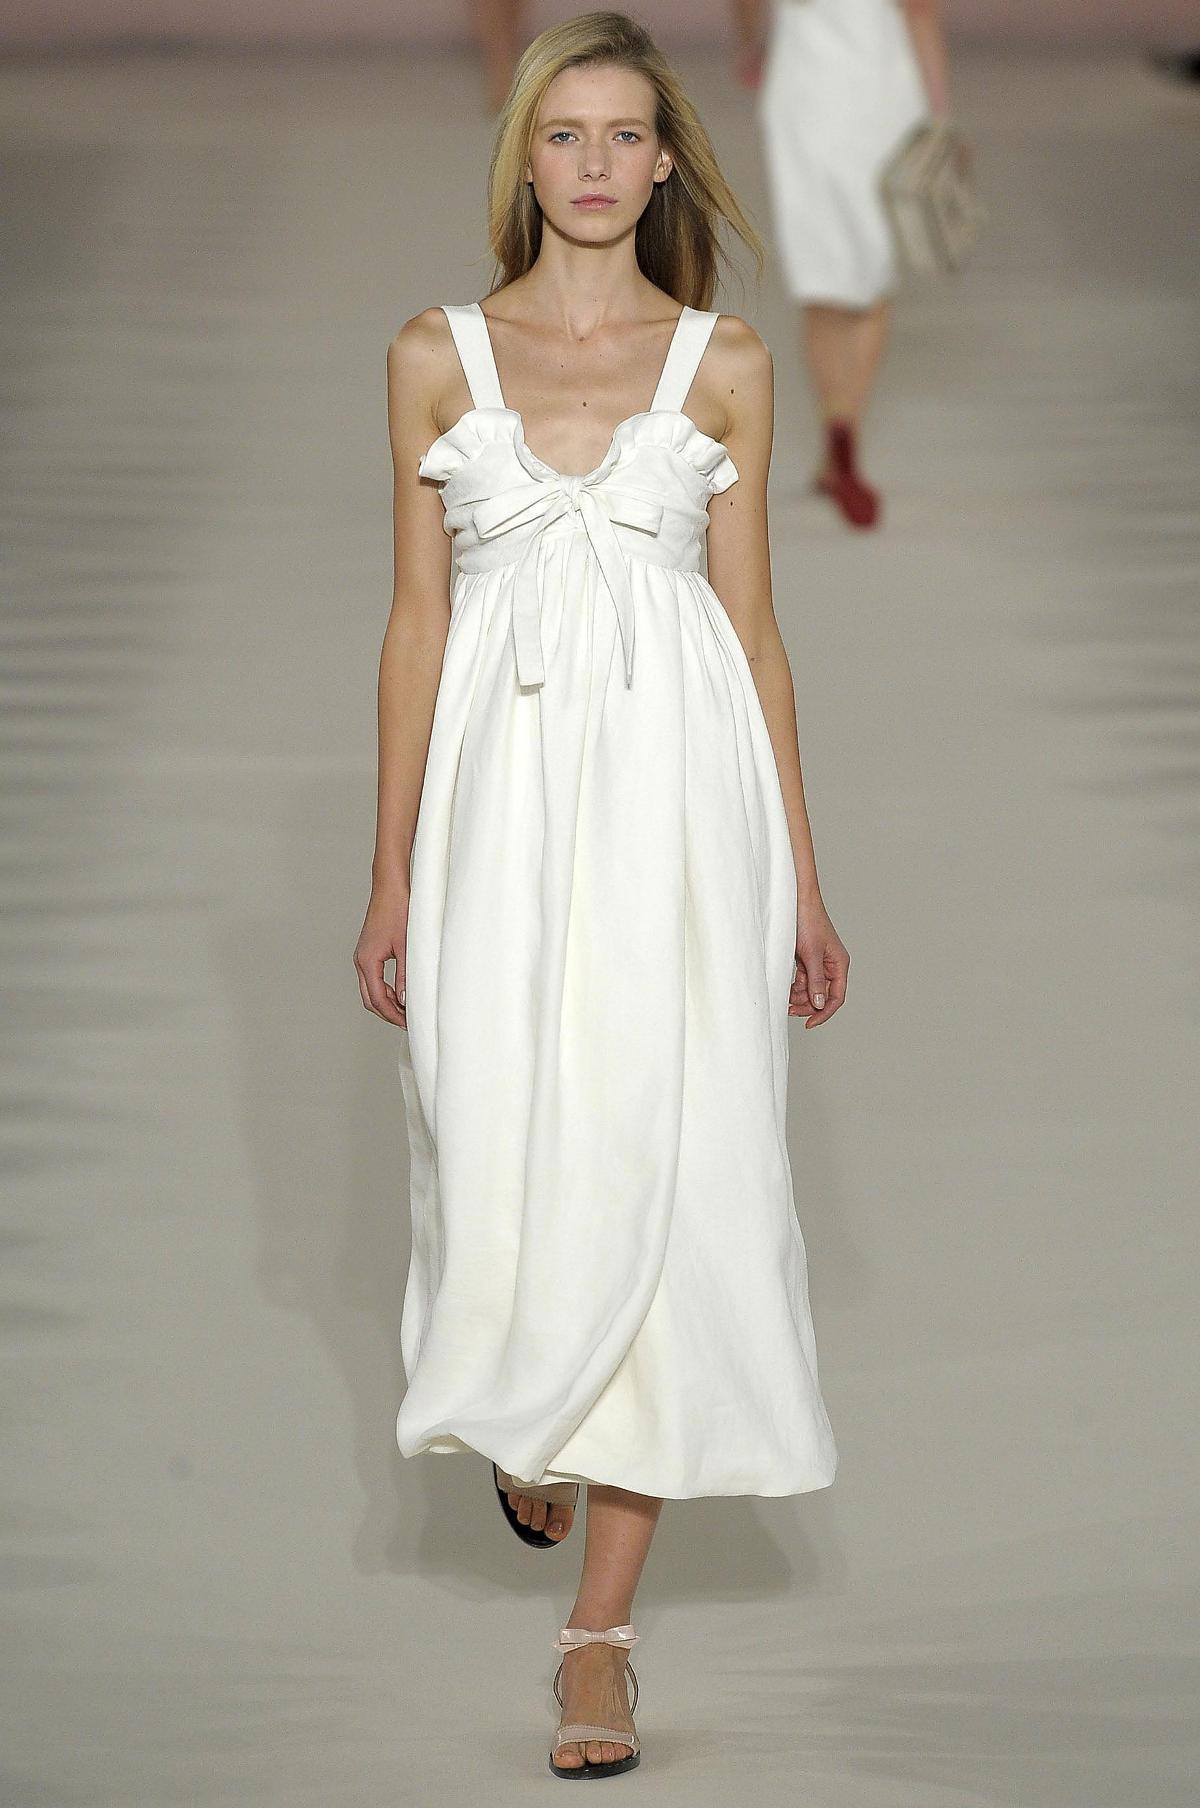
- Model the front part of the bodice and back detail.
- Straighten the straps separately with a width of 6 cm with allowances and lengthen so that you can sew to the back.
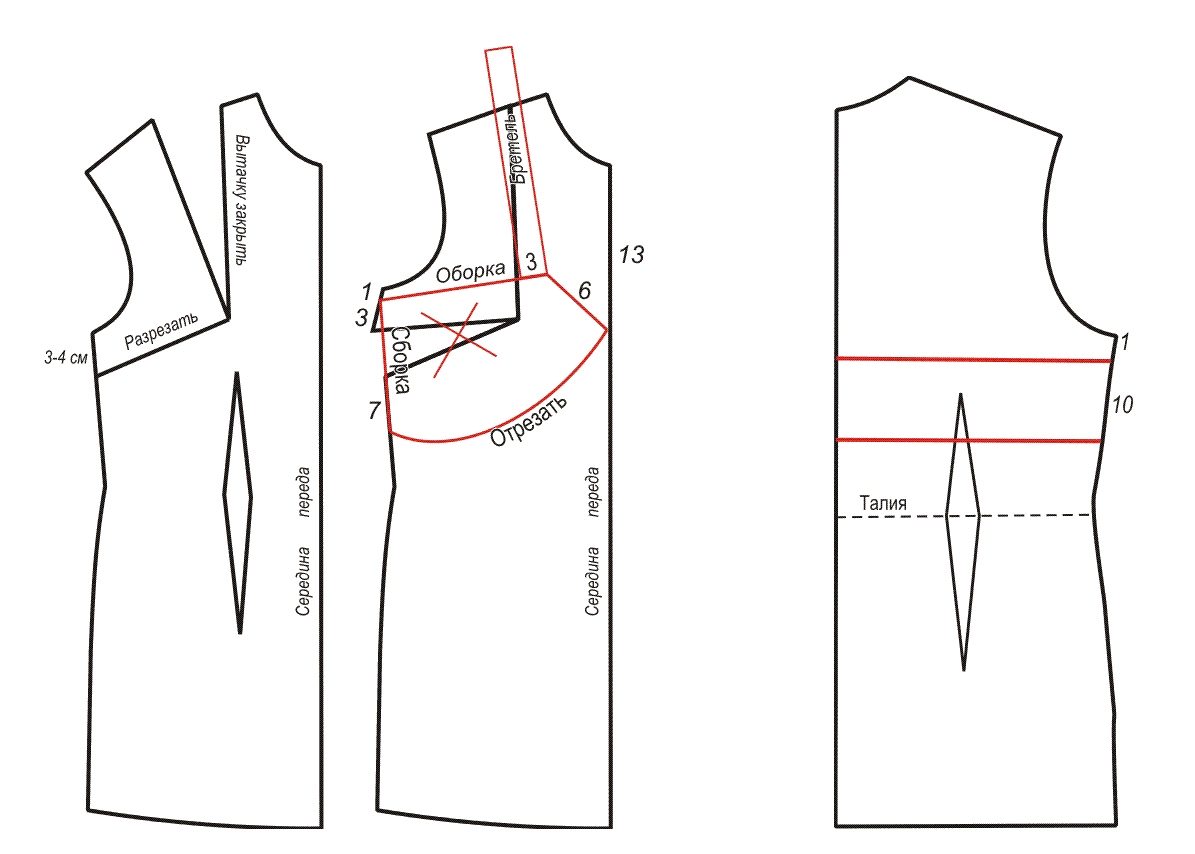
Model the front part of the skirt, the back will be the same, only the straight at the top.
Hedgehog that needs to be crafted along the neckline of a sundress is needed. Their length is equal to two lengths of the upper cut, and the width in the finished form is 3 cm.
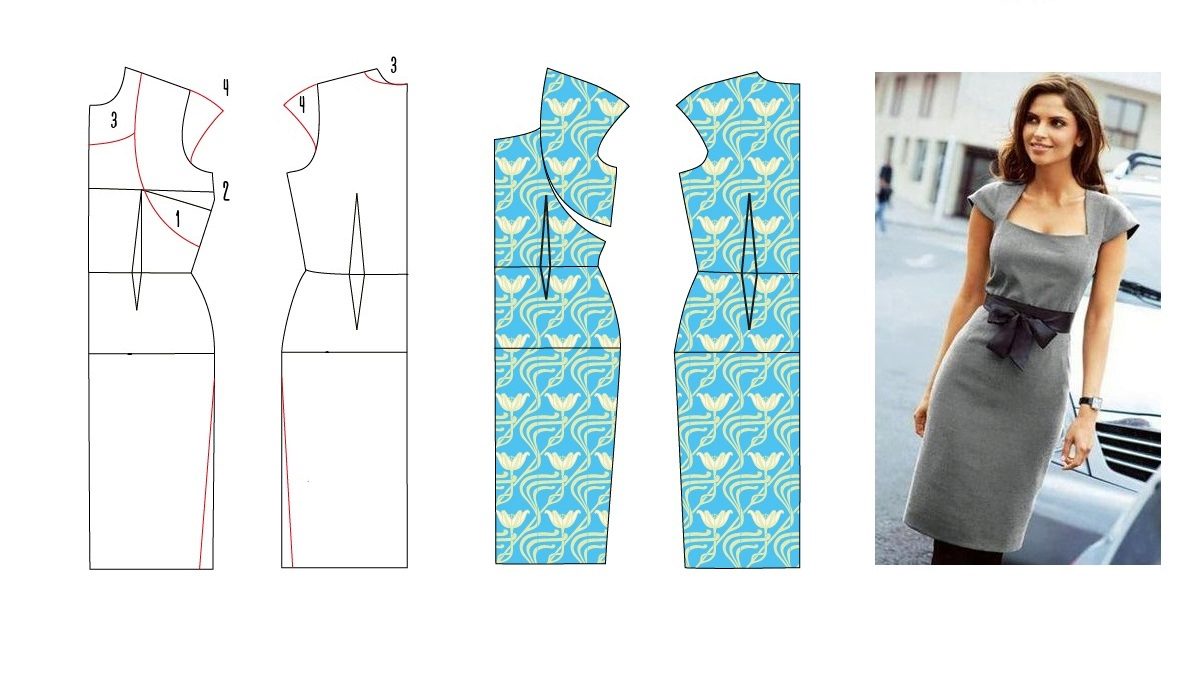
With one-piece short sleeves
- Through the protruding point along the chest line, draw a relief, then close the chest undercut.
- Also remove the waist tuck and extend the shoulder line, forming a one-piece sleeve.
- It remains to form the line of the neck.
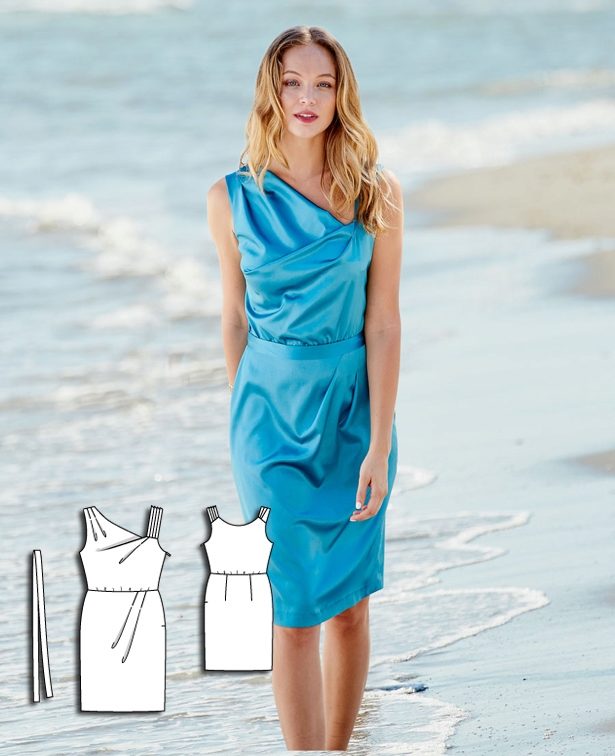
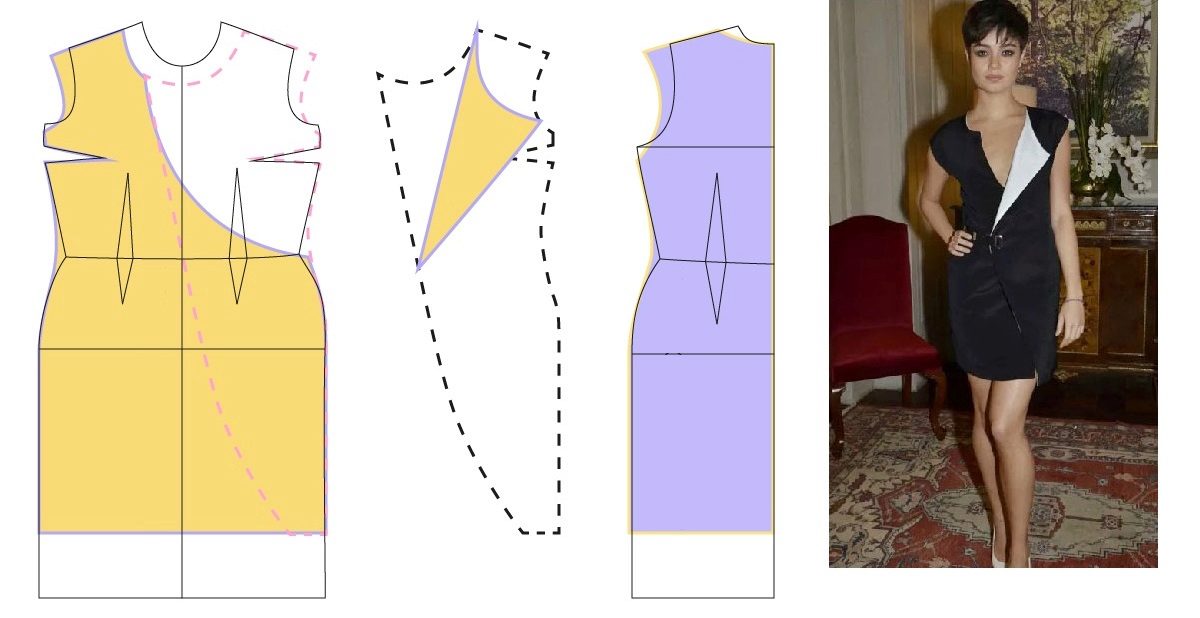
With smell
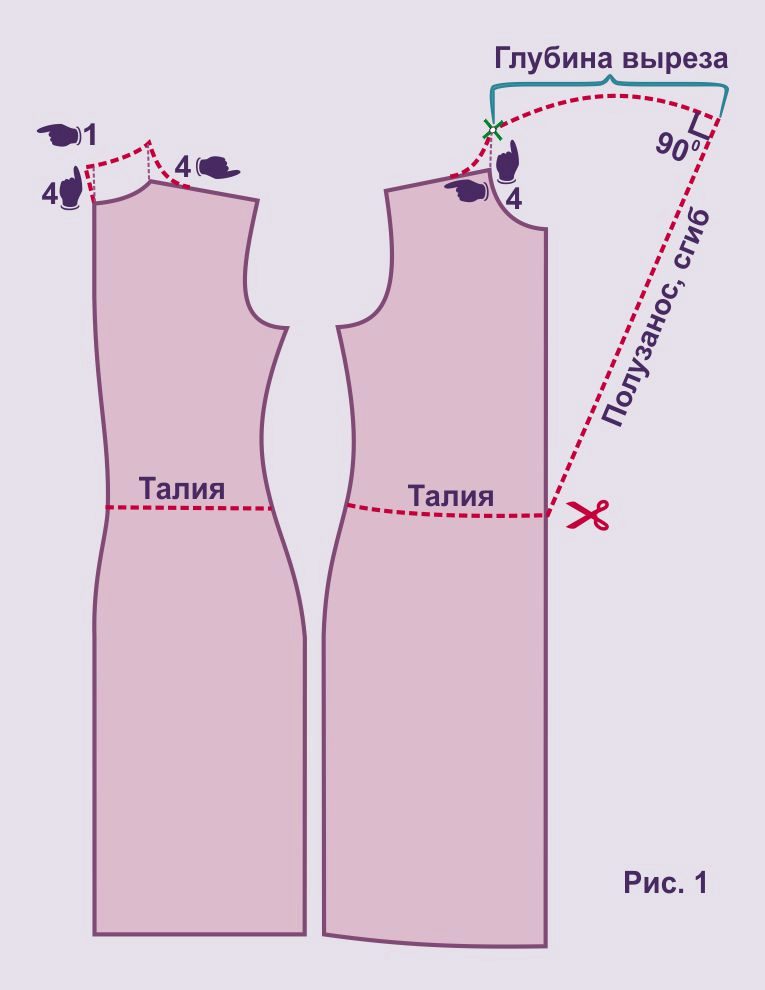
We are accustomed to having a wrap dress with a triangular neckline, but you can move away from the standards and draw asymmetrical.
Straight armhole
Chiffon dress with a straight armhole is very easy to model.